• Welcome to TechPowerUp Forums, Guest! Please check out our forum guidelines for info related to our community.

[CIP] Bel Air

Joined
Nov 27, 2011
Messages
108 (0.02/day)
Hello all,
This will be my first build log on TechPowerUp.

So let me introduce my new project Bel Air.

Sponsored By:


For this project i will be modding the Cooler Master Cosmos II.

I won't go to much in to details of the things that will be changing of the case. That are things that u will have to find out your self, by following this project. :D

The hardware for this project is still undiceited. It will all depend of the budget that is left after I'm done with the case self. I might use the hardware from my previous case mod Project White.

To cool all the hardware i will go for water cooling. This time I will do a dual loop and for this i will use copper pipes again. I know it is not something new but i just like to work with it. Plus it will fit perfect with the rest of the case and all the other details.

So lets start we have all seen the Cosmos II in one piece. For this i disassembled the case and placed all the parts on my floor witch was to small because the iron body couldn't fit on the picture :p


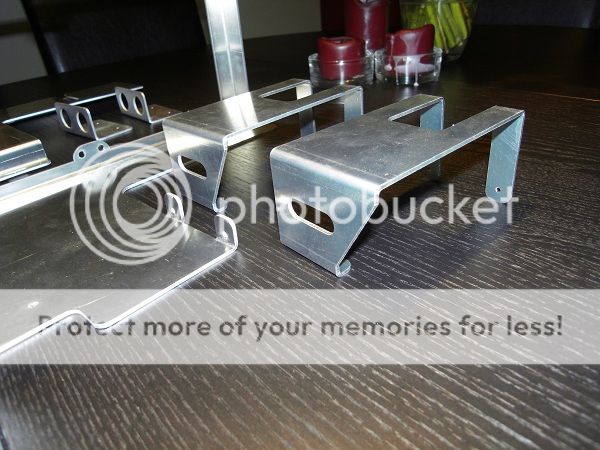
Removed the all the HDD cages + Midplate and PSU stand.


And the I/O backplate had to be removed.


Also cutted out a part out of the back of the case.


That is it for the case self. The rest u will all see later if u keep following :D

The next thing i have done is drawing the shape for the new air vents in the side panel. I have gotten the idea from a corvette anniversary 1978 with my own touch to it ofc :D


With the sketch ready i just had to get the materials to make the design. Got my self some foam to start the modeling of the air vents.


I had several attempts with different kind of tools. First one was with a knife that didn't go well.


Then i thought of making a some kind of heath wire to cut in the foam.


That plan has failed to :p my 12volt adapter wasn't strong enough to heat up the wire. Then i just purchased a tool to cut with.


With the new tool in the hand a started to make the venting hole in the foam.


This gives a better idea of how it will look like but still is not good enough. After some time i decided to make every piece apart if the vent.


One side is done now i only need to make a copy of it in mirror image.


And a picture of the garbage that was left behind.


That was it for this start post hope u all like. :D And stay tuned for the next update.

Alain
 
Last edited:
Joined
Nov 27, 2011
Messages
108 (0.02/day)
Small update about the new front grill of the case. The original design of the grill wont fit with the rest of the theme.


Removed the mesh and started to cut in the plastic housing of the grill.


After that i just had to file and sand the piece before it was ready for make over. :D


The 4 small pieces where placed on the rest part of the grill


This will fit perfect on the place of the old grill. And it can also be removed like the original grill by just pulling on it. The only thing that i still need to so is reenforce the frame of it.


When i recieved my parts of the grill i saw that i had made a little mistake. The curves of the grill all had angles in it. Not a big problem because i can file it round and sand it afterwards


When they where done i could start shortening and number the parts.


After all the small works i couldn't help my self to sand 2 pieces with a 240, 600, 1000grid paper. After that was done i polished it to get the maximum shininess.


Placed all the parts on it. :D


I am 6 pieces short of the grill because i miss typed the number :wallbash: but will be taking care of when the rest of the parts arrive :D
 

Athlon2K15

HyperVtX™
Joined
Sep 27, 2006
Messages
7,909 (1.24/day)
Location
O-H-I-O
Processor Intel Core i9 11900K
Motherboard MSI Z590 Carbon EK X
Cooling Custom Water
Memory Team DDR4 4000MHz
Video Card(s) ASUS TUF RTX 3080 OC
Storage WD WN850 1TB
Display(s) 43" LG NanoCell 4K 120Hz
Power Supply Asus Thor 1200w
Mouse Asus Strix Evolve
Keyboard Asus Strix Claymore
wow..your doing some really good work.
 
Joined
Jan 27, 2010
Messages
4,158 (0.81/day)
Location
USA
System Name ASUS ROG Zephrus M15
Processor AMD Rhyzen 7 4800HS
Memory 16GB
Video Card(s) Geforce RTX 2060
Storage 1TB
very nice ... subbed!
 
Joined
Apr 17, 2008
Messages
3,935 (0.68/day)
Location
West Chester, OH
I don't even know whats going on, so that equals AWESOME.
 
Joined
Nov 27, 2011
Messages
108 (0.02/day)
Haha lovely Johnnufiive just keep following and u will all see it. :D
 
Joined
Dec 21, 2008
Messages
1,374 (0.25/day)
System Name Hakase
Processor Ryzen 7 3700X @ Stock
Motherboard ASUS ROG Strix B450-F
Cooling Noctua NH-U12S
Memory 2x8GB Corsair Vengeance LPX DDR4 @ 3000MHz 18-18-18
Video Card(s) Asus GTX1070 Dual
Storage 250GB 860EVO - 2x600GB Cheetah 15k7 - 2x2TB Constellation ES - 2+3TB Green - 500GB Deskstar
Display(s) Viewsonic VX2476-smhd
Case Fractal Design Define R5
Audio Device(s) Fostex PC100USB > Altec Lansing ATP-3
Power Supply Corsair CX750M
Mouse Logitech G Pro X Superlight - Razer ExactMat Control
Keyboard Leopold FC750R, MX Blue
Software Win 10 Pro 64-bit
Benchmark Scores not benching anymore...
subbed!!
very nice vents there
 
Joined
Nov 27, 2011
Messages
108 (0.02/day)
Thank u AhokZyasha

Update!

I am happy to inform u that the first sponsored packages are arrived. The Packages are from Ek WaterBlocks and Highflow.


Thank u Gregor for sponsoring this beautiful cooling hardware.

Thank Freddy for the discount in the web-shop.


Started with the biggest package from EK WaterBlocks first. :p


EK-Supreme HF - Full EN (Nickel)


EK-CoolStream RAD XTC (140) and EK-CoolStream RAD XTC (420)


2x EK-DDC X-TOP V2 - Acetal G1/4


2x EK-Ekoolant CLEAR (premix 1000mL)


10x EK-PSC Adapter 90° G1/4 Nickel and 12x EK-PSC Adapter 45° G1/4 Nickel


The next package was from Highflow.


1x MagiCool COPPER Radiator 280


2x Laing DDC-1Plus MCP355 12V


To give u a idea, I have placed the hardware in the case and taken some pictures. In the bottom of the case I will place 1 140mm rad, 1 420mm rad, 2 Pumps and the PSU


In the top of the case I place the 280mm rad. That wont be visible when the case is finished.


I haven't had much time to continue with the side panels of the case. I haven taken them to my work so when I have some free time I could continue to work on it but the last weeks there was a lot of work. :(

But I have enforced the grill in the front of the case with 2 pieces of 5mm plexi. I glued the parts together and then filled up where it was needed.


That was it. I hope that the next update will come sooner then this one. But it all depends how much work there is at my work :p
 
Joined
Nov 27, 2011
Messages
108 (0.02/day)
Update,

Last days/weeks I have bin working with SU to design a radiator mount that can be easily be installed in the bottom of the case. It needs to hold 2 radiators, 4 140mm fans, 2 Pumps and 2 drains for the system. All of this needs to be mounted on one piece so I just have to slide it in the case and connect the power for the fans and the pump and attach the rest of the tubes for the water loop. For this I have used the same idea as they did with MKII this way I don't have to attach everything in small tight places that are hard to reach. I Made a few print screens of the design so U can all have look at it until the real parts arrive. :D

New Midplate.


Radiator stand.


Radiator foot + drain and pump stand.


When the parts are lazered and bended it should look like this.


The DXG files are sended now I only can wait when the parts are ready.
Till next Update. :D
 
Joined
Nov 27, 2011
Messages
108 (0.02/day)
Small teaser of the front grill of the Cosmos II. It is almost ready I just need the last 6 pieces of the grill. These parts will arrive this week. Then I can complete the grill.


The left piece still need to be attached to the rest of the grill. :D
 
Joined
Aug 17, 2009
Messages
1,585 (0.30/day)
Location
Los Angeles/Orange County CA
System Name Vulcan
Processor i6 6600K
Motherboard GIGABYTE Z170X UD3
Cooling Thermaltake Frio Silent 14
Memory 16GB Corsair Vengeance LPX 16GB (2 x 8GB)
Video Card(s) ASUS Strix GTX 970
Storage Mushkin Enhanced Reactor 1TB SSD
Display(s) QNIX 27 Inch 1440p
Case Fractal Design Define S
Audio Device(s) On Board
Power Supply Cooler Master V750
Software Win 10 64-bit
Good work. Thanks for the cool pictures.
 
Joined
Nov 27, 2011
Messages
108 (0.02/day)
Your welcome With a bid of luck the custom radiator stand will arrive this week so I can make a big Update at once. :D
 
Joined
Nov 27, 2011
Messages
108 (0.02/day)
Update :D

Sponsored By:


The sanding work for the front grill is almost over. I only need to complete 6 more pieces and the grill is finished.
The past 2 weeks I have bin sanding the aluminium parts alsmost everyday.


My Gf was not really happy with it I was more interested in sanding all the parts then here. And the dirt that came with it was not helping. :worried:
I did all the pieces with grid 240,400,600,1000,1500,2000 with result as this.


Time to polish it with the drill. Using polish paste and cotton disk on my drill. This progress wasted my hole Sunday. to get maximum bling out of it.:naughty:


Then I just have to place all the parts on its place.


6 More pieces and the grill is finished. Lucky they arrived by mail today with the radiator stand. That I had made in SU


Mounted the rads and pumps on the stand to check if everything fits proper.


Just enough room for the pipes and drains. Also the new midplate was ready for the case.


Fits perfect.


Also received a nice package from Cyberspace with 2 Aqua-Computer Poweradjust 2 USB - Ultra Version in it. Had the change to buy them over from. This way I got 1 controller for each loop.


If I got time this weekend I can tap some wire in the parts and modify the pumps housing.

Alain
 
Joined
Nov 27, 2011
Messages
108 (0.02/day)
Update!

Sponsored By:


Started with the pumps housing. The 2 extensions on the side needed to be removed so the pump can fin on its stand.


On the bottom of the housing are 2 extra holes that can be use to hold the pump on its place. I just have to tap some wire in it. After that I started to sand the housing and prep it for painting.


While the paint was drying I made 10 aluminium rings that will help guiding the radiator stand on the mounting plate.


These will be attached on the bottom of the radiator stand. The mounting plate of the radiator stand will come in the bottom of the case. So I just have to push the stand in the case.


Midplate on its place not much room left.


Here is a short video of how it works.


I have finished the front grill now this piece is completed. :D


Because I was a little bored and didnt know what to do. I started to sand and polish the feet of the the CosmosII.
Original colour black.


After a few hours of sanding and polishing. It started to look like this. :)


Got lucky with the weather this weekend. So I made some pictures of the case outside on the balcony.


And a other short video of the radiator stand but with radiators and pumps installed.


That was it again. The next steps are. Polishing the top bars from the case. Make a HDD bay with a hotswap. And start with the top grill of the case that need to look like the front grill of the case.
 
Joined
Nov 27, 2011
Messages
108 (0.02/day)
Update !
Havent really done very much because lak of time for this project. I am hoping to get back at it when the holiday is over.
But there are some little thing that I already have completed. The copper pipes are done between the radiators and pump. And installed 2 drains as well.


My first idea failed the curves in the pipe where to close on each other. So the pipe didn't line up with the fitting.


Next attempt I used a bend of 135° instate of 90°


After that was done I sanded and polished the pipes.


The 2 drainvalves.


Next step up is fixing the PSU mount. As U can see there is only a few mm space between the drains and the PSU.


Made a test plate out of carton to check if its fits.


Time for the real work.


Glued the piece with Bison metal metal glue.


Now it needs 24hours before the glue is ready. Then its time to sand the the rest of the glue away.

Till next Update.

Sponsored By:

 
Joined
Aug 17, 2009
Messages
1,585 (0.30/day)
Location
Los Angeles/Orange County CA
System Name Vulcan
Processor i6 6600K
Motherboard GIGABYTE Z170X UD3
Cooling Thermaltake Frio Silent 14
Memory 16GB Corsair Vengeance LPX 16GB (2 x 8GB)
Video Card(s) ASUS Strix GTX 970
Storage Mushkin Enhanced Reactor 1TB SSD
Display(s) QNIX 27 Inch 1440p
Case Fractal Design Define S
Audio Device(s) On Board
Power Supply Cooler Master V750
Software Win 10 64-bit
Continues to be a fascinating project. It will be beautiful.
 

Aquinus

Resident Wat-man
Joined
Jan 28, 2012
Messages
13,147 (2.97/day)
Location
Concord, NH, USA
System Name Apollo
Processor Intel Core i9 9880H
Motherboard Some proprietary Apple thing.
Memory 64GB DDR4-2667
Video Card(s) AMD Radeon Pro 5600M, 8GB HBM2
Storage 1TB Apple NVMe, 4TB External
Display(s) Laptop @ 3072x1920 + 2x LG 5k Ultrafine TB3 displays
Case MacBook Pro (16", 2019)
Audio Device(s) AirPods Pro, Sennheiser HD 380s w/ FIIO Alpen 2, or Logitech 2.1 Speakers
Power Supply 96w Power Adapter
Mouse Logitech MX Master 3
Keyboard Logitech G915, GL Clicky
Software MacOS 12.1
Love the copper piping and radiator layout. Are you going to use copper going to the blocks too?
 

de.das.dude

Pro Indian Modder
Joined
Jun 13, 2010
Messages
8,737 (1.74/day)
Location
Stuck in a PC. halp.
System Name Monke | Work Thinkpad| Old Monke
Processor Ryzen 5600X | Ryzen 5500U | FX8320
Motherboard ASRock B550 Extreme4 | ? | Asrock 990FX Extreme 4
Cooling 240mm Rad | Not needed | hyper 212 EVO
Memory 2x16GB DDR4 3600 Corsair RGB | 16 GB DDR4 3600 | 16GB DDR3 1600
Video Card(s) Sapphire Pulse RX6700XT 12GB | Vega 8 | Sapphire Pulse RX580 8GB
Storage Samsung 980 nvme (Primary) | some samsung SSD
Display(s) Dell 2723DS | Some 14" 1080p 98%sRGB IPS | Dell 2240L
Case Ant Esports Tempered case | Thinkpad | Antec
Audio Device(s) Logitech Z333 | Jabra corpo stuff
Power Supply Corsair RM750e | not needed | Corsair GS 600
Mouse Logitech G400 | nipple
Keyboard Logitech G213 | stock kb is awesome | Logitech K230
VR HMD ;_;
Software Windows 10 Professional x3
Benchmark Scores There are no marks on my bench
looks EPIC!
sub :D
 

t_ski

Former Staff
Joined
Apr 11, 2006
Messages
11,960 (1.83/day)
System Name My i7 Beast
Processor Intel Core i7 6800K
Motherboard Asus X99-A II
Cooling Nickel-plated EK Supremacy EVO, D5 with XSPC Bayres & BIX Quad Radiator
Memory 4 x 8GB EVGA SuperSC DDR4-3200
Video Card(s) EVGA 1080 SuperClocked
Storage Samsung 950 Pro 256GB m.2 SSD + 480GB Sandisk storage SSD
Display(s) Three Asus 24" VW246H LCD's
Case Silverstone TJ07
Audio Device(s) Onboard
Power Supply Corsair AX1200
Keyboard Corsair K95
Software Windows 10 x64 Pro
I like the polish on the tubes, but did you coat them with anything to keep them from tarnishing afterwards?
 
Joined
Nov 27, 2011
Messages
108 (0.02/day)
Continues to be a fascinating project. It will be beautiful.
Thx PopcornMachine will do my best.
Love the copper piping and radiator layout. Are you going to use copper going to the blocks too?
Yes that is the plan.
looks EPIC!
sub :D
:D
I like the polish on the tubes, but did you coat them with anything to keep them from tarnishing afterwards?
The copper pipes will be nickel plated when the loop is completed.

Small Update

This Friday I received a package from my new sponsor Noctua. They sended me 10 Noctua 140MM NF-P14 FLX 1200RPM.

Thank you Michaela for this very nice discount on your products.


Mounted all the fans in the case. :p


A little bit of news about the build it self. The last 2 months I didn't do anything on the project but last week I have started back.
I am currently working on the air vents on the side panel. These will be made out of 6mm plexiglas that will be glued together to a solid piece of 12mm.


There is still some work before all 4 pieces are Finished.

Sponsored By:


Joined
Nov 27, 2011
Messages
108 (0.02/day)
Small update I almost finished all pieces for the side panels. I only need to make 2 pieces before I can start filling up the small holes in the panel. The last 2 pieces will be very time consuming and a lot of pratice to get it right. But I will tell U more about it later this update.

I have taken the 2 side panels to work so I can start making some holes in it for the fins.


Removed the Aluminium from the plastic panel.


Cutted out 5 mm of the border of the panel this will give a better end result later in the progress.


Fitting the 2 fins in the panel.


As U can see there are some open spot between the pieces but U wont see this in the end result of the panel.


Next step is drilling some holes and tap some wire in it.


Placing the parts in the side panel.


Now I only need to make 1 more part for the panel before I can finish it. The idea is to implant a old school grill in the side that was used to ventilate the hot air under the hood. Here is a sample picture I have linked from the web to give U a idea.


The result will be beautiful but will take a lot of time and practice to get it right. I will try to make it out of 1mm thick iron plate that I had lying around from a other mod.


That was is it cya next time.

Sponsored By:


Joined
Nov 27, 2011
Messages
108 (0.02/day)
Yesterday I received a very nice package from Gigabyte Benelux which I am very grateful for.

With special tanks to Bernice from Gigabyte Benelux.

Gigabyte has sended me one of there best motherboards they have the GA Z77X UP4 TH


In the box we have a manual driver disk 2 sate cables SLI bridge and I/O Backplate.


All picture where taken very carefully under supervision of Boris.


Sponsored By:


brandonwh64

Addicted to Bacon and StarCrunches!!!
Joined
Sep 6, 2009
Messages
19,542 (3.68/day)
Good looking board! I have been fond of gigabyte SB/IB boards, I have a Z68X and a P67A board :)
 
Joined
Feb 26, 2008
Messages
4,876 (0.83/day)
Location
Joplin, Mo
System Name Ultrabeast GX2
Processor Intel Core 2 Duo E8500 @ 4.0GHZ 24/7
Motherboard Gigabit P35-DS3L
Cooling Rosewill RX24, Dual Slot Vid, Fan control
Memory 2x1gb 1066mhz@850MHZ DDR2
Video Card(s) 9800GX2 @ 690/1040
Storage 750/250/250/200 all WD 7200
Display(s) 24" DCLCD 2ms 1200p
Case Apevia
Audio Device(s) 7.1 Digital on-board, 5.1 digital hooked up
Power Supply 700W RAIDMAXXX SLI
Software winXP Pro
Benchmark Scores 17749 3DM06
This build is taking a minute. If motivation is a problem, you have plenty of people watching and waiting from TPU.

Great build, can't wait for more.
 
Top