• Welcome to TechPowerUp Forums, Guest! Please check out our forum guidelines for info related to our community.

[Case Mod] Project Imagination - CM Storm Trooper Mod by adamski07 [Completed]

adamski07

New Member
Joined
Jul 2, 2013
Messages
27 (0.01/day)
Location
USA/Philippines
UPPPDDDAAAAAAAAAAAAATTTTTTTTTTESSSSSSSSSSSSSS!!!!!!!!!!

Shroud-Channel-bay. This is the PSU shroud I made for Project Imagination. It's just like your regular PSU Shroud, but it has built-in floor channel and 5.25" bay mount for fan controllers/etc. Enjoy! (Please ignore the protective tape on the channel)

More coming for Project Imagination!


Joined
Feb 8, 2012
Messages
3,013 (0.68/day)
Location
Zagreb, Croatia
System Name Windows 10 64-bit Core i7 6700
Processor Intel Core i7 6700
Motherboard Asus Z170M-PLUS
Cooling Corsair AIO
Memory 2 x 8 GB Kingston DDR4 2666
Video Card(s) Gigabyte NVIDIA GeForce GTX 1060 6GB
Storage Western Digital Caviar Blue 1 TB, Seagate Baracuda 1 TB
Display(s) Dell P2414H
Case Corsair Carbide Air 540
Audio Device(s) Realtek HD Audio
Power Supply Corsair TX v2 650W
Mouse Steelseries Sensei
Keyboard CM Storm Quickfire Pro, Cherry MX Reds
Software MS Windows 10 Pro 64-bit
This is going to be great :D subbed :toast:
 

adamski07

New Member
Joined
Jul 2, 2013
Messages
27 (0.01/day)
Location
USA/Philippines
UPPPPPPDDDDDDDDDDDDAAAAAAAAAAATTTTTTTTTTTTEEEEEEEEEEEESSSSSSSSSSSSSSSSSSSSSSSSSSS!!!!!

These are the backplates for my two gtx 780 and a cover for my CPU. Enjoy! More coming for Project Imagination- ROG!


adamski07

New Member
Joined
Jul 2, 2013
Messages
27 (0.01/day)
Location
USA/Philippines
Final photos later tonight! Stay tuned!


Sorry for flood updates. Just updated all 7 different build log threads all over the net. lol
 

adamski07

New Member
Joined
Jul 2, 2013
Messages
27 (0.01/day)
Location
USA/Philippines
Well, here it is guys! Project Imagination is done. This is my 2nd case mod project and it is pretty challenging to modify a bigger case. Took me a while, but it was all worth it. First, I'd like to thank Cooler Master for giving me the chance to modify their Trooper case. I'd also like to thank Aquacomputer and ASUS for their support.

There's so much more I wanted to do on the case, but unfortunately I have to finish it now and share it with you all. I hope you all like it.

I apologize for picture's quality. I am not that great in photography. My setup was just a couple light bulbs, my comforter(lol) as background, and my sister's camera. :D

Also, please take time to visit my project log on CoolerMaster's forum and support me for the upcoming Cooler Master's Case Mod competition 2013.

Let me know what you think of it and you have any questions about my project. :)

PLEASE DON'T FORGET TO SHARE IT WITH YOUR FRIENDS! :D


XSI

Joined
Sep 4, 2012
Messages
390 (0.09/day)
Location
Vilnius. Lithuania
System Name Mother PC/XSI PC/ Laptop
Processor I3 6100 Skylake@3.7/Intel Core2Duo E8400@3.0-3.7Ghz/Amd sempron 2100+
Motherboard B150M MSI Night ELF/ASUS P5Q PRO P45/
Cooling Cooler Master Hyper Evo 212/ X 2
Memory Kingston HyperX Fury 2x4GB DDR4@2133 Dual channel /Adata 2x2 GB DDR2@800 dual channel/ 2,5GB
Video Card(s) Gigabyte Windforce 950GTX/MSI 8800GT OC Zilent edition@660/1650/950 / ATI Radeon x1250
Storage 1pc:240GB SSD Kingston HyperX Fury/2PC:Intel 330 SSD 60GB/Samsung 500 GB/Samsung 320GB/80 GB
Display(s) LG 22MP58VQ 1920x1080/ Samsung 2232BW - 22" 1680X1050 and LG Full HDTV 50" / 15" 1280x800
Case Deepcool Tesseract Red/ Modded no name case
Audio Device(s) Realtec 1150/Creative X-FI, Xtreme Gamer + Samsung 5.1 HT + additional 4 speakers and subwoofer
Power Supply EVGA 500B Bronze 80+/ Chieftek 650W 80+.
Mouse Cheapo 5$ mouse/ trackpad :)
Keyboard Some cheap 10$
Software Windows 10/Win 10/ Win 8.1
Benchmark Scores later :)
WOW are u fcuking kidding me !!! What a beauty :) Hope you win mate. One of the best mods!
 
Joined
Feb 8, 2012
Messages
3,013 (0.68/day)
Location
Zagreb, Croatia
System Name Windows 10 64-bit Core i7 6700
Processor Intel Core i7 6700
Motherboard Asus Z170M-PLUS
Cooling Corsair AIO
Memory 2 x 8 GB Kingston DDR4 2666
Video Card(s) Gigabyte NVIDIA GeForce GTX 1060 6GB
Storage Western Digital Caviar Blue 1 TB, Seagate Baracuda 1 TB
Display(s) Dell P2414H
Case Corsair Carbide Air 540
Audio Device(s) Realtek HD Audio
Power Supply Corsair TX v2 650W
Mouse Steelseries Sensei
Keyboard CM Storm Quickfire Pro, Cherry MX Reds
Software MS Windows 10 Pro 64-bit
Thank you. Hope you like it! :)

Yeah, let's be realistic, what's not to like :toast:
... and the reservoir embedded in back of the case - looks great
 

adamski07

New Member
Joined
Jul 2, 2013
Messages
27 (0.01/day)
Location
USA/Philippines
WOW are u fcuking kidding me !!! What a beauty :) Hope you win mate. One of the best mods!

Thank you. I hope so, but having this project finished is a big win already for me. :)
Yeah, let's be realistic, what's not to like :toast:
... and the reservoir embedded in back of the case - looks great

:D Thanks again.
 

adamski07

New Member
Joined
Jul 2, 2013
Messages
27 (0.01/day)
Location
USA/Philippines
Sorry, I spent the last 4 weeks on modding and finishing the project instead of taking lots of photos for the work log. Here are some of the photos together with explanations. I'am a student and working at the same time. I only have few hours a day and few days a week to mod. I cant really spend my time taking photos instead. Maybe on my project, ill share more of my worklog. I wish I have a buddy who can do all the photography for me. lol. Anyway, enjoy the photos. Tools used : Jigsaw, Rotary tool, different sizes of bits, router, metal saw, and etc. If you have any questions, please feel free to ask. Thank you!

First 360 RAD I custom made for the project.

New custom made 360 RAD mount.

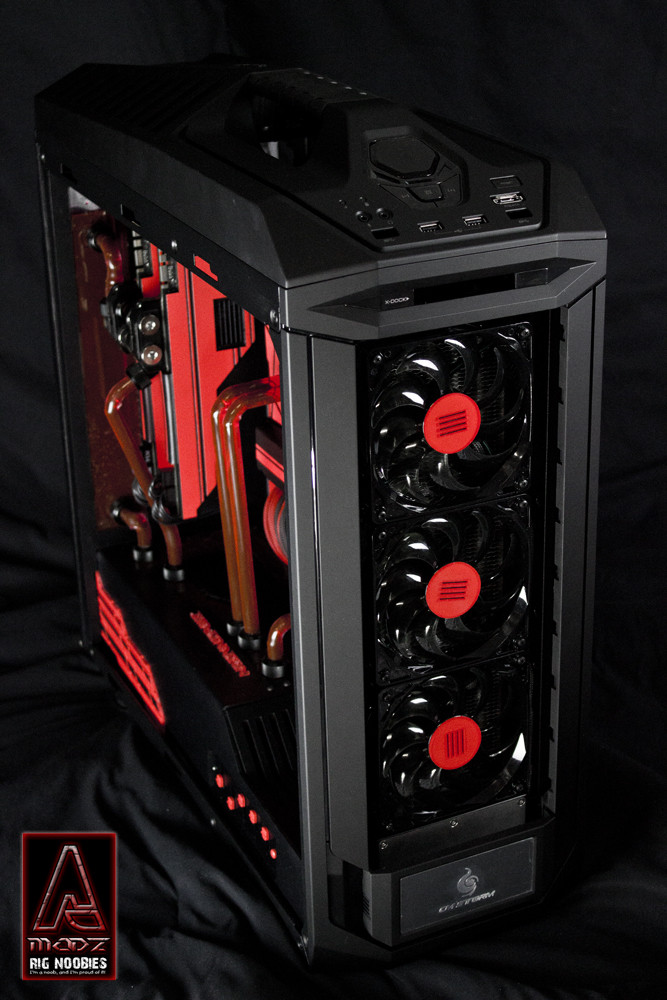
The Case : CM Storm Trooper Case.

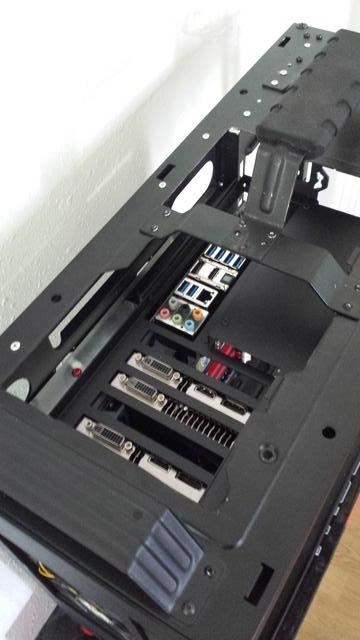
Disassembled the case and test fit of the mobo in 90 degrees orientation.


Custom MOBO tray, top layer.

Double-layeedr custom mobo tray.

Measuring where to make the bend for the side strip cover.

Some tools! :D

Top view.

Manually measuring the placement of holes for custom water channel


Acrylic pieces!


Cementing a small piece on each plate for added support on fittings.

Just.... my legs. lol


arm and leg worth of fittings.

PSU Shroud in 2D lol.

Home made acrylic bender.

First stage of the PSU shroud


It fits perfectly!


With the fittings, looks good at this stage.


Tapping the acrylic pieces. One of the most intense and toughest part of this mod. Luckily, it didnt break.


Cementing the acrylic pieces to the water channel block.

Just some crafting. First time doing this. Covering the back panel cover with plastic resin.


Time for painting!

Sexy black. Love the result of this air can paint. The end results always looks like a powdered covered paint.


Done with the last coating!

Custom routed plate for the PSU shroud.


Was so excited at this point to finish it!


IMAGINATION pieces for the PSU shroud. They're so small and pain in the ass gluing it on the shroud!

Used the cutout on the acrylic to place and glue each pieces on the shroud.

IMAGINATION: [R]OG

Painted!

Almost done with the custom back panel cover.


Time for painting!

Mounted the SSD at the back!

HELL YEAH! LOVE THIS! MATTE BLACK is :love:
This custom back panel cover is reinforced with a aluminum plate at the back.

Custom back plate with the built in reservoir and two 120mm exhaust fan.


Cementing the custom reservoir to the back panel!

my 5TB HDDs as weights when cementing the custom reservoir!

Done and ready for painting!

Added a red accent to the custom back panel cover.

done painting the back panel! Read for the coolant and the fans.


Perfect result. No leak!


Installed the two 120mm fans inside the custom back panel.


Starting to look finished.


Glued some acrylic pieces for the custom GPU Plate.

Painted it with Fiery red!

GPU backplates and the custom CPU plate


Covered the red part with modders tape and cut the details using xacto knife.

BLACK again!

Custom cover for the double layered mobo tray for a cleaner look!


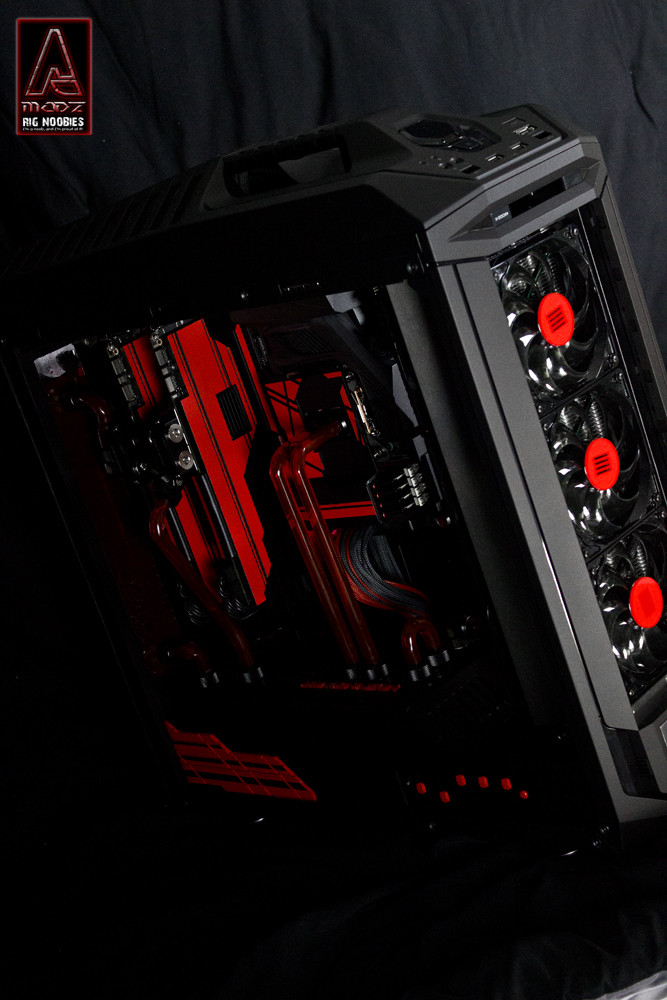
Done bending the tubings!
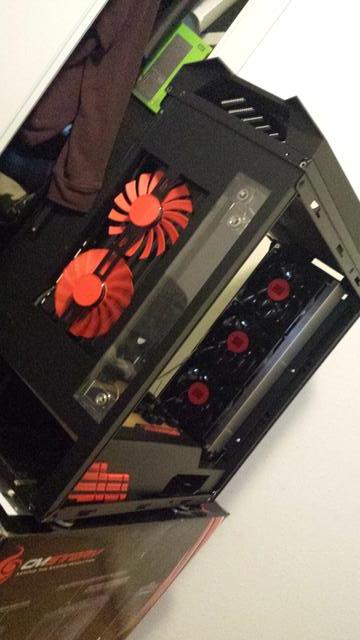
Its ALIVE!

 
Top