• Welcome to TechPowerUp Forums, Guest! Please check out our forum guidelines for info related to our community.

[CIP] Eden

Joined
Nov 27, 2011
Messages
108 (0.02/day)
Hello Fellow modders !

I have bin asked to join for the new edition of Modding Trophy 2014 organized by:

With already working on a project Purpura I couldn't resist this change to join the event.

For this edition fractal has chosen me to mod the Define R4

The hardware and water cooling will be provided by different partners
:clap:Witch I want to tank for making it possible to make a second edition of Modding Trophy 2014:clap:

Hardware:
Motherboard: MSI Z97 Gamming 9
Graphics card: MSI GTX 770 OC
Processor: Intel I7-4790
Memory: G.Skill Ripjaws X 4x4GB 1600Mhz
Solid State Drive: Samsung 840 EVO 250GB
Power Supply: Fractal 1000W Newton

Lets start with progress.

As you already know the PSU will be the Fracral 1000W Newton. The Design of the PSU looks great the only minor point is that it is not a full modular PSU. This little problem I will change in the future. The cables come is a organized bag where every cable has it own place.


Next the case it self, the Define R4 is build for silence and anti dust with all the filters.


Lets start stripping the case and remove everything that is not needed anymore.


This is what is left from the case a naked frame.


Time to rebuild the Define R4!

Till next update. :D
 

Norton

Moderator - Returning from the Darkness
Staff member
Joined
Dec 21, 2011
Messages
14,108 (3.13/day)
Location
Northeast USA
System Name Main PC- Gamer- Main Cruncher/Folder and too many crunching/folding rigs
Processor Ryzen 5900X- Ryzen 5950X- Ryzen 3950X and etc...
Motherboard Asrock X570 Extreme4- MSI X570S Tomahawk MAX WiFi- MSI B450M Bazooka Max and etc...
Cooling Noctua NH-U14S (dual fan)- EK 360 AIO with push/pull fans- Corsair H115i RGB Pro XT and etc...
Memory 2x16GB GSkill FlareX 3200/c14- 4x8GB Corsair Vengeance 3600/c16- 2x16GB Team 3600/c18 and etc..
Video Card(s) MSI Gaming RX 6800- Asus RTX 3070 TUF OC- MSI Ventus GTX 1660Ti and etc...
Storage Main PC (1TB WD SN850- 2TB PNY CS 3040- 2TB Seagate Firecuda) and etc...
Display(s) Main PC (2x24" Dell UltraSharp U2414H)
Case Phanteks P600s- Seasonic Q704- Fractal Meshify C and etc...
Audio Device(s) Logitech Z625 THX 2.1 speakers
Power Supply EVGA 750 G3- SeaSonic DGC 750- EVGA P2 850 and etc...
Mouse G300s
Keyboard Corsair K65
VR HMD N/A
Software Windows 10 Pro or Ubuntu
Benchmark Scores Why sit on the Bench when you can get in the game and Crunch!!!
sub'd- The Define R4 is my 2nd favorite case (Silverstone Fortress FT-01 is always my #1)
 
Joined
Nov 27, 2011
Messages
108 (0.02/day)
Lets get started!

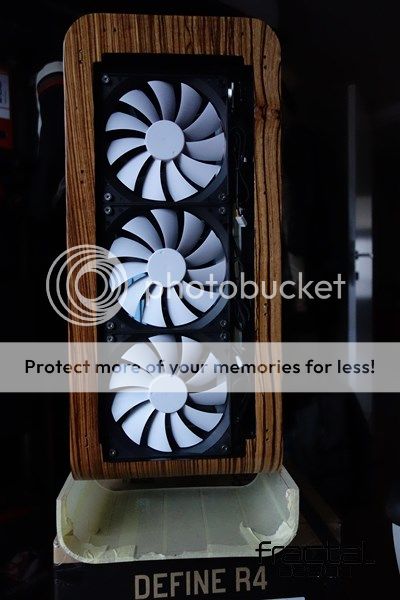
Got my self some MDF panels to get the shape of the case back.


Lined up the pieces


Adding some glue and pressure.


First new pieces are for the case are being made.


Need some extra adjustments to shape.


Much better.


Next update you will get to see a small sneak peak of the materials that I will use to give the mod a prefect finish.

Mod On !
 
Joined
Nov 27, 2011
Messages
108 (0.02/day)
Time for a other update.

Made a extra wooden part for the back of the case


And something little to make the MDF look like real wood. Got my self some wood veneer this type is called zebrano.


adding some pressure so the veneer and MDF


This can rest for 1day and then I will do the other pieces as well.

Next up is the Motherboard tray.


The new tray will be made from 5mm plexiglass with some bend in.


Adding the pci slots.


Installed it in the case.


Next update you can see the result of the veneer on the MDF pieces.

Stay tuned!
 
Joined
Nov 27, 2011
Messages
108 (0.02/day)
Small update.
The first panels are done they just need to small detailing and then I can add some clearcoat on the wood.


Painting the borders black that didn't got any veneer.


Till next update.
 
Joined
Nov 27, 2011
Messages
108 (0.02/day)
Small update

Continued the work on the panels. Starting with some clear coat on the veneer.


Also started to make a mold for top and bottom of the case.


The rest will be for the next update.

:)
 
Joined
Jan 17, 2010
Messages
12,280 (2.36/day)
Location
Oregon
System Name Juliette // HTPC
Processor Intel i7 9700K // AMD Ryzen 5 5600G
Motherboard ASUS Prime Z390X-A // ASRock B550 ITX-AC
Cooling Noctua NH-U12 Black // Stock
Memory Corsair DDR4 3600 32gb //G.SKILL Trident Z Royal Series 16GB (2 x 8GB) 3600
Video Card(s) ASUS RTX4070 OC// GTX 1650
Storage Samsung 970 EVO NVMe 1Tb, Intel 665p Series M.2 2280 1TB // Samsung 1Tb SSD
Display(s) ASUS VP348QGL 34" Quad HD 3440 x 1440 // 55" LG 4K SK8000 Series
Case Seasonic SYNCRO Q7// Silverstone Granada GD05
Audio Device(s) Focusrite Scarlett 4i4 // HDMI to Samsung HW-R650 sound bar
Power Supply Seasonic SYNCRO 750 W // CORSAIR Vengeance 650M
Mouse Cooler Master MM710 53G
Keyboard Logitech 920-009300 G512 SE
Software Windows 10 Pro // Windows 10 Pro
I love Fractal stuff. looks promising
 

HammerON

The Watchful Moderator
Staff member
Joined
Mar 2, 2009
Messages
8,397 (1.52/day)
Location
Up North
System Name Threadripper
Processor 3960X
Motherboard ASUS ROG Strix TRX40-XE
Cooling XSPC Raystorm Neo (sTR4) Water Block
Memory G. Skill Trident Z Neo 64 GB 3600
Video Card(s) PNY RTX 4090
Storage Samsung 960 Pro 512 GB + WD Black SN850 1TB
Display(s) Dell 32" Curved Gaming Monitor (S3220DGF)
Case Corsair 5000D Airflow
Audio Device(s) On-board
Power Supply EVGA SuperNOVA 1000 G5
Mouse Roccat Kone Pure
Keyboard Corsair K70
Software Win 10 Pro
Benchmark Scores Always changing~
Sub'd for a sweet looking mod:toast:
 
Joined
Nov 27, 2011
Messages
108 (0.02/day)
Update

Lets continue with the motherboard tray first. Finished all the cable routes and mounting places so time to polish the borders of the plexi tray.

To refresh you mind this was how it looked like.


And here is you can see the finished tray. Left the protective foil around to prevent scratches.


The SSD will be mounted on the back of the tray with these holes.


You just have to slide the SSD on its place easy to remove or install a new one.


With the new shape of the case I had to make some new pieces so I can easily remove the casefeet from the frame.
made a few spacer and glued them on the bottom of the case.


and on that I mount some L pieces.


Next up is the body work of the case.
To get the right shapes I made a mold out of MDF wood. Using 2 heatblower I heated up the plexi so it can fall in to shape.


cutted of the extra material and filed and sanded the border in a straight line using a steel bar as guiding line.


Mounted it on the bottom of the case.


I repeated the bending for the top panel and glued 2 plexi panels to the side panels.


sawed out the new shape of the case.


Just need to file the edges straight and continue the work on the other parts.


Thank you for reading.
And see you in the update. :)
 
Joined
Nov 27, 2011
Messages
108 (0.02/day)
Small update received a few packages with hardware and watercooling. I wont go to deep in to that because I didnt had to time to take pictures of all the parts and taking them out of the boxes for some extra pictures.


I had a bit of back luck with the package from the watercooling. Lucky noting got damaged.


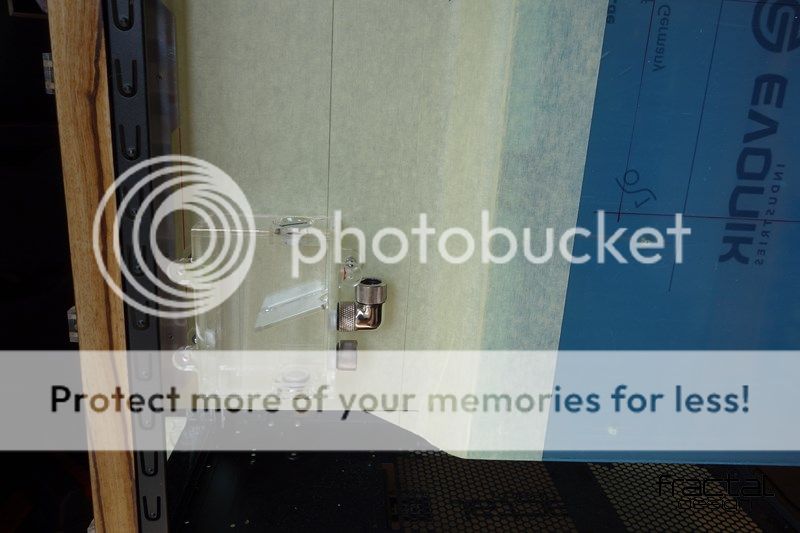
once I had the parts I could start with giving them a place in the case. Used 2 Micro reservoirs from Swiftech to make a hardline connection between the top and front of the case.


Next up was the pump.


The pump will be placed under the 3th reservoir that will be attached to the radiator. For that I cutted some alu pieces to creat a new attachment for it.


That was it again only a few more thing that need to be made and the case can be painted.

See you next time.
 
Joined
Nov 27, 2011
Messages
108 (0.02/day)
Update!!! :D

Making some fast progress on the case.
I continued my work on the wooden panels. Then I can finish them and move on to the rest of the case.
Used a sheet of plexi glass to achieved the desired shape for the front. Placed it on a new mold and heated it up.


mounted it on the front, so I could draw the right shape on it.


And the final shape of the front.


Just have to add the veneer to the plexi.


While everthing was drying I removed the protective foil from the plexi panels and mounted the top reservoir in the case. Also secured the mounting of the stand of case.


Back to the veneer panels.
To remove the extra material I used some sanding paper. Mounted the panel on the front and test fitted it on the case.


Next up is the power supply. I got the Fractal 1000W Newton PSU only 1 minor thing on it the psu. Not all cable modular, so I had to make some adjustments to get the result that I want to achieve.
Cutted out a piece of plexi and glued it on the PSU.


Removed the top of the psu and started to short in the wires.


After the psu I started to make all the other cables that where needed.


So that was it then next week a new update where you can see the assembly of the case.

AAAaaaand I will just place this picture here to teas a bit.


Till next update.
 
Joined
Nov 27, 2011
Messages
108 (0.02/day)
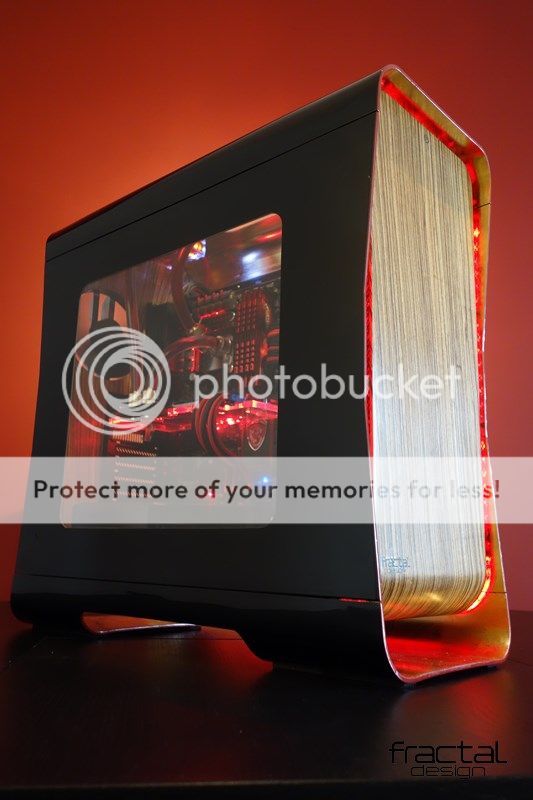
Started to ad some gold leaf on the inside of the case. This material can be used for all kinds of project most people you it on fall frames to give them a old look.
Sanded the inside of the panels and applied glue on it afterwards. Then you wait a 10min before you can lay the paper on it.


Also added some extra detail on the case using red paint to give the pc some extra color.


And total picture of the pc.


The rest will be for next update.
 
Joined
Nov 27, 2011
Messages
108 (0.02/day)
Last update before the final pictures will be shown.
Continued with installing all the remaining hardware and cooling parts. Before I start installing the wooden panels I have to install a few cables. This way I can keep a clean look in the case with not to much cables around.


Installed the all the inside panels PSU, radiator, pump and reservoirs.


When all that was done I installed the remaining hardware and started the leak test.


The only thing that needs to be installed are the cables and the front of the case. All this you will see in the final update of this project.
 
Joined
Mar 17, 2013
Messages
451 (0.11/day)
Location
Existence
System Name Workstation
Processor Ryzen 9 5950x
Motherboard Msi B550-A pro
Cooling Artic Cooling 360mm
Memory 64 GB DDR4 3200Mhz
Video Card(s) Amd Radeon pro w5500
Storage WD 850X 2 TB m2 + Seagate Exos 4 tb + WD 2tb Gold
Display(s) Aoc 32" qhd
Case Lian Li 011 DX
Audio Device(s) Beyerdynamics DT 770 pro + Logitech Z 623
Power Supply CM V1300
Mouse Razer Basilisk
Keyboard Gskill Ripjaws KM 780 MX
Software W 11 pro 64
Benchmark Scores It works.
Nice casemod, thanks for sharing.
 
Top