• Welcome to TechPowerUp Forums, Guest! Please check out our forum guidelines for info related to our community.

[Build Log] Project: BLACK & WHITE - PC/Desk Mod Build

Sock Fight

New Member
Joined
Aug 11, 2013
Messages
5 (0.00/day)

The Build:
How this started: While I was deployed to Afghanistan I saw a picture or two on TheChive of someone who built their PC into their desk with clear glass on top, I knew I had project waiting for me when I got home. I immediately started researching more and found a couple of very inspiring builds. the L3P desk was especially impressive. I always wanted to build my own rig, and I always thought water cooling was visually awesome, and my old desk was pretty beat up so I had a great excuse to start this project and get a lot of firsts out of the way; my first PC build, my first PC case mod, my first water-cooling system, etc. Also, I planned on Frankensteing my old case for parts. When I finally got home I went to get a new desk and went from there. Also, I found the final mod that was very inspiring and the aesthetic model for my build, an all White and Black build by Abiril in his Corsair 900D.

The Parts:

I got a an aluminum and black glass desk at Office Depot for <$200 and then started making cardboard template cutouts from the box to figure out what dimensions I had to work with (the case will be on the right side of the "L"):


From there the NewEgg Shopping spree started....

The Hardware:

Intel Core i5-3570K Ivy Bridge 3.4GHz (3.8GHz Turbo)
EVGA SuperClocked 02G-P4-2662-KR GeForce GTX 660 2GB
GIGABYTE GA-Z77X-UD3H LGA 1155 Intel Z77
SAMSUNG 840 Pro Series MZ-7PD128BW 2.5" 128GB
EVGA SuperNOVA NEX750G 750W GOLD
CORSAIR Vengeance 8GB (2 x 4GB) 240-Pin DDR3 SDRAM DDR3


The Water Cooling:

XSPC Raystorm 750 RS240 Extreme
XSPC Photon 170 Tube Glass Cylinder Reservoir - This thing is awesome, XSPC just started shipping it a few weeks ago and it looks great!
XSPC High Flex 7/16 x 5/8 - White


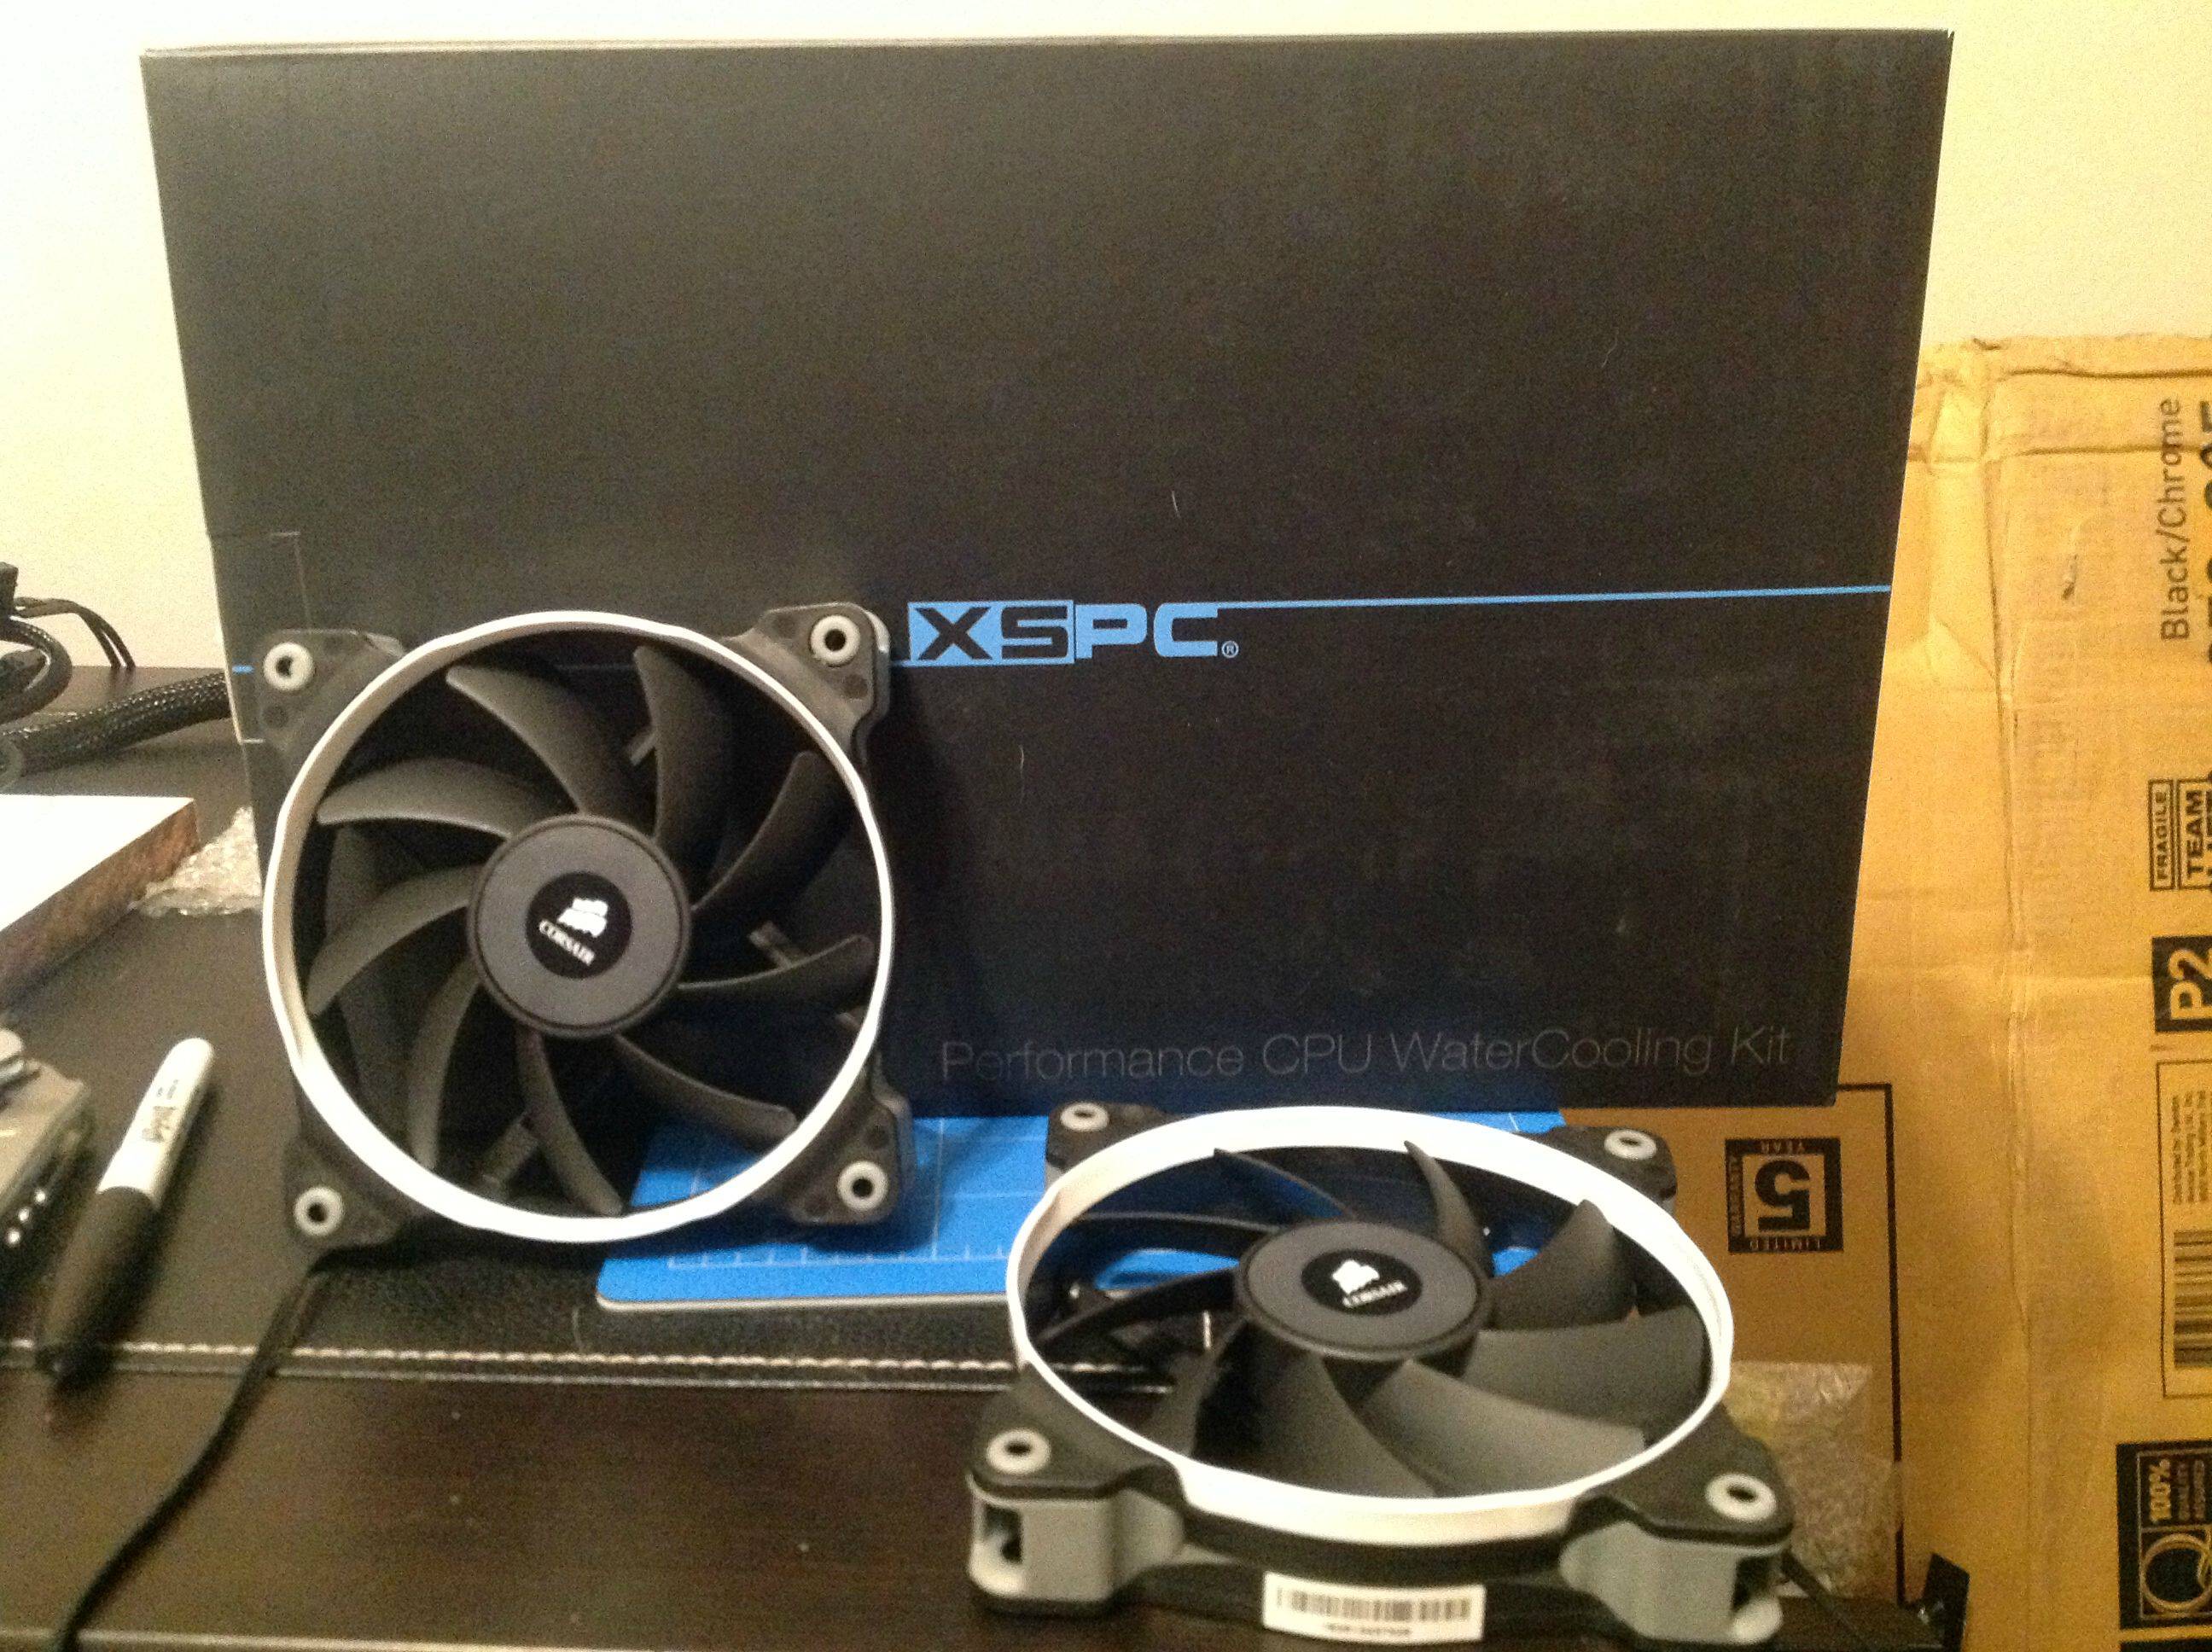
These fans are amazing, super quiet and the white replaceable rings will look great with the color theme for my build:


The Layout:

The goal was to highlight the watercooling bits as much as possible so the reservior will be a major focal point, along with the pump and tubing. The SSD, HDD, power supply, cables, and optical drive will all be hidden from the main top-down view from the glass in the desk. Once I had the dimensions of the desk using cardboard cutouts, paint, and graph paper was extremey helpful in tweaking the layout while waiting for all the parts to come in.

This is the planned layout as of now:


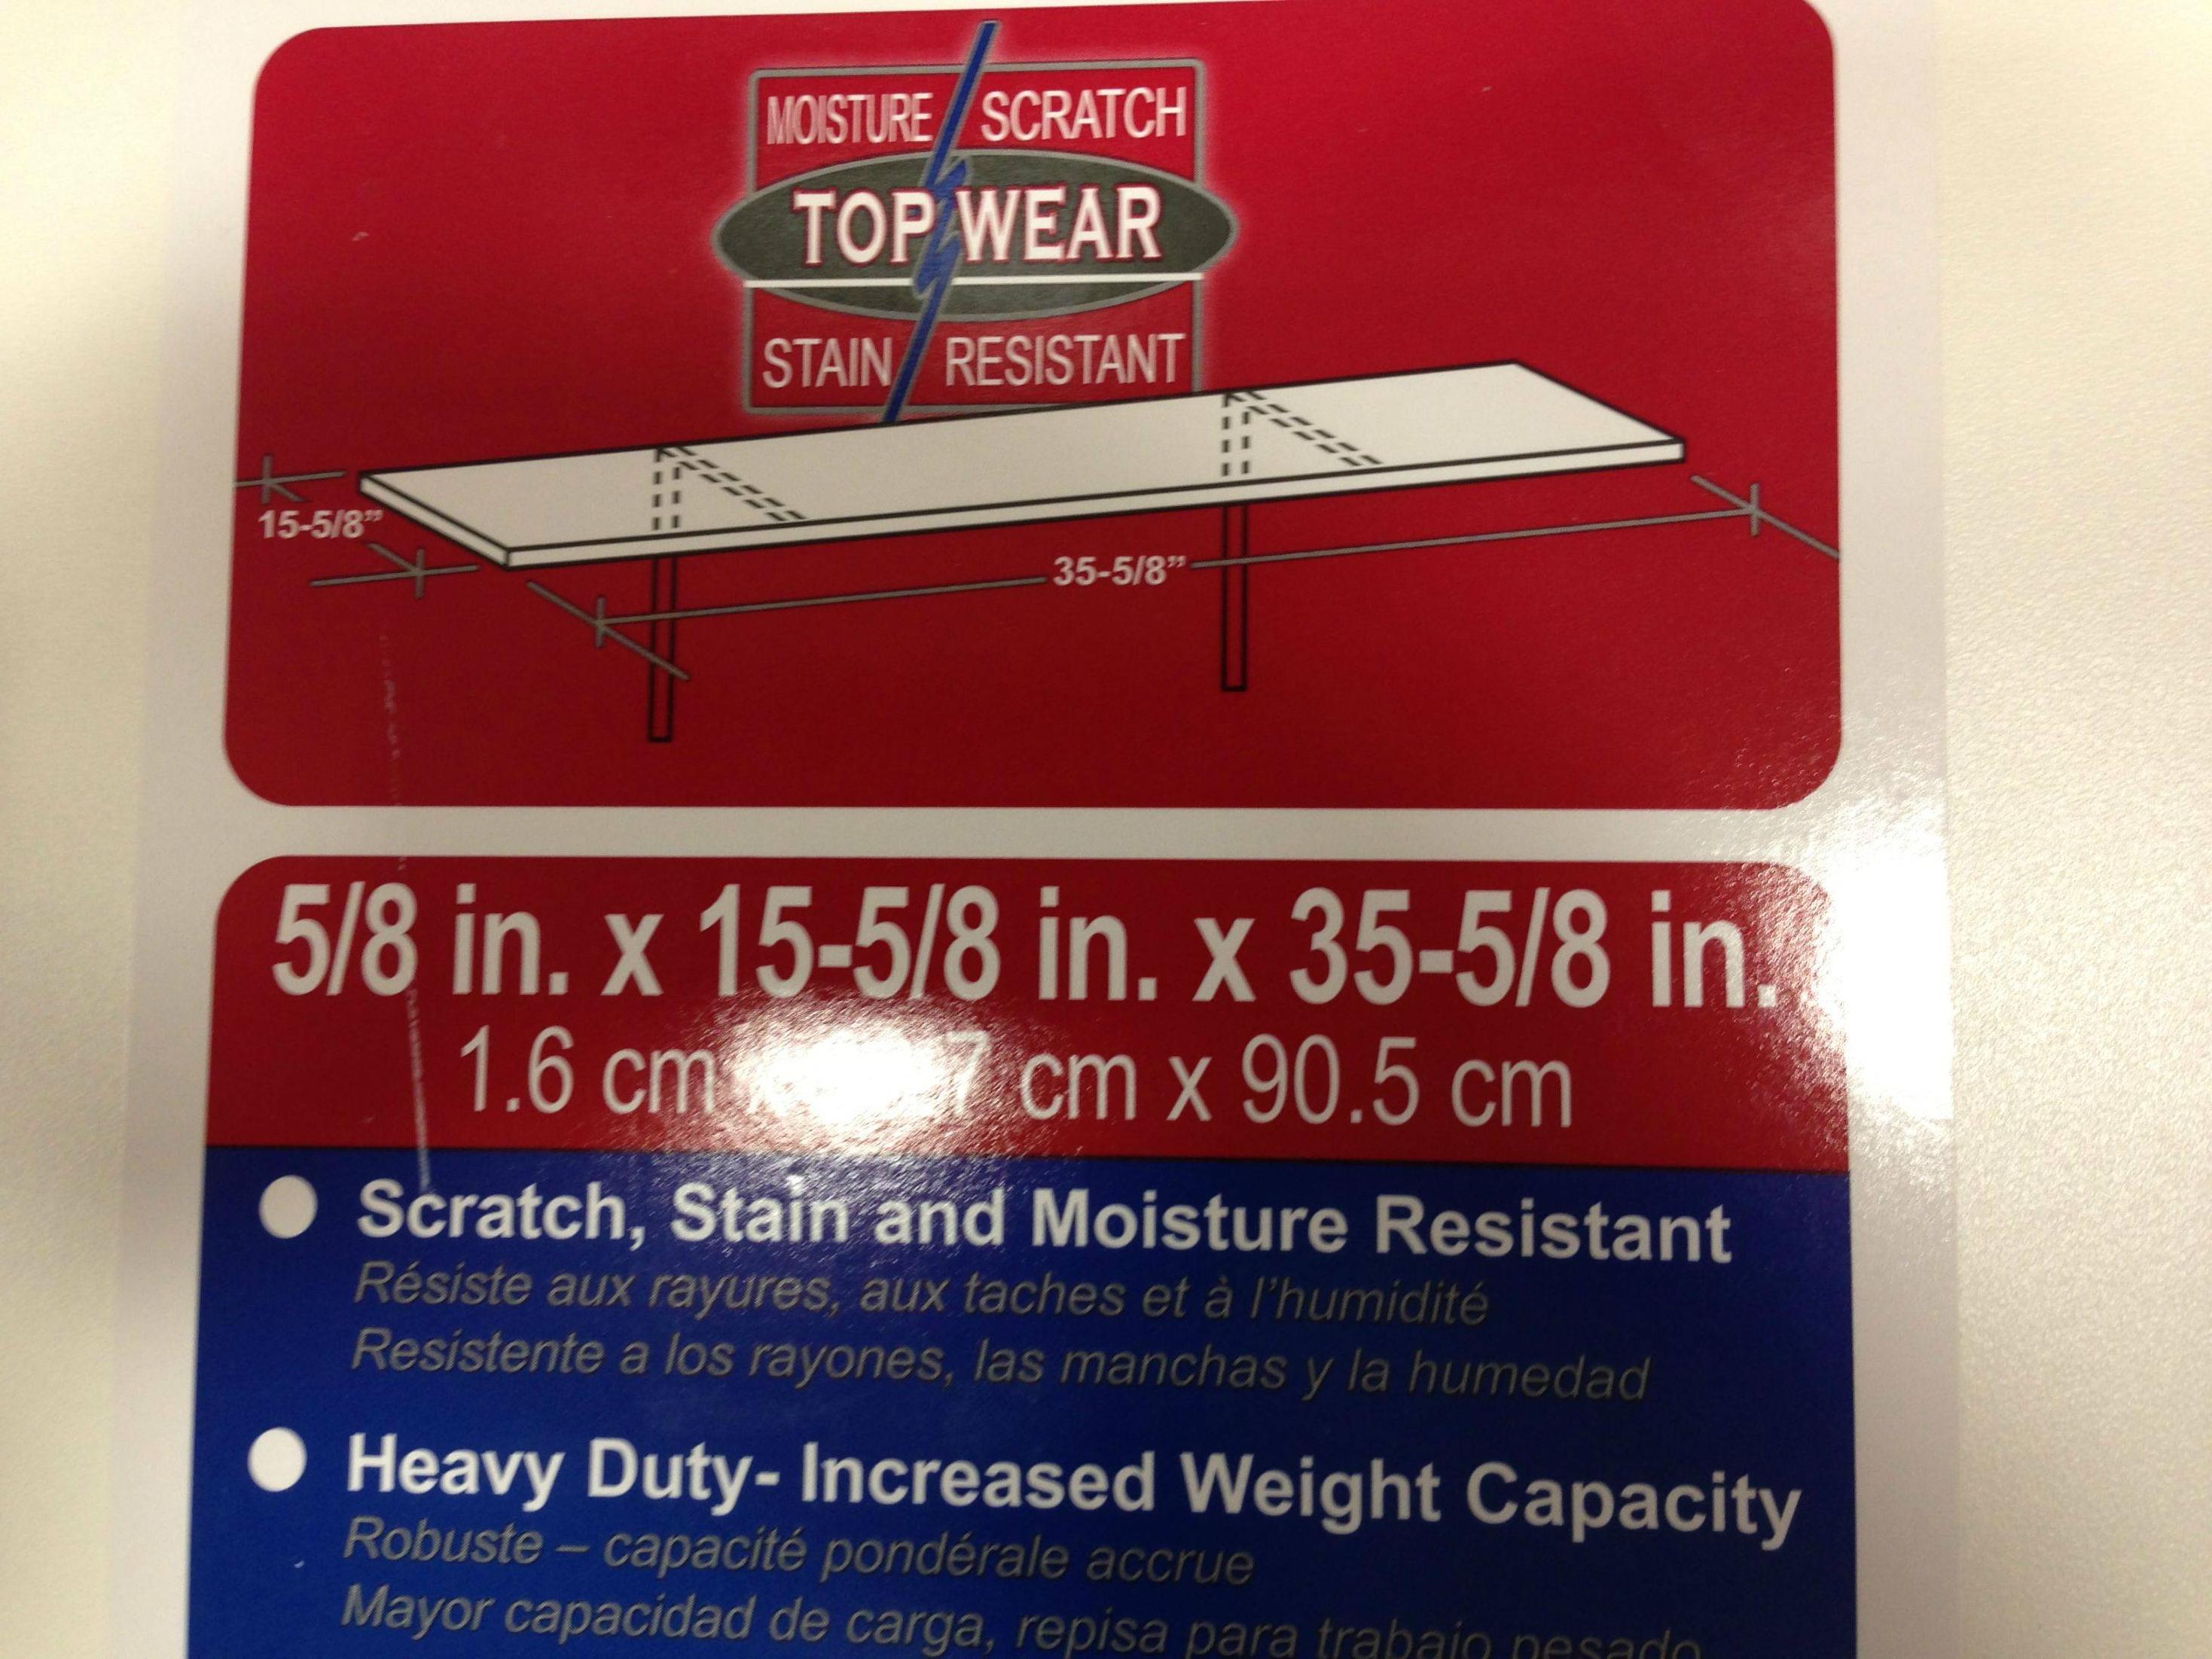
This is the main material for the build, I orginally wanted to use MDF but it only came in 3/4" sheets and I found this pre-cut and primed shelving boards at Lowes and it was exactly the width I needed. A big consideration for me was making sure I still have leg room on the half of the "L" desk where the case will be mounted.:


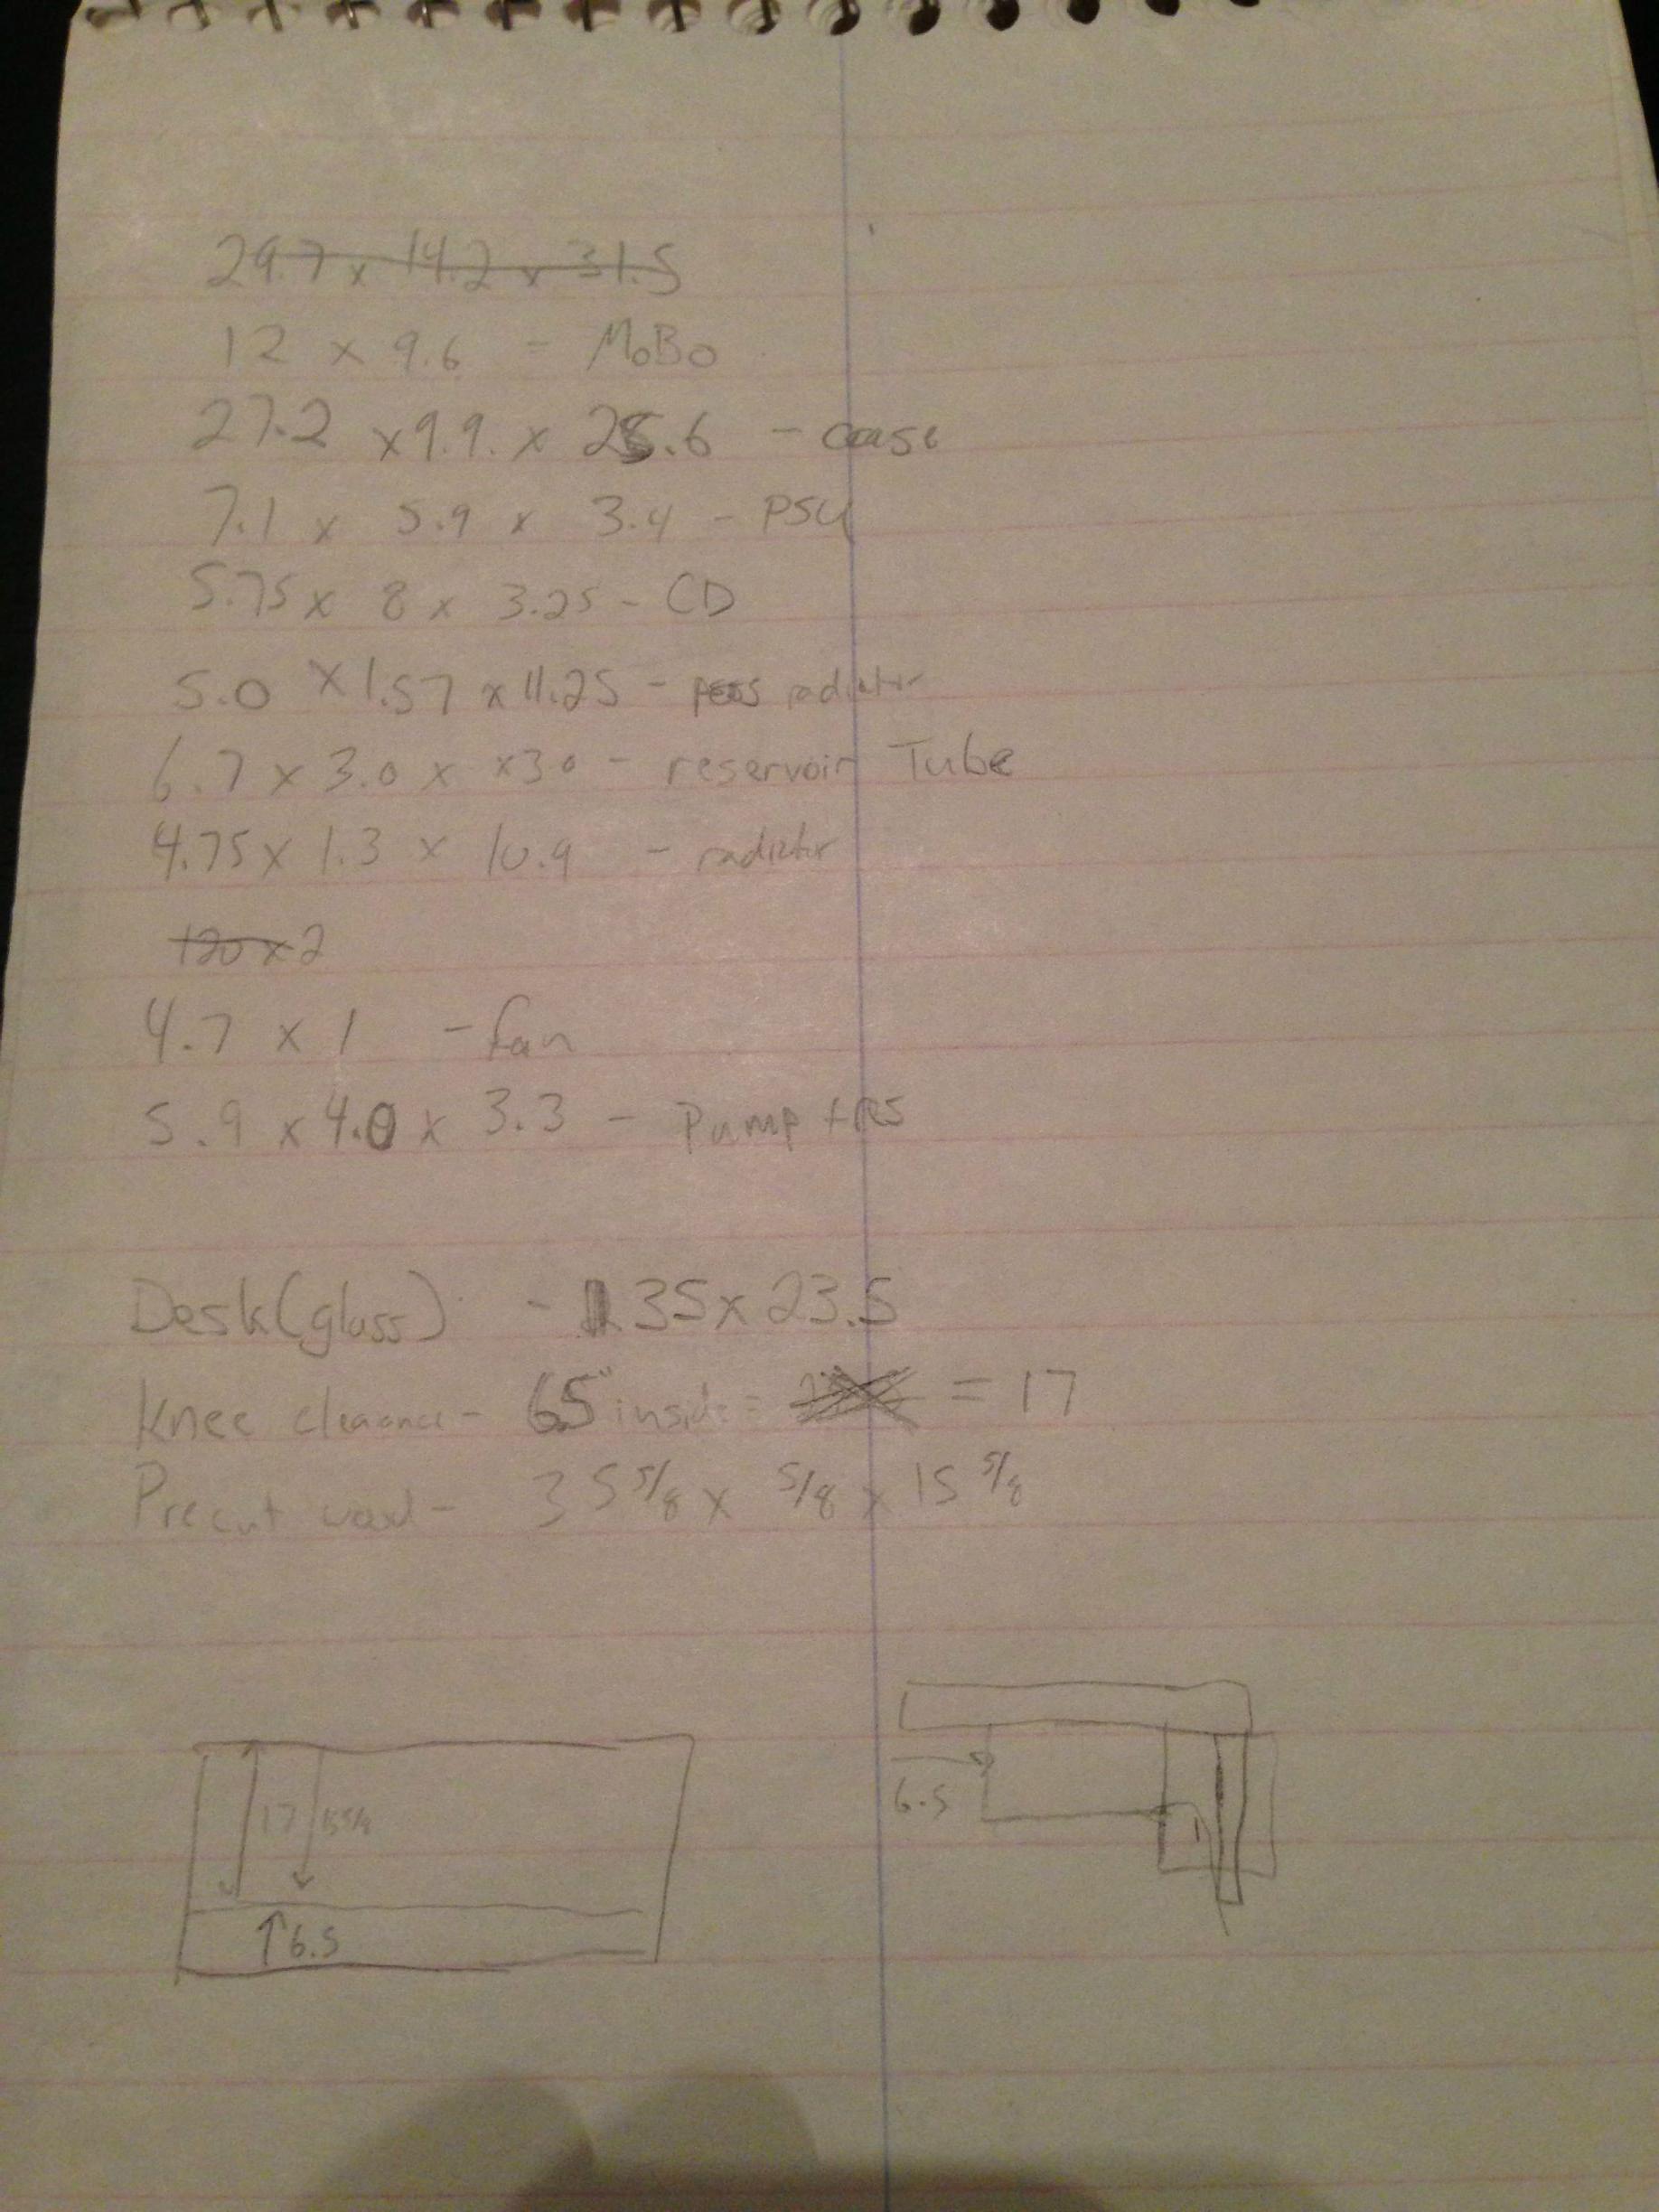
Using to scale drawings with graph paper was very helpful (I know its hard to read). Also, I pretty much decided the best way to mount the PSU is under the main part of the case so that all the cables can easily be routed underneath the elevated motherboard shelf I'm building and will not require a lot of cable extension work so that the PSU is hidden and the cables are tidy and tucked away:


Refered to NewEgg for the dimensions of my parts for planning while they are being shipped:


Next time:

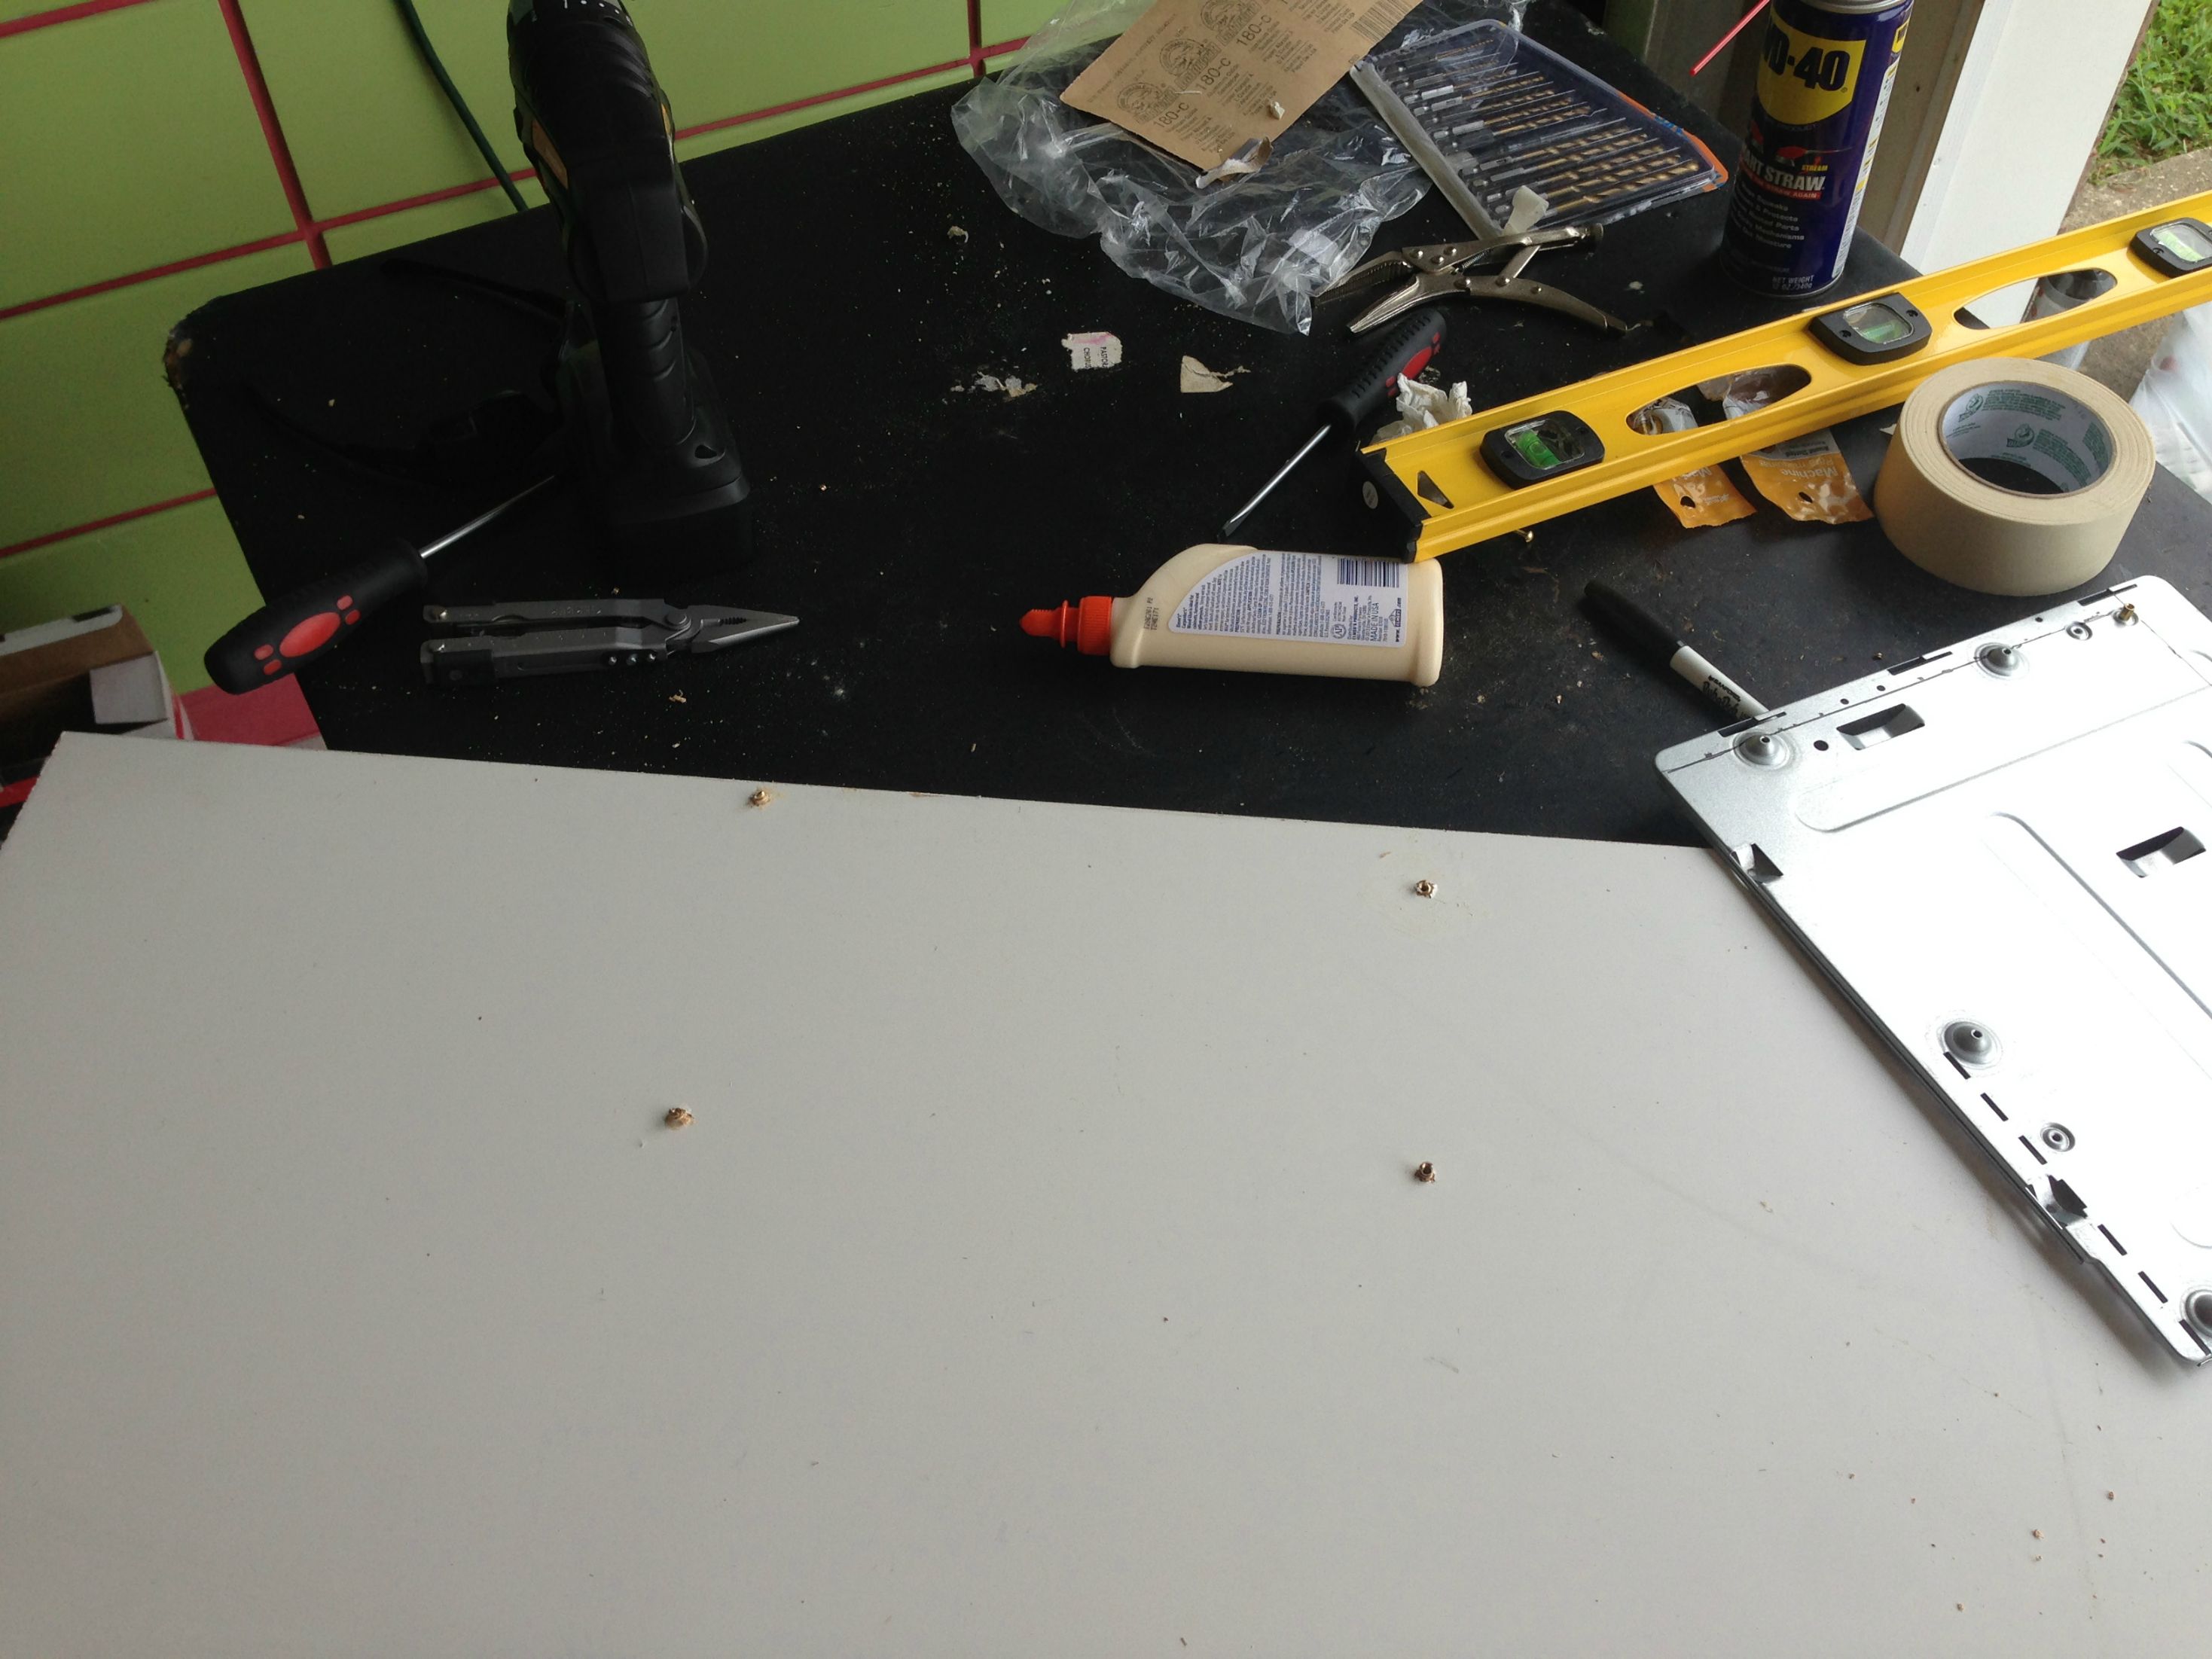
For the next part I need to make the motherboard mount. It will consist of the mount from my old case sized down to hide the ugly aluminum parts. Also, the motherboard tray will be elevated about an inch so I can route the cables underneath the tray back to the PSU. Im thinking of either using blocks of elongated screws to elevate the motherboeard.

Any feedback is appreciated! This is pretty fun, like I said, I took a big bite on this project making my first PC build a pretty complicated one. Time to break out my brand new Dremel, wish me luck! Also, that ugly metallic red RAM is turning white soon, stay tuned!


Sock Fight

New Member
Joined
Aug 11, 2013
Messages
5 (0.00/day)
Part 2: Putting things together!

The base board and motherboard tray is done! I predrilled holes and sunk in mounting screws on the base board where all the components will be displayed. The mounting screws are 1.5" long so I can run all the MoBo cables underneath the motherboard tray:


Next had to mark and cut the old motherboard to hide the extra metal:

...yes I live in Florida...


With the motherboard tray but to size and the elevatng mounts secured moved inside to start laying things out for the build:


The elevation is nice, can hide all the cables (although its messy now):


I laid out the watercooling line so I can get an idea of the layout while I wait for the last 2 barbs to arrive, The awesome reservoir didn't come with any so that was my bad. Once they are in, it'll be time to hook up the watercooling. Also, went ahead and moved the baseboard to where it will finally be. I think I'll be mounting the fans in the front and back instead of the sides like originally planned, i think they'll look great with the black and white theme in the front of the box:


The ugly Red VGA 6-pin and that stock Red RAM will be gone soon, dont worry


Stay tuned! Watercooling Project Black and White is next!
 

t_ski

Former Staff
Joined
Apr 11, 2006
Messages
11,960 (1.82/day)
System Name My i7 Beast
Processor Intel Core i7 6800K
Motherboard Asus X99-A II
Cooling Nickel-plated EK Supremacy EVO, D5 with XSPC Bayres & BIX Quad Radiator
Memory 4 x 8GB EVGA SuperSC DDR4-3200
Video Card(s) EVGA 1080 SuperClocked
Storage Samsung 950 Pro 256GB m.2 SSD + 480GB Sandisk storage SSD
Display(s) Three Asus 24" VW246H LCD's
Case Silverstone TJ07
Audio Device(s) Onboard
Power Supply Corsair AX1200
Keyboard Corsair K95
Software Windows 10 x64 Pro
Seems a lot of your pics are broken ATM
 

t_ski

Former Staff
Joined
Apr 11, 2006
Messages
11,960 (1.82/day)
System Name My i7 Beast
Processor Intel Core i7 6800K
Motherboard Asus X99-A II
Cooling Nickel-plated EK Supremacy EVO, D5 with XSPC Bayres & BIX Quad Radiator
Memory 4 x 8GB EVGA SuperSC DDR4-3200
Video Card(s) EVGA 1080 SuperClocked
Storage Samsung 950 Pro 256GB m.2 SSD + 480GB Sandisk storage SSD
Display(s) Three Asus 24" VW246H LCD's
Case Silverstone TJ07
Audio Device(s) Onboard
Power Supply Corsair AX1200
Keyboard Corsair K95
Software Windows 10 x64 Pro
red/black "X" of death
 
Joined
Mar 5, 2009
Messages
248 (0.04/day)
Location
Western NC
System Name dell beast
Processor dual Xeon x5675
Motherboard dell t7500
Cooling stock
Memory 48gb ecc ddr3
Video Card(s) PowerColor 7870 Myst 2gb
Storage 2tb hpe ssd
Display(s) asus 23.8" 1080p
Case t7500
Audio Device(s) XFI soundblaster
Power Supply 1200watt dell
Mouse logitech
Keyboard logitech
Software win10x64
i see all the pics, looks like a very cool project!
 
Joined
Feb 9, 2011
Messages
133 (0.03/day)
System Name Main Gaming
Processor i2600k @4.3
Motherboard Asus P8P67 Pro
Cooling Thermaltake Frio
Memory 8gb G.Skill 1866
Video Card(s) Saphire 6970
Storage 128gb Samsung 830 SSD, 1TB Samsung Spinpoint
Display(s) HP 27" ZR2740w IPS WQHD
Case CM 690 II Advanced
Audio Device(s) Asus Xonar DX
Power Supply SeaSonic 750w X-series Gold
Software Win 8 64bit
Sub'd, can't wait to see more.
 

Sock Fight

New Member
Joined
Aug 11, 2013
Messages
5 (0.00/day)
Part 3: Building the PC!

I finally got the last 2 fittings I needed and built the loop. It was pretty easy, the XSPC kit is amazing. Picture time!


The blue LED in the reservior will be swapped out to a white one eventually:


Ugly red RAM before:


After:


Installed!:


The VGA cable that came with the PSU was red so I had to change that:


After (so much better):


I didnt take pictures but I booted up the PC just fine and started checking temps. The watercooling is great, im getting 30-31C Idle and started tweaking with OC. At 4.3GHz Temps are peaking at 60 at full load and avergaing about 58. I'm super happy about the temps with this kit.

More soon!
 

Sock Fight

New Member
Joined
Aug 11, 2013
Messages
5 (0.00/day)
Part IV.

So, update time! I had to RMA my motherboard, so that has been a hassle and caused me to pause things, however, I got a good bit done before the board finally died. Pictures below!


Dog Helper:


There will be a 2nd shelf below for the PSU, DVD drive, HDD, SD, etc


The blue LEDs will be swapped for white


More to come once the new motherboard is in!
 
Top