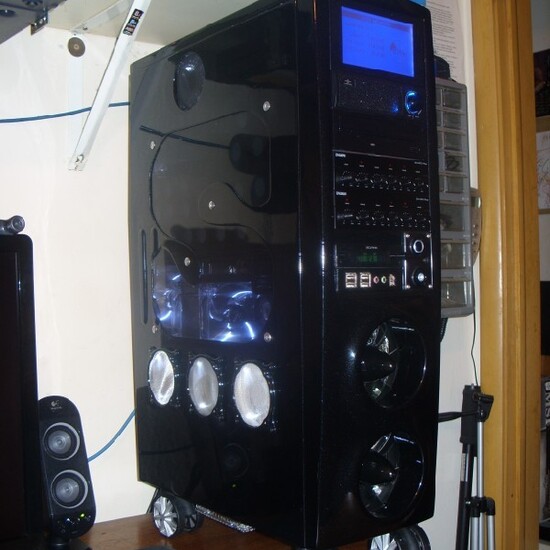
Stealth 2 Duo Turbine


Owner:
Posted:
May 5th 2008
Updated:
Viewed:
23,242 times
Rating:
 21 votes total
Superb (8.4)
Submit vote:
Please register on the forums & login to vote.
Key Features:


Homepage:
This modder's other projects:
- 900 CPD Edition
- AWAKENING
- Basic 4Ghz Classified
- COLORS
- Daughters new PC
- Extreme Green SMILODON
- HAF This Way
- Harley
- Mystique-Fire
- Need MOD Ideals Please
- Oh So Sexy
- Old Case New Life
- Server XT Mid
- SIMPLE
- Simply Pink
- SredT
- Starting a Mod
- SteelKanePc DreamWorks
- STEELKANEPC Quad Panther SLI
- SteelKanePC's HTPC SLI-Sleeper
- SteelkanePc's SLI-EVO
- SteelKanePC's SLI-Fox690
- SteelkanePC's SLI-Panther
- SteelkanePC's SLI-Silent Black Edition
- Sword-XSPC_Master
- Twin Video Edit 1200
- Ultra Grid Micro
- X-Clio SLI Turbine Black UPGRADED
- X-Clio SLI Turbine Black UPGRADED
System Specs:
Performed Mods:
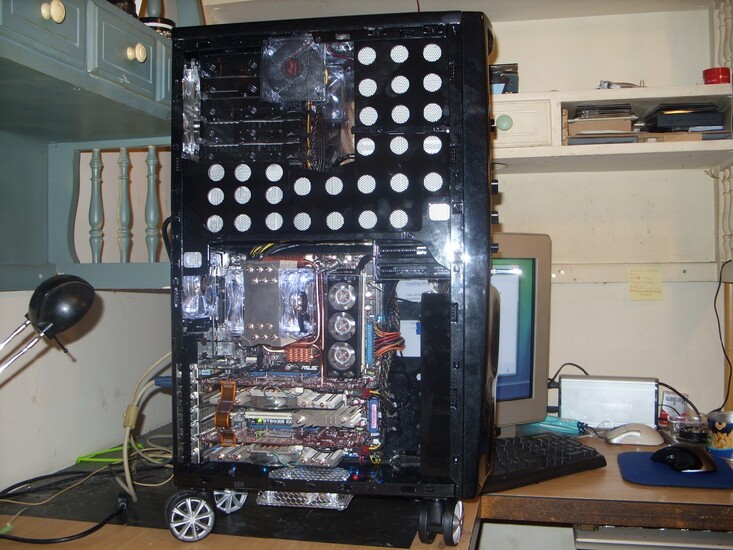
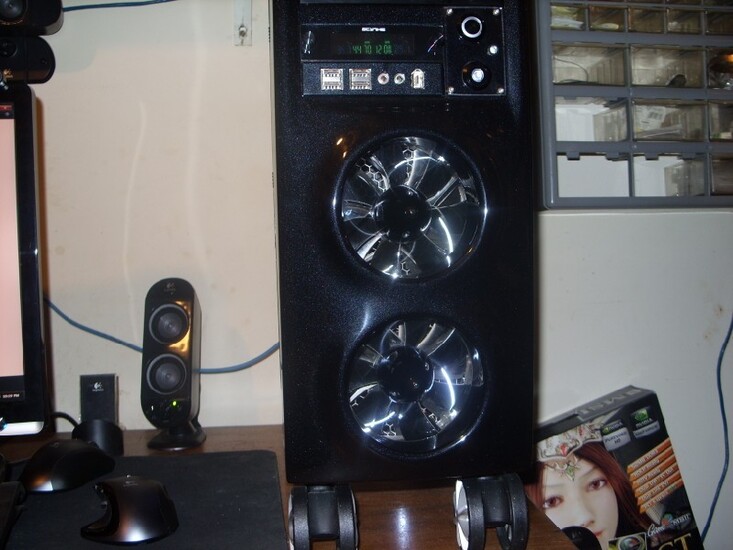
HOLES & CUT’s>> Bottom 120mm Intake, 2- front 120mm in case shell & Bezel for Intake, Rear 92mm Exhaust, 80mm right side panel intake for cpu, Rear Top 140mm intake, Top middle 120mm exhaust, 80mm Left & Right top side panel exhaust, 3- 80mm left lower side panel intake, square hole in motherboard tray for cpu heatsink access, Slot for 6 sata cables, Slot for PSU 24 pin plug, Removed metal that was blocking 135mm bottom intake fan for PSU, Removed metal from the top of motherboard tray so wire’s would clear side panel, Removed metal in front case shell for power & reset switch clearance, Removed bottom section of 3.5” drive cage for front 120mm fan clearance, Removed some metal from right side 5.1/2” drive bays for wire management.
MADE>> Top drive bay & power supply cover’s using gloss black plexiglass then drilled 7/8”inch hole’s & cut modders mesh for the back side,> Hard drive cage that hold’s 5 HDD using black transparent plexiglass, then cut 80mm holes for left & right side for exhaust, then cut flames for the end using a bandsaw, cage will hang from the top of the case with screws & rest on the top of the power supply with a bottom plexiglass plate with rubber feet,> Front fan box using gloss black plexiglass with modders mesh for grills,> Gloss black plexiglass plate for memory cooler,> fan wirebox for 3 side 80mm fans,> front power, reset & hdd led plate cover using black transparent plxiglass,
FIBERGLASS WORK>> 2 front 120mm fan ducts,> Back 92mm fan hole,> Back top 140mm fan hole,>Power, reset & hdd led relocated.
SLEEVING & W/M>> Front I/O panel,>power, reset &hdd led,> Used self crimping sata power connectors for a clean inline look,> All black zip ties,> Wire’s attached to back side of motherboard try using self adhesive zip tie clips.
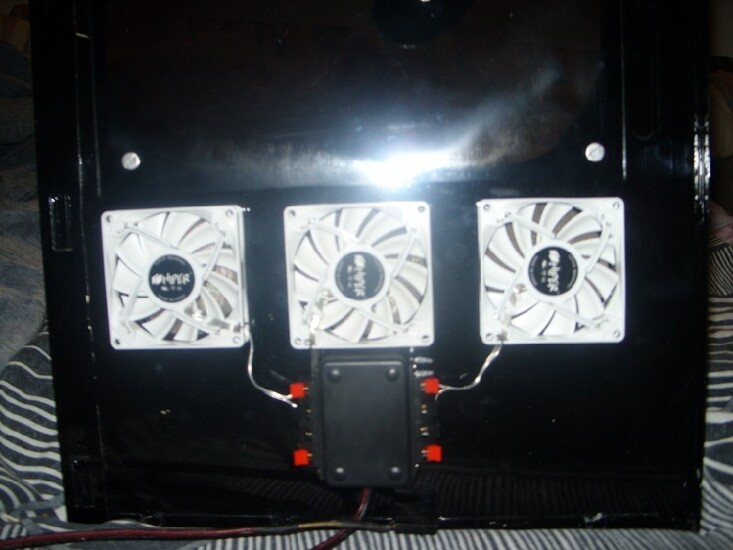
FANS & PAINT>> 6 – 120mm > 3- 92mm > 6- 80mm > 1- 140mm > 3- 40mm > 1- Front Vantec vortex,> Alphcool panel, Lite-on burner, I/O panel & Case were painted with Black Gunmetal Candy Pearl paint that was applied with a spray gun, Clear coated then polished.
This PC was built for myself, It took about 7 months to complete, I wanted to design a case that keeps all the hardware running cool on air,, water will be the next project, Please have a look at my youtube video > http://www.youtube.com/watch?v=w0TkVjAMMvU < Please enjoy, & thanks for viewing.
Apr 23rd, 2024 09:44 EDT
change timezone
Latest GPU Drivers
New Forum Posts
- EK seems to be having major issues (25)
- Odd RTX 3080 behaviour (2)
- Possible near-future 2024 Arrow Lake build.... (47)
- Windows 12 (141)
- Show us your collections thread!! (281)
- Serious bug in PHP reported! (2)
- Upgrade Build (105)
- The Official Linux/Unix Desktop Screenshots Megathread (693)
- Share your AIDA 64 cache and memory benchmark here (2913)
- My computer setup - Request for opinions (4)
Popular Reviews
- Horizon Forbidden West Performance Benchmark Review - 30 GPUs Tested
- Fractal Design Terra Review
- Corsair 2000D Airflow Review
- Thermalright Phantom Spirit 120 EVO Review
- Minisforum EliteMini UM780 XTX (AMD Ryzen 7 7840HS) Review
- ASUS GeForce RTX 4090 STRIX OC Review
- NVIDIA GeForce RTX 4090 Founders Edition Review - Impressive Performance
- ASUS GeForce RTX 4090 Matrix Platinum Review - The RTX 4090 Ti
- Creative Pebble X Plus Review
- MSI GeForce RTX 4090 Gaming X Trio Review
Controversial News Posts
- Sony PlayStation 5 Pro Specifications Confirmed, Console Arrives Before Holidays (116)
- NVIDIA Points Intel Raptor Lake CPU Users to Get Help from Intel Amid System Instability Issues (105)
- AMD "Strix Halo" Zen 5 Mobile Processor Pictured: Chiplet-based, Uses 256-bit LPDDR5X (101)
- US Government Wants Nuclear Plants to Offload AI Data Center Expansion (98)
- Windows 10 Security Updates to Cost $61 After 2025, $427 by 2028 (84)
- Developers of Outpost Infinity Siege Recommend Underclocking i9-13900K and i9-14900K for Stability on Machines with RTX 4090 (82)
- TechPowerUp Hiring: Reviewers Wanted for Motherboards, Laptops, Gaming Handhelds and Prebuilt Desktops (74)
- Intel Realizes the Only Way to Save x86 is to Democratize it, Reopens x86 IP Licensing (70)
47 Comments on Stealth 2 Duo Turbine
Had one of those kinda cases back in the UK never got around in doing what you done there.
10/10 as it's a true modded case.
8/10
I personally like the airflow intake and exhaust features you have added.
Nice job man 10/10
glad to see it completed and looking great!
8/10
why is that, just wondering.
I'll just clone my Gallery2 install and import export my sql database and give you full rights to it so you have a decent photo gallery.
8/10
Really astounding job!
i bet the lights go dim when you power that baby up!
Very nice job of packing so many wires into the case, wheels add a nice touch.
PS:nicely done with the metallic paint.
PS: lol on the monster
@ flawless692008: Thanks for the wow, if you ever need a hand with mods or building, ask me or the forums for help.
@ JC316: Thanks for following & the F^$%#$@ Awesome 10.
@Vongoerlich: Thanks for you input & vote.
Like your side panel too. It shows just enough, and at the same time hides enough of the inside for you to hide your wires. Pretty nice.
10/10
Just one thing I could find wrong with this mod: I hope you don't live in California, because during an earthquake, those wheels will make the case roll right off your desk :P
WoW!!!This guy is the goods,it has been a long time since ive seen creativity like this, i have seen a lot of modded machines, but this guy thinks outside the box(no pun intended). If i were looking to get a box done, i would contact this guy.
His labor would probably cost ,But for the best i would be willing to pay, so listen up you people that are looking for new and exciting ideas insted of those played out old mods, contact this guy it's worth it.
Keep rocking steel.
ripping box.
Blooddawg
arstechnica.com/reviews/4q99/supercase/apex-atxft-1.html
You Are Niceeeeeee Mannnnnnn And That Isssssss Soooooooo Koooooooooollllllll Nice Mannnnnnnn
ps: if I could rate it 1,000,000,000, I would
PS: just remember I know who you are.
www.youtube.com/watch?v=m488PjlVws8
needs a clean for a start fingerprints everywere