Homemade Transparent Case with water cooling


Posted:
June 16th 2008
Updated:
Viewed:
21,037 times
Rating:
 6 votes total
Outstanding (7.3)
Submit vote:
Please register on the forums & login to vote.
Key Features:


System Specs:
Apr 16th, 2024 11:02 EDT
change timezone
Latest GPU Drivers
New Forum Posts
- Outer Worlds getting boring (14)
- which new soundcard or which 4.1 speakers kits ? (1)
- TPU's WCG/BOINC Team (34415)
- Using a cable from 1 psu in another PC (10)
- DMAS Design [SPDIF-Optical] (72)
- Time to update the motherboards layout! (99)
- Beware: Win11 KB5035853 Cumulative Update may cause stuttering and other performance problems. (16)
- Shadow Of The Tomb Raider - CPU Performance and general game benchmark discussions (523)
- DTS:X APO4 + DTS Interactive for Most Devices [USB Supported] (303)
- Which air cooler for a ryzen 9 5900x (148)
Popular Reviews
- Horizon Forbidden West Performance Benchmark Review - 30 GPUs Tested
- PowerColor Radeon RX 7900 GRE Hellhound Review
- Galax GeForce RTX 4070 Super EX Review
- Fractal Design Terra Review
- ASUS GeForce RTX 4090 Matrix Platinum Review - The RTX 4090 Ti
- Corsair 2000D Airflow Review
- Minisforum EliteMini UM780 XTX (AMD Ryzen 7 7840HS) Review
- Creative Pebble X Plus Review
- FiiO KB3 HiFi Mechanical Keyboard Review - Integrated DAC/Amp!
- ASUS GeForce RTX 4090 STRIX OC Review
Controversial News Posts
- NVIDIA Points Intel Raptor Lake CPU Users to Get Help from Intel Amid System Instability Issues (102)
- US Government Wants Nuclear Plants to Offload AI Data Center Expansion (98)
- Sony PlayStation 5 Pro Specifications Confirmed, Console Arrives Before Holidays (91)
- Developers of Outpost Infinity Siege Recommend Underclocking i9-13900K and i9-14900K for Stability on Machines with RTX 4090 (82)
- Windows 10 Security Updates to Cost $61 After 2025, $427 by 2028 (79)
- TechPowerUp Hiring: Reviewers Wanted for Motherboards, Laptops, Gaming Handhelds and Prebuilt Desktops (70)
- Intel Realizes the Only Way to Save x86 is to Democratize it, Reopens x86 IP Licensing (70)
- AMD Zen 5 Execution Engine Leaked, Features True 512-bit FPU (63)
27 Comments on Homemade Transparent Case with water cooling
Thanks for your reply
amazing ingenuity!!
Gave you an 8 for having a set of brass ones...Home made H20? You are braver than me. Nice job
Since automotive coolant are good in heatexchange but when concentrated in 50/50 ratio it is best for Water cooling Kits for Pc.
Thanks
Accouding to Galvanic table and all galvanic corrosion calculations between coolent composition and two metals( aluminium & Copper) results in a lifetime period of more then 70 years.
long time..................So no worry of galvanic corrosion
hope you like it.
Here is twesked pic.
AMD x2 4000+ run at 2.1GHz but i am running it at about 2.9 Ghz and at full load for about a hour you get just 41 c temp.
Hello to every one.
I am back with some more mod thing.
Currently i modded my Sound blaster Audigy Value 7.1. Installed new Op-amps Burr-Brown OPA277 and Capicitor mod.
It improved sound quality a lot...But now i think i Should have new SUBWOOFER..
So here i am with my own Power Sub-woofer.
DIM:-
14inc X 14inc X 18inc Sealded Encloser made from 1/2 inc thick MFD board.
12inc - 4ohms - 800Watts Sub- drive
home-made 450watts amp.
Have a look
SUB
Its very enjoying Playing CRYSIS with this subwoofer.
brilliant work!
NEw system Update:-
Samsung 22" LCD
Hope you all like it....It's great to watch HD Movies on it...Super...
hava a look on motor , pump unit , armature and small pump running..
DIY Reservoir
DIY Reservoir Update ... New High Pressure Pump tested ok
De-assembling the dusty case.
Components:
Removing the water cooling setup:
Dusty radiator. Many members of different forums were asking me about this radiator..Now everyone can see the manufacturer’s logo still alive and speaking loud about the quality of the product.
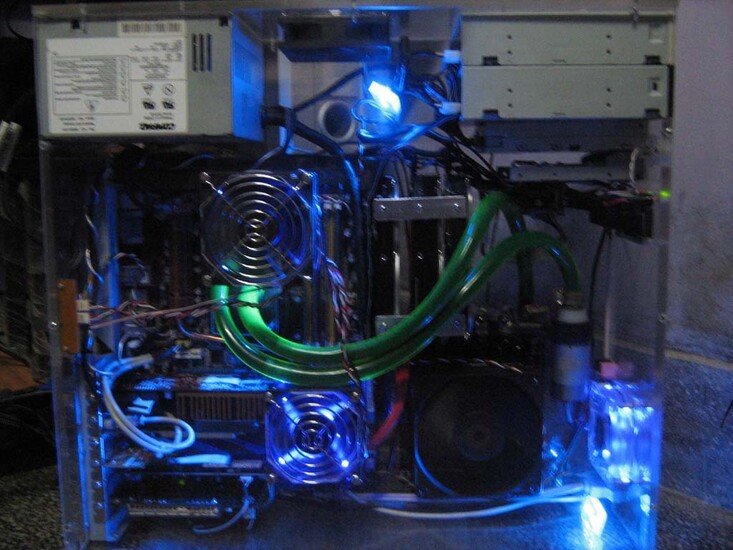
Re-assembling you can see all the cable management in action with three SATA power connectors in line. No cable mess.
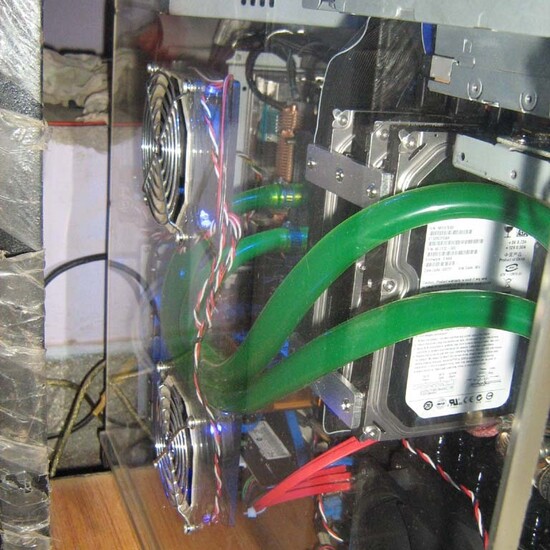
All fans cleaned and radiator washed.
Radiator and HDD’s in place.
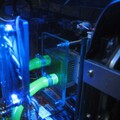
Connecting New pipes and optical drives.
All assembled. The best cable management possible for me…
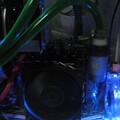
Night mode.
Hope you like it… If you have any suggestion regarding making this case neater or better say cool, then you are most welcome..
Thanking
Rakesh Sharma
You know I'm pretty certain some members would probably buy custom made water cooling parts from you, those who don't have access/can't afford brand parts.
Perhaps something to think about : ]
I was told by many on different forums that my Watercooling does not contras with the whole transparent cabinet. So I decided to do something ,,, well hope you like my new CPU block.
This is the pic of old CPU block.
This time I made it with 2mm thick copper base with 1mm deep round channel for some water resistance, top with 10mm thick acrylic sheet and added two UV LEDs.
As per working or so called temperature performance it is equal to my old block. Not even a single degree of difference . But looks now cool…, after all watercooling is also somewhat show off.
Hope you all like the new update..
Thanking
Rakesh Sharma
i love clear cases and know how hard it is to hide all the gubbins
check mine
www.techpowerup.com/gallery/2602.html
but i`m glad i held back on rating till i`d read through it properly
YOU MADE ALL THIS YOUR SELF????
now i`m impressed. nice work 7/10 from me
Last week when i played Bioshock 2 for 1 hour or so, the temp of my HD4850 went up to 87c and the entire fan were making lot of noise (since they have to move lot of hot air from inside of the cabinet).
So i said to myself, "It's time to do something of the HD4850." VGA water block for HD4850 was in my mind for even before building the Clearity, and i searched a lot for stock heat sink of HD4850 to convert it into a Water block. But no success.
Many forum members have branded GFX block for HD4850 but they all are very costly. And even my current rad 1x120 is not enough to handle load of both CPU anf GPU.
Last week my friend came to me regarding up-gradation of his PC. He wanted i7. So i made him one. But he also had 1.5 yrs old CM Aquagate S1 cooler, which i have repaired 6 months ago. His original fan blads brooked so i replace it with new CM silent FAN. Now this cooler won’t fit on LCG1366 socket so he asked me to sale it.
After two days of zero response in sale posted on many forums, he gave me the S1 free for the cost.
So now I have an extra rad and a block. Only thing I have to figure out is how to use it with HD4850.
After thinking for whole day I came to this idea.
Now instead to two different loops I added both rads and both pumps in the same loop. This will work better since extra rad will add up more coolant and extra heat exchange, second two pumps will help in better flow and if in any case one pumps dies other will still server the cooling.
So this is the loop flow order.
OLD Rad -> AC pump -> CPU -> S1 Rad -> GPU block/pump -> OLD Rad
Now start moding.
First take apart of the Aquagate S1.
Now added rad to the Clearity. Two fans in push and pull format.
Now made some acrylic mountings to attach the S1 block on to HD4850. After two hours of cutting, filling, drilling and screwing the block finally mounted on the card and I think it looks cool.
It’s too late in night so I have close the work for now.
On Sunday I will make the heatsinks for memory and power mosfets on the card from few old aluminum sinks lying around.
Hope you like the modding.
Rakesh Sharma