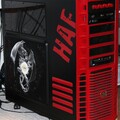
HAF 932 Red Dragon MOD


Owner:
Posted:
January 15th 2010
Updated:
Viewed:
42,065 times
Rating:
 46 votes total
Superb (8.2)
Submit vote:
Please register on the forums & login to vote.
Key Features:


Worklog:
This modder's other projects:
System Specs:
Performed Mods:
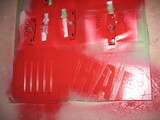
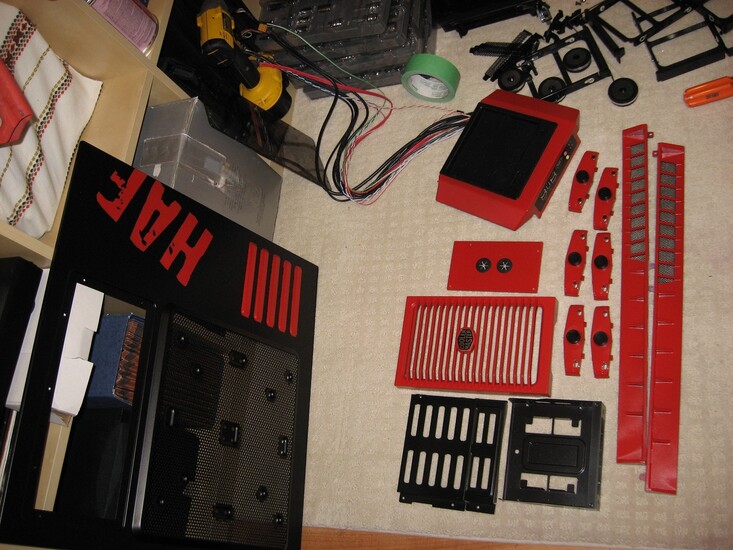
Prep, Primed & Painted. The sanding was tricky along with the taping. It took me some time to tape up the "HAF" on the side of the case. I did not sand the plastic. Big mistake, DO NOT SAND THE PLASTIC because it's not plastic, its PVC piping plastic. If you sand it it comes out like spaghetti. I stopped just in time and prevented damage to my case. Just clean it with soap & water, then give it about 4 to 5 thin coats of primer to get it fully covered. Then paint away. It seems as though CoolerMaster put some sort of residue on the exposed steel parts of the case. So sanding then priming is a must.
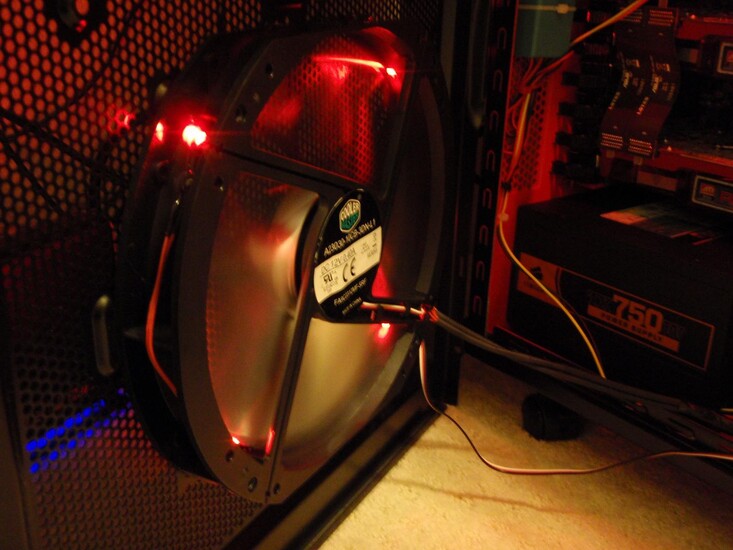
Finished the 2 x 230mm Black fans. Added RED LED's on them and painted the fins bright Chrome Metallic. I'll be adding new photos in the coming days.
Air blowing inside the case from the side, bottom & back fans and hot air blowing out of the case from the top fans (230mm & 120mm).
Hope you all like my Mod...
Apr 18th, 2024 13:42 EDT
change timezone
Latest GPU Drivers
New Forum Posts
- Gigabyte gpu model differences? (43)
- DDR5 RAM Speeds and the future (29)
- XFX RX580 stock Bios (1)
- What phone you use as your daily driver? And, a discussion of them. (1449)
- Need help reaching Package C8 on Intel N100 (1)
- 13600k undervolt with B660 (88)
- TPU's Nostalgic Hardware Club (18446)
- drivers MSI G253PF (2)
- DMAS Design [SPDIF-Optical] (74)
- FINAL FANTASY XIV: Dawntrail Official Benchmark (49)
Popular Reviews
- Horizon Forbidden West Performance Benchmark Review - 30 GPUs Tested
- PowerColor Radeon RX 7900 GRE Hellhound Review
- Fractal Design Terra Review
- Corsair 2000D Airflow Review
- Minisforum EliteMini UM780 XTX (AMD Ryzen 7 7840HS) Review
- Creative Pebble X Plus Review
- FiiO KB3 HiFi Mechanical Keyboard Review - Integrated DAC/Amp!
- Thermalright Phantom Spirit 120 EVO Review
- ASUS GeForce RTX 4090 STRIX OC Review
- NVIDIA GeForce RTX 4090 Founders Edition Review - Impressive Performance
Controversial News Posts
- Sony PlayStation 5 Pro Specifications Confirmed, Console Arrives Before Holidays (108)
- NVIDIA Points Intel Raptor Lake CPU Users to Get Help from Intel Amid System Instability Issues (102)
- US Government Wants Nuclear Plants to Offload AI Data Center Expansion (98)
- Windows 10 Security Updates to Cost $61 After 2025, $427 by 2028 (82)
- Developers of Outpost Infinity Siege Recommend Underclocking i9-13900K and i9-14900K for Stability on Machines with RTX 4090 (82)
- TechPowerUp Hiring: Reviewers Wanted for Motherboards, Laptops, Gaming Handhelds and Prebuilt Desktops (71)
- Intel Realizes the Only Way to Save x86 is to Democratize it, Reopens x86 IP Licensing (70)
- AMD Zen 5 Execution Engine Leaked, Features True 512-bit FPU (63)
111 Comments on HAF 932 Red Dragon MOD
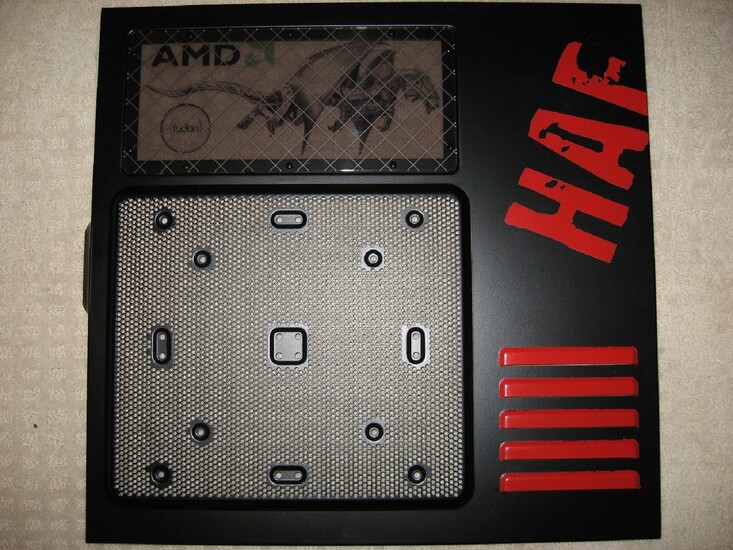
Similar looking to the AMD Limited Edition version, though I rather have the side cooling for my Crossfire Setup. But that dragon on the panel does look good on the AMD Limited Edition.
I am trying to add a few more pics and its not letting me. I get an error message lol
OK, I figured it out, my picture res was way to large, so I made them all 1600 x 1200 and they loaded up super fast without error.
Regards,
I voted 10/10 i llove ur colour:-)nice job
check out my pc n vote plz
www.techpowerup.com/gallery/2423.html
If you want a real good example, try screwing a screw in a hole where you painted, once that screw touches the case as you tighten it, if your paint does not flake off, then you should be OK.
Oh, they do have paint with primer together. But it costs like $20+ for a can lol.
But if you want just coat it with a nice Clear Coat Paint to protect it and make your paint finish stronger!
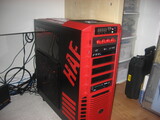
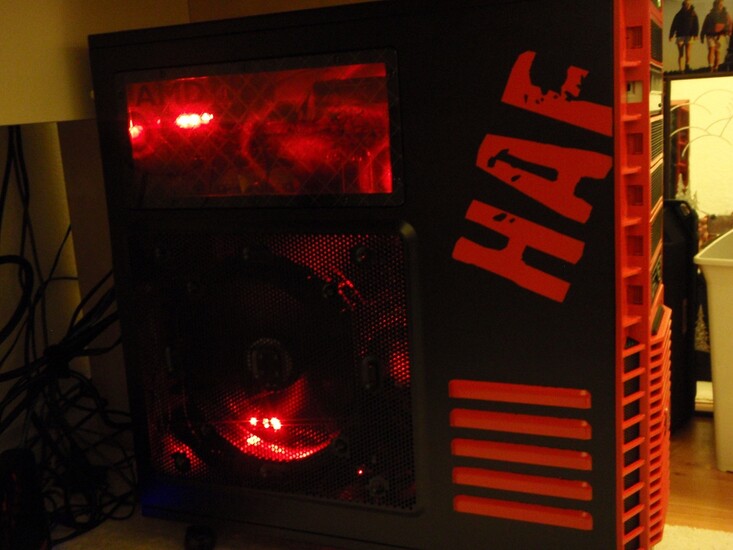
O.K. all my hardware is now in my new modded case. The CoolerMaster fans are not all that bright I've noticed. Anyway, I've attached 4 more pictures in the Case Gallery.
Hope you all like my Mod.
Feel free to tell me what you think.
www.techpowerup.com/gallery/2116.html
8/10
Perhaps I can get an extension or something. I will try and work on the cables in the case to further clean them up. I value your vote and everybody elses votes.
Mate ur case looks amazing! I LOVE IT!
I had a hard time organizing my Power Supply cables even though there's a lot of room in this case. There are so many strands of thick wire, it sort of mimics tangled spaghetti lol, but I managed to clean her up as much as possible.
My original CPU temps were ranging in around 48-55OC at idle and around 63-66OC after 2 hours of L4D2 gaming in my Antec 900 mid tower gaming case which did push a lot of air, but organizing the cables was really hard and somewhat sloppy.
But now with my Red Dragon case, my temps have dropped more than 10OC all across the board. And with the addition of my upcoming Corsair H5O, it should further improve Big Time. Organizing the power supply cables I now realize is of the up most importance in any gaming case!
still a nice job :)
Thanks for the 9/10.
It's awesome.
I know how to paint a casing, just i wonder how he traced the "HAF" wording and paint it like that :D
I took my dear time and taped it very slow cutting ever single little piece of green painters tape with scissors. Darn that was time consuming, but I really wanted this to look professional. I hope I accomplished that.
I chose the colour red because I always did used blue, and red is a great colour for gaming, it’s also a difficult colour to find stuff in like fan controllers & case fans. Blue & Green are everywhere lol. No thanks.
Now I am custom building my own RED LED fan controller to quiet my case alittle more and adding LED's with Chrome and RED Metalic primer/paint to my 2 x 230mm fans which came with the HAF. If you are interested in adding LED's to those fans let me know, I know the best place to get them online.
And thanks for Voting...
Here's those modded fans. I have more pics in my first post.
It controlls 4 fans, so it's now nice and quiet when need be. I crank it up while gaming lol
Reason I did this, for the love of RED, I just couldn't find anything but Blue, Green & Blue. I am sick of Blue/Green lol
I have one more Blue fan controller but I don't know if I am going to assault that one just yet lol I bought about 20 Red LED's so, we'll see.
IF your interested in having the AMD side panel mine comes with then we might can do a trade?
The fan controller I built made a load of difference, it keeps my system extremely quiet when need be.
I love the H20 but I do have one minor issue. When I unpacked it and cleaned off the copper surface I noticed a deep single scratch on it. It was real deep. I really didn't want to deal with RMA so I cleaned it off nice and filled that scratch with AS5. So for now it seems to be working great. My temps are getting better by the day. I guess just as the AS5 cures.
you start off with
o 400 Grit Super Fine Wet/Dry
o 600 Grit Ultra Fine Wet/Dry
o 800 Grit Ultra Fine Wet/Dry
o 1000 Grit Ultra Fine Wet/Dry
o 1500 Grit Mirror Fine Wet/Dry
o 2000 Grit Mirror Fine Wet/Dry
Then go 30 times in all 4 directions on each type of sand paper starting @ 400 grit
it will turn it into a mirror like finish when your done and buff out that deep scratch
Why dont you submit your case to cpu magazine Super? I think its the best looking Haf so far.
same combination here as well
www.techpowerup.com/gallery/2500.html
nt300, people vote what they want. I don't worry too much, I just enjoy gaming with my case in its Black & Red glory.
Hey should I upgrade my MSI 790FX-GD70 to the newer 890FX or just wait for Bulldozer and that chipset when it comes out? I like what I have right now it does everything I want and I can always get another XFX HD 5770 for crossfire yes?
your's haf just like your a big ati fans - sorry if i'm wrong :), although i'm a neutral one
1-do you think it is ok to use a metal primer on the plastic parts?
2-Do you think i'll be ok with 4 coats of a blue enamel instead of 2 coats then 2 coats of clear? I rather not use clear coat since some times it alters the color just slightly & I don't want that but I want my paint well protected.
3-did you repaint the black areas of the case? I didn't plan on it but I might finish all my blue parts & let everything dry for 48+ hours then redo all the black b/c it is a really cheap light paint job if you ask me :(
thanks in advance for any replies....just want my case to be perfect & well protected.
1) No I did not redo the original black, it does have a good strong black finish IMO.
2) Not sure about metal primer on plastic parts. Personally I would use an all purpose primer that does both metal and plastic just to be 100% sure. The last thing you want is your paint to flake off. Try to get the good stuff, may set you back a few more $$'s but it will be well worth it.
3) Clear Coat? No thinks, I wouldn't use it. Today's spray paints are a lot better now that do not require clear coat IMO. I would stick with about 2-3 lite primer coats, then 1 steady primer coat to make sure you got it all, then I would repeat the same for the spray paint.
Good luck, can't wait to see your finished case.
I'll be sure to try & post pics once it is finished ( i said try b/c i suck with software just good at painting & building them lol) but I will wait to post pics until my 1090T arrives!
Thanks again for the advice & your case really does look amazing. All the hard work shows & I absolutely love the layout of your paint job. The only things I'm doing different is there will be a black border around the CM logo on the front of the case, my HDD cage will be blue with black clips, & I'm not painting the top fan grill blue/red for yours.
Oh by the way those push button clips which holds the DVD drives etc. were a pain in the aris taking them off and even worst putting the buggers on lol, but lucky that Coolermaster built them strong, so I painted them red.
Anyways for anyone who is curious I just finished building my new rig, tweaking my BIOS, & installing all my MB features. Now to test the Phenom II x6 1090T hands on!!
Try putting one together in your hand and push the button, make sure when you press it the little metal pin that pops out (holds the harddrive or DVD rom in place) then pops back in with a clicking sound. That is how I figured out how it went on. It really is quite easy once you get it.
Did you try checking the internet for more info?
www.facebook.com/settings/?tab=privacy#!/photo.php?pid=242675&id=100000295846001&fbid=118965401456654
www.facebook.com/settings/?tab=privacy#!/photo.php?pid=242674&id=100000295846001&fbid=118965394789988
I have the Core i500000 with 5 million terabytes of DDJesus ram (Double data jesus) , golden plate joseph smith edition with buddha heatsinks.
my graphicard is zeus edition with odin ram and my monitor extends into space.
you can make stuff up, too! give it a try!
That is the reason why I called my MOD the HAF 932 Red Dragon MOD.
I should be able to post new pics soon, hopefully within 2 weeks time or less.
bof