KRK MTT-2.1


Posted:
August 21st 2009
Updated:
Viewed:
9,503 times
Rating:
 16 votes total
Excellent (5.5)
Submit vote:
Please register on the forums & login to vote.
Key Features:


This modder's other projects:
System Specs:
Performed Mods:
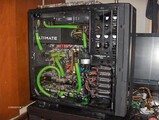
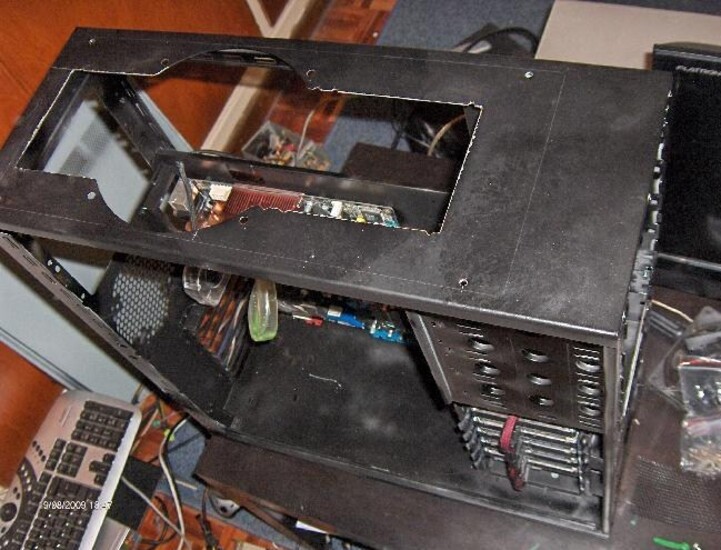
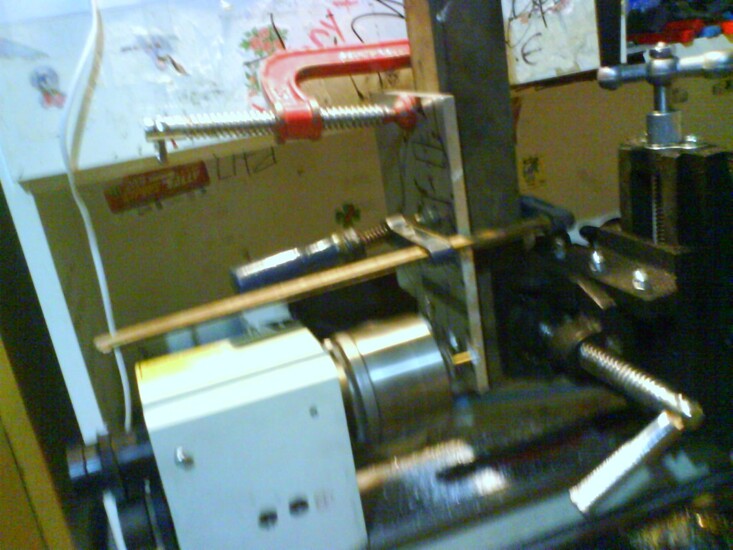
Case moddifications: moved the PSU support closer to the mobo tray to allow mounting of a triple radiator on top; made the holes for radiator on top, fill port and wiring on mobo's tray, painted all black.The waterblocks for the 2 GTX260 are homemade, I used a small lathe as a router to fabricate those fron 8mm thick aluminium plates. Won't do it again, I swear!
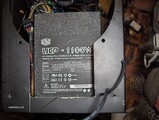
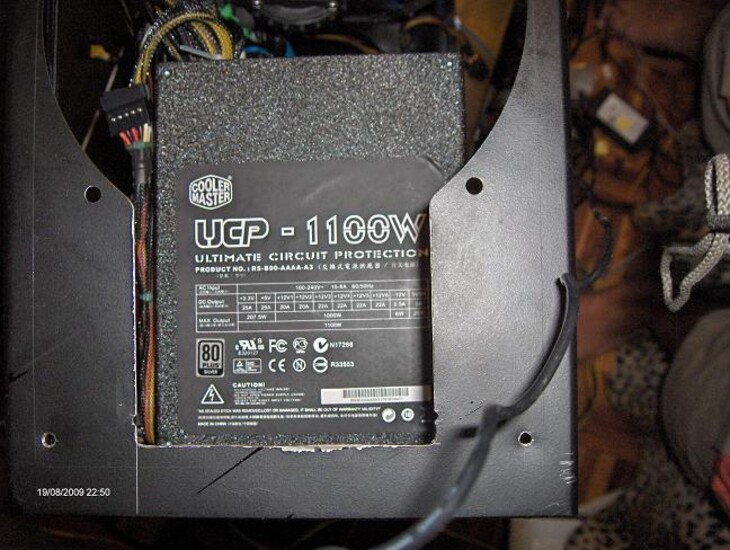
To be honest, I was working on this system for almost a year just to get some crappy ratings without any explanation. Thanks to those taking time to comment, much appreciated!I was running this system using a coolermaster real power520w. So much about power requirements! I switched to UCP 1100w just because I intend overclocking it. It tops at 505W on stock settings. The room temperature at the time of testing was about 36 Celsius degree and CPU idle at 37! Tested the graphic cards and those go as high as 76 Celsius for the 65nm versions and 65 for the 55nm. From my experience, overclocking 20% won't increase much the temps, maybe about 5 degree more.
Apr 23rd, 2024 17:31 EDT
change timezone
Latest GPU Drivers
New Forum Posts
- What's your latest tech purchase? (20301)
- ThrottleStop 9.6 Voltage won't change (1)
- need help with motherboard/ ram compability certainty (9)
- FINAL FANTASY XIV: Dawntrail Official Benchmark (71)
- CPB Enabled Boot Loop (8)
- No POST, and no display (8)
- Aida64 cache mem OC (5)
- hacked (72)
- Meta Horizon OS (6)
- windows 11 (4)
Popular Reviews
- Horizon Forbidden West Performance Benchmark Review - 30 GPUs Tested
- Fractal Design Terra Review
- Corsair 2000D Airflow Review
- Thermalright Phantom Spirit 120 EVO Review
- Minisforum EliteMini UM780 XTX (AMD Ryzen 7 7840HS) Review
- ASUS GeForce RTX 4090 STRIX OC Review
- NVIDIA GeForce RTX 4090 Founders Edition Review - Impressive Performance
- ASUS GeForce RTX 4090 Matrix Platinum Review - The RTX 4090 Ti
- Creative Pebble X Plus Review
- MSI GeForce RTX 4090 Gaming X Trio Review
Controversial News Posts
- Sony PlayStation 5 Pro Specifications Confirmed, Console Arrives Before Holidays (116)
- NVIDIA Points Intel Raptor Lake CPU Users to Get Help from Intel Amid System Instability Issues (106)
- AMD "Strix Halo" Zen 5 Mobile Processor Pictured: Chiplet-based, Uses 256-bit LPDDR5X (101)
- US Government Wants Nuclear Plants to Offload AI Data Center Expansion (98)
- Windows 10 Security Updates to Cost $61 After 2025, $427 by 2028 (84)
- Developers of Outpost Infinity Siege Recommend Underclocking i9-13900K and i9-14900K for Stability on Machines with RTX 4090 (84)
- TechPowerUp Hiring: Reviewers Wanted for Motherboards, Laptops, Gaming Handhelds and Prebuilt Desktops (74)
- Intel Realizes the Only Way to Save x86 is to Democratize it, Reopens x86 IP Licensing (70)
26 Comments on KRK MTT-2.1
would u mind to share temp/core info?
will vote when it's ready..
+1 for the effort! finally 8/10!
anyway, do u really need that many of HDDs???
personally, i think ur PSU a lil too powerful for your current setup bro!
thx !
welcome check out my RIG!
www.techpowerup.com/gallery/2255.html
PS.: The PSU is too big but I've got it for only 130USD so is a bargain(had to replace the power connector only!LOL Anyway, as I said, at stock speed, the monster is eating 505W so imagine it OC... for sure more than 600W wich exceed the 520W on my old PSU.
For some reason I can't get it past 3.3 Ghz and the QC6600 is easily going to 3.6 or more. I had it OC at 3.75 on a crappy mobo before! Same problem, overheating the chipset! I would watercool it but it doesn't worth the effort! When I'm thinking about those buying the Striker, based on the same architecture with some eye candy... What a loss! At least I found this mobo as a bargain...!
Sorry for the long text, is taking a piss at me today! :D
I rated this build a 5 for a few reasons and i hope you don't take this as a "crappy comment" but as a form of constructive critisism. Let me explain how i felt about it.
First of all if you took a whole year to build a computer and it's not worthy of the cover of CPU mag... then you either have 20 illigitimate children at home sucking your money and time out of you, or you didn't work to hard at it.. and i think based on the pictures it shows.
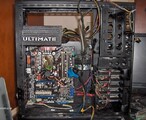
There are far to many elbows in there and even in the places that should have elbows like just below the rad barbs you put none and opted to bend the hose precariously instead-this shows lack of thought, time, and effort all rolled into one.
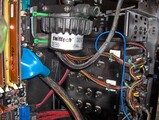
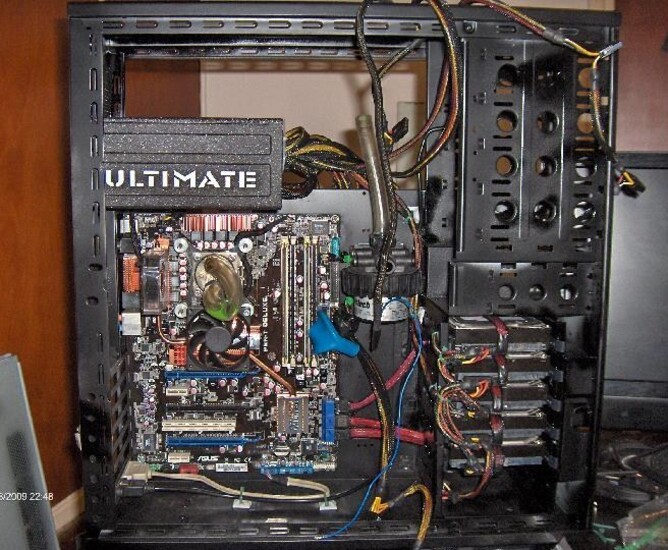
I don't know who said that this case was small but you fit an incredibly unnessessary amount of hdd's into that case and you put them in backwards, you could have hid all the wires if you turned them around.
Next thing i noticed was the fans on the rad itself... there are only 5.. pretty sure it will take 6 if i'm not mistaken and although you have little room underneat the rad at that point, you could have put the fan in anyways, or better yet, moved the rad perhaps outside the case to the top of the case instead, either way there is a way to put 6 fans on and for a case mode gallery, things like that should not be overlooked or cut out just for the sake of space, we're modding here.
Elbows... I don't know but holy fuckin shit, does the water still move after all those corners. Completely unnessessary. Even if you are getting average temps for a water cooling righ, it's a mess and it takes way to much of the veloicity out of the current inside the hose. Not to mention, it makes the case look like my basement by the boiler. Fix this and it will clean up the case a lot.
fan grills or dust shields on the inside of the case... seems like your trying to prevent dust from getting out. You've got it backwards, things like that go on the intake fans, if you do that then you won't have any dust to filter on the exhaust ports.
Wire management, to be honest the mess of hose actually makes the case less clean, but the wiring is pretty shoddy. Modular psu's def help with things like this but in your case the one thing you could have done is lined up all of the wire coming out of your psu instead of them looking like you braded them first.
To be completely honest with you the build really is impressive and if you just made it "modded" in some way besides water cooling it could be worthy of a higher score. Keep us updated and do what you can to change it up a little bit. I did my first water cooling rig and then had to change it about 3 times before i found a config that fit my style and made me feel as if i did a good job. Show as whatcha got tool man.
it's just a suggestion tho..
@exodusprime
1 year to finish this build, well that's hard to believe,
unless he wants to do it slowly, or maybe he got a busy life??? haha..
it's kind of hard to mount all WC parts in such small case, and especially he used that 360rad.
blind guess though, anyways good luck to this build !!!
It took almost a year overall to build this case because I live on a fucking island and I had to wait on average 3 weeks for any part I order. I was building alone the waterblocks for the GTX260s and that took time to build, experiment, take it apart, moddify it, and so on.
I had it mounted toghether in about 7-8 hours last time but imagine I had to dismantle this case about 30 times to the bits. That adresses the issue of time.
The watercooling loop is crappy, right; too many elbows for sure and in the wrong place also, agree; I was just using scraps to put the tubbing together, I think the longest piece of tubing I had left was about a foot. I will order some half inch tubing soon and I will buy some threaded elbows for the rad as soon as the shops open on this island(in August everything is closed but the bakery and supermarket)!
The wiring is tough. First of all, this PSU is not modular.The wires come out of it trough a 2 inch hole and are very rigid. I have the 520W modular one, is great but we have to consider 2 issues with modular power supply: first, more connectors, greater risk of poor connections on greedy graphic cards and overclocked components and the average life time of those molex pins is about 3 years and are rated under 3 ampers a piece. I understand the choice of many manufacturers of PSUs that exceed 600W not to make them modular. Is a mess in a case, I dmit but I won't cut the extra wiring just for that! I will consider opening the PSU's case and rearanging the wires to get the unused ones on the side tho'.
The HDD. I can't turn those around and keep the actual rail system that makes them removable. I did the best I could to compact the wiring and maximize the air flow around them. Too many?! Gotta be kidding! I wish I had 6 of them in a RAID5 configuration. The case is built for that many, it has 2 fans to cool them so I disagree! Is up to my choice how many HDD I use in a system, that seem unfair, sorry!
The fan grills and filters are there to solely protect the blades from dust and the radiator fins. I was thinking of mounting filters on the 2 big fans but that will imply a moddification of the plastic casing of those fans and I prefer on the next revision to use smaller fans and a transparent window on that side panel. Another reason the fans have the filters inside the case is the pressure. if I turn the big fans to minimum, in the case I will have negative pressure and the air will go in from the vent ports on the back and side of the case rather than the 2 big fans.
5 fans on the rad is overkill actually. 3 of them are enough actually if wasn't for the dust filters. The reason I didn't add the 6th one is the space left between the fan and PSU. I want to be able to remove that dust filter with ease. It might work but is not necessary. It makes no diference, I tried it. The flow restriction compensate the added power probably because I've seen no diference in temps readings.
Anyway, be sure this is not the final revision. For the HDDs I have a surprise: I ordered some SMD SATA connectors that I will solder on a PCB as soon as I get the CNC machine up and running to cut it. then I will reverse those suckers and make it removable just the way the laptop drives are; all or nothing ;) ! See you next year ! :))
off to a good build..
but just don't keep modding, u need to enjoy ur PC, that's the main point!
hehe peace out~
anyway, what island u live in? u r not in hawaii, rite? or guam? haha..
I just put 9 to balance it out. The score should be higher than the 5.9 average imo.
In anycase, nice specs. Sweet case to boot as well.. first time Ive seen a case like this.. and your mod is good.
The elbow to the pump inlet and the cpu > rad is unessesary imo. Better design the loop with minimal adapters.. kills the pressure.
you scoring angle barbs? score one from bits or koolance. they have this unrestricitve design to it. (I know because I tried to breathe in / out using those, and you can feel like your still breathing to a normal 1/2 barb fitting)
Some cable management is definitely needed in there mate.
Switch the H.D.D's around and move/lose the dust covers. If you intend to leave the case open like that then the dust covers are kind useless ;)
Maybe some decent cable sleeving would also help.
I know nothing about water cooling so I cannot comment there :P I am an air cooling junky so I would look at sorting out the cables to improve airflow of the existing case fans as much as possible.
Post up some more pics after a bit of a tidy up.
Later mate!
Cheers Mate!
although the case has mod potential, it seems that you rushed everything and did not even take your time to clean the cable mess inside the case. Furtheremore, the WC loop can be greatly improved, by even just shortening the length of the tubes.....
sorry but this is poor!