 0
0
Arctic Cooling VGA Silencer Review
Performance, Value & Conclusion »Introduction
From the manufacturer arctic cooling:- First VGA cooler with selectable cooling and noise level
absolute silence or uncompromising cooling performance - Unique mounting clip
improves the heat transfer of the GPU to the heat sink significantly - DHES (Direct Heat Exhaust System)
carries the warm exhaust air directly outward
| Overall Dimension | 185 x 84 x 34 mm |
|---|---|
| Weight | 278 g |
| Material | Aluminium |
| Rated Fan Speeds | 1200 / 2400 RPM |
Compatibility List
| Video Card | Silencer Rev. 1 | Silencer Rev. 2 (Feb. 2004) | Silencer Rev. 3 (March 2004) | Silencer XT (March 2004) |
|---|---|---|---|---|
| Geforce 3 | yes | yes | yes | no |
| Geforce 4 | no | no | no | no |
| 9000/9200 | no | no | no | no |
| 9500 | yes | yes | yes | no |
| 9500 Pro | yes | yes | yes | no |
| 9600 | no | no | yes | no |
| 9600 Pro | no | no | yes | no |
| 9600 XT | no | no | yes | no |
| 9600 AIW | no | no | yes | no |
| 9700 | yes | yes | yes | no |
| 9700 Pro | yes | yes | yes | no |
| 9700 AIW | no | yes | yes | no |
| 9800 | yes | yes | yes | no |
| 9800 Pro | yes | yes | yes | no |
| 9800 Pro 256MB | yes | yes | yes | yes |
| 9800 XT | no | no | no | yes |
| 9800 AIW | no | yes | yes | no |
Packaging

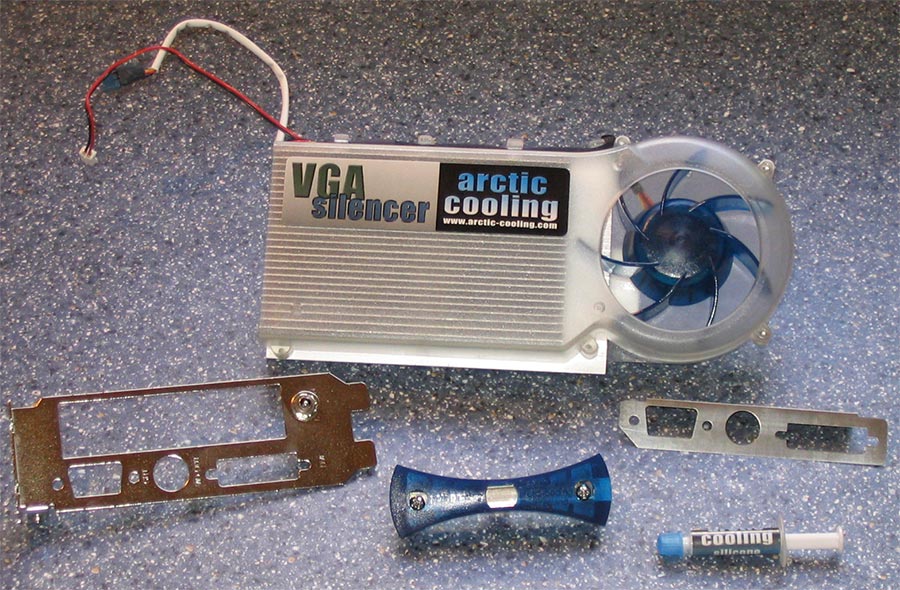
Box contents:
- VGA cooler
- AGP/PCI Slot cover with Switch
- Grounding metal sheet to go between card and slot cover
- Plastic mounting clip
- Syringe of Thermal Paste
- Installation Instructions


Installation
Arctic Cooling recommends the following installation procedure which takes about 15-20 minutes:- Remove the power connection to the stock cooler
- Remove the stock cooler
- Clean GPU core
- Put thermal paste on GPU core
- Remove old slot bracket
- Put grounding metal sheet over connectors
- Put AGP/PCI metal bracket over grounding sheet and connectors
- Plug the fan power connector into video card
- Lay the heatsink on table facing down and put the video card on it, aligning the mounting holes.
- Screw mounting clip on backside of card.
Overall, the installation is very easy, and suitable even for less experienced people.
I really like the blue backside mounting clip, it has a flexible steel clip inside that bends as mounting pressure increases - this makes it virtually impossible to crush your core, or bend the card by overtightening the screws. I killed a Radeon 9500 while mounting a waterblock and overtightening the screws, so you might want to pay attention to this.


As you can see in the last installation picture there is a small 7mm gap between the slot cover and the end of the heatsink. Unfortunately, this gap allows a little bit of warm air intended for exhaustation to escape into the case. An easy fix is to use duct tape to seal it off.

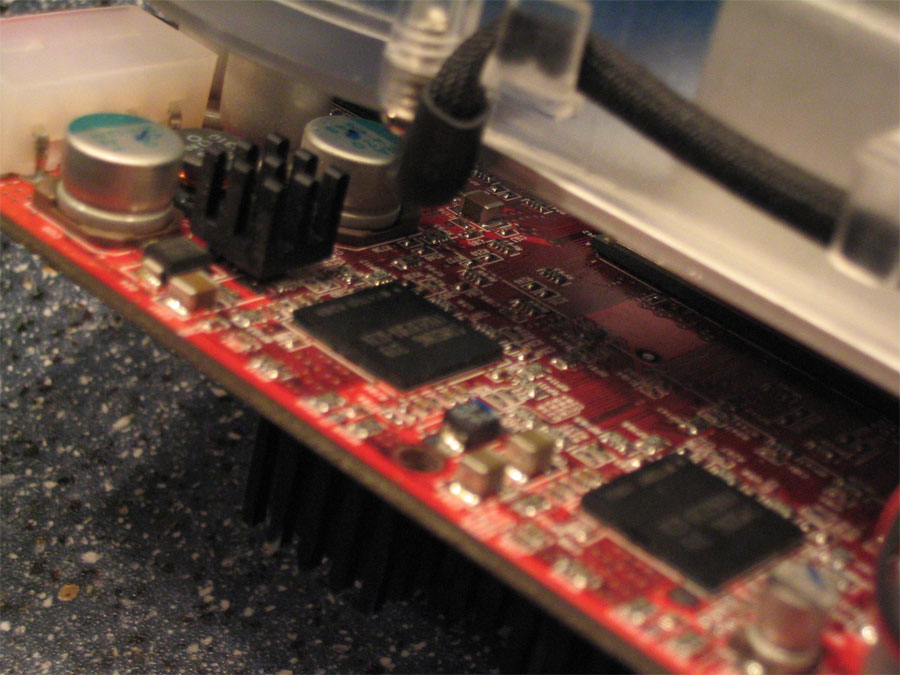
I had to remove my ramsinks (custom made, 17 mm high) from the card because the available space is only 13 mm. Also, the fan's power cable has to be bent around a bit if you plan to use ramsinks higher than 10 mm because it blocks the space above one memory chip. Tweakmonster BGA Ramsinks will fit fine on this card.

Another issue is the really small space (3-4 mm on my Abit IC7) between the backside mounting clip and northbridge cooler. This may result in problems if you are using an aftermarket heatsink on the northbridge.
Apr 24th, 2024 23:37 EDT
change timezone
Latest GPU Drivers
New Forum Posts
- im new to throttelstop and i think i messed it up by copying others any hints would be very much aprreciated (1)
- Aida64 cache mem OC (7)
- I am getting artifacting when I change Windows security settings. Is my GPU failing, or is this just a Windows issue? (10)
- Is there a technical reason that Windows 11 doesn't have built into it battery charge limitation? (42)
- (Anti) SFF fun house (347)
- Cinebench crashed my PC. My Wi-Fi stopped working, and I keep getting a "Please wait" screen when I boot up my PC. (30)
- The TPU UK Clubhouse (24783)
- Sharing experience with MSI RTX 3070 vBIOS update to enable Resizable Bar with MB Z490 (2)
- Share your AIDA 64 cache and memory benchmark here (2915)
- Will a RTX 4070 TI super bottleneck a Ryzen 9 7950X3D? (58)
Popular Reviews
- Fractal Design Terra Review
- Thermalright Phantom Spirit 120 EVO Review
- Corsair 2000D Airflow Review
- Minisforum EliteMini UM780 XTX (AMD Ryzen 7 7840HS) Review
- ASUS GeForce RTX 4090 STRIX OC Review
- NVIDIA GeForce RTX 4090 Founders Edition Review - Impressive Performance
- ASUS GeForce RTX 4090 Matrix Platinum Review - The RTX 4090 Ti
- MSI GeForce RTX 4090 Suprim X Review
- MSI GeForce RTX 4090 Gaming X Trio Review
- Gigabyte GeForce RTX 4090 Gaming OC Review
Controversial News Posts
- Sony PlayStation 5 Pro Specifications Confirmed, Console Arrives Before Holidays (116)
- NVIDIA Points Intel Raptor Lake CPU Users to Get Help from Intel Amid System Instability Issues (106)
- AMD "Strix Halo" Zen 5 Mobile Processor Pictured: Chiplet-based, Uses 256-bit LPDDR5X (101)
- US Government Wants Nuclear Plants to Offload AI Data Center Expansion (98)
- Windows 10 Security Updates to Cost $61 After 2025, $427 by 2028 (84)
- Developers of Outpost Infinity Siege Recommend Underclocking i9-13900K and i9-14900K for Stability on Machines with RTX 4090 (84)
- TechPowerUp Hiring: Reviewers Wanted for Motherboards, Laptops, Gaming Handhelds and Prebuilt Desktops (78)
- AMD's RDNA 4 GPUs Could Stick with 18 Gbps GDDR6 Memory (73)