 10
10
Cooler Master Storm Sniper Review
Assembly & Finished Looks »A Closer Look - Inside

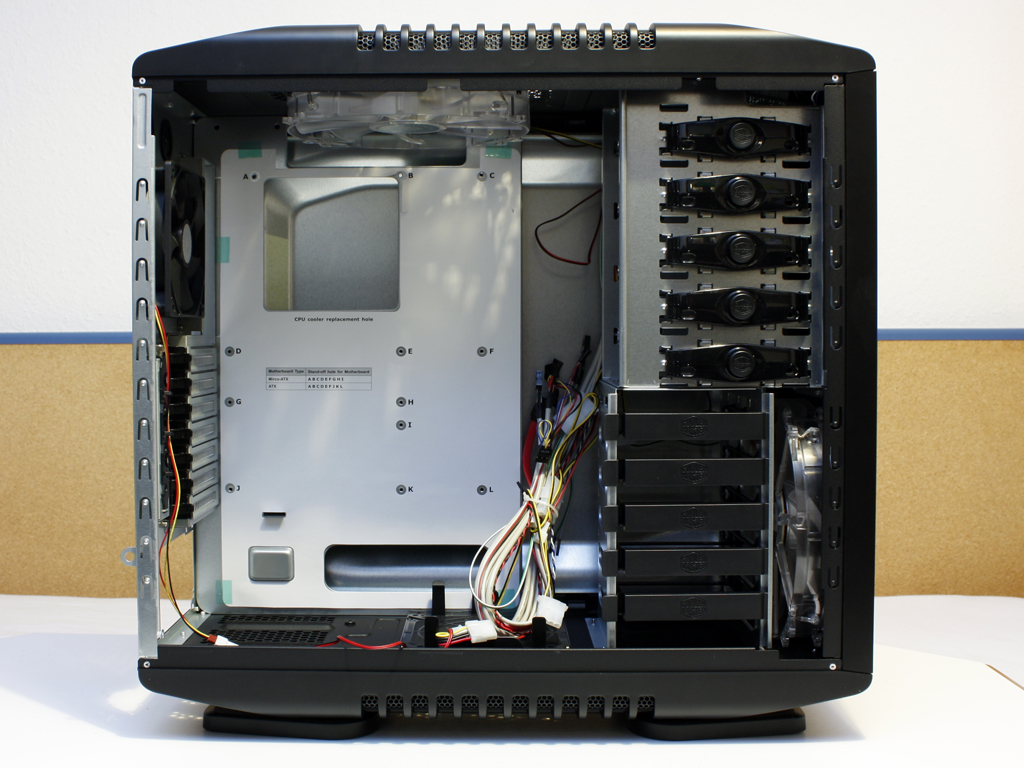

The inside of the Sniper side panels are unpainted. This is probally due to the cost factor of the outside paint job and the lack of usefulness on such a coating on the inside of the case. The mesh is lined with a very fine cloth, to hold back any dust from entering the chassis. The one weird aspect is that hole in the support frame of the mesh window. I do not know why Cooler Master has decided to remove that part. The inside of the chassis does remind a bit of the Cosmos series and the HAF chassis. It sports elements from both of them. The other side of the Sniper holds the pre-routed cables for the top I/O and the mainboard tray has a large cutout, so that you may install CPU coolers with backplate or water cooling, without pulling out the entire mainboard. As you can see some parts of the internal structure do not feature a paint job, while the frame of the Sniper does. It would have been nice to see a more uniform approach in this area.
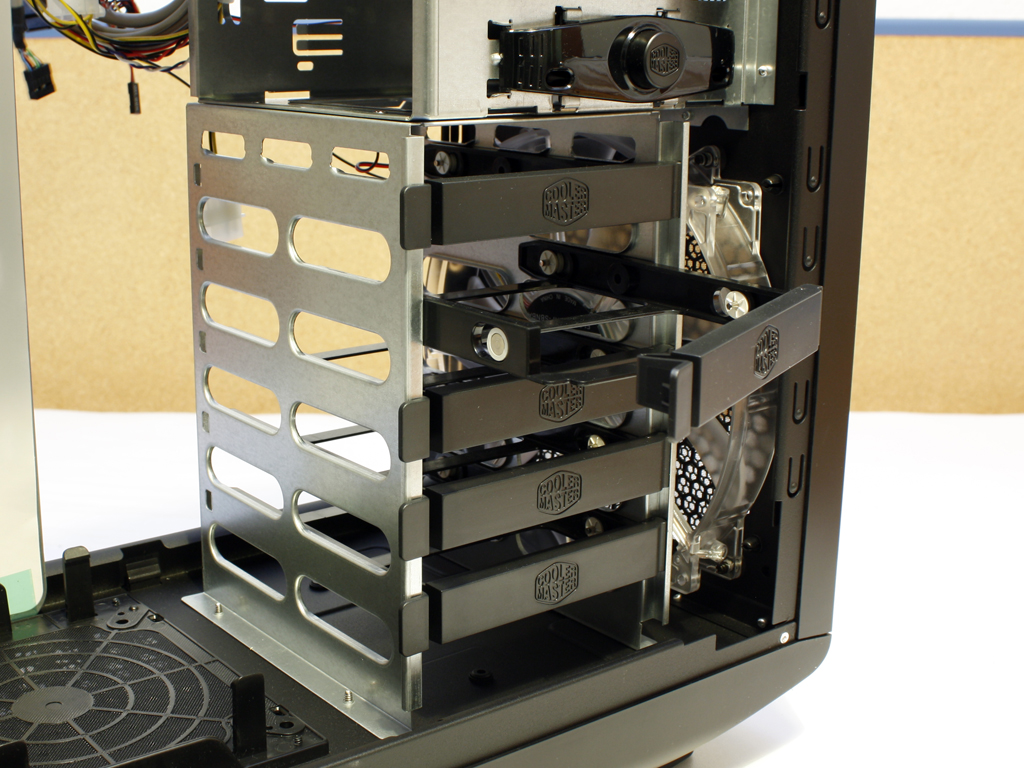

The hard drive bay can hold a total of five drives. These are mounted on removable trays made of flexible plastic. They made their first appearance in the HAF 932 on our test bench. The locking mechanism from the external drive bays has first been introduced with the Cosmos series and has been passed down to the HAF 932 and also made it into the Sniper chassis.

The bottom rear of the chassis interior is taken by the power supply bay. There are two strips of foam to kill any vibration in its tracks. As you can see, there is an open air vent to allow for air flow to the PSU fan, but there is no dust filter. Above this area are the mainboard expansion slots, which feature a plastic locking mechanism. As I mentioned in the HAF 932 review, I am not a big fan of such fragile systems, as traditional thumb screws work much better. The top holds the rear 120 mm exaust fan, which does not have any LEDs and has a Molex connector.
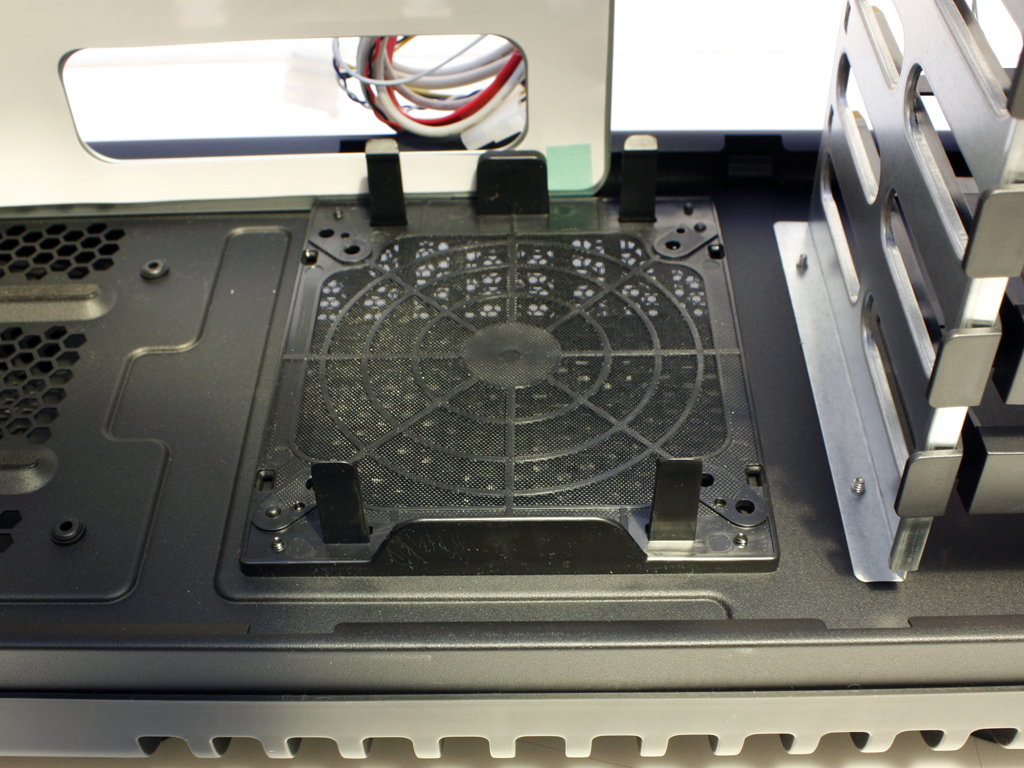

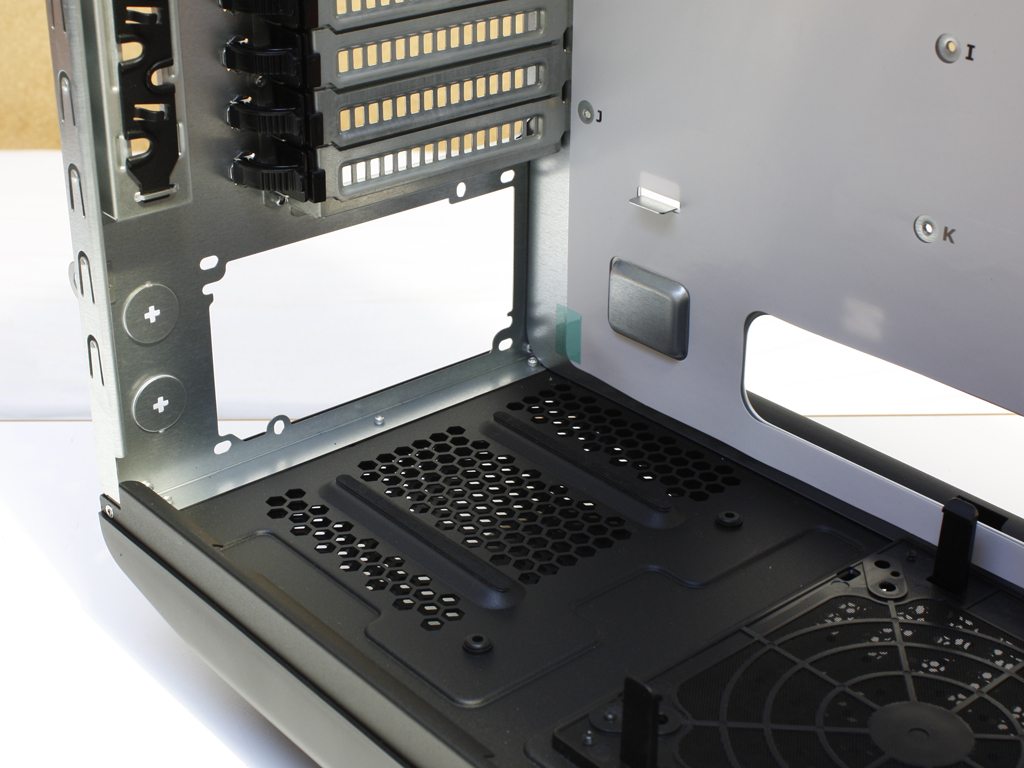
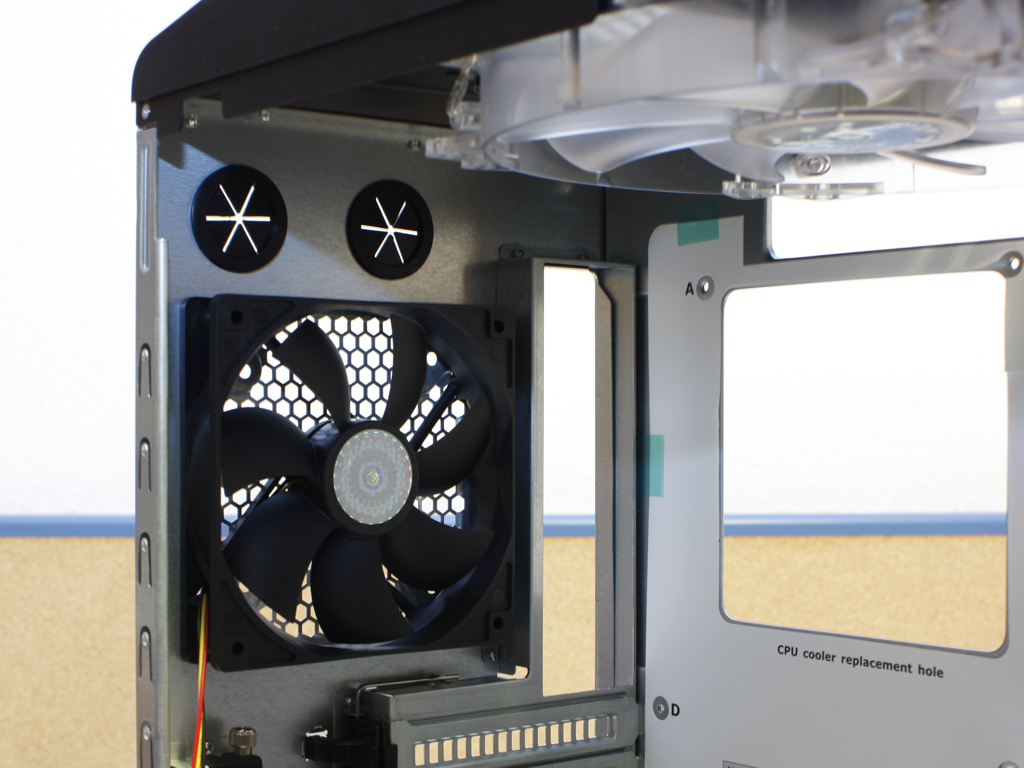
The bottom center of the case floor may also hold a 120 mm fan. Cooler Master supplies a plastic dust filter, which may easily be removed for cleaning in this area. The ceiling of the Sniper holds the second 200 mm fan, which is has blue LEDs. The unit can be removed to free space for two 120 mm fans. Such a mounting possibility should be great for dual 120 mm radiators of a water cooling loop.
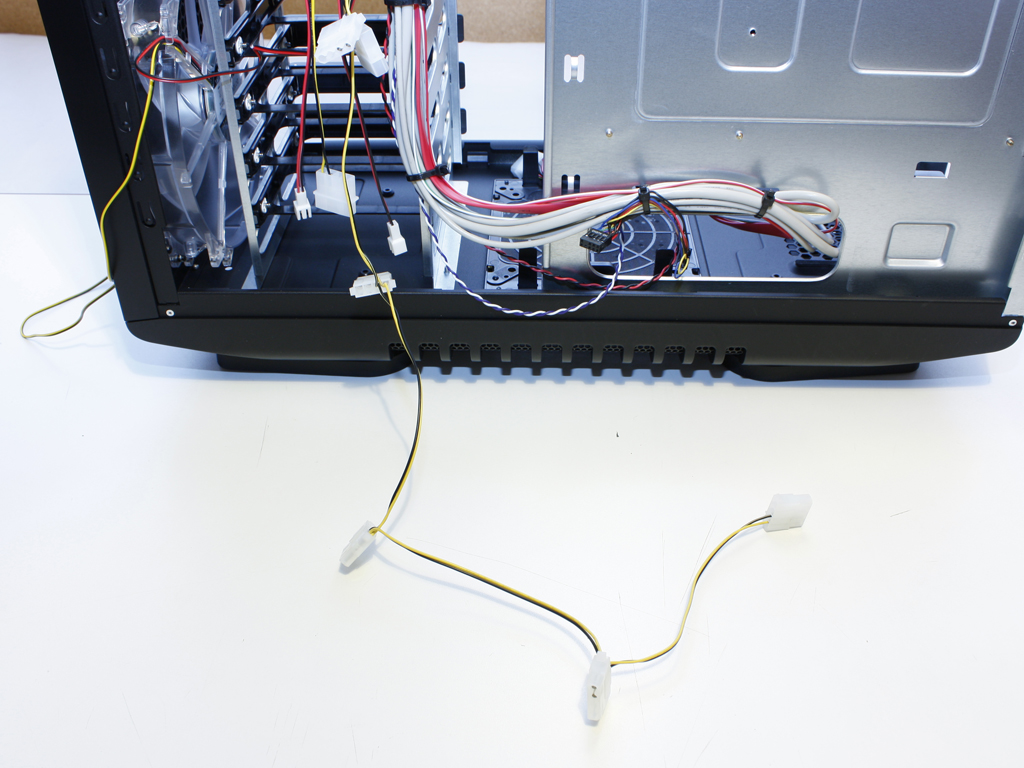


Besides the usual cables to connect the top I/O to the mainboard there are three other cable sets, which are unique to the Sniper chassis. The first is a long string with five Molex connectors. This one is intended for all the case fans. It connects them to the big dial, so you may control their speed. The second is a set of three identical female Molex connectors. I was sitting on front of these for quite some time, scratching my head, wondering which was which. Turns out the outer two are from the two 200 mm fans, while the center one is actual the one used to power the dial and thus the five fans (including the two 200 mm units). There is no label on the Molex connector, which leads to the fan controller.
Apr 19th, 2024 20:28 EDT
change timezone
Latest GPU Drivers
New Forum Posts
- Official Board Game Discussion (0)
- GTX 1060 6GB ASUS GPU Shuts Down after 5min of Gaming (1)
- AMD RX 7000 series GPU Owners' Club (1068)
- I just succesfully baked DDR4 (69)
- I9 13890HX undervolting Suggestions (4)
- Undervolting Dell XPS 14 9440 is it possible? (7)
- Share your AIDA 64 cache and memory benchmark here (2884)
- Roccat Kone AIMO has developed a double left click, when I click it once. Any fix out there? (34)
- The TPU UK Clubhouse (24738)
- XFX RX580 stock Bios (7)
Popular Reviews
- Horizon Forbidden West Performance Benchmark Review - 30 GPUs Tested
- Fractal Design Terra Review
- Corsair 2000D Airflow Review
- Thermalright Phantom Spirit 120 EVO Review
- Minisforum EliteMini UM780 XTX (AMD Ryzen 7 7840HS) Review
- Creative Pebble X Plus Review
- FiiO KB3 HiFi Mechanical Keyboard Review - Integrated DAC/Amp!
- ASUS GeForce RTX 4090 STRIX OC Review
- NVIDIA GeForce RTX 4090 Founders Edition Review - Impressive Performance
- ASUS GeForce RTX 4090 Matrix Platinum Review - The RTX 4090 Ti
Controversial News Posts
- Sony PlayStation 5 Pro Specifications Confirmed, Console Arrives Before Holidays (111)
- NVIDIA Points Intel Raptor Lake CPU Users to Get Help from Intel Amid System Instability Issues (102)
- US Government Wants Nuclear Plants to Offload AI Data Center Expansion (98)
- AMD "Strix Halo" Zen 5 Mobile Processor Pictured: Chiplet-based, Uses 256-bit LPDDR5X (84)
- Windows 10 Security Updates to Cost $61 After 2025, $427 by 2028 (82)
- Developers of Outpost Infinity Siege Recommend Underclocking i9-13900K and i9-14900K for Stability on Machines with RTX 4090 (82)
- TechPowerUp Hiring: Reviewers Wanted for Motherboards, Laptops, Gaming Handhelds and Prebuilt Desktops (72)
- Intel Realizes the Only Way to Save x86 is to Democratize it, Reopens x86 IP Licensing (70)