 7
7
Cubitek Magic Cube AIO Review
A Closer Look - Inside »A Closer Look - Outside

At first glance, the chassis looks pretty cool. The use of small thumb screws around the sides and the front of the case gives it a slightly industrial look, while the round design adds a nice little detail to it. The anodizing job is quite good on the exterior as well, with no obvious blemishes.


The front is quite unusual, with only a single 5.25-inch bay at the bottom of the chassis. At the rear, you will find a bottom-mounted PSU; it is clear therefore that the area above the PSU and the drive bay is used for the motherboard - up to eATX.
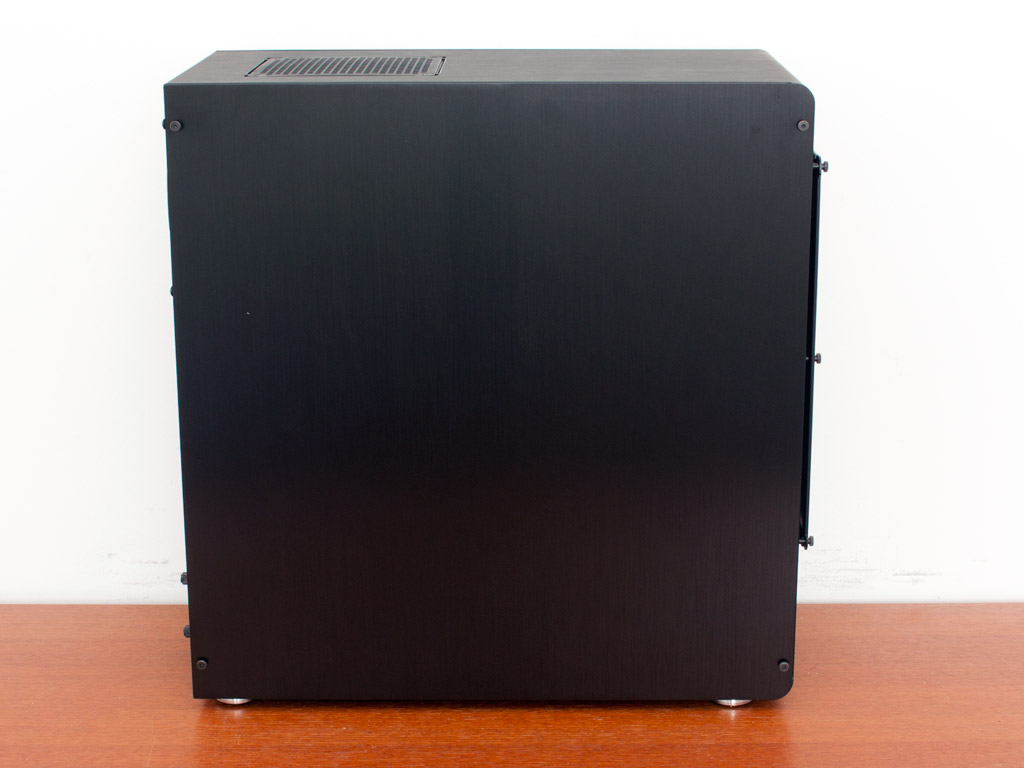


Both side panels of the Magic Cube AIO are held in place by four little thumb screws. This does not really add up, as Cubitek uses six such screws to keep the front cover pinned down, which is a small fraction of the size of the panels. It would have been wise to use at least six if not nine such screws for each of the sides, to prevent the chassis panel from bulging under pressure.
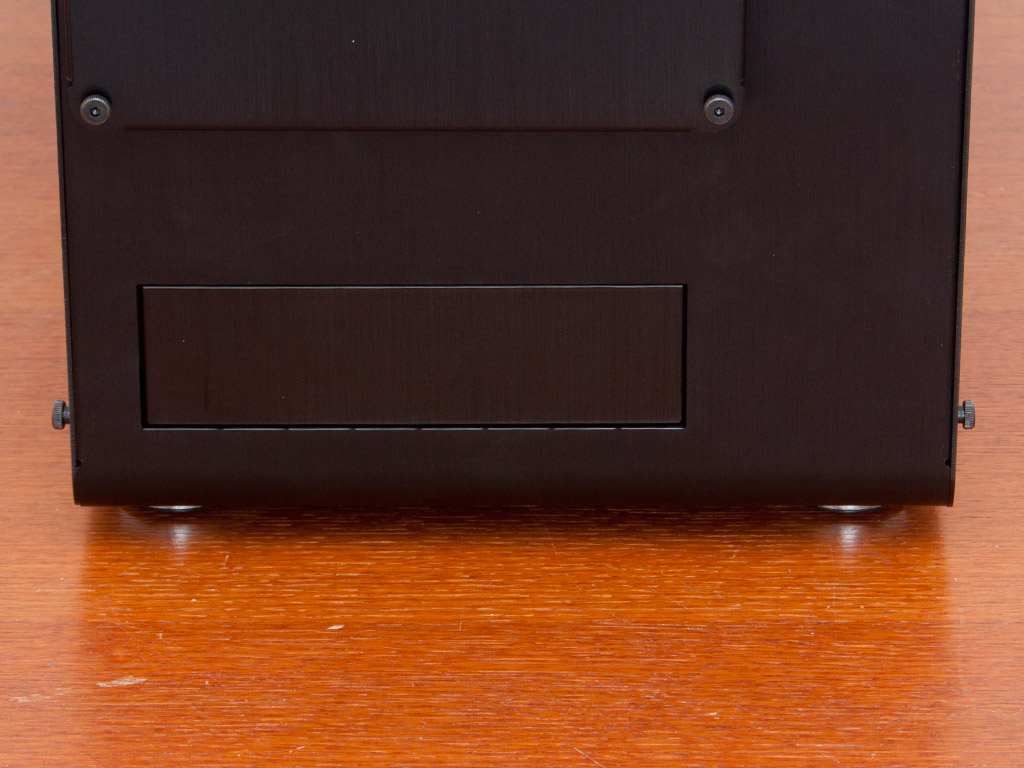


As mentioned before, the single 5.25-inch bay can be found at the bottom, protected by a simple aluminum cover. If you look closely, there are clearly visible tooling marks around the cutout of the bay. Above that is a mysterious cover, behind which are two 120-mm intake fans. Thanks to the spacing, you should be able to install a 240-mm radiator here if you like. The top cover is placed on six spacers, to allow for adequate air ventilation. To the right of this is the I/O, consisting of two USB 3.0 ports and the usual pair of audio connectivity. Cubitek uses gold metal plugs for audio, which is pretty cool. Unfortunately, these are not labeled, so it is difficult to determine which plug does what. The power and reset buttons are made of metal as well. Pushing them down makes a loud scratching sound and does not really feel good.


Turning the chassis around, you can see that the bottom PSU bay features an exterior frame, so that you have the choice of installing the power supply with the fan facing upward or downward. Above that are the eight motherboard expansion slots, each protected by a separate, vented cover. To the right of these are four large openings for routing cables or tubing out the back. At the very top, a 120-mm fan can be found, which pushes air out the rear of the case. If you look closely here, the hole for the fan is not circular and also has similar tool marks as the front drive bay.


At the top, you will find a single 140-mm fan, hidden behind a vent with an unusual design. While this looks good, Cubitek has missed some real potential here. There is so much unused space which could have been used for a similar setup to that of the front, allowing for an additional radiator to be installed. On top of that, the single air vent lacks compatibility with 120-mm cooling units. Four high-quality feet are screwed into the base of the chassis. You can see that the black rivets holding the separate case parts together have tooling marks on them, which results in the silver metal shining through. This seems to be a general aesthetic feature of the Magic Cube AIO. While some may say that I am nitpicky, the chassis does clock in at well above 200 Euros, so I do expect to see quality.
Apr 25th, 2024 01:13 EDT
change timezone
Latest GPU Drivers
New Forum Posts
- Github comments used to push malware via Microsoft repo urls (1)
- What's your latest tech purchase? (20337)
- The Official Linux/Unix Desktop Screenshots Megathread (694)
- XFX RX470 8GB no video and error 43 (27)
- (Anti) SFF fun house (348)
- Cinebench crashed my PC. My Wi-Fi stopped working, and I keep getting a "Please wait" screen when I boot up my PC. (31)
- im new to throttelstop and i think i messed it up by copying others any hints would be very much aprreciated (1)
- Aida64 cache mem OC (7)
- I am getting artifacting when I change Windows security settings. Is my GPU failing, or is this just a Windows issue? (10)
- Is there a technical reason that Windows 11 doesn't have built into it battery charge limitation? (42)
Popular Reviews
- Fractal Design Terra Review
- Thermalright Phantom Spirit 120 EVO Review
- Corsair 2000D Airflow Review
- Minisforum EliteMini UM780 XTX (AMD Ryzen 7 7840HS) Review
- ASUS GeForce RTX 4090 STRIX OC Review
- NVIDIA GeForce RTX 4090 Founders Edition Review - Impressive Performance
- ASUS GeForce RTX 4090 Matrix Platinum Review - The RTX 4090 Ti
- MSI GeForce RTX 4090 Suprim X Review
- MSI GeForce RTX 4090 Gaming X Trio Review
- Gigabyte GeForce RTX 4090 Gaming OC Review
Controversial News Posts
- Sony PlayStation 5 Pro Specifications Confirmed, Console Arrives Before Holidays (116)
- NVIDIA Points Intel Raptor Lake CPU Users to Get Help from Intel Amid System Instability Issues (106)
- AMD "Strix Halo" Zen 5 Mobile Processor Pictured: Chiplet-based, Uses 256-bit LPDDR5X (101)
- US Government Wants Nuclear Plants to Offload AI Data Center Expansion (98)
- Windows 10 Security Updates to Cost $61 After 2025, $427 by 2028 (84)
- Developers of Outpost Infinity Siege Recommend Underclocking i9-13900K and i9-14900K for Stability on Machines with RTX 4090 (84)
- TechPowerUp Hiring: Reviewers Wanted for Motherboards, Laptops, Gaming Handhelds and Prebuilt Desktops (78)
- AMD's RDNA 4 GPUs Could Stick with 18 Gbps GDDR6 Memory (74)