 14
14
DimasTech Bench Table V2.5 Review
Installation & Finished Looks »Parts


While the "arch", as I like to call the top part, has remaind the same as far as dimensions and shape is concerned, there are plenty of subtle changes. First off, where the old Benchtable V2 had a few areas where the paint was thicker, the V2.5 paint job is excellent. I would even go as far as to say, that it is better than many normal cases out there. The holes on top have changed slightly as well. There are additional openings to route cables through and the mainboard standoffs now screw directly into the metal sheet. This means that these standoffs now consist of a single part instead of up to three smaller pieces (standoff, washer & screw). There are also new holes with a thread around the edges of the platform. These are intended for the FlexFan120, but you could really use them for anything.

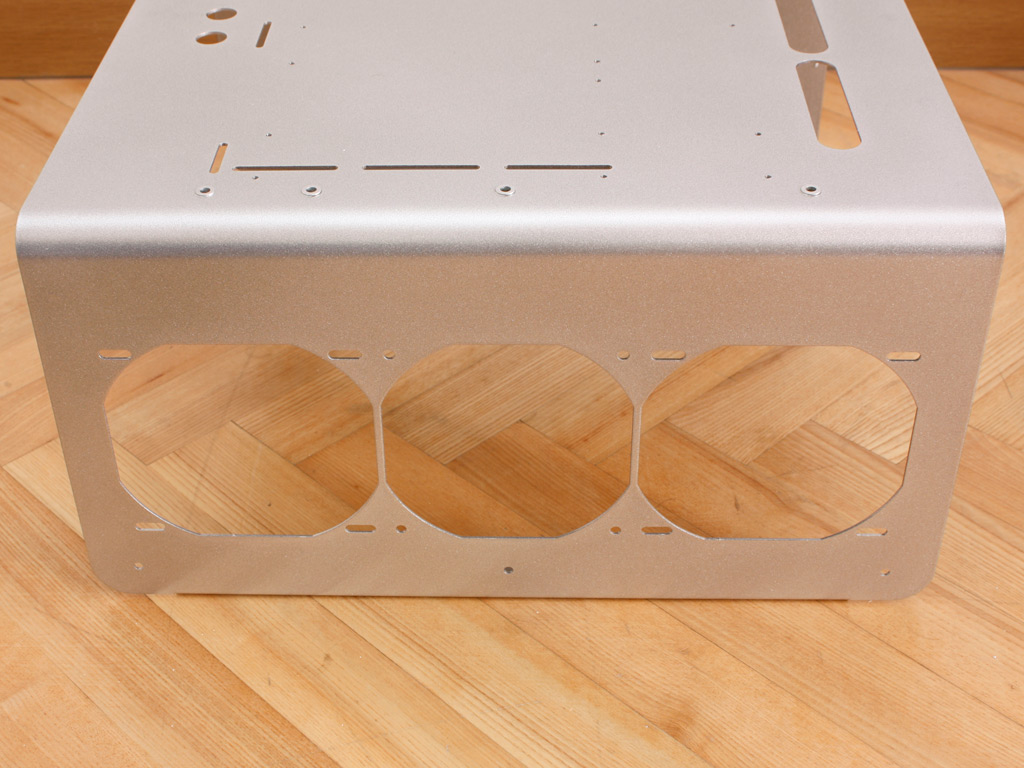
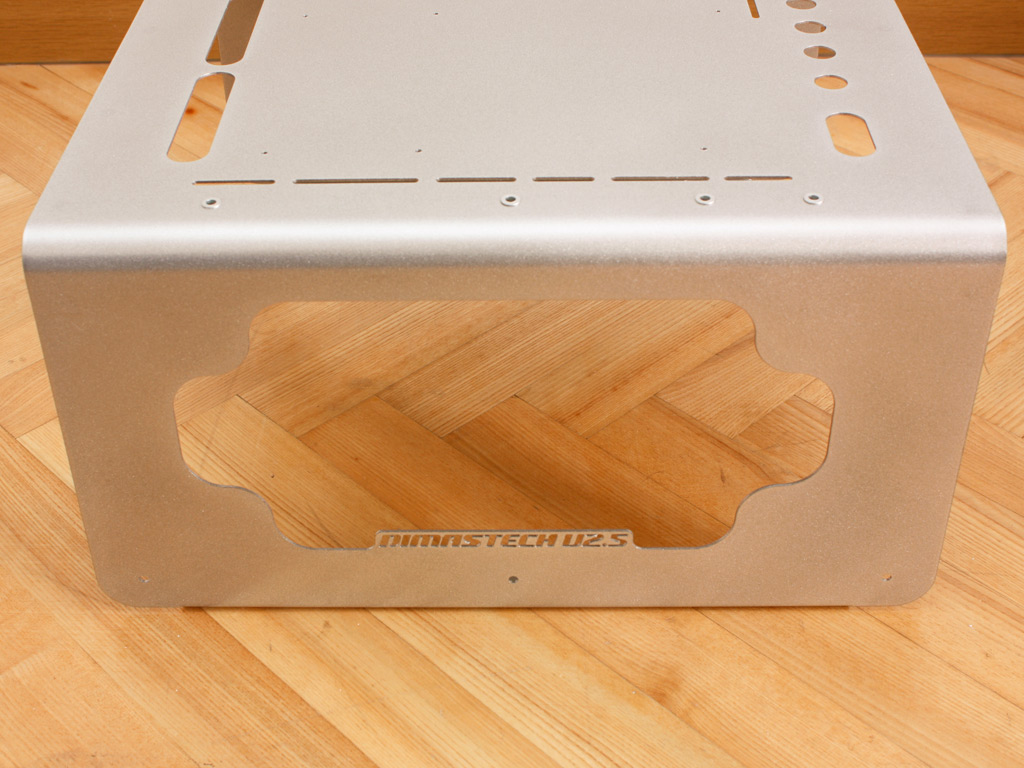
The rear of the bench table now has a laser cut text reading "Made in Italy". I am sure the guys in the south of Europe are proud of their products and they have every reason to be. The one opening on the right, which serves no other purpose besides to give you easy access has been reshaped. Gone is the round cornered square cut out, having been replaced by a more elaborate shape along with a fairly elaborate laser cut "Dimastech V2.5" as part of it. This is certainly a nice touch and adds to the overall design as well as feel of quality. Turning things around to the left side, we got the version which can take a triple radiator, while our last one had two 120 mm openings for a dual rad. You can have this area customized to your needs.

The second part of the table itself is the flooring. There are a lot of changes here as well. First off, it has been lifted by a set of feet. This makes it easier to slide under the arch. Dimastech has also increased the number of holes in the flooring considerably. From the looks of it, I would say the total is now twofold that of the old table. In addition to that, the holes are now wider and slightly larger, giving you more flexibility and increasing the ease of assembly.


The additional parts have not changed at all. These seem to have the same paint job quality as the old parts, so it may just be that the metallic grey happens to be better than a solid color in this regard. You get two drive bays, one for 3.5 and one for 5.25 inch devices. The PSU frame is made of thinner metal for some reason, but does the job just fine. Dimastech is still including a piece of foam to use in this area to reduce vibration. The foam sheet is extremely bad cut and I had to whip up my own scissors to get it into shape. With all the detailed and precision laser cutting, I am surprised that they do not try with this little piece of foam. Maybe Dimastech would be better off, by offering you little rubber standoffs instead.


The contraption for the seven expansion bays has remained unchanged, as have the parts for the fans. Gone is the 92 mm one, but you get three different 120 mm units to use.
Assembly
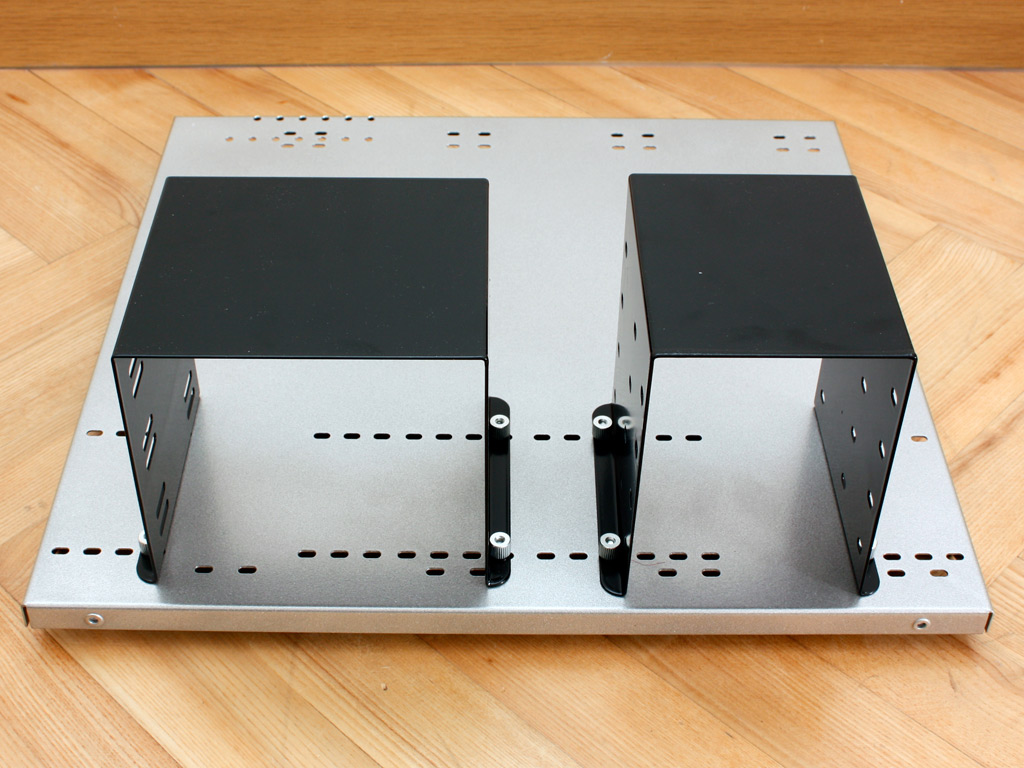

Having learned from my previous assembly of the Benchtable, I started with the flooring first this time around. Simply secure the two drive bay frames in the front, alining them to your liking. Dimastech has changed the types of screws used to secure the parts with the V2.5. Instead of screws, washers and nuts you now have screws and thumb nuts. Sounds weird, but that is exactly what they are. This is a great move, as it reduces the separate parts and makes it very easy to get everything secured. While a screwdriver is not necessary, I suggest you have one at your disposal anyways. I have placed the PSU bracket on the right rear corner of the flooring, as this seems to be the best spot for it as far as cable length is concerned. You may also place it in the middle or left of the rear edge, or even including a second PSU. This time around, I have placed the foam on top of the bracket instead of under it, giving me the option to remove it easily.
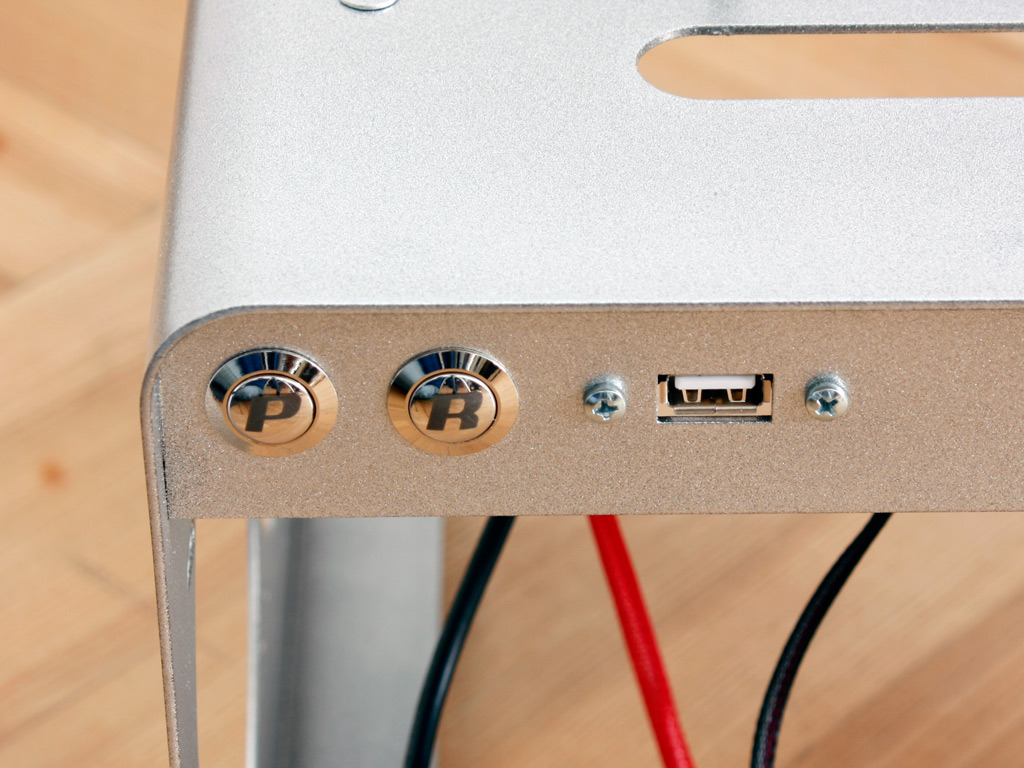


Next up we have the new power and reset buttons. They are now clearly labeled so no more guessing which does what. Right next to that the USB 2.0 plug fits nicely. The mainboard area only requires the nine spacers for a full ATX board along with the rear expansion slots bracket. The feet of the table have also been improved considerably. Once again, instead of having four parts (foot, two washers, large nut), we are down to one.
Now that we have both the arch and the flooring ready to go, let us move on to filling them up.
Apr 25th, 2024 02:35 EDT
change timezone
Latest GPU Drivers
New Forum Posts
- GTX 1070 Ti - TDP Issues - Always Power Throttling (5)
- What phone you use as your daily driver? And, a discussion of them. (1471)
- Core i5-6300U (12)
- Github comments used to push malware via Microsoft repo urls (2)
- The TPU UK Clubhouse (24784)
- (Anti) SFF fun house (349)
- What's your latest tech purchase? (20337)
- The Official Linux/Unix Desktop Screenshots Megathread (694)
- XFX RX470 8GB no video and error 43 (27)
- Cinebench crashed my PC. My Wi-Fi stopped working, and I keep getting a "Please wait" screen when I boot up my PC. (31)
Popular Reviews
- Fractal Design Terra Review
- Thermalright Phantom Spirit 120 EVO Review
- Corsair 2000D Airflow Review
- Minisforum EliteMini UM780 XTX (AMD Ryzen 7 7840HS) Review
- ASUS GeForce RTX 4090 STRIX OC Review
- NVIDIA GeForce RTX 4090 Founders Edition Review - Impressive Performance
- ASUS GeForce RTX 4090 Matrix Platinum Review - The RTX 4090 Ti
- MSI GeForce RTX 4090 Suprim X Review
- MSI GeForce RTX 4090 Gaming X Trio Review
- Gigabyte GeForce RTX 4090 Gaming OC Review
Controversial News Posts
- Sony PlayStation 5 Pro Specifications Confirmed, Console Arrives Before Holidays (116)
- NVIDIA Points Intel Raptor Lake CPU Users to Get Help from Intel Amid System Instability Issues (106)
- AMD "Strix Halo" Zen 5 Mobile Processor Pictured: Chiplet-based, Uses 256-bit LPDDR5X (101)
- US Government Wants Nuclear Plants to Offload AI Data Center Expansion (98)
- Windows 10 Security Updates to Cost $61 After 2025, $427 by 2028 (84)
- Developers of Outpost Infinity Siege Recommend Underclocking i9-13900K and i9-14900K for Stability on Machines with RTX 4090 (84)
- TechPowerUp Hiring: Reviewers Wanted for Motherboards, Laptops, Gaming Handhelds and Prebuilt Desktops (78)
- AMD's RDNA 4 GPUs Could Stick with 18 Gbps GDDR6 Memory (74)