 4
4
In Win Dragon Rider Review
Value & Conclusion »Assembly

Installing the mainboard is very easy as there is plenty of space all around it. I am using a fairly compact ATX board in this build and the CPU socket is very close to the top edge of the board, but you still have loads of space to install a CPU cooler properly and the Super Mega will also fit perfectly fine if turned 90 degrees.
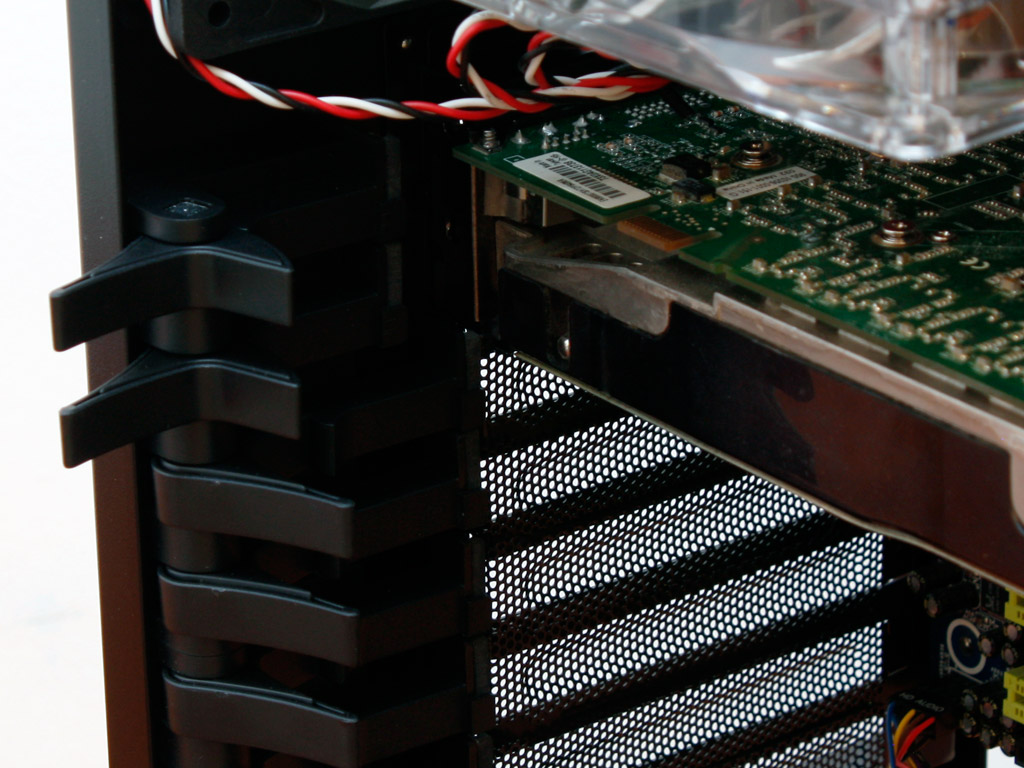
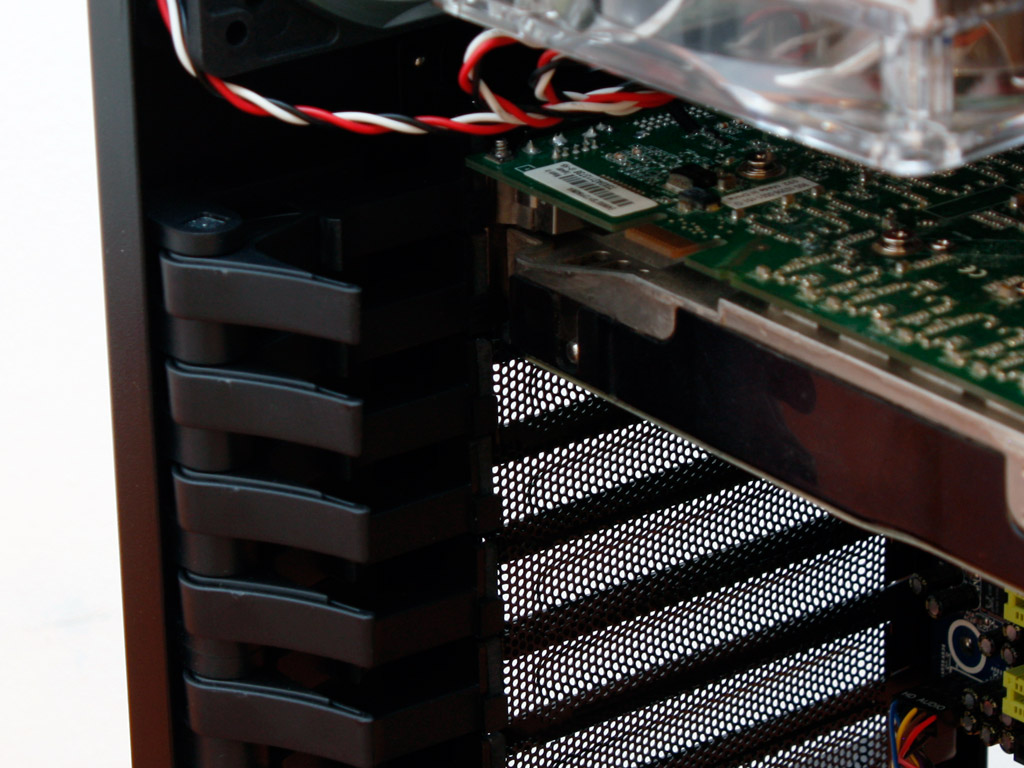
As mentioned before, the plastic clips hold really well and the card is pushed into place without any play, even with just one of the two clips applied. So no matter what you will install within the Dragon Rider, these clips should manage to hold everything well.


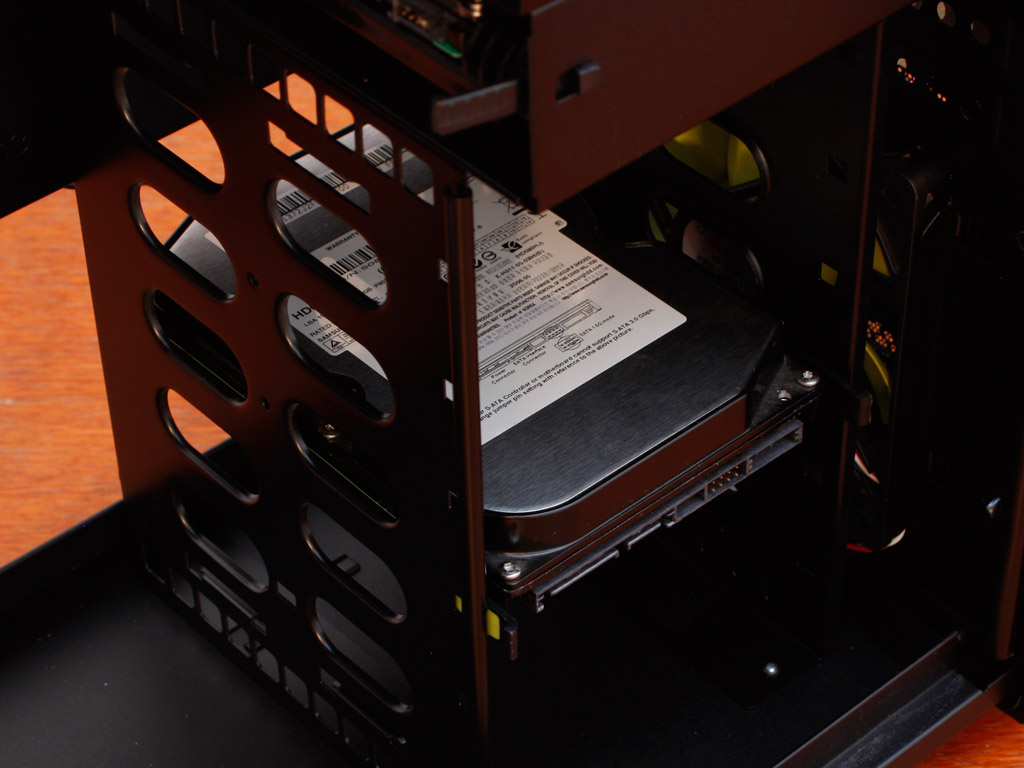
Placing a 3.5 inch hard drive within the case is easy as well and does not require any screws. Just place the two rails on each side of the drive and slide it in until the rails snap into place. It would have been great if the construction would have allowed to install the storage units with the connectors facing the other side to minimize the amount of visible cables though. Even though the rails would allow such a placement, the drive would reach too far out the other side.


Utilizing the 2.5 inch drive bay is the only one which will require you to use a traditional screw driver. After installing the drive, simply slide the entire tray into place.

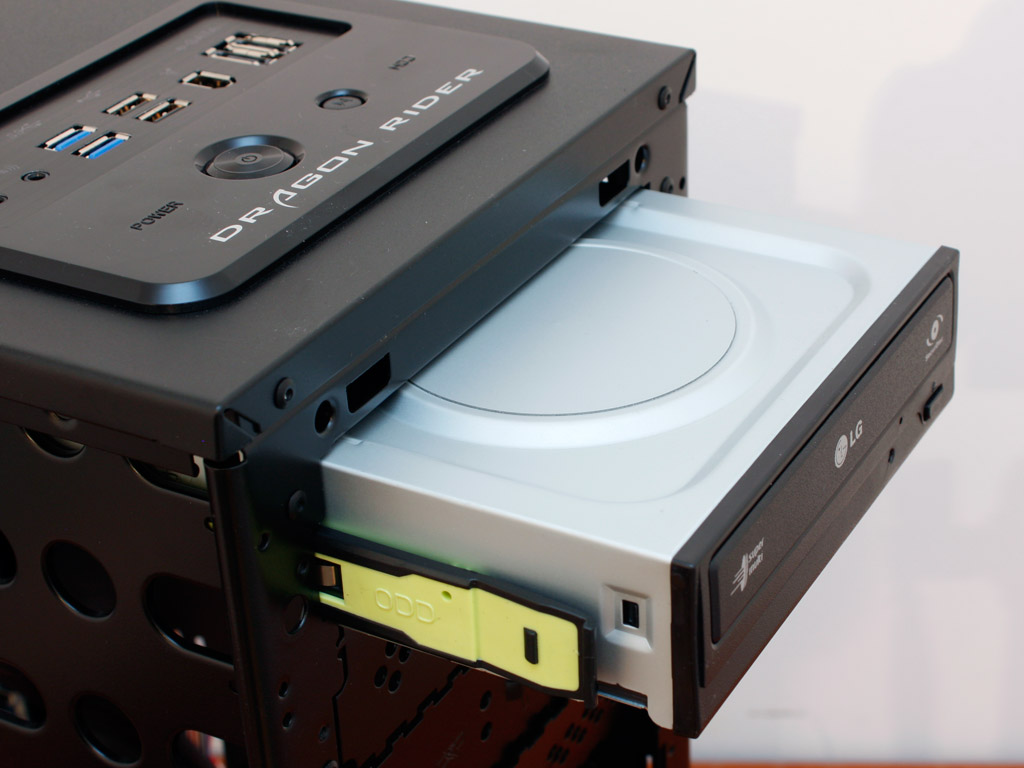

Installing an optical drive is a very simple task as well and is very similar to that of the 3.5 inch hard drives. You do however have to pull off the front of the case first. Once that is done, just slide it into place and put the front back on.

Installing the power supply is done traditionally with either the screws supplied by In Win or by the PSU manufacturer. There is plenty of space for even the longest units, so you can jam pack the case with as much hardware as it can hold.


Once everything is in place and connected, it becomes apparent that, even though there is plenty of room to route the cables, there is no way to hide them properly. This is due to the minimalistic mainboard tray, which does not extend to the bottom and top of the case. Luckily the case does not really allow you to take a close look at the interior anyways, so the fact that cables are simply stowed and not in the way may be sufficient in the end.
Finished Looks


Once everything is closed up, the Dragon Rider was turned on. The four fans are not the quietest out there, but they emit a clean and continuous "whoosh" sound, so it should easily be drowned out by any surrounding noises. For those who are not a big fan of the side LEDs, these can easily be turned off while keeping the system itself running. Sadly all the openings within the case do not really encase the sounds from the various parts of the case well, so the Dragon Rider may not be the best choice for silent fans.


Due to the curved design, the external drives end up fairly recessed within the chassis, but this is by no means a problem. A very cool aspect is the large In Win logo, which lights up blue, much like the Apple logo on a notebook would light up white when turned on. I have to admit - I love it.
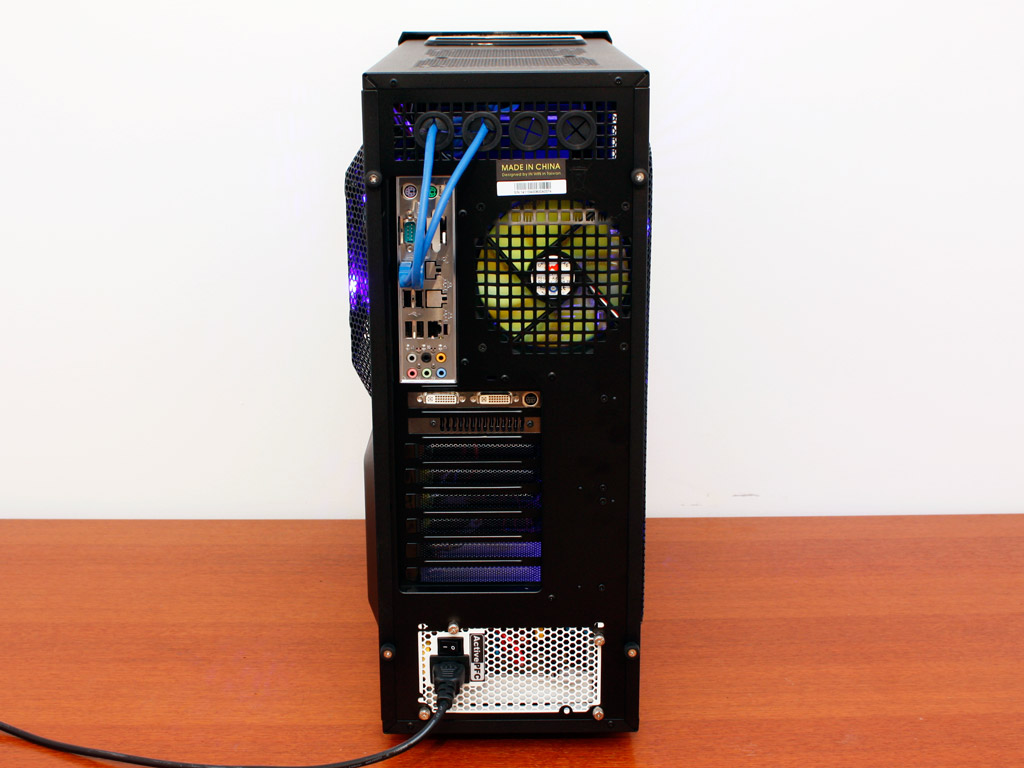
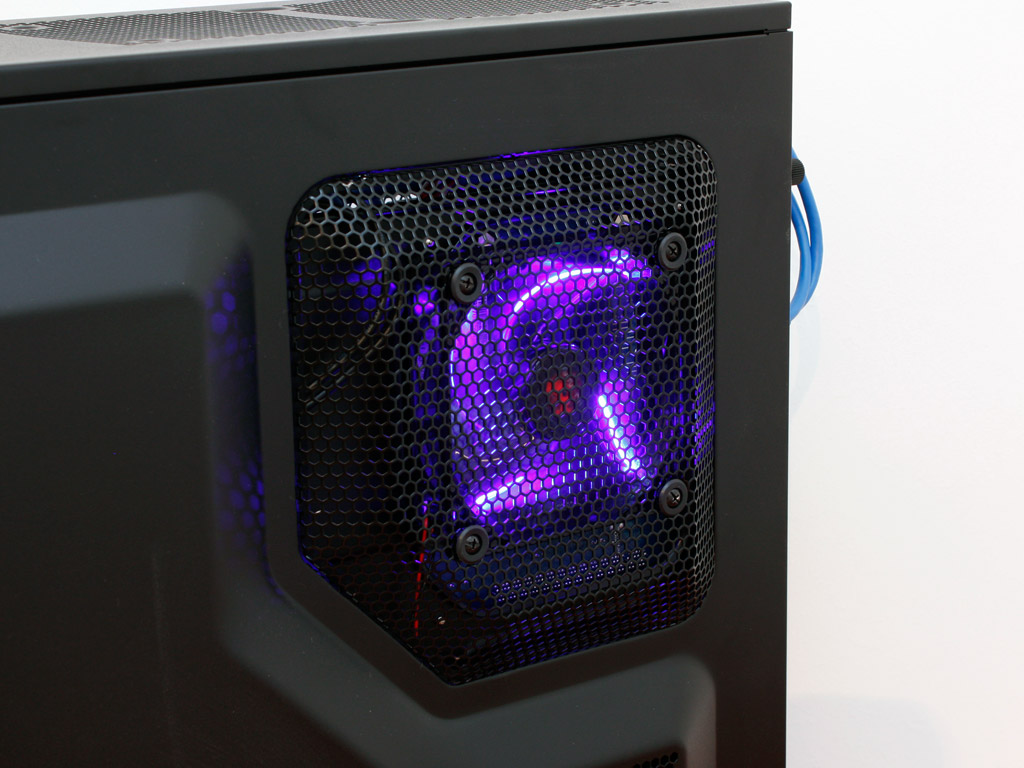
Taking a quick look at the rear, everthing is accessible. The two USB 3.0 cables were routed out the back and connected to the board, which is not a very elegant solution. I would have liked to see a USB 3.0 to USB 2.0 header adapter included, so that users could have the ability to connect it directly to the board header instead. The fan for the mainboard CPU area also lights up with blue LEDs which cannot be turned off and - as mentioned before - it always runs at full speed.

Turning off the surrounding lights, you can clearly see how the Dragon Rider would look in such an environment, like a LAN party for example. Pretty cool In Win - pretty cool.
Apr 24th, 2024 02:43 EDT
change timezone
Latest GPU Drivers
New Forum Posts
- Official Board Game Discussion (13)
- The TPU UK Clubhouse (24772)
- Random blue screen from winload.efi error (0xc000000e) (0)
- What's your latest tech purchase? (20327)
- Which new games will you be buying? (304)
- need help with motherboard/ ram compability certainty (15)
- Flashing lenovo BIOS (11)
- FINAL FANTASY XIV: Dawntrail Official Benchmark (72)
- What phone you use as your daily driver? And, a discussion of them. (1455)
- I am getting artifacting when I change Windows security settings. Is my GPU failing, or is this just a Windows issue? (9)
Popular Reviews
- Fractal Design Terra Review
- Corsair 2000D Airflow Review
- Thermalright Phantom Spirit 120 EVO Review
- Minisforum EliteMini UM780 XTX (AMD Ryzen 7 7840HS) Review
- ASUS GeForce RTX 4090 STRIX OC Review
- NVIDIA GeForce RTX 4090 Founders Edition Review - Impressive Performance
- ASUS GeForce RTX 4090 Matrix Platinum Review - The RTX 4090 Ti
- MSI GeForce RTX 4090 Suprim X Review
- MSI GeForce RTX 4090 Gaming X Trio Review
- Gigabyte GeForce RTX 4090 Gaming OC Review
Controversial News Posts
- Sony PlayStation 5 Pro Specifications Confirmed, Console Arrives Before Holidays (116)
- NVIDIA Points Intel Raptor Lake CPU Users to Get Help from Intel Amid System Instability Issues (106)
- AMD "Strix Halo" Zen 5 Mobile Processor Pictured: Chiplet-based, Uses 256-bit LPDDR5X (101)
- US Government Wants Nuclear Plants to Offload AI Data Center Expansion (98)
- Windows 10 Security Updates to Cost $61 After 2025, $427 by 2028 (84)
- Developers of Outpost Infinity Siege Recommend Underclocking i9-13900K and i9-14900K for Stability on Machines with RTX 4090 (84)
- TechPowerUp Hiring: Reviewers Wanted for Motherboards, Laptops, Gaming Handhelds and Prebuilt Desktops (77)
- Intel Realizes the Only Way to Save x86 is to Democratize it, Reopens x86 IP Licensing (70)