 43
43
In Win H-Frame Review
Value & Conclusion »Assembly

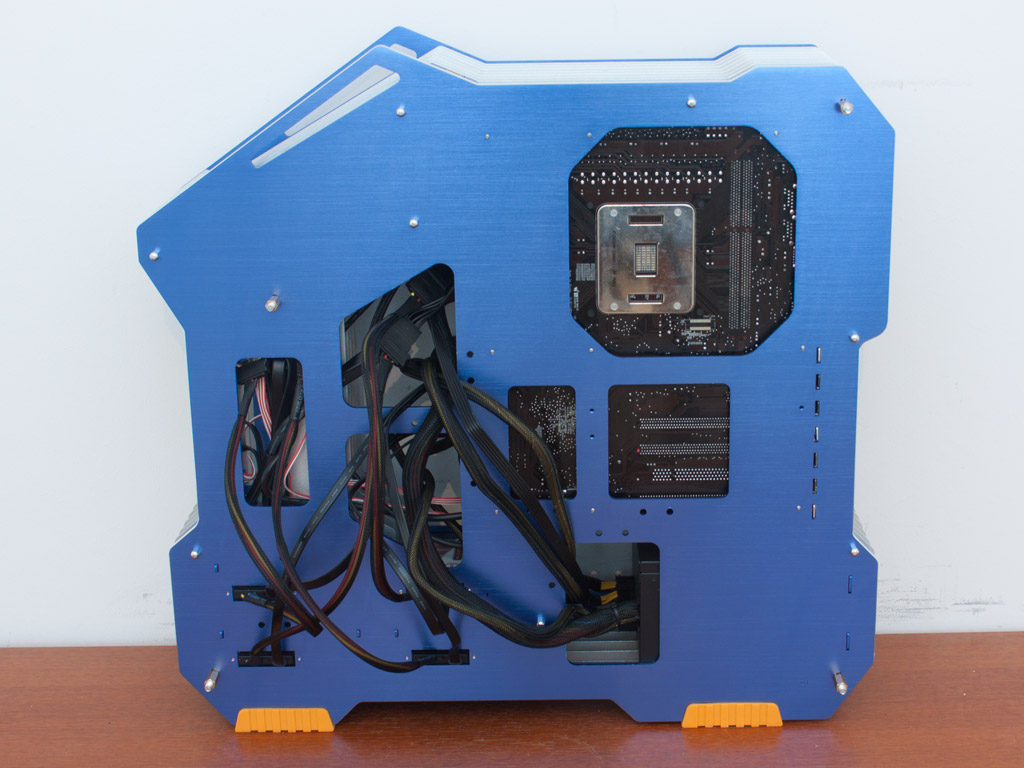
Installing the motherboard within the H-Frame is done by traditional means. Simply place the spacers on the thick, blue aluminum sheet and the board on top of those. There is enough space for the top-blow Phanteks fan, but a full-tower variant will not end up with enough space. You will have to make sure to find one that is compact enough.

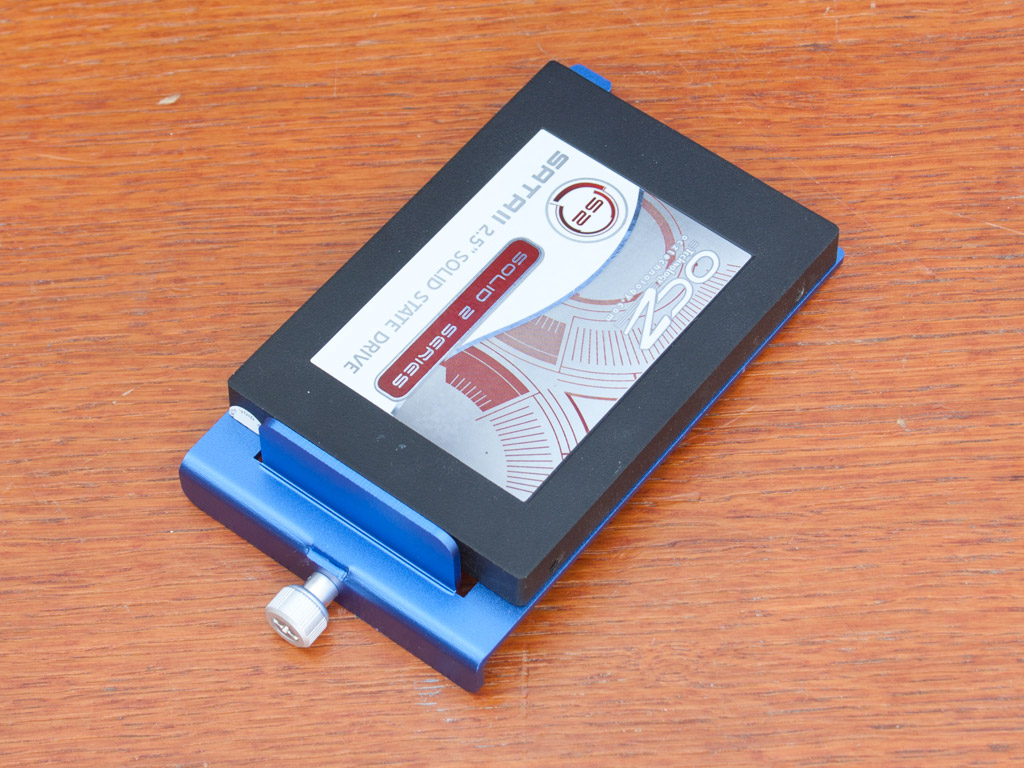

Installing the hard drives into the trays requires the use of some screws, but that is easily done by securing the drives onto the contraptions outside of the chassis. The 2.5" tray is a simple plate with four holes, but it works, as you can see, flawlessly.


Prepping the 3.5" drives requires one more step, as In Win ships them with 2.5" trays. You will have to remove these to clear up room for traditional, larger drives. A 3.5" variant is then secured using provided screws.


Once in place, simply slide the tray back into the bay of your choice. Last, but not least, push down on both spring-loaded thumbscrews and tighten them down. This way, the bay won't budge, and you will not have to worry about vibrations through the area.


Installing the optical-drive bay bears a small surprise. When empty, the frame's back not only acts as something to fill the bay, but also as a cover for the front, which is why there is an In Win logo on that side of the bay. But filling and installing the bay also means turning the bay around, making its open front face outward with the back in the rear. While this is pretty cool, it makes the SATA connectors a bit hard to reach, as you will have to feel your way around this area of the case.

Installing the power supply is done by traditional means. Just make sure you use the foam spacers to eliminate any vibrations being transmitted from the PSU to the chassis frame.

With everything installed and in place, the H-Frame makes a bit of an untidy impression. Using the included zip ties will minimize this issue, but this is an open-air chassis, and you do expect to see cables somewhere. Thanks to the firmly attached SATA data cables, you at least avoid a colorful mess in this area.
Finished Looks


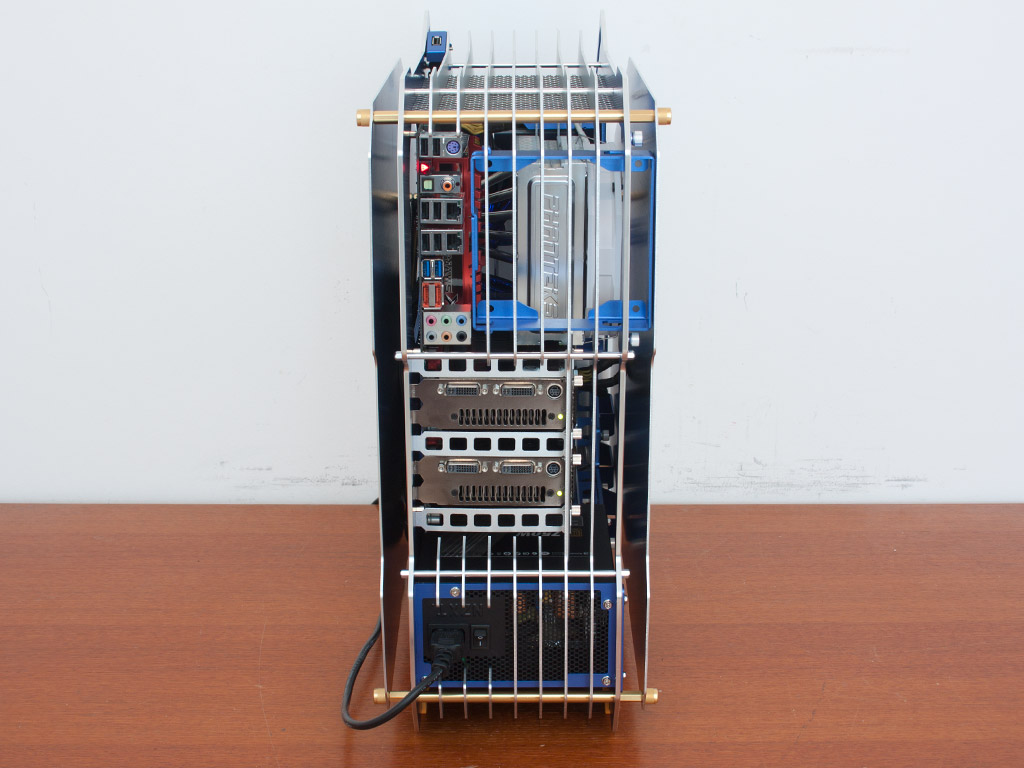
With everything in place, the In Win H-Frame is such an unusually cool sight that you may forget having spent a lot of money on design instead of functionality. You can clearly see the internals of your system from the front or the rear of the chassis, and that mess of cables does not even look out of place anymore.


A small blue LED lights up after turning on the chassis, and the ODD opens up at an angle like a boss. You can also clearly see the parts within the chassis from the top.
Apr 19th, 2024 02:35 EDT
change timezone
Latest GPU Drivers
New Forum Posts
- Linus watercools (17)
- FINAL FANTASY XIV: Dawntrail Official Benchmark (58)
- What's your latest tech purchase? (20283)
- Should the CDPR make the Fallout 5 instead? (23)
- Will a RTX 4070 TI super bottleneck a Ryzen 9 7950X3D? (36)
- DDR5 RAM Speeds and the future (45)
- Cinebench crashed my PC. My Wi-Fi stopped working, and I keep getting a "Please wait" screen when I boot up my PC. (7)
- Adventure: Running 8/9th gen Coffee Lake CPUs on Z170 motherboard (ASUS Maximus VIII Ranger) (336)
- First computer build for my son (1)
- Why is SteamOS taking so long to come to desktop for AMD users, when ChimeraOS is the same thing almost? (19)
Popular Reviews
- Horizon Forbidden West Performance Benchmark Review - 30 GPUs Tested
- PowerColor Radeon RX 7900 GRE Hellhound Review
- Fractal Design Terra Review
- Corsair 2000D Airflow Review
- Minisforum EliteMini UM780 XTX (AMD Ryzen 7 7840HS) Review
- Thermalright Phantom Spirit 120 EVO Review
- Creative Pebble X Plus Review
- FiiO KB3 HiFi Mechanical Keyboard Review - Integrated DAC/Amp!
- ASUS GeForce RTX 4090 STRIX OC Review
- NVIDIA GeForce RTX 4090 Founders Edition Review - Impressive Performance
Controversial News Posts
- Sony PlayStation 5 Pro Specifications Confirmed, Console Arrives Before Holidays (110)
- NVIDIA Points Intel Raptor Lake CPU Users to Get Help from Intel Amid System Instability Issues (102)
- US Government Wants Nuclear Plants to Offload AI Data Center Expansion (98)
- Windows 10 Security Updates to Cost $61 After 2025, $427 by 2028 (82)
- Developers of Outpost Infinity Siege Recommend Underclocking i9-13900K and i9-14900K for Stability on Machines with RTX 4090 (82)
- TechPowerUp Hiring: Reviewers Wanted for Motherboards, Laptops, Gaming Handhelds and Prebuilt Desktops (71)
- Intel Realizes the Only Way to Save x86 is to Democratize it, Reopens x86 IP Licensing (70)
- AMD Zen 5 Execution Engine Leaked, Features True 512-bit FPU (63)