 0
0
Intel NUC DC3217IYE (Next Unit of Computing) Review
Performance, Power Consumption & Temperature »A Closer Look - inside

As the Intel NUC ships as a barebone, you still require memory, an SSD, and any mini-PCIe connectivity of your choosing. Simply remove the four screws to then pull the top cover off the device for full access to the interior. You can also take the solid aluminum ring that acts as a purely esthetic shell to the metal enclosure off at the same time.


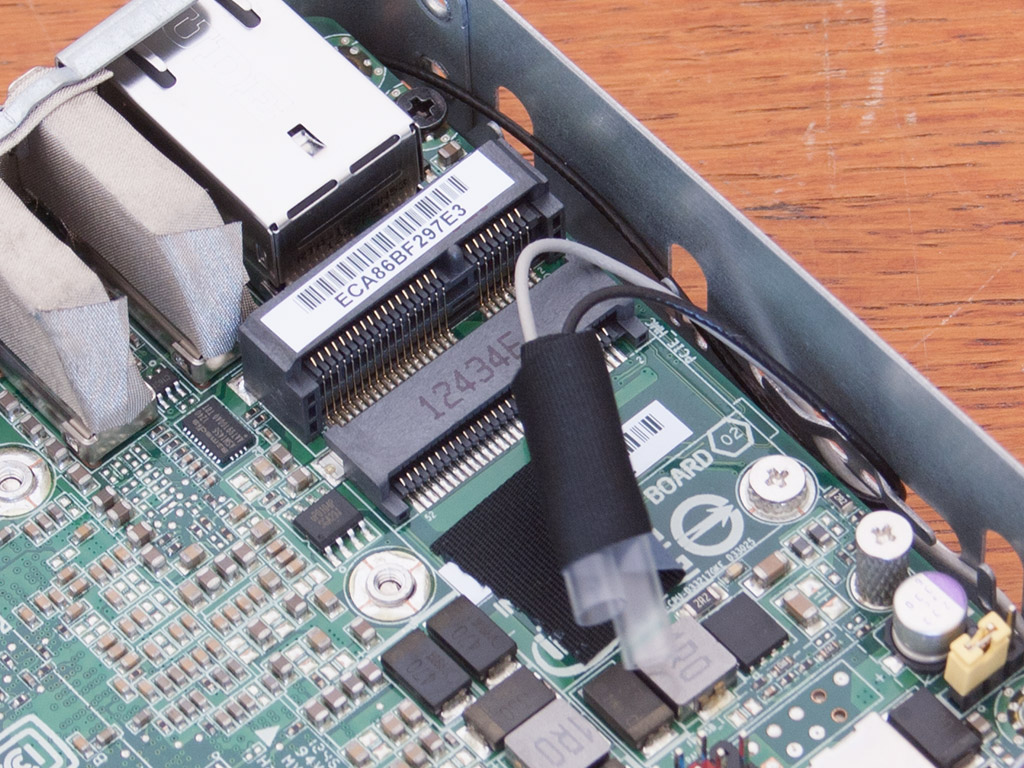
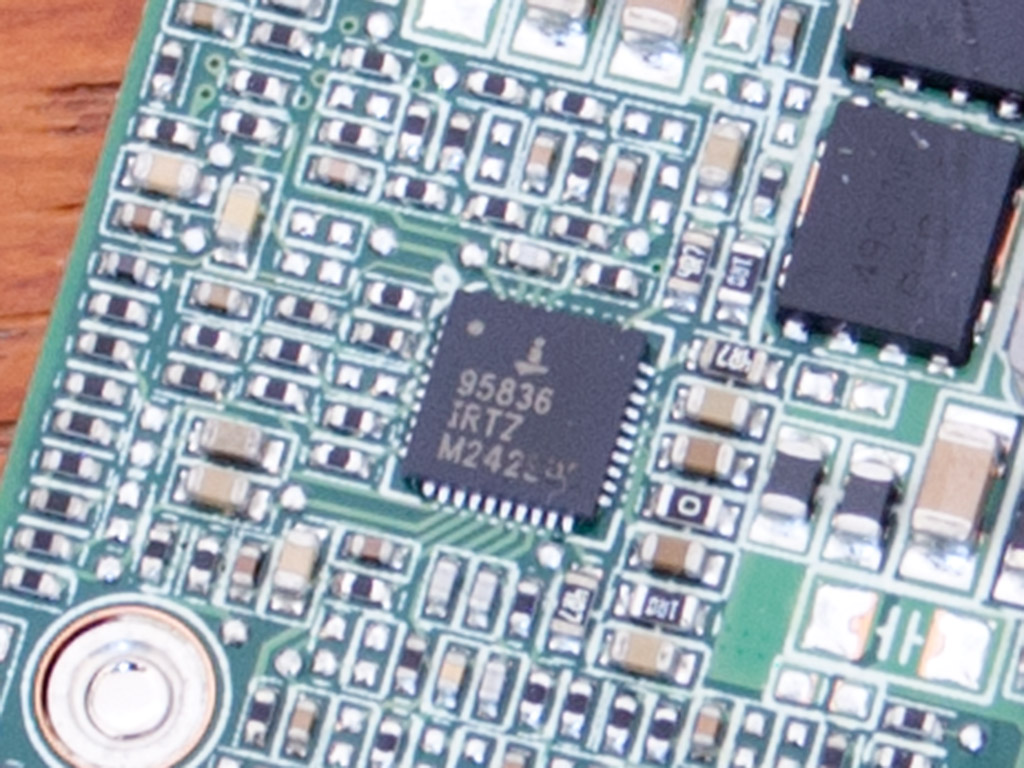
The PCB has a standard header to connect power, reset, and LED leads to the board. This is because Intel also offers the exact same motherboard without a case, which allows you to go for your own chassis to even cool the entire system passively. Two SODIMM slots can also be found within. Each can hold modules of up to 8GB in density. The two mini-PCIe slots allow you to add your choice of storage and connectivity, like WiFi or Bluetooth. Intel has already pre-wired cables for additional connectivity, so there are antennas in place to that purpose.


If you are going to use the motherboard in an aftermarket chassis, simply remove two screws and pull the board out of the case. A notebook-style fan and heatsink is used to keep things cool under the hood.


This element is easily removed, which is important for those taking the all-passive cooling route through a chassis that acts as a massive heatsink.


Both the CPU and chipset take up the majority of the space on the PCB. Both of these are cooled by the fan and heatsink. Intel opted for thermal paste instead of, say, less effective frag tape. The one to the left is the QS77 chipset, and the longer one is the actual Intel i3-3217U processor.


An AsMedia ASM1456 IC is used to provide the SATA 6G connectivity, and a Nuvoton NCT5577D takes care of hardware monitoring the system.

Looking closer, you will also find an Intersil ISL95836 PWM controller IC and an Intel IC with a model number I could not decipher on the sample due to sloppy lasering on the packaging.
Assembly

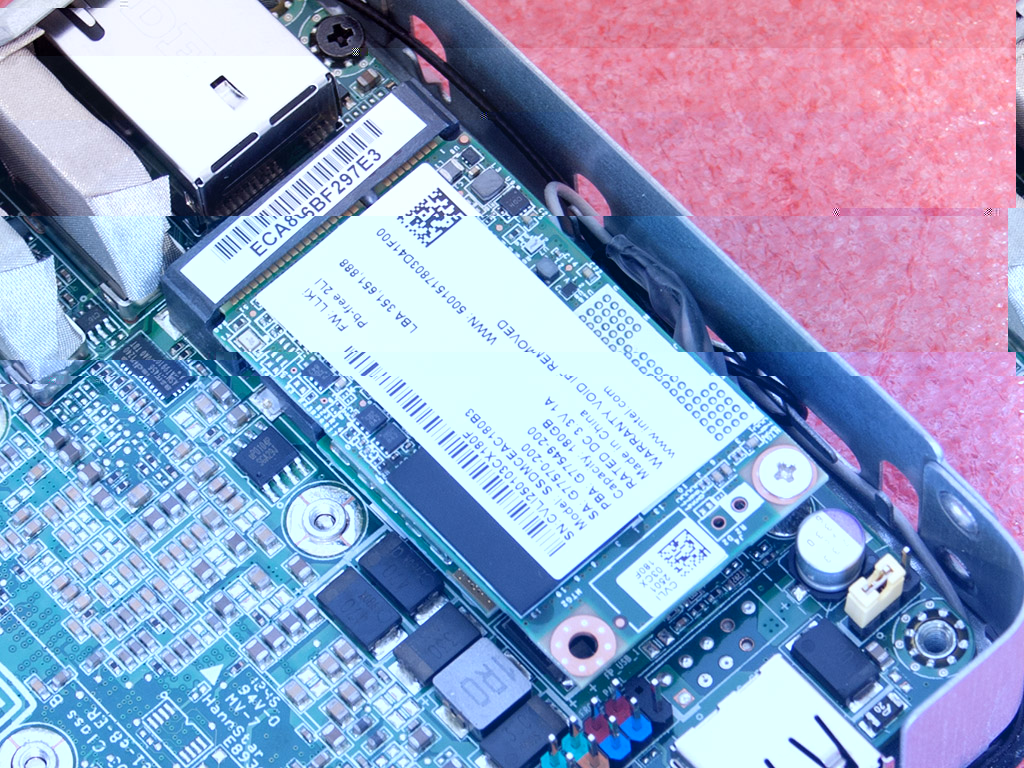

Simply install the memory, the SSD, and any optional connectivity you require to create a fully functional system. This is easily done as Intel utilizes standard interfaces. Anyone who has ever upgraded a modern notebook should be able to complete this task with ease.
Apr 24th, 2024 13:17 EDT
change timezone
Latest GPU Drivers
New Forum Posts
- Rare GPUs / Unreleased GPUs (1872)
- Is It The 1080 TI The Best GPU Ever? (209)
- Disable Turbo OR Undervolt - 12th gen P CPUs in thin or ultrathin design impossible to cool ? (2)
- 14700K + 4070TI New Build. Will become an unRAID server in the future (11)
- Meta Horizon OS (10)
- What are you playing? (20522)
- EK seems to be having major issues (47)
- What phone you use as your daily driver? And, a discussion of them. (1469)
- How are MX330 and İ5 1135G7 ? (4)
- The TPU UK Clubhouse (24780)
Popular Reviews
- Fractal Design Terra Review
- Thermalright Phantom Spirit 120 EVO Review
- Corsair 2000D Airflow Review
- Minisforum EliteMini UM780 XTX (AMD Ryzen 7 7840HS) Review
- ASUS GeForce RTX 4090 STRIX OC Review
- NVIDIA GeForce RTX 4090 Founders Edition Review - Impressive Performance
- ASUS GeForce RTX 4090 Matrix Platinum Review - The RTX 4090 Ti
- MSI GeForce RTX 4090 Gaming X Trio Review
- MSI GeForce RTX 4090 Suprim X Review
- Gigabyte GeForce RTX 4090 Gaming OC Review
Controversial News Posts
- Sony PlayStation 5 Pro Specifications Confirmed, Console Arrives Before Holidays (116)
- NVIDIA Points Intel Raptor Lake CPU Users to Get Help from Intel Amid System Instability Issues (106)
- AMD "Strix Halo" Zen 5 Mobile Processor Pictured: Chiplet-based, Uses 256-bit LPDDR5X (101)
- US Government Wants Nuclear Plants to Offload AI Data Center Expansion (98)
- Windows 10 Security Updates to Cost $61 After 2025, $427 by 2028 (84)
- Developers of Outpost Infinity Siege Recommend Underclocking i9-13900K and i9-14900K for Stability on Machines with RTX 4090 (84)
- TechPowerUp Hiring: Reviewers Wanted for Motherboards, Laptops, Gaming Handhelds and Prebuilt Desktops (78)
- Intel Realizes the Only Way to Save x86 is to Democratize it, Reopens x86 IP Licensing (70)