 8
8
MIPS RAM Freezer Review
Performance »Construction


If you dismantle the freezer into its components, you will see it is a quite simple structure sealed with O-rings. The cross section is wide enough to make a good flow rate possible.
Installation
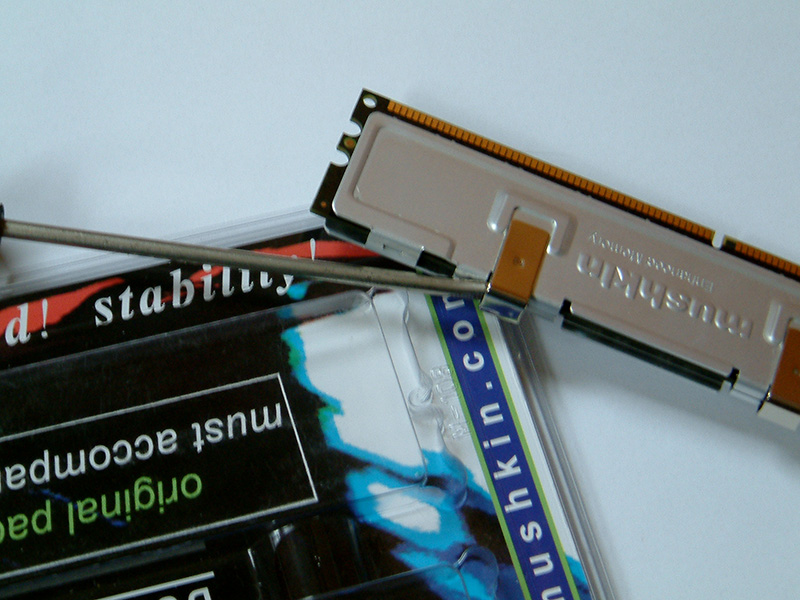

First you have to remove the heatspreaders (if your RAM has some). Just get the two clips off with the screwdriver, then you can remove the rest easily with your hands.

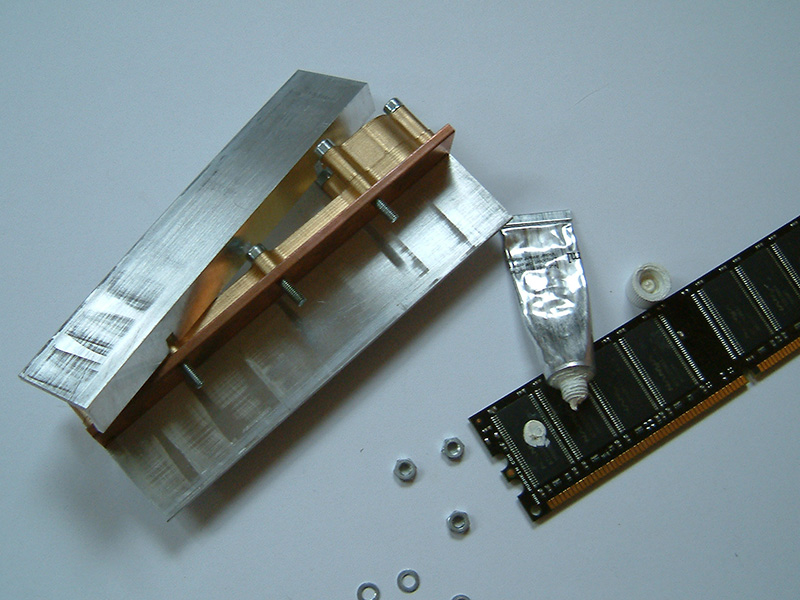
Next you have to loosen the nuts, so you can remove one of the cold plates. Put some non-conductive thermal paste on the memory chips and put it on the other (fixed) cold plate.

Now fix the removed cold plate on the RAM and tighten the nuts. Finished. The first time it's not so easy, but after the third or fourth time it shouldn't be a problem.
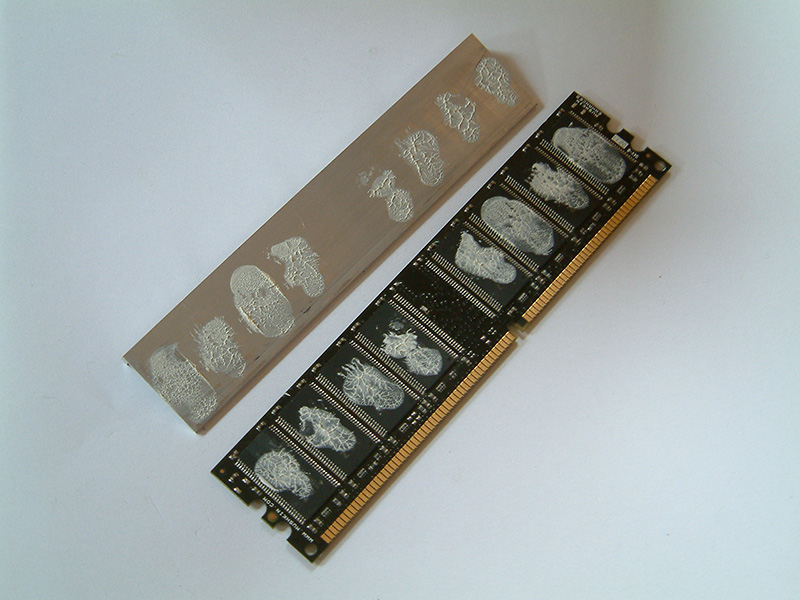
After testing we looked at the contact area. It's not perfect but good enough. Memory chips aren't CPUs.
Apr 23rd, 2024 23:32 EDT
change timezone
Latest GPU Drivers
New Forum Posts
- Flashing lenovo BIOS (7)
- What phone you use as your daily driver? And, a discussion of them. (1455)
- I am getting artifacting when I change Windows security settings. Is my GPU failing, or is this just a Windows issue? (9)
- Cinebench crashed my PC. My Wi-Fi stopped working, and I keep getting a "Please wait" screen when I boot up my PC. (26)
- What's your latest tech purchase? (20321)
- CPB Enabled Boot Loop (10)
- Upgrade Build (106)
- Official Board Game Discussion (9)
- TPU's Nostalgic Hardware Club (18461)
- The TPU UK Clubhouse (24771)
Popular Reviews
- Fractal Design Terra Review
- Corsair 2000D Airflow Review
- Thermalright Phantom Spirit 120 EVO Review
- Minisforum EliteMini UM780 XTX (AMD Ryzen 7 7840HS) Review
- ASUS GeForce RTX 4090 STRIX OC Review
- NVIDIA GeForce RTX 4090 Founders Edition Review - Impressive Performance
- ASUS GeForce RTX 4090 Matrix Platinum Review - The RTX 4090 Ti
- MSI GeForce RTX 4090 Suprim X Review
- MSI GeForce RTX 4090 Gaming X Trio Review
- Gigabyte GeForce RTX 4090 Gaming OC Review
Controversial News Posts
- Sony PlayStation 5 Pro Specifications Confirmed, Console Arrives Before Holidays (116)
- NVIDIA Points Intel Raptor Lake CPU Users to Get Help from Intel Amid System Instability Issues (106)
- AMD "Strix Halo" Zen 5 Mobile Processor Pictured: Chiplet-based, Uses 256-bit LPDDR5X (101)
- US Government Wants Nuclear Plants to Offload AI Data Center Expansion (98)
- Windows 10 Security Updates to Cost $61 After 2025, $427 by 2028 (84)
- Developers of Outpost Infinity Siege Recommend Underclocking i9-13900K and i9-14900K for Stability on Machines with RTX 4090 (84)
- TechPowerUp Hiring: Reviewers Wanted for Motherboards, Laptops, Gaming Handhelds and Prebuilt Desktops (74)
- Intel Realizes the Only Way to Save x86 is to Democratize it, Reopens x86 IP Licensing (70)