 13
13
NZXT Phantom 820 Review
Assembly & Finished Looks »A Closer Look - Inside


Simply remove the top and bottom thumb screws and loosen the middle one to gain access to the interior. The latter, being spring loaded, acts as a quick-locking mechanism, which gives you the option to only use this contraption if you access the interior of the Phantom 820 frequently. The interior is, not surprisingly, painted to match the exterior. There are plenty of openings for cables to be routed and hidden away nicely. A big opening in the motherboard tray gives the user access to any cooler backplate that may be used. You get 20 mm of space for cable routing and hiding, which should suffice most of the time.


The two hard-drive cages are essentially the same as those in the Switch 810 chassis, but they have been redesigned to look cooler. The handle bars have been replaced with clips on which the bottom cage is pulled out. The hard-drive bays face away from the window, and you will have to remove the other side panel every time you want to gain access to these drive bays, which may be a bit of a pain. Above that are the three 5.25" slots; each slot is equipped with a screw-less locking mechanism for tool-less installation.


Just like in the Switch 810, you may install a fan, with the option to angle it a bit, onto the top hard-drive cage. When removing the bottom cage, the support beam on the floor of the Phantom 820 may also be removed with the bottom cage, which gives way to a pair of 120/140 mm fan mounts that may also be used with a 240 or 280 mm radiator - pretty cool.
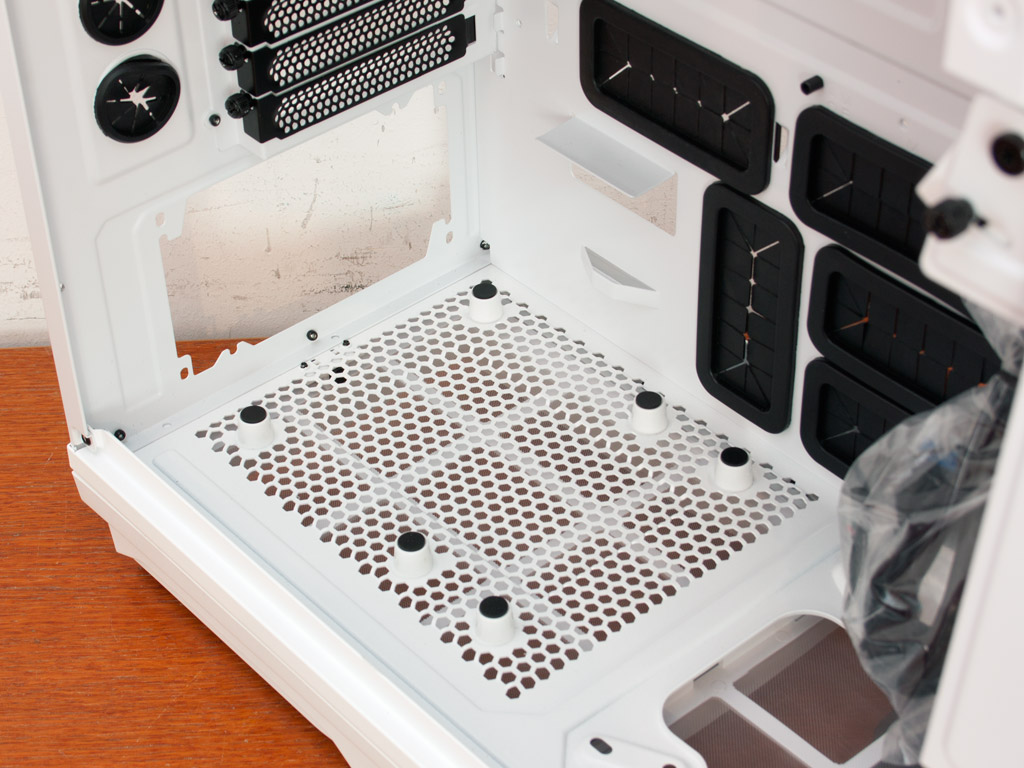


In the rear, the PSU bay comes with a total of six little foam-lined bumps to hold up the power supply, regardless of length. Above that are the nine expansion slots. Each cover is held in place by a black thumb screw. You will find the previously mentioned 140 mm exhaust fan with a black frame and white blades in the very top of the chassis.

In the ceiling, you will find the second and nicely hidden away 200 mm fan. It is used to pull and blow hot air out of the case through the top air-vent. This brings the total cooling-unit count within the chassis up to four, but you can install an additional five if you really want to. This means that the four-channel controller should cover pretty much any cooling scenario with the exception of a couple extreme radiator setups.
The silver bar you see in the image above is part of the multi-color HUE system from NZXT. These include RGB based LEDs which allow you to create the color of your choice within the chassis right out of the box.

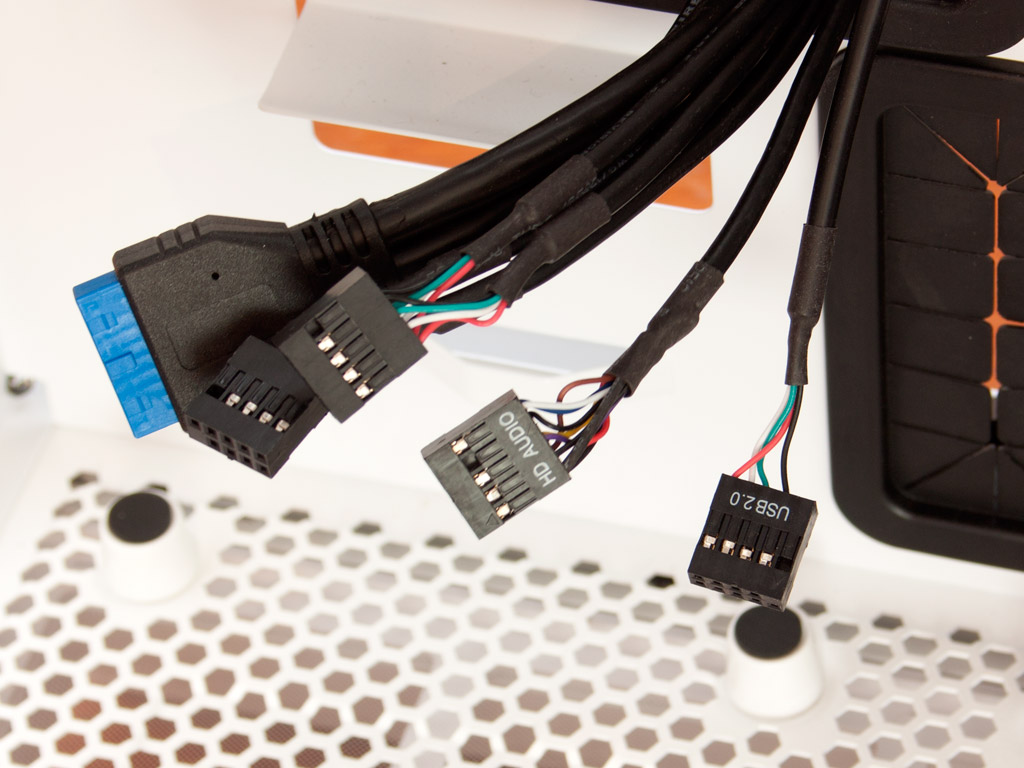

All the cables within the chassis are black to match the overall color theme. The case cables and IO plugs are nothing out of the ordinary, but the flurry of fan-controller cables does add a bit of a mess to the backside of the motherboard tray. NZXT has tried to clean this up a bit by pre-routing most of the cables, but you will most likely end up taking NZXT's setup apart, which means investing a bit of time into cleanly routing everything yourself.
Apr 25th, 2024 18:32 EDT
change timezone
Latest GPU Drivers
New Forum Posts
- Core PL1 + GPU PL1 + Ring EDP OTHER (7)
- How to check flatness of CPUs and coolers - INK and OPTICAL INTERFERENCE methods (112)
- Best SSD for system drive (78)
- Which new games will you be buying? (314)
- TPU's Nostalgic Hardware Club (18464)
- Post your Cinebench 2024 score (450)
- Ubuntu 24.04 LTS released (2)
- Dell Workstation Owners Club (3054)
- im new to throttelstop and i think i messed it up by copying others any hints would be very much aprreciated (2)
- Ryzen Owners Zen Garden (7243)
Popular Reviews
- Fractal Design Terra Review
- Thermalright Phantom Spirit 120 EVO Review
- Corsair 2000D Airflow Review
- Minisforum EliteMini UM780 XTX (AMD Ryzen 7 7840HS) Review
- ASUS GeForce RTX 4090 STRIX OC Review
- NVIDIA GeForce RTX 4090 Founders Edition Review - Impressive Performance
- ASUS GeForce RTX 4090 Matrix Platinum Review - The RTX 4090 Ti
- MSI GeForce RTX 4090 Suprim X Review
- MSI GeForce RTX 4090 Gaming X Trio Review
- Gigabyte GeForce RTX 4090 Gaming OC Review
Controversial News Posts
- Sony PlayStation 5 Pro Specifications Confirmed, Console Arrives Before Holidays (117)
- Windows 11 Now Officially Adware as Microsoft Embeds Ads in the Start Menu (106)
- NVIDIA Points Intel Raptor Lake CPU Users to Get Help from Intel Amid System Instability Issues (106)
- AMD "Strix Halo" Zen 5 Mobile Processor Pictured: Chiplet-based, Uses 256-bit LPDDR5X (101)
- US Government Wants Nuclear Plants to Offload AI Data Center Expansion (98)
- AMD's RDNA 4 GPUs Could Stick with 18 Gbps GDDR6 Memory (87)
- Developers of Outpost Infinity Siege Recommend Underclocking i9-13900K and i9-14900K for Stability on Machines with RTX 4090 (85)
- Windows 10 Security Updates to Cost $61 After 2025, $427 by 2028 (84)