 3
3
NZXT Rogue mATX Gaming Case Review
Value & Conclusion »Assembly


Installing the parts on the mainboard tray is nothing out of the ordinary. Simply secure the board and parts with the supplied screws. The I/O cables within the Rogue are standard as well, which should give you the needed compatibility to any modern mainboard.
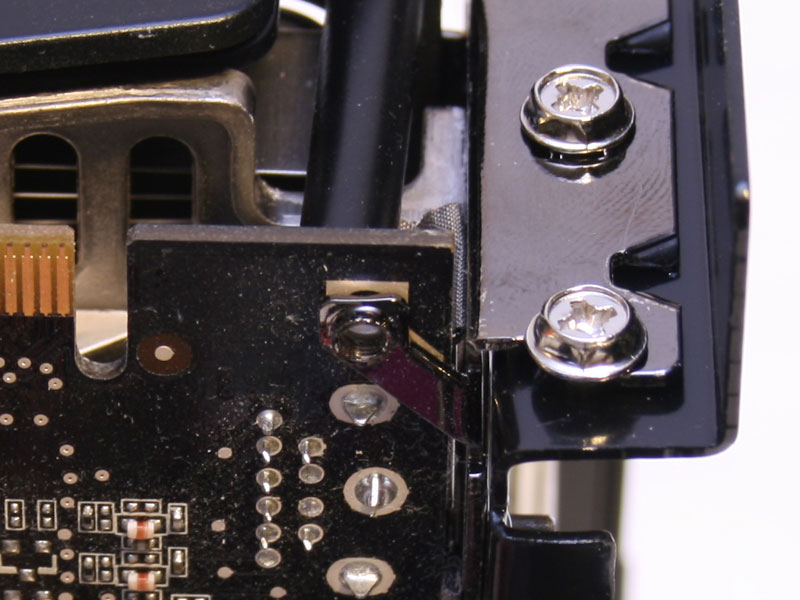


NZXT advertises the Rogue as being able to fit large graphic cards, like the GeForce 8800 GTX, but upon closer inspection I noticed that the EVGA cooler, which is a bit larger than the card PCB made it impossible to install the graphic card outside the case. So, to test general compatibilty, a Gainward 7300GT was installed. That card is just as tall as any normal GTX with a reference cooler. Installing the GPU and pushing the tray back into the case, became a nerve racking task, as the top of the opening scraped along the card, the SLI connector and further. I am not sure, if you want to do this to a high-end card, as the pressure is so large, that a bit of the PCB is shaven off in the process. The only way to install a high-end GPU was to place the tray back into the case and insert it traditionally. The same would be the case for a high end CPU cooler. So you may ask yourself, what is the use of a mainboard tray if you are forced to install the GPU and CPU heatsink within the case itself anyways?


Installing the optical drive is an easy task, simply slide it into place and screw it in with the supplied screws. If you did not manage to remove the side panels, find yourself a tiny screw driver or one with a 90 degree angle. Installing the hard drives is possible as well, but you will only be able to secure them with two screws. While this may not be optimal, two will hold the drive in place quite well. Installing the PSU is straight forward as well and you even have a bit of room around the unit. So even though there is no air vent in the top cover, there should still be enough airflow for any large PSU fan to function properly.
Finished Looks


Once the unit is put back together, I plugged it in and was greeted by very bright blue LED strips on either side of the case. Taking a look at the Rogue at that moment, made me forget some of the ceavats we found during inspection and assembly. It looks beautiful and the fans are surprisingly quiet, even though they are powered directly by the PSU and are running at full speed right away. The rear does actually look much nicer turned on as well. The blue LED fan and black rear complement each other nicely.
Apr 23rd, 2024 16:49 EDT
change timezone
Latest GPU Drivers
New Forum Posts
- No POST, and no display (8)
- CPB Enabled Boot Loop (6)
- Aida64 cache mem OC (5)
- hacked (72)
- FINAL FANTASY XIV: Dawntrail Official Benchmark (70)
- Meta Horizon OS (6)
- windows 11 (4)
- Which new games will you be buying? (299)
- need help with motherboard/ ram compability certainty (5)
- My computer setup - Request for opinions (11)
Popular Reviews
- Horizon Forbidden West Performance Benchmark Review - 30 GPUs Tested
- Fractal Design Terra Review
- Corsair 2000D Airflow Review
- Thermalright Phantom Spirit 120 EVO Review
- Minisforum EliteMini UM780 XTX (AMD Ryzen 7 7840HS) Review
- ASUS GeForce RTX 4090 STRIX OC Review
- NVIDIA GeForce RTX 4090 Founders Edition Review - Impressive Performance
- ASUS GeForce RTX 4090 Matrix Platinum Review - The RTX 4090 Ti
- Creative Pebble X Plus Review
- MSI GeForce RTX 4090 Gaming X Trio Review
Controversial News Posts
- Sony PlayStation 5 Pro Specifications Confirmed, Console Arrives Before Holidays (116)
- NVIDIA Points Intel Raptor Lake CPU Users to Get Help from Intel Amid System Instability Issues (105)
- AMD "Strix Halo" Zen 5 Mobile Processor Pictured: Chiplet-based, Uses 256-bit LPDDR5X (101)
- US Government Wants Nuclear Plants to Offload AI Data Center Expansion (98)
- Windows 10 Security Updates to Cost $61 After 2025, $427 by 2028 (84)
- Developers of Outpost Infinity Siege Recommend Underclocking i9-13900K and i9-14900K for Stability on Machines with RTX 4090 (84)
- TechPowerUp Hiring: Reviewers Wanted for Motherboards, Laptops, Gaming Handhelds and Prebuilt Desktops (74)
- Intel Realizes the Only Way to Save x86 is to Democratize it, Reopens x86 IP Licensing (70)