 4
4
Nanoxia Deep Silence 1 Review
Assembly & Finished Looks »A Closer Look - Inside


Simply remove the two thumbscrews holding each panel in place to gain access to the interior of the chassis. Each of them is lined with thin sound-dampening material, while the side fan placement comes with a thicker unit that has a pre-installed dust filter. The interior is all black, and the combination of the tooling is new to me, which means that Nanoxia invested into changing a few of the tooling elements. The motherboard tray has plenty of holes to help with cable routing, along with a large cut-out below the CPU area for easy access to cooler backplates. You will have around 20 mm of space behind the tray to route any cables, which should be enough in most cases; that is, if you route things nicely.


The eight hard drive bays are divided into three cages: two for three and one for two drives. Above that are the 5.25" bays; the bottom bay here can also hold a 5.25 to 3.5" tray, which allows one of the large bays to hold a smaller device. Black plastic locks have been placed on both sides of each bay. While this should be alright, we have seen these locks before and know that the plastic is not quite strong enough to keep the drives from having some wiggle room.


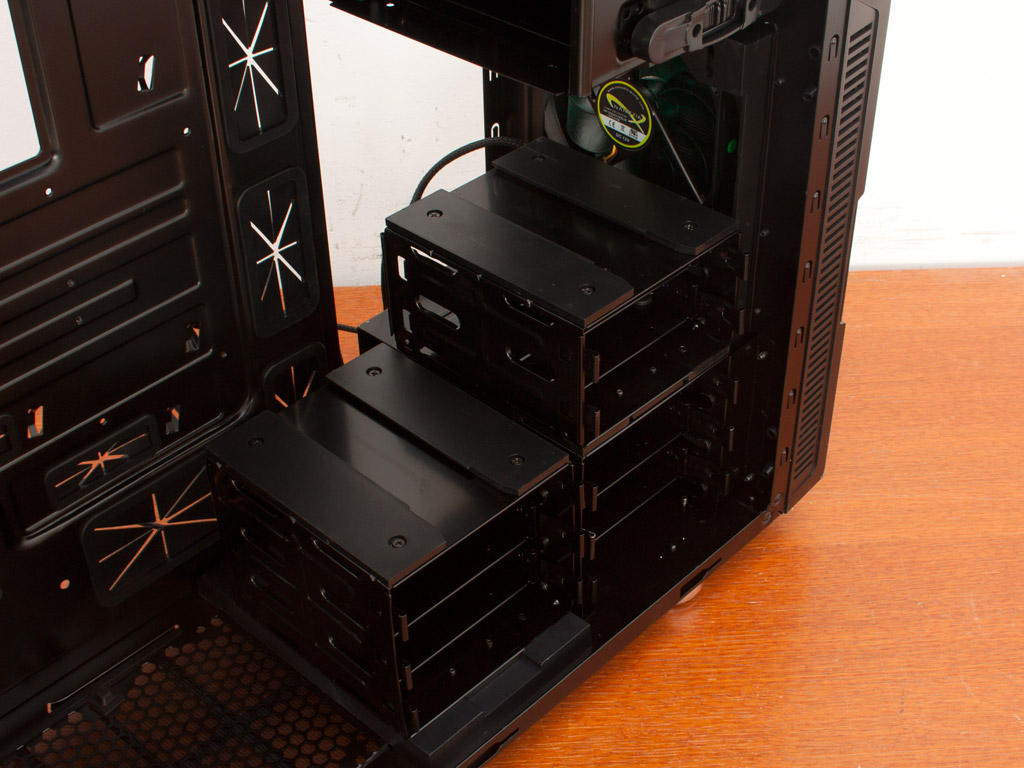

Thanks to the two modular bays and the secondary placement possibility, you can really mix things up with these hard drive bays. Above are a few possibilities to maximize the odds of keeping all eight drive bays regardless of which components or what type of cooling goes inside the chassis. The flexibility of the hard drive cages is actually pretty darn cool.


Turning our focus to the rear, the aforementioned PSU bay in the bottom comes with two little rubber bumps to support it. I would have liked to see four of them to ease installation a bit, but this should do. The lining for the PSU bay is made of simple but effective foam running along the edges of the bay. Two sets of mounting screws allow for the power supply to be installed with the fan facing down or up. Above that are the seven motherboard expansion slots with a cover for each being held in place by a thumbscrew. In the very top is the 140 mm exhaust fan, which also features semi-transparent green blades, sleeved cables, and a 3-pin motherboard header.

You may place either two 120 or 140 mm fans into the very top. There are actually multiple sets of holes for the 120 mm units, giving you a lot of flexibility with the installation. 240 or 280 radiators should also fit in here if they don't collide with any parts on the motherboard.


All cables within the chassis are black and of the usual kind. The two fan-controlling sliders can each adjust up to three cooling units, and the whole assembly draws power through a Molex connector.
Apr 23rd, 2024 21:11 EDT
change timezone
Latest GPU Drivers
New Forum Posts
- Realtek Modded Audio Driver for Windows 10/11 - Only for HDAUDIO (5688)
- What's your latest tech purchase? (20319)
- Post your Cinebench 2024 score (449)
- Sexy Mechanical Keyboard Thread (484)
- The TPU UK Clubhouse (24766)
- need help with motherboard/ ram compability certainty (14)
- My computer setup - Request for opinions (12)
- Show us your collections thread!! (282)
- What phone you use as your daily driver? And, a discussion of them. (1454)
- Is there a technical reason that Windows 11 doesn't have built into it battery charge limitation? (37)
Popular Reviews
- Fractal Design Terra Review
- Corsair 2000D Airflow Review
- Thermalright Phantom Spirit 120 EVO Review
- Minisforum EliteMini UM780 XTX (AMD Ryzen 7 7840HS) Review
- ASUS GeForce RTX 4090 STRIX OC Review
- NVIDIA GeForce RTX 4090 Founders Edition Review - Impressive Performance
- ASUS GeForce RTX 4090 Matrix Platinum Review - The RTX 4090 Ti
- MSI GeForce RTX 4090 Gaming X Trio Review
- MSI GeForce RTX 4090 Suprim X Review
- Gigabyte GeForce RTX 4090 Gaming OC Review
Controversial News Posts
- Sony PlayStation 5 Pro Specifications Confirmed, Console Arrives Before Holidays (116)
- NVIDIA Points Intel Raptor Lake CPU Users to Get Help from Intel Amid System Instability Issues (106)
- AMD "Strix Halo" Zen 5 Mobile Processor Pictured: Chiplet-based, Uses 256-bit LPDDR5X (101)
- US Government Wants Nuclear Plants to Offload AI Data Center Expansion (98)
- Windows 10 Security Updates to Cost $61 After 2025, $427 by 2028 (84)
- Developers of Outpost Infinity Siege Recommend Underclocking i9-13900K and i9-14900K for Stability on Machines with RTX 4090 (84)
- TechPowerUp Hiring: Reviewers Wanted for Motherboards, Laptops, Gaming Handhelds and Prebuilt Desktops (74)
- Intel Realizes the Only Way to Save x86 is to Democratize it, Reopens x86 IP Licensing (70)