 5
5
Synology DS207 Review
Performance »Installation & Software
Installation for this unit is pretty easy, I chose to attach the cables to the drives before I installed them into the enclosure as the clearances would be pretty tight once they were installed. The shorter cables on the lower HDD (Disk 1) and the longer cables for the upper drive (Disk 2). Simply slide the bottom drive in and secure it with the four screws, after that slide the upper drive in and secure it with the provided screws as well. Once your HDDs are secured in the drive plug in the SATA connectors and then the power input. Once you have checked all your connections its time to seal this baby back up and get ready for testing.Slide the cover back on, secure it with the provided screw. After I had cleaned off a spot on my desk for this unit it was time to make all the necessary hookups for power, and then network.
This unit comes packaged with some software to install onto your computer to properly access the features of this unit. I will be taking screenshots of the most important configuration options that can be found in the web interface; for the simple reason that if I were to show every menu there would be about 50+ screenshots. I have included the ones that I think will be most beneficial and explanative below. Having a quick look through the web menu gave me a fairly clear idea of some of the more notable things that this little server can do.
With the click of a button this unit will be a web server, FTP server, iTunes server, and BitTorrent download server. This thing will do pretty much anything you could want in a server without all the hassle of setup and maintenance! With the simple click of a button you can turn this unit into virtually anything.
When you enable the web server, or any of the other features there is a corresponding folder created on the unit that you simply upload the files to and away you go. Before we can do any of this though we need to setup the unit's HDDs, and RAID options. After connecting and powering on the unit, I popped in the driver disc and installed the Synology Assistant, which in turn readied the DS207 for my use. Once this was done I was able to log onto the unit. Simply open the Synology Assistant, click the search button, it will find the DS207 and then you can log into it from where which brings you to the web based administration panel.
This panel will give you control over every aspect of the DS207, from simple naming, function control all the way to user groups!
Web Interface
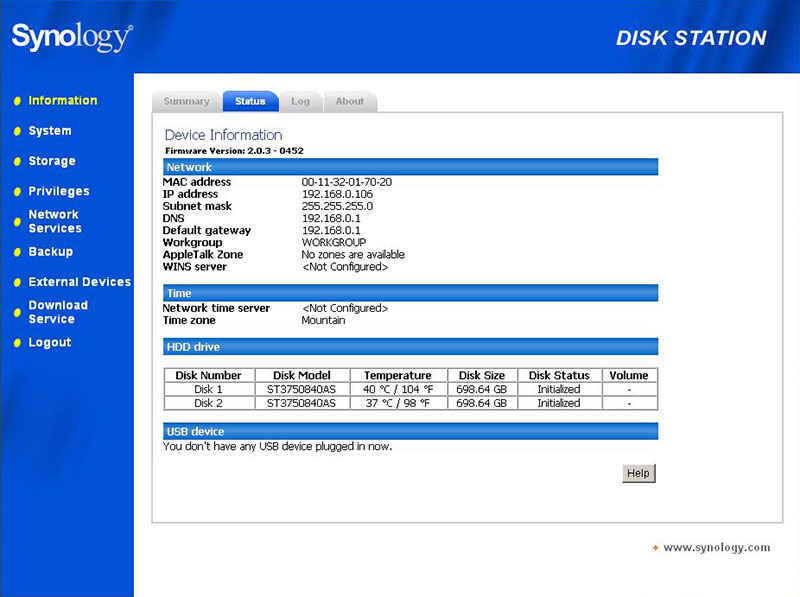
Time to navigate through the web interface and make sure that we have everything configured correctly. When you first log into the webadmin you get a nice summary of the unit, the name of it model, serial number, IP address, date, system temperature, as well as some quick links.
Moving over to the status screen of the unit we can see a bit more detail such as the MAC address, all IP related information, the workgroup, the time, as well as information on each disk that is installed in the unit, their model, temperature, size, and what volume they are setup for.
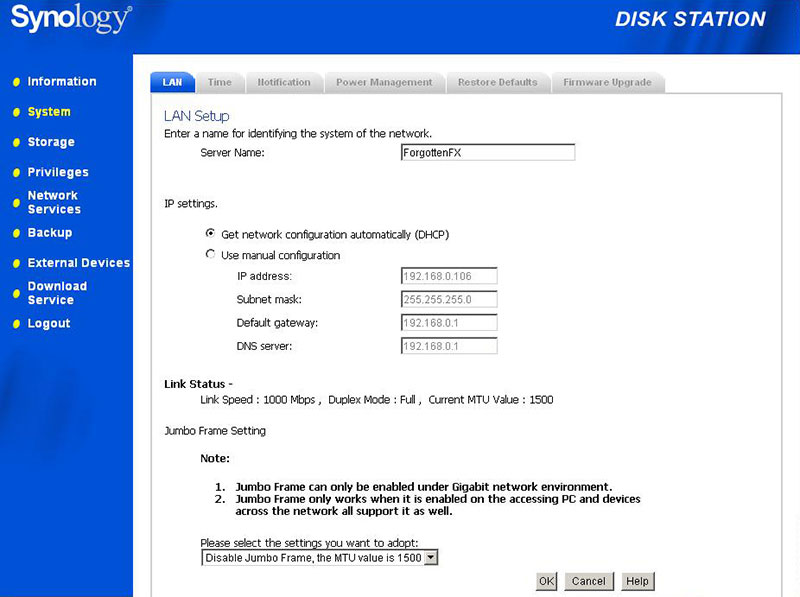
Moving on down the list we have the System link on the left which brings us to the LAN tab. This will allow you to name your server, as well as configure your IP settings, in this case I will be letting my Router assign the IP so automatic will be fine. You can also set your Jumbo frame on or off, as well as the MTU value accordingly (though these will only be beneficial in a completely GigaBit environment). In this area you can also set the power management settings (HDD standby) as well as manage the firmware on the unit, restore the unit to defaults, or update the firmware.
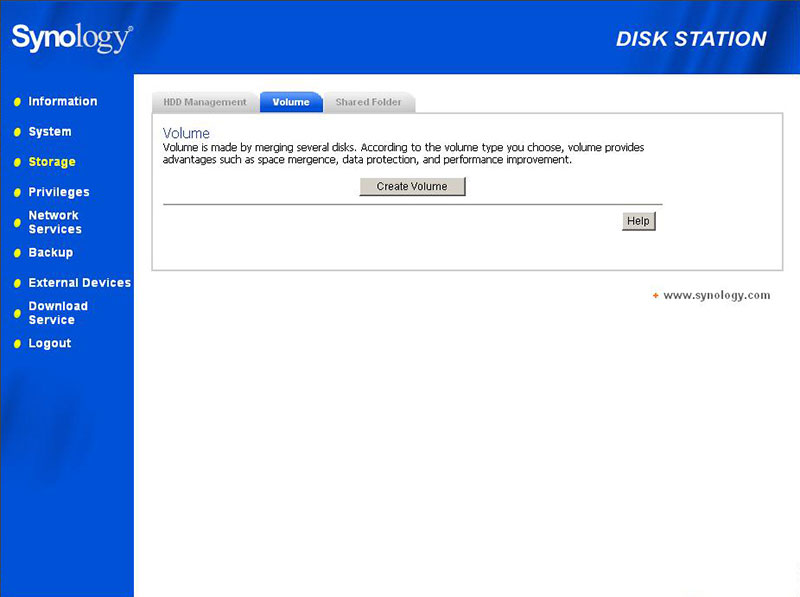
Next on the list is Storage. The only really interesting thing in here is the Volume tab which will give you control over how you want the volumes setup on your drives. In this case I will be setting them up in RAID 1 for better data safety, once you click the OK button it will want to check the consistency on the volume after telling it to do a complete check the unit took about 3-4 hours to complete the check and become ready.


After setting up the volume and the RAID array it was time to take a look at the permissions, in this menu we have complete control to add/remove users and modify their various permissions, and we can do this for individual users of make new groups if there are to be a lot of users. For my application a single user should be fine, so I will be using the default "admin" user.


Now we have the 'Network Services' tab which is where all the fun really starts. From this menu we have all the control to setup the workgroup, the FTP service with port settings, as well as bandwidth restrictions. Next tab we have the "Web Service" control. In here we can enable secure connections, modify the HTTP port, enable the 'photo station', 'web station', and 'MySQL' options. For my application I will be turning on the web station, as well as MySQL to test with a website. This unit comes with a multimedia server function though for my application I do not need a media server as I have another computer dedicated to that. Last on the list there is the iTunes service configuration tab, allowing to you to share music between multiple copies of iTunes on various computers. Personally I do not foresee this as being very useful as simply sharing the folder across a network would work equally as well, and you would not be limited to use iTunes either.


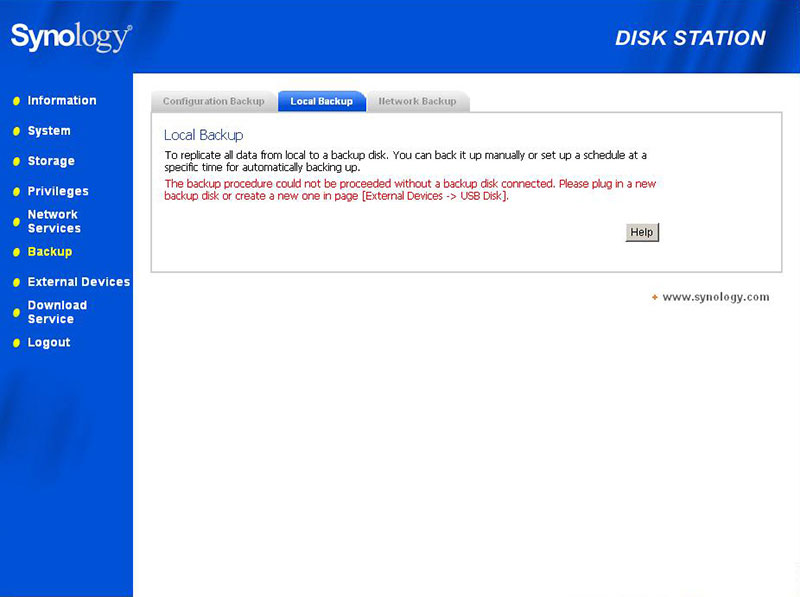
The backup section of this very complete web interface gives the user control over all the backup options this unit comes packed with. From backing up the system configuration of the DS207, being able to configure local backups as well we are able to setup backup schedules for files so that they will be backed up unattended without having to worry about it. If you have multiple Synology Disk Stations you are able to set them up to backup to this unit, with this level of backup you could have a VERY redundant and secure backup solution if you had a couple Disk Stations configured this way.


That pretty much sums up all the options that should be gone over, there is also a menu that lists the status of external devices, such as a USB drive, or an eSATA hard drive. The last menu that you can configure is the Download Service, this keeps track of any file downloads that you moved to the Disk station to finish once you had shut down your computer.
This goes hand in hand with the client side software that Synology packages, you simply start the downloads with it, transfer them to the DS207 and then turn your computer off, the files will continue to download even when your computer is off, you can then retrieve them after you have restarted your computer and logged back into he DS207. Now that we have had a peek through the inner workings of this unit, as well as configured it to my liking its time for some testing!
Apr 18th, 2024 21:12 EDT
change timezone
Latest GPU Drivers
New Forum Posts
- XFX RX560 1024 shaders 16 CU 4GB from Aliexpress (6)
- Is it possible that the atmosphere is losing less of its "shield" capabilities due to more and more jets/rockets puncturing it daily? (25)
- Do you use Linux? (228)
- FINAL FANTASY XIV: Dawntrail Official Benchmark (55)
- Why is SteamOS taking so long to come to desktop for AMD users, when ChimeraOS is the same thing almost? (16)
- MSI Z790 owners - be careful, the screw can crack the chipset (5)
- Should the CDPR make the Fallout 5 instead? (12)
- Cinebench crashed my PC. My Wi-Fi stopped working, and I keep getting a "Please wait" screen when I boot up my PC. (1)
- TPU's Nostalgic Hardware Club (18452)
- WX9100 Power mods - help w/ powerplay tables (107)
Popular Reviews
- Horizon Forbidden West Performance Benchmark Review - 30 GPUs Tested
- PowerColor Radeon RX 7900 GRE Hellhound Review
- Fractal Design Terra Review
- Corsair 2000D Airflow Review
- Minisforum EliteMini UM780 XTX (AMD Ryzen 7 7840HS) Review
- Thermalright Phantom Spirit 120 EVO Review
- Creative Pebble X Plus Review
- FiiO KB3 HiFi Mechanical Keyboard Review - Integrated DAC/Amp!
- ASUS GeForce RTX 4090 STRIX OC Review
- NVIDIA GeForce RTX 4090 Founders Edition Review - Impressive Performance
Controversial News Posts
- Sony PlayStation 5 Pro Specifications Confirmed, Console Arrives Before Holidays (109)
- NVIDIA Points Intel Raptor Lake CPU Users to Get Help from Intel Amid System Instability Issues (102)
- US Government Wants Nuclear Plants to Offload AI Data Center Expansion (98)
- Windows 10 Security Updates to Cost $61 After 2025, $427 by 2028 (82)
- Developers of Outpost Infinity Siege Recommend Underclocking i9-13900K and i9-14900K for Stability on Machines with RTX 4090 (82)
- TechPowerUp Hiring: Reviewers Wanted for Motherboards, Laptops, Gaming Handhelds and Prebuilt Desktops (71)
- Intel Realizes the Only Way to Save x86 is to Democratize it, Reopens x86 IP Licensing (70)
- AMD Zen 5 Execution Engine Leaked, Features True 512-bit FPU (63)