 0
0
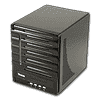
Thecus N5550 Review
Interactivity with Smart Phones »Local Display Module and XBMC Install Guide
Unfortunately, the installation of modules isn't as easy as it is with a QNAP or Synology NAS, so we decided to provide a small how-to guide on how you can install Local Display and XBMC to the N5550 to check on its multimedia capabilities, which are unfortunately very poor.For starters, you have to make sure your NAS has the latest firmware installed. Our sample had v2.04.01 installed, but we tried the beta v2.04.01.2 firmware because installing and activating Local Display gave us many problems. The beta v2.04.01.2 firmware can be downloaded here. Installing the newer firmware allowed us to overcome the problems we faced initially, though we are pretty sure that the NAS firmware wasn't the main culprit behind the problems we faced.
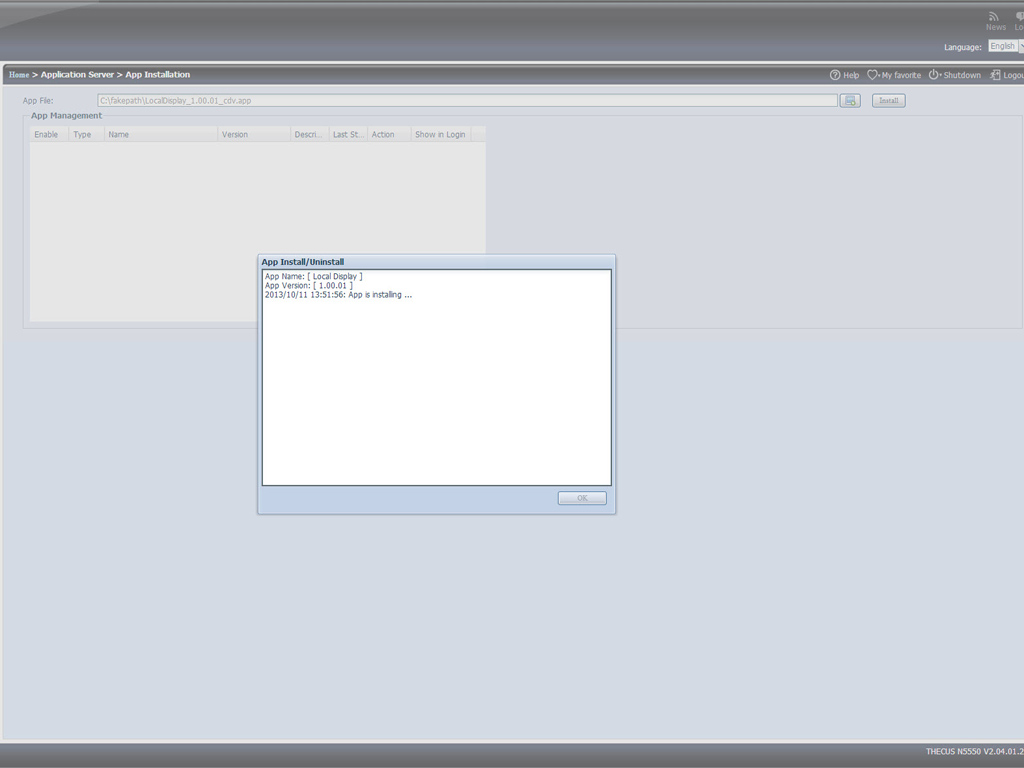
We used Local Display v1.00.01 because it was the only properly working version. Here, we should note that after a number of failed installs and problems with installing the Local Display module, we had to remove the RAID partition and default the NAS in order for the installation of Local Display to complete. Though we tried the right package, the Local Display module refused to install, showing an error message about an incompatibility issue with the Atom processor. The problem never occurred again after completely defaulting the NAS. However, deleting RAID isn't an option if you have lots of date on your disks. Thecus should find and examine these problems during the installation of modules and improve the whole procedure by making it more intuitive and user friendly.
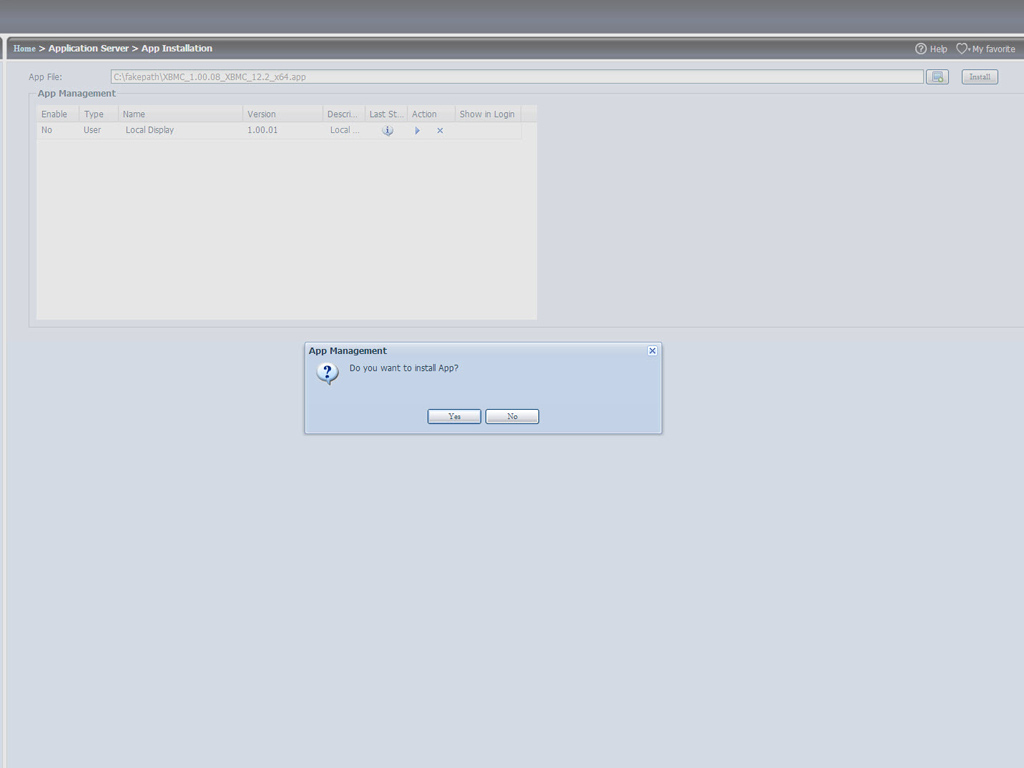
After you have successfully installed the Local Display module, hook an HDMI cable, USB mouse, and, optionally, your USB keyboard up to the NAS, enable the above module, and perform a reboot. Now, install the XBMC package once the NAS reboots. You will find the XBMC package in this thread.
With installation complete and after activating the XBMC module, you will be presented with three options on the monitor connected to the NAS: Firefox, Command Prompt, and XBMC. Click the latter and your NAS will be transformed into a multimedia player, or not because there is a catch. Every MKV video, HD or SD, we tried failed to play, and XBMC often simply restarted while it also froze up, forcing us through a manual restart of the NAS. Even normal AVI videos weren't reproduced properly since we noticed freezes and frame drops. We don't think that the hardware is responsible for these problems since XMBC runs smoothly in other NAS boxes with similar hardware installed, reproducing even high bit-rate files without a hiss. This module must be defective. We cannot blame Thecus since it is made by a third party developer, but it would be to the benefit of Thecus to assist in its development.
Bottom line: The N5550 is far from a fully capable multimedia player, so don't rush to get rid of your HTPC or media player once you buy this NAS. Lots of work needs to take place to make Local Display and XBMC installation more friendly and their operation more stable and effective. The current software and its modules situate the Thecus N5550 NAS miles away from a multimedia station, which is a shame because it has the necessary hardware to take on the role.
The following screenshots will walk you through the installation of the Local Display and XMBC modules, step by step.


Now that we installed Local Display, let's install the XBMC module. Follow the steps shown in the screenshots below to do so.


Now, both Local Display and XBMC are on your NAS.
Apr 19th, 2024 20:51 EDT
change timezone
Latest GPU Drivers
New Forum Posts
- I just succesfully baked DDR4 (70)
- Windows 11 General Discussion (5014)
- GTX 1060 6GB ASUS GPU Shuts Down after 5min of Gaming (4)
- Official Board Game Discussion (1)
- USB C to USB A hub (42)
- The Official Linux/Unix Desktop Screenshots Megathread (688)
- AMD RX 7000 series GPU Owners' Club (1068)
- I9 13890HX undervolting Suggestions (4)
- Undervolting Dell XPS 14 9440 is it possible? (7)
- Share your AIDA 64 cache and memory benchmark here (2884)
Popular Reviews
- Horizon Forbidden West Performance Benchmark Review - 30 GPUs Tested
- Fractal Design Terra Review
- Corsair 2000D Airflow Review
- Thermalright Phantom Spirit 120 EVO Review
- Minisforum EliteMini UM780 XTX (AMD Ryzen 7 7840HS) Review
- Creative Pebble X Plus Review
- FiiO KB3 HiFi Mechanical Keyboard Review - Integrated DAC/Amp!
- ASUS GeForce RTX 4090 STRIX OC Review
- NVIDIA GeForce RTX 4090 Founders Edition Review - Impressive Performance
- ASUS GeForce RTX 4090 Matrix Platinum Review - The RTX 4090 Ti
Controversial News Posts
- Sony PlayStation 5 Pro Specifications Confirmed, Console Arrives Before Holidays (111)
- NVIDIA Points Intel Raptor Lake CPU Users to Get Help from Intel Amid System Instability Issues (102)
- US Government Wants Nuclear Plants to Offload AI Data Center Expansion (98)
- AMD "Strix Halo" Zen 5 Mobile Processor Pictured: Chiplet-based, Uses 256-bit LPDDR5X (84)
- Windows 10 Security Updates to Cost $61 After 2025, $427 by 2028 (82)
- Developers of Outpost Infinity Siege Recommend Underclocking i9-13900K and i9-14900K for Stability on Machines with RTX 4090 (82)
- TechPowerUp Hiring: Reviewers Wanted for Motherboards, Laptops, Gaming Handhelds and Prebuilt Desktops (72)
- Intel Realizes the Only Way to Save x86 is to Democratize it, Reopens x86 IP Licensing (70)