 47
47
Thermaltake Bigwater 760i Review
Installation Continued »Installation
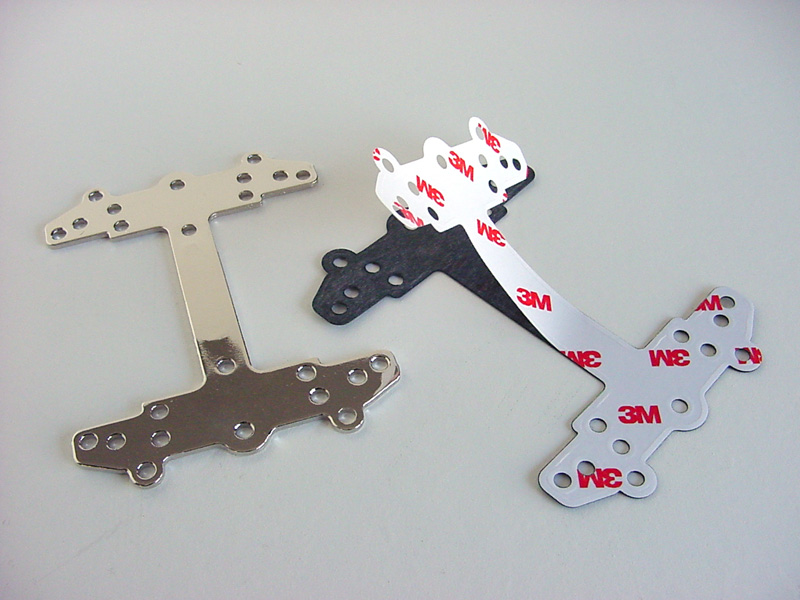


To assemble the mounting system the thin plastic insulator needs to be attached to the metal H-plate. Simply remove the backing on the insulator, line it up and press it into place. Then this process gets repeated to attach the black foam piece to the insulator.

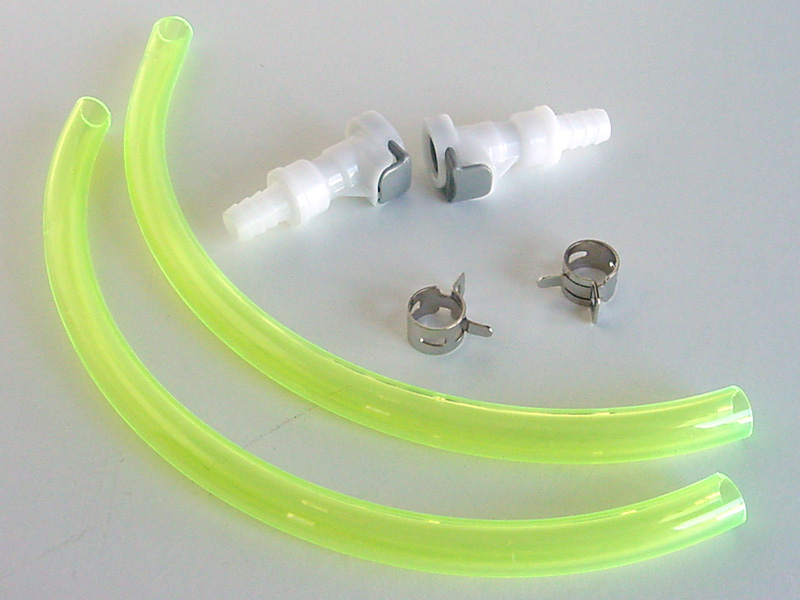


Mounting the couplings to the tubing is an easy process. Simply cut the tubing to the desired length with a regular pair of scissors and slide the coupling into the end of the tubing. Next, take two of the clamps and slide one down each of the tubes, and move them onto the barbs of the couplings by squeezing them open with a pair of pliers.


To attach the tubes to the block, remove the nuts from the compression fittings and slide them over the other ends of the tubes making sure they are facing the right direction. Slide the open end of each tube over the barbs on the block and then tighten the nuts to secure the tubes. If needed, a 19mm wrench can help secure the nuts in place.


The manual presents the user the option to remove the protective backing from the black foam on the backplate assembly shown previously. Doing so would make the backplate almost permanently attached to the motherboard. If the user plans at any point that they may upgrade the motherboard or the cooling system, it is recommended to leave the film on the foam so the backplate can easily be removed. To mount the backplate the four longer screws will be inserted through the backplate assembly. The hardware required to mount the block on an Intel LGA775 board are the four red felt washers, four standoffs and four thumb nuts.


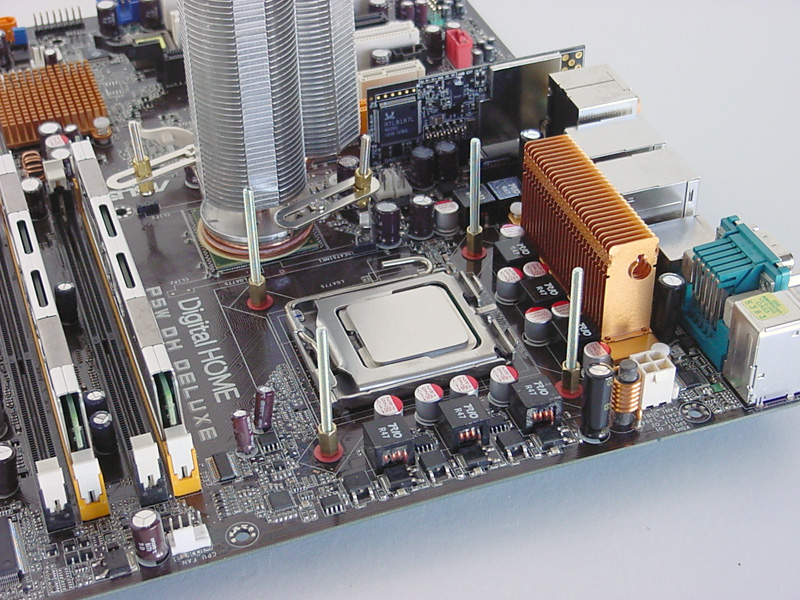

With the motherboard removed from the case or motherboard tray, the backplate needs to be lined up with the CPU socket and the screws inserted through the holes in the motherboard. Next, the four red felt washers need to be dropped over the top on the four screws, and then the four standoffs should be threaded onto the screws and tightened in a criss-cross pattern until secure. Arctic Silver 5 thermal compound will be used for this installation, and it should be applied according to manufacturer's instructions. Next the waterblock should slide down over the CPU on the screws and the four thumb nuts should be added and tightened in a criss-cross pattern. In a tower case it is important to install the block so that the fittings are lined up vertically and not horizontally. This will aid in the removal of air bubbles from the loop once the system is installed.
Apr 24th, 2024 17:32 EDT
change timezone
Latest GPU Drivers
New Forum Posts
- Will a RTX 4070 TI super bottleneck a Ryzen 9 7950X3D? (54)
- 3DMARK "LEGENDARY" (189)
- TPU's Nostalgic Hardware Club (18462)
- Best SSD for system drive (74)
- Meta Horizon OS (14)
- im new to throttelstop and i think i messed it up by copying others any hints would be very much aprreciated (0)
- Is It The 1080 TI The Best GPU Ever? (214)
- What phone you use as your daily driver? And, a discussion of them. (1470)
- Core PL1 + GPU PL1 + Ring EDP OTHER (6)
- Rare GPUs / Unreleased GPUs (1875)
Popular Reviews
- Fractal Design Terra Review
- Thermalright Phantom Spirit 120 EVO Review
- Corsair 2000D Airflow Review
- Minisforum EliteMini UM780 XTX (AMD Ryzen 7 7840HS) Review
- ASUS GeForce RTX 4090 STRIX OC Review
- NVIDIA GeForce RTX 4090 Founders Edition Review - Impressive Performance
- ASUS GeForce RTX 4090 Matrix Platinum Review - The RTX 4090 Ti
- MSI GeForce RTX 4090 Gaming X Trio Review
- MSI GeForce RTX 4090 Suprim X Review
- Gigabyte GeForce RTX 4090 Gaming OC Review
Controversial News Posts
- Sony PlayStation 5 Pro Specifications Confirmed, Console Arrives Before Holidays (116)
- NVIDIA Points Intel Raptor Lake CPU Users to Get Help from Intel Amid System Instability Issues (106)
- AMD "Strix Halo" Zen 5 Mobile Processor Pictured: Chiplet-based, Uses 256-bit LPDDR5X (101)
- US Government Wants Nuclear Plants to Offload AI Data Center Expansion (98)
- Windows 10 Security Updates to Cost $61 After 2025, $427 by 2028 (84)
- Developers of Outpost Infinity Siege Recommend Underclocking i9-13900K and i9-14900K for Stability on Machines with RTX 4090 (84)
- TechPowerUp Hiring: Reviewers Wanted for Motherboards, Laptops, Gaming Handhelds and Prebuilt Desktops (78)
- Intel Realizes the Only Way to Save x86 is to Democratize it, Reopens x86 IP Licensing (70)