 0
0
Thermaltake Muse LanDisk Review
Installation »
Power for the harddisk is delivered by an external PSU. This is necessary, because USB is specified to max. 500mA.

This button has to be pressed to open the enclosure. No screwdriver required.

Inside you will find some empty space for your 3.5" HDD and a small PCB which has the controller chip on-board. The cable is a standard IDE cable, if you lose or break the cable you can just use any regular HDD cable.
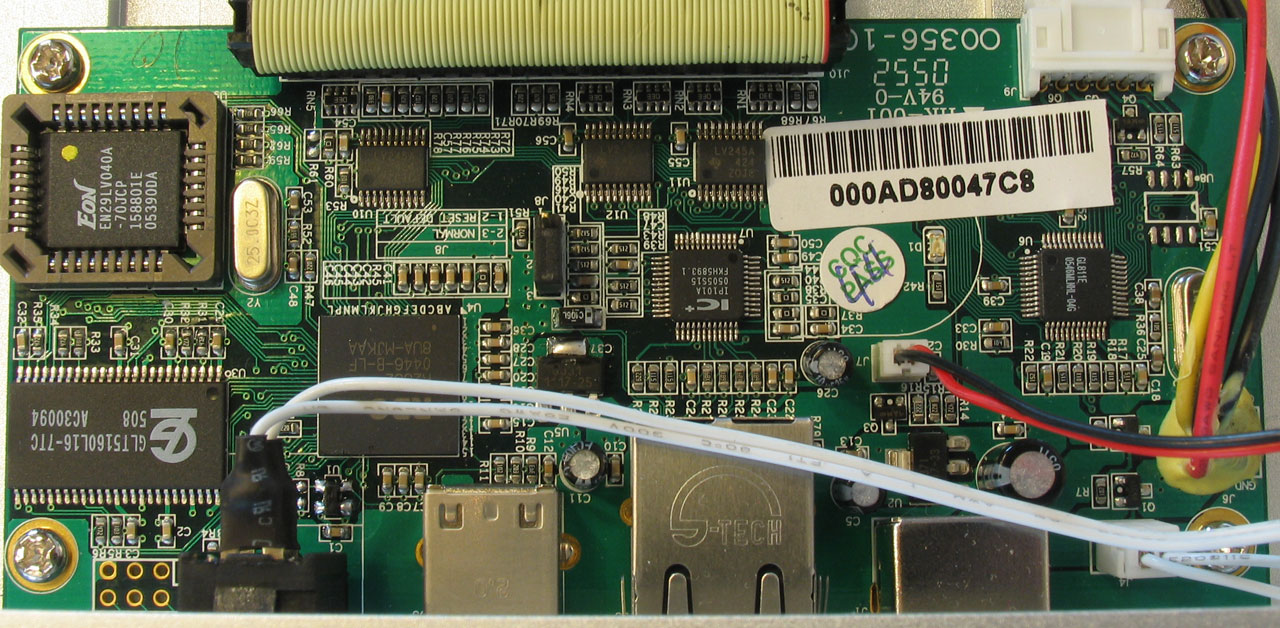
Supporting Ethernet and USB at the same time does not seem to be so easy. The PCB is packed with ICs.

When the unit is powered on, the analog VU meter is lit up in a nice blue. The meter's needle moves with harddisk activity.

One side has the power switch and all the external connectors for USB, Ethernet and power supply.

To make sure that your HDD is placed safe inside the unit, this foam pressed down on the HDD when the lid is closed.

For additional visualization three LEDs are installed. Left shows if Ethernet is connected, middle whether the interface is 10 MBit or 100 MBit. The LED on the right is lit when USB is active.
Apr 24th, 2024 19:00 EDT
change timezone
Latest GPU Drivers
New Forum Posts
- GTX 1070 Ti - TDP Issues - Always Power Throttling (4)
- The TPU UK Clubhouse (24782)
- 2022-X58/1366 PIN Motherboards NVME M.2 SSD BIOS MOD Collection (656)
- Will a RTX 4070 TI super bottleneck a Ryzen 9 7950X3D? (57)
- Meta Horizon OS (15)
- Is there a technical reason that Windows 11 doesn't have built into it battery charge limitation? (41)
- Best SSD for system drive (75)
- How are MX330 and İ5 1135G7 ? (9)
- 3DMARK "LEGENDARY" (189)
- TPU's Nostalgic Hardware Club (18462)
Popular Reviews
- Fractal Design Terra Review
- Thermalright Phantom Spirit 120 EVO Review
- Corsair 2000D Airflow Review
- Minisforum EliteMini UM780 XTX (AMD Ryzen 7 7840HS) Review
- ASUS GeForce RTX 4090 STRIX OC Review
- NVIDIA GeForce RTX 4090 Founders Edition Review - Impressive Performance
- ASUS GeForce RTX 4090 Matrix Platinum Review - The RTX 4090 Ti
- MSI GeForce RTX 4090 Gaming X Trio Review
- MSI GeForce RTX 4090 Suprim X Review
- Gigabyte GeForce RTX 4090 Gaming OC Review
Controversial News Posts
- Sony PlayStation 5 Pro Specifications Confirmed, Console Arrives Before Holidays (116)
- NVIDIA Points Intel Raptor Lake CPU Users to Get Help from Intel Amid System Instability Issues (106)
- AMD "Strix Halo" Zen 5 Mobile Processor Pictured: Chiplet-based, Uses 256-bit LPDDR5X (101)
- US Government Wants Nuclear Plants to Offload AI Data Center Expansion (98)
- Windows 10 Security Updates to Cost $61 After 2025, $427 by 2028 (84)
- Developers of Outpost Infinity Siege Recommend Underclocking i9-13900K and i9-14900K for Stability on Machines with RTX 4090 (84)
- TechPowerUp Hiring: Reviewers Wanted for Motherboards, Laptops, Gaming Handhelds and Prebuilt Desktops (78)
- AMD's RDNA 4 GPUs Could Stick with 18 Gbps GDDR6 Memory (70)