 2
2
VLSystem LIS 2 Blue Eye VFD Review
Value and Conclusion »Installation:
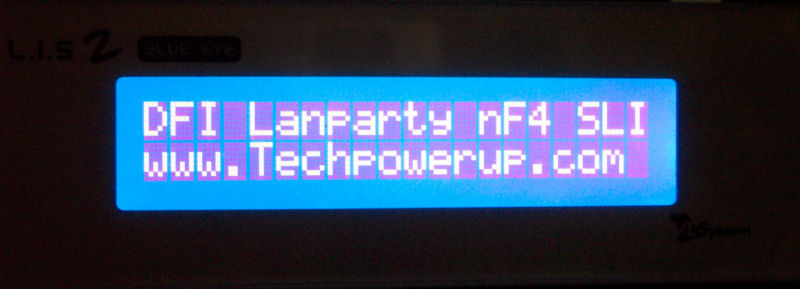
Installing the unit into my CM Stacker was no sweat. It’s exactly the same as with any other 5.25” bay device, just fasten the screws and you’re pretty much done. Don’t forget to connect the power and USB cables, and if you wish, you can connect up to 4 fans to the unit for automatic or manual control. I chose to use the internal USB cable, and there were no compatibility issues with my DFI nF4 motherboard, everything fit perfectly. I would advise that before you screw in the unit, you connect all the cables to the LCD, as plugging them in with the unit inside your case can be quite problematic. After everything was plugged in, I fired up my PC. The unit came to life with a flash of its bright blue LCD, followed by an animation. As I logged on, Windows automatically detected new hardware. I decided to click cancel and download the newest drivers (USB and control center for the LCD) from the internet. I installed the USB drivers first, then the Multimedia control center ones. The unit was incorrectly detected at first. Then Windows came up with another “New hardware found” dialog, which I had to go through before the unit was fully functional. This three step installation is not particularly user friendly, and can scare off some novice users. It would be great if VL System could make an All in One driver package, after which installation would be a breeze.

Software
The unit comes with its own software called Multimedia Control Center. The program starts automatically with windows and sits in your system tray. Each time Windows starts, the unit is detected, and your settings are loaded.
The software sports a lot of functions, for example you can set your LCD to show your temps, it can communicate with MBM or SpeedFan, and then show voltages and fan RPM; CPU load and memory load can also be shown. Defining what you want to see is done through input boxes; values such as temp, voltage, etc., are stored as variables and can be included in the text.


Under auto user, you can set up a routine of the information you want shown, and the unit will automatically alternate between the items.


I also tried out the unit with MBM 5, using custom settings for my motherboard from the DFI Street website. After the unit detected MBM5, I was given several presets for temperatures, voltages, fan RPM and a user set option.
To complete the system sensor reading abilities section, I finally decided to install Speedfan. The options for Speedfan and MBM5 are exactly the same, so you won't miss out on anything choosing either one - stick to what you prefer.
Moving on; I wanted to see how good the spectrum analyzer function of the unit was, for these purposes I chose to install the Windows Media Player plug-in. I followed the instructions as written in the manual, but at first the unit refused to show anything useful. As soon as I chose the WMPLAYER option from the list, the unit would show Windows Media Play Indicator and just sit there, no matter what song was playing in the background. After a restart of Media Player, the spectrum analyzer came to life. However, I think that this function is perhaps the weakest part of the whole unit - the overdraw of the LCD is just not up to the task of changing data (in this case making columns larger/smaller) quickly. It doesn't look dynamic enough, you can partly solve this mishap if you only have the analyzer on the left hand side of the screen and track info on the right. Here, the unit scrolls continuously so that you can see the full track name. If you thought that this unit could change your PC into a Hi-fi, I suggest that you look somewhere else, you might be disappointed.
Unfortunately, the unit does not scroll from side to side if you enter too much information to be displayed. On one hand this means that you can’t miss what you’re looking for (looking at the unit while it’s scrolling), but you cannot enter more information than the amount that physically fits on the screen of the unit.
You can also choose the font you want for the program's headings and options, although it is not particularly useful, it is a nice touch.
Here you can see a short clip (600 KB) of what the auto user option does.
The users who demand more graphic output can use the built in CG Builder:

Through this software you can create logos such as the one above.
As for the fan control, the unit CAN regulate from 0 to 100%, although this is not reccomended due to the heat buildup that would occur at low percentages. As a safety feature, the fan control amount is locked between 70 - 100%, but you can unlock it at your own risk. The fan capacity is 10W (12V, 0.83A), which is just enough to power a 80mm Vantec Tornado, but your amp-hungry Deltas will have to sit out on this one. As the unit is not primarily intended to be a fan controller, I wouldn't take this as a major disadvantage.
Apr 23rd, 2024 20:41 EDT
change timezone
Latest GPU Drivers
New Forum Posts
- What's your latest tech purchase? (20319)
- Post your Cinebench 2024 score (449)
- Sexy Mechanical Keyboard Thread (484)
- The TPU UK Clubhouse (24766)
- need help with motherboard/ ram compability certainty (14)
- My computer setup - Request for opinions (12)
- Show us your collections thread!! (282)
- Realtek Modded Audio Driver for Windows 10/11 - Only for HDAUDIO (5687)
- What phone you use as your daily driver? And, a discussion of them. (1454)
- Is there a technical reason that Windows 11 doesn't have built into it battery charge limitation? (37)
Popular Reviews
- Fractal Design Terra Review
- Corsair 2000D Airflow Review
- Thermalright Phantom Spirit 120 EVO Review
- Minisforum EliteMini UM780 XTX (AMD Ryzen 7 7840HS) Review
- ASUS GeForce RTX 4090 STRIX OC Review
- NVIDIA GeForce RTX 4090 Founders Edition Review - Impressive Performance
- ASUS GeForce RTX 4090 Matrix Platinum Review - The RTX 4090 Ti
- MSI GeForce RTX 4090 Gaming X Trio Review
- MSI GeForce RTX 4090 Suprim X Review
- Gigabyte GeForce RTX 4090 Gaming OC Review
Controversial News Posts
- Sony PlayStation 5 Pro Specifications Confirmed, Console Arrives Before Holidays (116)
- NVIDIA Points Intel Raptor Lake CPU Users to Get Help from Intel Amid System Instability Issues (106)
- AMD "Strix Halo" Zen 5 Mobile Processor Pictured: Chiplet-based, Uses 256-bit LPDDR5X (101)
- US Government Wants Nuclear Plants to Offload AI Data Center Expansion (98)
- Windows 10 Security Updates to Cost $61 After 2025, $427 by 2028 (84)
- Developers of Outpost Infinity Siege Recommend Underclocking i9-13900K and i9-14900K for Stability on Machines with RTX 4090 (84)
- TechPowerUp Hiring: Reviewers Wanted for Motherboards, Laptops, Gaming Handhelds and Prebuilt Desktops (74)
- Intel Realizes the Only Way to Save x86 is to Democratize it, Reopens x86 IP Licensing (70)