 0
0
Xigmatek Asgard 381 Review
Assembly & Finished Looks »A Closer Look - Inside
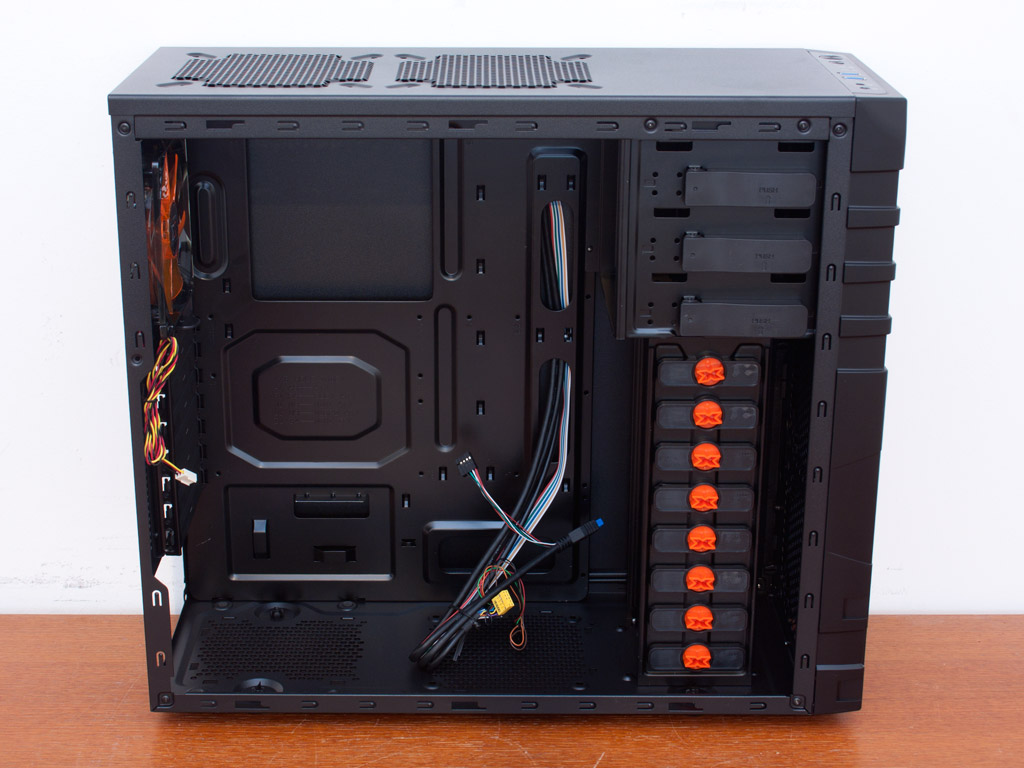

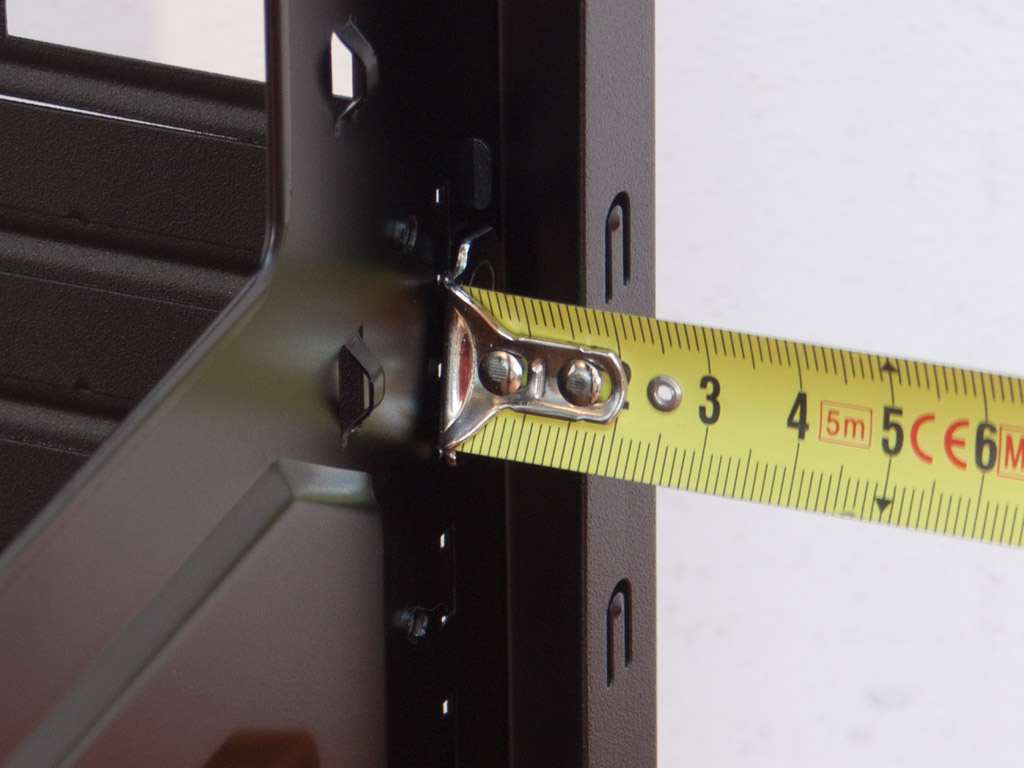
To gain access to the interior, simply unscrew the thumb screws holding each side panel in place. The entire inside of the case is painted black to match the exterior, and, nowadays, we would not expect anything else. Xigmatek keeps things simple within the case, with a basic row of hard drive bays and a screw-less plastic system across all drive bays. A large opening below the CPU gives easy access to any backplates, and a few openings along the edge of the motherboard make cable routing easier. You have around 18 mm to work with along the L-shaped trench of the chassis, while the rest of the backside only offers 15 mm, which is a bit tight, but it should work.


The aforementioned HDD drive bays are of the simple kind. They cannot be removed and point towards the rear of the case instead of the side. Basic, screw-less locks made of plastic line these bays on one side. Above the bays are the three 5.25" bays. They also feature plastic locks. Having seen both of these system types before, I know that they don't really hold well, but we will see how these specific ones fare on the next page.


The bottom PSU bay in the rear of the chassis comes with four foam-covered bumps and requires normal screws to be attached. There is plenty of space here for long units if need be. Above that are the seven aforementioned expansion slots. The covers can easily be broken out with a screwdriver by gently applying some force to them. I do suggest you break them out before installing the motherboard, so that you do not end up damaging the motherboard in the process. In the very top, the 120 mm exhaust fan with the orange blades can clearly be seen. It comes with a 3-pin connector but no LEDs.


While you are not able to install 2.5" drives into the larger bays, there is a single slot for such a drive on the floor of the case. The screws to this one have to be applied through the underside of the chassis. A single 120 or 140 mm cooling fan may also be placed on the floor of the case, but that would limit the available space for the power supply.


The top air vent may hold two 120 or 140 mm units. While there may be enough space for radiators, the holes are not lined up properly to use of such units. A basic dust filter made of metal mesh has been placed onto the underside of the case. While this works in keeping larger dust particles out, finer ones will still be able to enter the case through these vents.


All the cables within the Asgard 381 are of standard variety and come sleeved in the default color, which introduces an intrusive element of color to the insides of the chassis. System Integrators will not care about such a minor deviation, but end users may.
Apr 25th, 2024 19:28 EDT
change timezone
Latest GPU Drivers
New Forum Posts
- Best SSD for system drive (80)
- Dell Workstation Owners Club (3055)
- Core PL1 + GPU PL1 + Ring EDP OTHER (9)
- Which new games will you be buying? (315)
- BSOD if I touch the pcache offset voltage in throttlestop (i9-13900hx lenovo pro 7i) (23)
- Alphacool CORE 1 CPU block - bulging with danger of splitting? (16)
- How to check flatness of CPUs and coolers - INK and OPTICAL INTERFERENCE methods (112)
- TPU's Nostalgic Hardware Club (18464)
- Post your Cinebench 2024 score (450)
- Ubuntu 24.04 LTS released (2)
Popular Reviews
- Fractal Design Terra Review
- Thermalright Phantom Spirit 120 EVO Review
- Corsair 2000D Airflow Review
- Minisforum EliteMini UM780 XTX (AMD Ryzen 7 7840HS) Review
- ASUS GeForce RTX 4090 STRIX OC Review
- NVIDIA GeForce RTX 4090 Founders Edition Review - Impressive Performance
- ASUS GeForce RTX 4090 Matrix Platinum Review - The RTX 4090 Ti
- MSI GeForce RTX 4090 Suprim X Review
- MSI GeForce RTX 4090 Gaming X Trio Review
- Gigabyte GeForce RTX 4090 Gaming OC Review
Controversial News Posts
- Sony PlayStation 5 Pro Specifications Confirmed, Console Arrives Before Holidays (117)
- Windows 11 Now Officially Adware as Microsoft Embeds Ads in the Start Menu (106)
- NVIDIA Points Intel Raptor Lake CPU Users to Get Help from Intel Amid System Instability Issues (106)
- AMD "Strix Halo" Zen 5 Mobile Processor Pictured: Chiplet-based, Uses 256-bit LPDDR5X (101)
- US Government Wants Nuclear Plants to Offload AI Data Center Expansion (98)
- AMD's RDNA 4 GPUs Could Stick with 18 Gbps GDDR6 Memory (87)
- Developers of Outpost Infinity Siege Recommend Underclocking i9-13900K and i9-14900K for Stability on Machines with RTX 4090 (85)
- Windows 10 Security Updates to Cost $61 After 2025, $427 by 2028 (84)