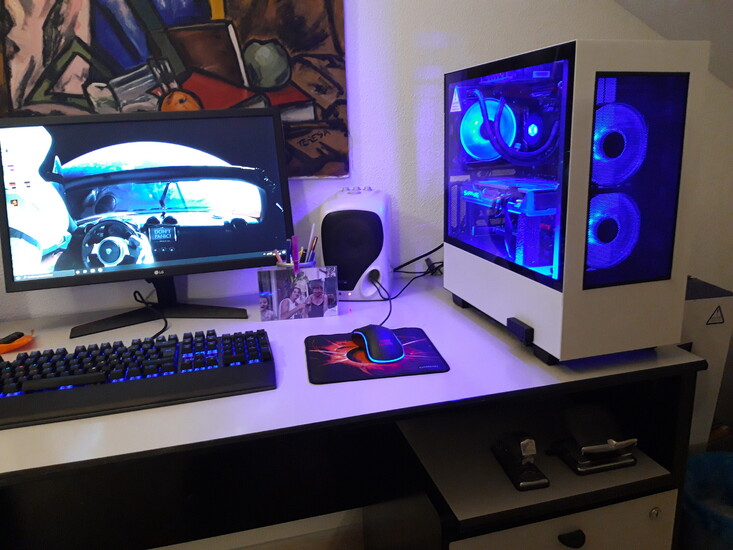
Ice Blue


Owner:
Posted:
January 1st 2021
Updated:
Viewed:
4,345 times
Rating:
 10 votes total
Good (5.4)
Submit vote:
Please register on the forums & login to vote.
Key Features:


This modder's other projects:
System Specs:
Performed Mods:
Cut the front to add black painted stainless steel mesh. Paint the bottom edge of the glass like the rest of the edges.
Special Tools Used:
- Grinder,
- drill,
- shear,
- glue,
- paint,
Time Spent:
10 hours.
Sponsors:
The pc case is cool but it doesn't breathe. It would be easy for it to come from the factory like that. The thermals improve a lot. It's for my grandson. Happy new year.
Jun 15th, 2024 14:50 EDT
change timezone
Latest GPU Drivers
New Forum Posts
- Your PC ATM (34632)
- System shutdown from short when connecting USB type C cable? (17)
- new tv/display what one? what to avoid? (18)
- Youtube benchmark,test of cpu,gpu using script (4)
- Ghetto Mods (4342)
- Can you help me decide for which AM4 CPU to buy plz? (14)
- Black screen in SOME games 6800xt Sapphire Pulse (8)
- Alphacool - problem with radiators - bad fin soldering? (23)
- Rare GPUs / Unreleased GPUs (1903)
- Realtek Modded Audio Driver for Windows 10/11 - Only for HDAUDIO (5710)
Popular Reviews
- Aune AR5000 Headphones + S17 Pro Headphones Amplifier Review
- Pulsar Xlite V3 eS Review
- VAXEE Outset AX Wireless (4K) Review
- Upcoming Hardware Launches 2024 (Updated May 2024)
- Team Group T-Force G70 Pro 2 TB Review
- Intel Lunar Lake Technical Deep Dive - So many Revolutions in One Chip
- AMD Ryzen 7 7800X3D Review - The Best Gaming CPU
- NZXT H6 Flow RGB Review
- Quick Look: Final UX2000 Wireless Noise Canceling Headphones
- Thermal Grizzly KryoSheet Review - Tested on RX 7900 XTX with 475 W
Controversial News Posts
- Possible Specs of NVIDIA GeForce "Blackwell" GPU Lineup Leaked (132)
- NVIDIA RTX 5090 "Blackwell" Founders Edition to Implement the "RTX 4090 Ti" Cinderblock Design (118)
- AMD Outs Ryzen 5000XT Processors for Socket AM4, an 8-year Old Socket (105)
- Nightmare Fuel for Intel: Arm CEO Predicts Arm will Take Over 50% Windows PC Market-share by 2029 (105)
- AMD Says Ryzen 9000 Series Won't Beat 7000X3D Series at Gaming (101)
- AMD Zen 5 Storms into Gaming Desktops with Ryzen 9000 "Granite Ridge" Processors (100)
- AMD Ryzen 9000 Zen 5 Single Thread Performance at 5.80 GHz Found 19% Over Zen 4 (98)
- Biden Administration to Revive Trump-Era Tariffs on China-made GPUs and Motherboards (95)
5 Comments on Ice Blue