- Joined
- Jul 3, 2016
- Messages
- 758 (0.27/day)
Tseng DUO
This episode features two Tseng video cards. Both of them are the PCI version.
I was searching for a Tseng ET4000/W32P video card for some time. In the end I found it at the good ol' flea market. I would've wanted the VLB or at least the ISA version but beggars can't be choosers, I guess.
The Tseng ET6000 4MB was bought a few years ago, also from the flea market. A test made after that moment, revealed that it was dead, so I put in a box and that was it. At least until this year
Let's meet the two video cards:
* JATON TSENG LABS ET4000/W32P PCI - KY2-JAX-EVGA32PCI - 8248D/V2
* Vision Magic Tseng Labs ET6000 4 MB MDRAM
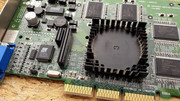
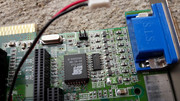
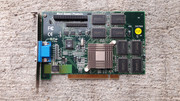
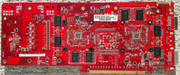
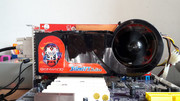
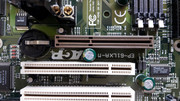
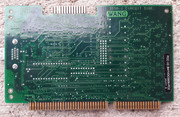
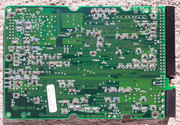
JATON TSENG LABS ET4000/W32P PCI - KY2-JAX-EVGA32PCI - 8248D/V2
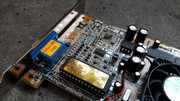
The card was in a rough shape but as soon as I saw Tseng ET4000/W32P written all over it, I knew I had to have it. I paid very little for it and I took it home.


The card took a hit before I got to it and a few pins from the graphic chip were affected but they didnt separate from the PCB. Lucky me!

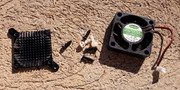
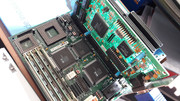
I took the card apart.


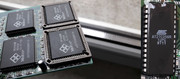
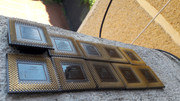
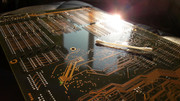
The BIOS chip had a few light scratches which werent removed by IPA 99% and cotton sticks, so, I searched for other options.
It became clear that I would need an abrasive paste which would also have to be friendly with the markings on the chip.
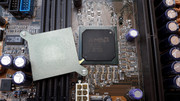
I decided to try a little metal polish paste, the kind I use to restore the shine of the chromed brackets, and a cotton stick. I rubbed gently the graphic chip and afterwards I washed it well with IPA 99%.
After two passes I got the desired results. GOOD AS NEW!!!
The satisfaction I got after this step was off the scale.
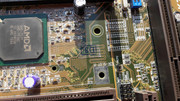
I applied this treatment to other IC's on the board.

The final results were notable. The downside is that now I have to apply this step to other cards I restore and the time that I spend with each component will get even longer than already is. Regardless, after these many electronic artifacts recovered from the crusher, one more stage dedicated to the restoration process isn't much. By now, all I do is like a reflex. I'm not kidding. Also, I never say STOP until I am completely satisfied.
Enjoy.


gallery: https://postimg.cc/gallery/jyxc9xso/
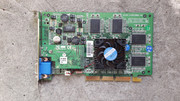
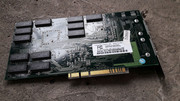
Vision Magic Tseng Labs ET6000 4 MB MDRAM
I was so proud when I bought this card. Tseng ET6000 with 4MB, NICE! Lucky find!
After I tested it I was deflated. Dead!


This year, right after I managed to exorcise all the demons from the socket 4 / Pentium 66MHz setup (which will be presented at a later date), amadeus777999, a fellow vogons user, asked me to run some DOOM Shareware 1.9 timedemo tests with some of my graphic cards. These results were needed for a project of his. In the end I made over 100 DOOM Shareware 1.9 runs, so it was obvious that the ET6000 could not miss from the line-up. Needless to say, the P66+ASUS PCI/I-P5MP3 rev. 2.4 combo was rock solid, even if I got a few gray hairs during the process of eliminating all the demons that took over the socket 4 setup, and believe me they were many! (The P66 story will also be very interesting). (The results of the DOOM Shareware tests will be presented at the appropriate time)
I checked the ET6000 and I couldn't find anything wrong with it.
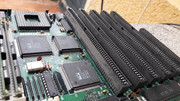
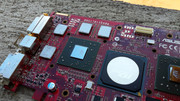
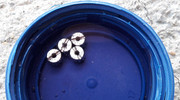
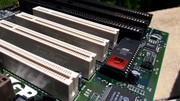
At first, I decided to remove the extra 2MB video memory from the PLCC sockets. This task was unbelievably hard. What could possibly go wrong?
The PLCC exctractor that I have is a cheap chinese model and it didnt grab the memory chips as it should. The plastic of the PLCC was brittle and old. After I applied the force required, I was faced with a disaster. One of the metal hooks of the PLCC extractor, dug into a memory chip, broke off a corner if it and then left a diagonal scratch.
You should've seen my face. NOOOOOOOOOOOOOOO!!!!
&*($@#*($&###!!!! Curses, ()&%#*%#&*~)@%~~~!!!
Before I resorted to the chinese PLCC extractor, I tried two small screwdrivers but I couldn't remove the memory chips. The PLCC sockets groaned and flexed and I couldn't remove the chips.
In the end I managed to remove the memory chips. The PLCC sockets were cracked, the chips looks like hell....
I tested the card again. STILL NOTHING!. No change.....^$@#&$*^@*!@!@!!##
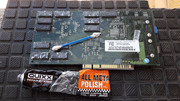
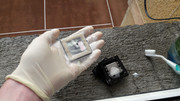
Reluctantly, I removed the Vision Magic sticker from the BIOS chip and I verified if the BIOS image was good. I had to know what model the chip was. This information was vital. I placed it into my MiniPro TL866A BIOS programmer and I did a READ and VERIFY test. ALL WAS OK! Foiled again! - ATMEL AT27C256R
I used double sided tape to put back the Vision Magic sticker and I inserted the memory chips I removed earlier.
Damn it!
What could be the problem?
And then IT HIT ME!!!
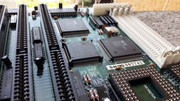
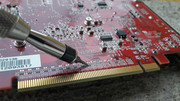
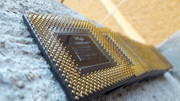
I saw some marks on the pins of the graphic chip, so, I decided to investigate them thoroughly. Flea market cards usually have a few marks on them and I investigate the chips to see if the pins make contact with each other.
I took a fine needle and I checked the pins. Needless to say that I found out soon why the ET6000 wasnt running. Lots of pins were separated from the PCB.
I knew the cause of the problem and I needed a solution.
Ideally I would've needed a hot air station and the required supplies. At the start of this year I thought of buying a hot air station but in the end I gave up. I couldn't justify the costs as I dont have many card to repair.
The second option was represented by a repair shop but where's the fun in that? I think you know me well after the V4-L saga.
For some time I wanted to try the drag soldering tehnique. After I got accustomed with the use of flux and I got a little courageous, I said LET'S DO IT!!!
The brain-dead ET6000-ul was the perfect candidate!
I looked at a demo of the drag soldering tehnique.
HowTo: Drag Soldering Demo
I looked a few times over these videos.
Professional SMT Soldering: Hand Soldering Techniques - Surface Mount
Professional Hand Soldering: Surface Mount QFP 208 Fine-Pitch
I couldn't be bothered with the lower stages and I went straight to MASTER class, crash course style just the way I LIKE IT!!! QFP 208 Fine-Pitch drag soldering. How hard can it be?
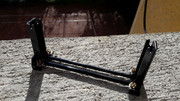
Because I couldnt find angled tips for my soldering iron I decided to make my own.


Dont forget the sponge.

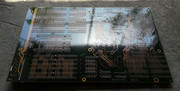
Let's inspect the pins closer. Not GOOD!!! Some are bent and some are separated from the PCB due to some force applied over them.


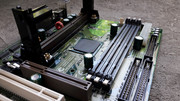
Before I took over the main task, I practiced on a dead laptop motherboard.
I used liquid flux branded Topnik RF800.

The results were encouraging so I tackled the ET6000.
I applied Topnik RF800 flux and I placed the tip of the soldering iron over the pins. Unfortunately, the flux was liquid and it wouldn't stay in one place. It quickly evaporated at the contact with the soldering iron and it didnt help me. I used a low quantity of solder.
A few weeks before, I bought from the flea market, some Amtech RMA-223 flux, which in the end proved to be fake. I decided to use it after I saw a comparative video in which it was said that it is OK. To my surprise, I found the exact fake flux at the local electronic shop. YAY!!! The label has spelling errors and the packaging is not like the original.
I applied Amtech RM-223-FAKE flux.
TOO LITTLE!

TOO MUCH!

After a soldering pass.

The Topnik RF800 flux is a NO CLEAN flux. The Amtech RMA-223-FAKE flux was an unknown quantity so I had to clean it.
The weather was cold during this operation. The lack of experience meant that I used too much flux and I had to clean A TON OF IT!
Cleaning the leftover flux proved to be a challenge. The difficulty was due to the fact that it was behind the pins and in contact with IPA 99% it would turn in a substance like cheese.
I was afraid that some of the pins I soldered back might separate again, so, I placed the card in a IPA 99% bath. I used a container with a lid to reduce evaporation.


The IPA 99% bath didnt remove the flux so I had to use an old tooth brush and a syringe.
After almost an hour, I managed to remove all the flux. DAMN SON!


I inspected the solder job and I was pleased with the results. I didnt straighten any of the pins because I was afraid I might break them. Before I got to solder them back I checked that each one of them made contact with their pad.


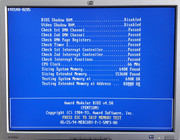
I placed the card in the PC and I saw that the orange led of the monitor turned to green but the screen remained black.
It looks like I'm on the right path. I inspected again all of the pins, 208 of them....
I found a few pins that werent making contact. It looks like my solder job wasnt as strong as I thought and during cleaning I separated some of them.
BACK TO SQUARE ONE!
This time I used the right amount of flux.


I soldered again all the pins and I cleaned the card.
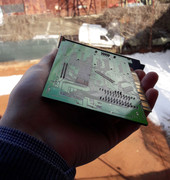
Final results.


Close view of the soldered pins.


I DID THIS! When all was said and done, I was satisfied with my results.
I tested the card again and it ran flawlessly, almost.
The image was crips, the drivers installed without a hitch, I ran a DOOM test. ALL OK!


I was happy and I wasnt bothered anymore with the looks of the card. I will remember these battle scars for a long time from now. They look bad from every angle. (One of the soldered memory chips had some chips when I bought it.)


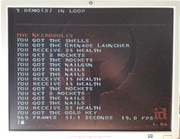
Unfortunately, the victory was bitter sweet. When I ran the timedemo benchmark from DOOM Shareware 1.9, I saw on the lower part of the screen, that some pixels werent displayed correctly.

I removed the extra VRAM and I left the card with the soldered chips. When I booted in WIN 95 I saw that the image wasnt right.
I inspected again all of the pins of the graphic chip. All was well.
After I put back the extra VRAM chips the video card didnt show the anomalies that were present with just the soldered 2MB and I was left with the odd pixels.
At this moment I gave up. There was no way I could recover this card completely.
Some fights you cannot win. I could find some memory chips and try something, but this might come sometime in the far far far future.
The upside is, that I can execute drag soldering at a reasonable level of quality. Practice makes perfect and I'm sure I'll need this skill someday.
gallery: https://postimg.cc/gallery/31f9xa72w/
C ya next time with more good stuff.
This episode features two Tseng video cards. Both of them are the PCI version.
I was searching for a Tseng ET4000/W32P video card for some time. In the end I found it at the good ol' flea market. I would've wanted the VLB or at least the ISA version but beggars can't be choosers, I guess.
The Tseng ET6000 4MB was bought a few years ago, also from the flea market. A test made after that moment, revealed that it was dead, so I put in a box and that was it. At least until this year
Let's meet the two video cards:
* JATON TSENG LABS ET4000/W32P PCI - KY2-JAX-EVGA32PCI - 8248D/V2
* Vision Magic Tseng Labs ET6000 4 MB MDRAM
JATON TSENG LABS ET4000/W32P PCI - KY2-JAX-EVGA32PCI - 8248D/V2
The card was in a rough shape but as soon as I saw Tseng ET4000/W32P written all over it, I knew I had to have it. I paid very little for it and I took it home.
The card took a hit before I got to it and a few pins from the graphic chip were affected but they didnt separate from the PCB. Lucky me!
I took the card apart.
The BIOS chip had a few light scratches which werent removed by IPA 99% and cotton sticks, so, I searched for other options.
It became clear that I would need an abrasive paste which would also have to be friendly with the markings on the chip.
I decided to try a little metal polish paste, the kind I use to restore the shine of the chromed brackets, and a cotton stick. I rubbed gently the graphic chip and afterwards I washed it well with IPA 99%.
After two passes I got the desired results. GOOD AS NEW!!!
The satisfaction I got after this step was off the scale.
I applied this treatment to other IC's on the board.
The final results were notable. The downside is that now I have to apply this step to other cards I restore and the time that I spend with each component will get even longer than already is. Regardless, after these many electronic artifacts recovered from the crusher, one more stage dedicated to the restoration process isn't much. By now, all I do is like a reflex. I'm not kidding. Also, I never say STOP until I am completely satisfied.
Enjoy.
gallery: https://postimg.cc/gallery/jyxc9xso/
Vision Magic Tseng Labs ET6000 4 MB MDRAM
I was so proud when I bought this card. Tseng ET6000 with 4MB, NICE! Lucky find!
After I tested it I was deflated. Dead!
This year, right after I managed to exorcise all the demons from the socket 4 / Pentium 66MHz setup (which will be presented at a later date), amadeus777999, a fellow vogons user, asked me to run some DOOM Shareware 1.9 timedemo tests with some of my graphic cards. These results were needed for a project of his. In the end I made over 100 DOOM Shareware 1.9 runs, so it was obvious that the ET6000 could not miss from the line-up. Needless to say, the P66+ASUS PCI/I-P5MP3 rev. 2.4 combo was rock solid, even if I got a few gray hairs during the process of eliminating all the demons that took over the socket 4 setup, and believe me they were many! (The P66 story will also be very interesting). (The results of the DOOM Shareware tests will be presented at the appropriate time)
I checked the ET6000 and I couldn't find anything wrong with it.
At first, I decided to remove the extra 2MB video memory from the PLCC sockets. This task was unbelievably hard. What could possibly go wrong?
The PLCC exctractor that I have is a cheap chinese model and it didnt grab the memory chips as it should. The plastic of the PLCC was brittle and old. After I applied the force required, I was faced with a disaster. One of the metal hooks of the PLCC extractor, dug into a memory chip, broke off a corner if it and then left a diagonal scratch.
You should've seen my face. NOOOOOOOOOOOOOOO!!!!
&*($@#*($&###!!!! Curses, ()&%#*%#&*~)@%~~~!!!
Before I resorted to the chinese PLCC extractor, I tried two small screwdrivers but I couldn't remove the memory chips. The PLCC sockets groaned and flexed and I couldn't remove the chips.
In the end I managed to remove the memory chips. The PLCC sockets were cracked, the chips looks like hell....
I tested the card again. STILL NOTHING!. No change.....^$@#&$*^@*!@!@!!##
Reluctantly, I removed the Vision Magic sticker from the BIOS chip and I verified if the BIOS image was good. I had to know what model the chip was. This information was vital. I placed it into my MiniPro TL866A BIOS programmer and I did a READ and VERIFY test. ALL WAS OK! Foiled again! - ATMEL AT27C256R
I used double sided tape to put back the Vision Magic sticker and I inserted the memory chips I removed earlier.
Damn it!
What could be the problem?
And then IT HIT ME!!!
I saw some marks on the pins of the graphic chip, so, I decided to investigate them thoroughly. Flea market cards usually have a few marks on them and I investigate the chips to see if the pins make contact with each other.
I took a fine needle and I checked the pins. Needless to say that I found out soon why the ET6000 wasnt running. Lots of pins were separated from the PCB.
I knew the cause of the problem and I needed a solution.
Ideally I would've needed a hot air station and the required supplies. At the start of this year I thought of buying a hot air station but in the end I gave up. I couldn't justify the costs as I dont have many card to repair.
The second option was represented by a repair shop but where's the fun in that?
I think you know me well after the V4-L saga. For some time I wanted to try the drag soldering tehnique. After I got accustomed with the use of flux and I got a little courageous, I said LET'S DO IT!!!
The brain-dead ET6000-ul was the perfect candidate!
I looked at a demo of the drag soldering tehnique.
HowTo: Drag Soldering Demo
I looked a few times over these videos.
Professional SMT Soldering: Hand Soldering Techniques - Surface Mount
Professional Hand Soldering: Surface Mount QFP 208 Fine-Pitch
I couldn't be bothered with the lower stages and I went straight to MASTER class, crash course style
just the way I LIKE IT!!! QFP 208 Fine-Pitch drag soldering. How hard can it be?Because I couldnt find angled tips for my soldering iron I decided to make my own.
Dont forget the sponge.
Let's inspect the pins closer. Not GOOD!!! Some are bent and some are separated from the PCB due to some force applied over them.
Before I took over the main task, I practiced on a dead laptop motherboard.
I used liquid flux branded Topnik RF800.
The results were encouraging so I tackled the ET6000.
I applied Topnik RF800 flux and I placed the tip of the soldering iron over the pins. Unfortunately, the flux was liquid and it wouldn't stay in one place. It quickly evaporated at the contact with the soldering iron and it didnt help me. I used a low quantity of solder.
A few weeks before, I bought from the flea market, some Amtech RMA-223 flux, which in the end proved to be fake. I decided to use it after I saw a comparative video in which it was said that it is OK. To my surprise, I found the exact fake flux at the local electronic shop. YAY!!!
The label has spelling errors and the packaging is not like the original.I applied Amtech RM-223-FAKE flux.
TOO LITTLE!
TOO MUCH!
After a soldering pass.
The Topnik RF800 flux is a NO CLEAN flux. The Amtech RMA-223-FAKE flux was an unknown quantity so I had to clean it.
The weather was cold during this operation. The lack of experience meant that I used too much flux and I had to clean A TON OF IT!
Cleaning the leftover flux proved to be a challenge. The difficulty was due to the fact that it was behind the pins and in contact with IPA 99% it would turn in a substance like cheese.
I was afraid that some of the pins I soldered back might separate again, so, I placed the card in a IPA 99% bath. I used a container with a lid to reduce evaporation.
The IPA 99% bath didnt remove the flux so I had to use an old tooth brush and a syringe.
After almost an hour, I managed to remove all the flux. DAMN SON!
I inspected the solder job and I was pleased with the results. I didnt straighten any of the pins because I was afraid I might break them. Before I got to solder them back I checked that each one of them made contact with their pad.
I placed the card in the PC and I saw that the orange led of the monitor turned to green but the screen remained black.
It looks like I'm on the right path. I inspected again all of the pins, 208 of them....
I found a few pins that werent making contact. It looks like my solder job wasnt as strong as I thought and during cleaning I separated some of them.
BACK TO SQUARE ONE!
This time I used the right amount of flux.
I soldered again all the pins and I cleaned the card.
Final results.
Close view of the soldered pins.
I DID THIS! When all was said and done, I was satisfied with my results.
I tested the card again and it ran flawlessly, almost.
The image was crips, the drivers installed without a hitch, I ran a DOOM test. ALL OK!
I was happy and I wasnt bothered anymore with the looks of the card. I will remember these battle scars for a long time from now. They look bad from every angle. (One of the soldered memory chips had some chips when I bought it.)
Unfortunately, the victory was bitter sweet. When I ran the timedemo benchmark from DOOM Shareware 1.9, I saw on the lower part of the screen, that some pixels werent displayed correctly.
I removed the extra VRAM and I left the card with the soldered chips. When I booted in WIN 95 I saw that the image wasnt right.
I inspected again all of the pins of the graphic chip. All was well.
After I put back the extra VRAM chips the video card didnt show the anomalies that were present with just the soldered 2MB and I was left with the odd pixels.
At this moment I gave up. There was no way I could recover this card completely.
Some fights you cannot win. I could find some memory chips and try something, but this might come sometime in the far far far future.
The upside is, that I can execute drag soldering at a reasonable level of quality. Practice makes perfect and I'm sure I'll need this skill someday.
gallery: https://postimg.cc/gallery/31f9xa72w/
C ya next time with more good stuff.
Last edited:


")