Update!!!


Where were we .... the acrylic tubes where almost finished, now it's time to make some covers.
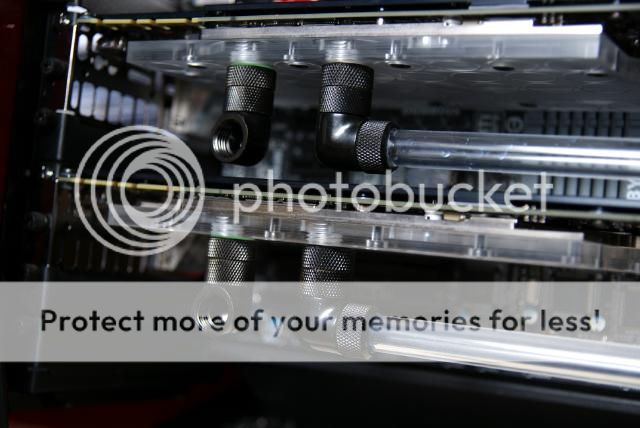
First the CPU first connection, this is becoming exactly in the center of the two reservoirs
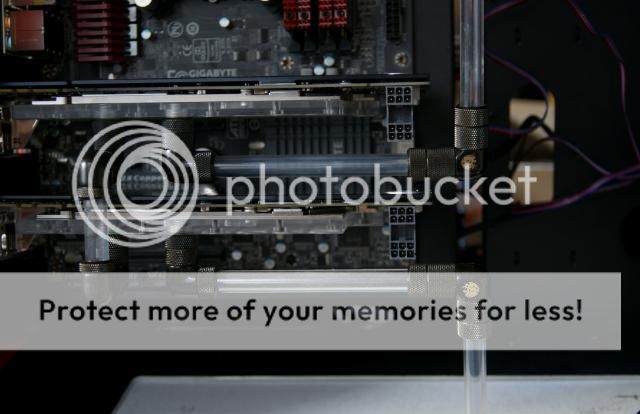
The midplate, Here I have created the holes for the tubes and fill-ports.
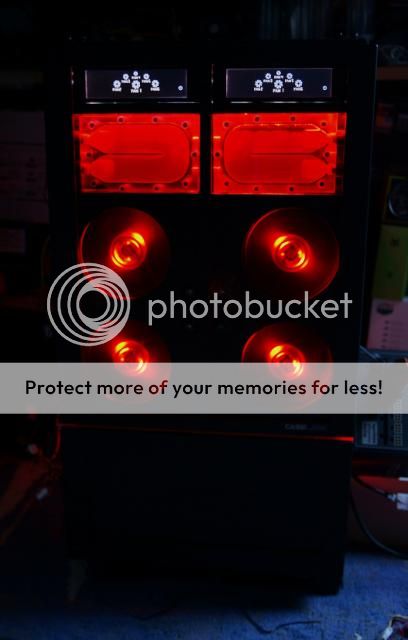
For the left 240 rad I have bent an aluminum cover and made it black.
Cut a piece of red acrylic cut to the dimensions of the radiator. And past this black vinyl
Besides the radiator there is a nice space for all wiring but I don't want to see the wires. Therefore a cover. Cut, bent and made it black.
To hide the HDDs and a nice black background for the tubes, I cut a piece of aluminum and again made it black, also made a nice red acrylic roof.
The earlier made red acrylic placed on the radiator.
The cover for the wiring.
One side complete.
Gonna make both sides almost the same. So cut another piece of aluminum for the HDD cover.
Made it black
Again, a piece of red acrylic for the other radiator
Then suddenly a package from.......
Coolermaster
With a box full of game gear in the colors of the Case Labs build.. Thank you Cooler Master Marco, Ruud and everyone who made this possible.
The
CM Storm Trigger Keyboard:
•High durability gold-plated Cherry switches rated for over 50 million key strokes
•Multi-media control keys for convenient sound control
•5 macro keys with profile management
•18K gold plated ultra low latency USB plugs
•Anti-ghosting 6 key rollover
•64KB on-board memory for profile storage
•Storm tactics key for deactivation of Windows key
•1000Hz driverless polling / 1ms response time
•Two port enhanced USB 2.0 hub
•Detachable wrist rest
•Braided cable for durability
•Non-slip rubber coating
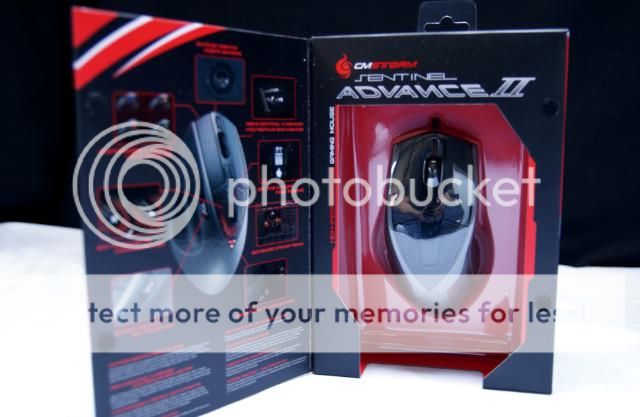
The
CM Storm Sentinel Advance II:
•200 - 8200 DPI tracking resolution
•128 KB Sentinel-X TM Memory for profiles and macros
•On the fly DPI adjustments (+/- 200 DPI)
•As little as 1.5 mm lift-off distance
•Up to 150 IPS – 3.8 m/s
•125 Hz – 1000 Hz USB rate fine-tuning
•5 profiles with 4 DPI setting each
•8 programmable buttons
•9 virtual buttons via button combinations
•Right-hand Ergonomic Design
•Customizable OLED logo
•Customizable multi color LED light system
•5 x 4.5g weight fine-tuning system
The
CM Storm Speed-RX:
•Microscopic Synthetic Mesh for optimum precision
•Smooth nano fibers for reduced drag and better comfort
•Extra thick (5mm) soft rubber center piece for better ergonomics and endurance
•Triple Layer heat bonding process for improved durability and prevent peeling
•Grip coating on bottom side to keep the mousepad in place
And last but not least, the
CM Storm Sirus 5.1 gaming headset:
•True 5.1 Surround Sound (4 high quality speakers on each side)
•On-The-Fly Rear, Center, & Front speaker control for maximum sound customization (in USB mode only)
•Interchangeable ear-cups, micro weave for breathable audio and leatherette for improved noise insulation
•Dual gold-plated USB Connectors for improved signal quality
•Extra long durable and flexible microphone arm with LED mute indicator
So the ultimate gaming kit. Thanks again and complete review follows when everything is plugged in.
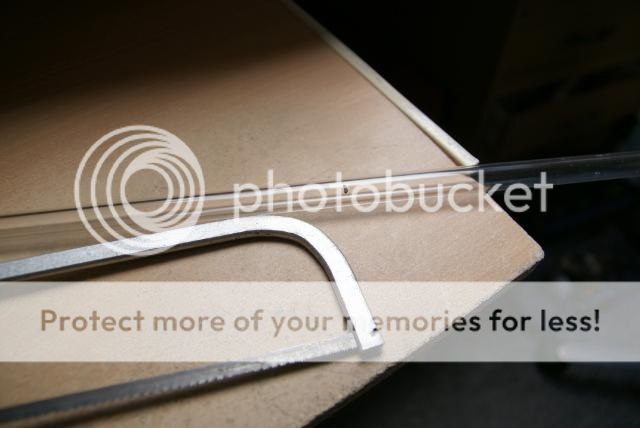
I got a lot of questions about the acrylic tubes, how I make them fit.
The acrylic tube is unfortunately with a tolerance, and unfortunately I rarely got the 12mm.
The tube that I most of the time get is generally 12.23 mm. Unfortunately, this does not fit into a
multi link
Specs of the multilink C47 has no internal dimensions, therefore the C71
Step by step how I do this
Tube with the tolerance
Marked the tube and cut it with a junior saw.
Both ends file straight.
Removed a thin layer internally with a sharp knife
My dremel extention tool, set to 8mm
And this a few times around the tube. After some filing and measuring the right size
Now you have a sharp edge on the side which is not very good for your o-rings in the multilink.
The original BP links also have a slanted edge, so made this also. File a slanted edge with a small file.
And ready is your custom made crystal link.
To end this update a small teaser


")


")