• Welcome to TechPowerUp Forums, Guest! Please check out our forum guidelines for info related to our community.

[casemod] Anubis

Joined
Aug 26, 2016
Messages
78 (0.03/day)
Location
Germany
Welcome to my next project

"Anubis"

Anubis is portrayed in old traditions as a jackal,
whose task was to lead the souls of the people into the land of the dead.

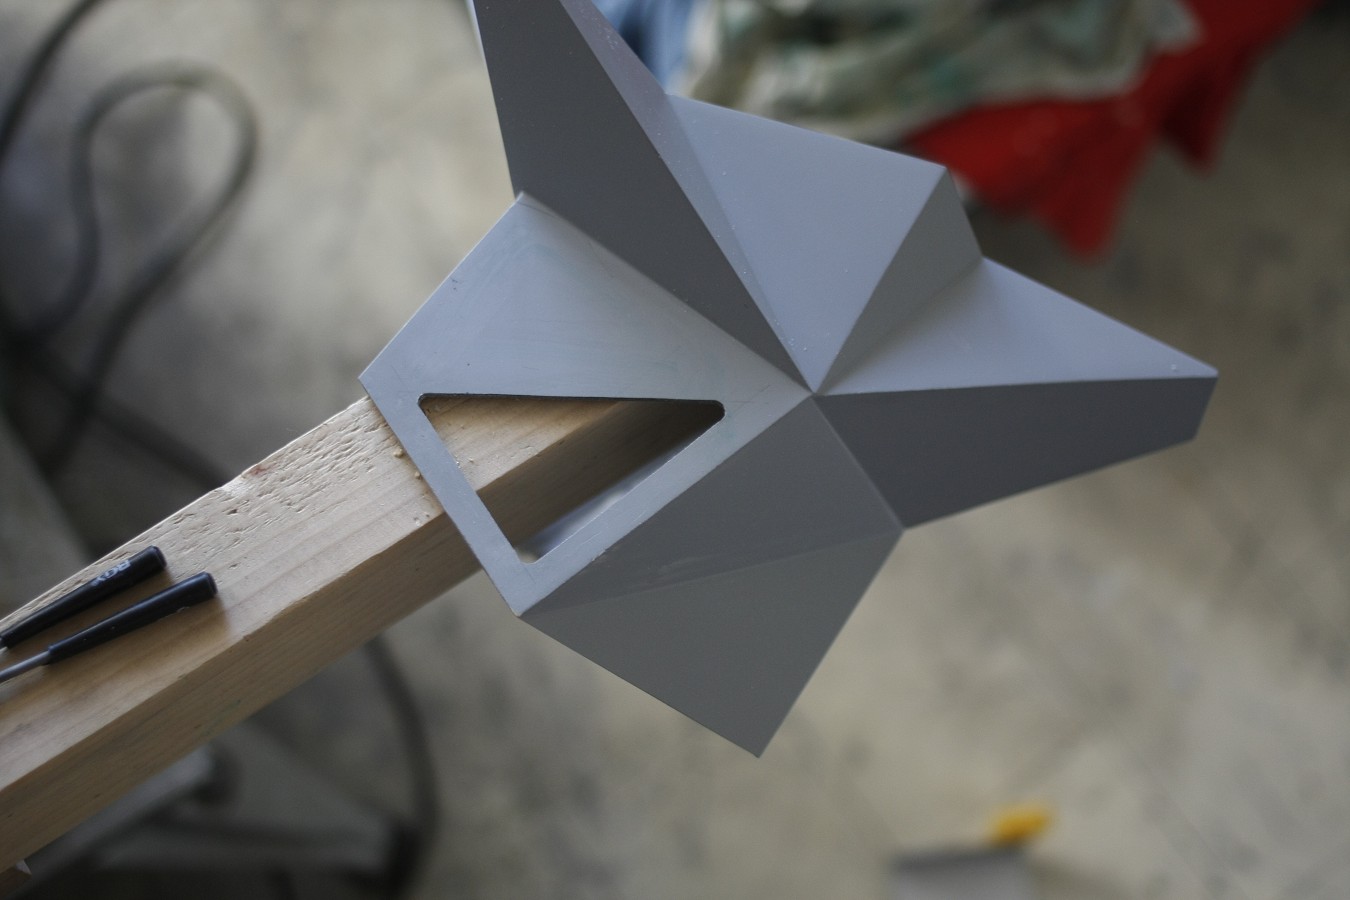
In this project a jackal head should be polygonized and adapted to the Cougar Conquer.
I have had this idea for a long time but when I saw this case for the first time it was time to put the idea into action.

Furthermore, 2 300mm reservoirs are to be mounted on each side of the housing and be clad with aluminum to suit the case.
Here's a short taste but see for yourself how I implemented this idea.


Hardware:
CPU: Intel I7 7800X/I5 7640X
Mainboard: Asus Ramppage VI Extreme
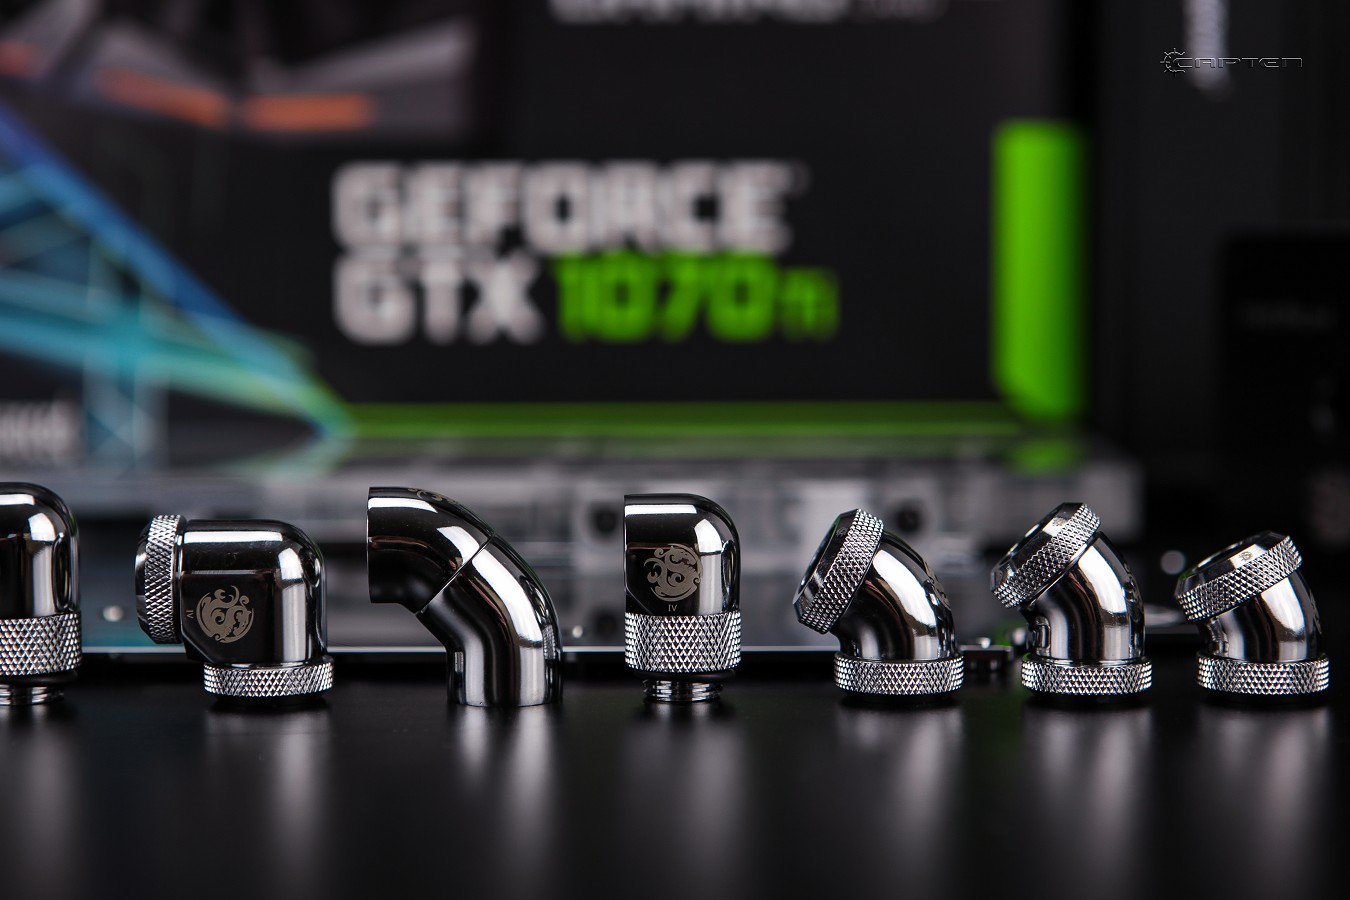
VGA: Asus Strix Geforce GTX 1070ti
Case: Cougar Conquer
PSU: Cougar GX-F 750
Fan: Cougar ?
SSD: 2 x Crucial MX500 500Gb
Ram: Ballistix Elite 8x4Gb DDR4 3000Mhz

watercooling:
Bitspower custom


Take a look at the installed hardware:


I would like to thank all sponsors who support me so energetically in this Project:

ASUS

COUGAR

BITSPOWER

CRUCIAL

BALLISTIX


phill

Moderator
Staff member
Joined
Jun 8, 2011
Messages
15,960 (3.40/day)
Location
Somerset, UK
System Name Not so complete or overkill - There are others!! Just no room to put! :D
Processor Ryzen Threadripper 3970X
Motherboard Asus Zenith 2 Extreme Alpha
Cooling Lots!! Dual GTX 560 rads with D5 pumps for each rad. One rad for each component
Memory Viper Steel 4 x 16GB DDR4 3600MHz not sure on the timings... Probably still at 2667!! :(
Video Card(s) Asus Strix 3090 with front and rear active full cover water blocks
Storage I'm bound to forget something here - 250GB OS, 2 x 1TB NVME, 2 x 1TB SSD, 4TB SSD, 2 x 8TB HD etc...
Display(s) 3 x Dell 27" S2721DGFA @ 7680 x 1440P @ 144Hz or 165Hz - working on it!!
Case The big Thermaltake that looks like a Case Mods
Audio Device(s) Onboard
Power Supply EVGA 1600W T2
Mouse Corsair thingy
Keyboard Razer something or other....
VR HMD No headset yet
Software Windows 11 OS... Not a fan!!
Benchmark Scores I've actually never benched it!! Too busy with WCG and FAH and not gaming! :( :( Not OC'd it!! :(
Would like to see how this one turns out :)
 
D

Deleted member 178884

Guest
1540235334634.png

Edit: You can't run an "i5 X" series processor in there anyways.
 
Joined
Aug 26, 2016
Messages
78 (0.03/day)
Location
Germany
@Xx Tek Tip xX okay thx, good to know:banghead:
I bought the I5 and wonder why not all memory is working. Nobody works on the left side only. But right all 8 run individually. I have already checked all socket pinnings and suspected that the memory controller of the CPU is defective. But your hint explains a lot, of course.
Okay let's see how I clear that up now.


Time for the first update.
First, I built the head out of paper.
Sounds easy, but it is not XD


So I could now transfer the measurements from the paper head to Plexiglas and have cut this.
Depending on how large the existing plexiglass was, a circular, stitch or the scroll saw was used.
For the most part, I was only able to recycle leftovers here, which is why I also used the various plexiglass varieties.


after everything was sawn clean and straightened I began to grind all edges to miter.
Now I could stick one part after the other with Akryfix R192.


After everything had been glued and dried, I additionally filled in all splices with Akryfix and reinforced.
After coarse sanding, all necessary parts were prepared with polyester putty for painting.


After several coats of primer and spray filler I fastened the head to the housing by means of a hinge.


fits pretty well I have to say.


Now I have set on both sides cutouts to reach the USB slots and the power Buttons.


Now I have painted the head completely black matt from inside and outside


Next, I want to provide the project with different round elements.
For this I cut with a hole cutter a few circles in two sizes.


This I then slanted with the router laterally to 60 degrees and deepened the inner area


to sink there 3mm Plexiglas can. This was eventually cut also briefly before.


The slices I now cut in the form of wings which are later to rotate by means of a Motor.


Now I also started to prime everything here and to spatula until I had a nice smooth surface for painting.


The orange side of the case went to the collar.
First of all, sanded again, primed with Alugrundierung and then painted black.


Since my loop later, as always, something special, I had to put holes on the case for the radiator


Now I cut with the circular saw 2mm aluminum and bent it in the form of the side part.
So I've created a relatively small space to hide cables and
In addition, the whole hardware area looks even neater.


Now I have further processed the sheet for mounting the SSD's and the cable guide of the 24pin ATX connector,
which I want to provide later with 10mm cable conduits.


Okay the beginning is done.
The next update will come soon ;)
 
D

Deleted member 178884

Guest
I bought the I5 and wonder why not all memory is working. Nobody works on the left side only. But right all 8 run individually. I have already checked all socket pinnings and suspected that the memory controller of the CPU is defective. But your hint explains a lot, of course.
Okay let's see how I clear that up now.
Yep the i5 will only be able to use 50% of the memory slots available, it can only handle dual channel - not quad channel, hence no usage of 8 ram modules.
 
Joined
Oct 6, 2018
Messages
220 (0.11/day)
System Name SALTY
Processor A10-5800K
Motherboard A75
Cooling Air
Memory 10Gig DDR133
Video Card(s) HD 7660D
Storage HDD
Display(s) 4k HDR TV
Power Supply 320 Watt
OP I would love to have a work shop and the tools to get into stuff like this, grate work.
 
Joined
Aug 26, 2016
Messages
78 (0.03/day)
Location
Germany
@Salty_sandwich I also only have a 3x3m workshop IN my apartment:kookoo:.
And believe me, three years ago I just had a cordless screwdriver.
I almost always buy only the cheapest machines, because no money no modding :rockout:
 
Joined
May 13, 2010
Messages
5,688 (1.12/day)
System Name RemixedBeast-NX
Processor Intel Xeon E5-2690 @ 2.9Ghz (8C/16T)
Motherboard Dell Inc. 08HPGT (CPU 1)
Cooling Dell Standard
Memory 24GB ECC
Video Card(s) Gigabyte Nvidia RTX2060 6GB
Storage 2TB Samsung 860 EVO SSD//2TB WD Black HDD
Display(s) Samsung SyncMaster P2350 23in @ 1920x1080 + Dell E2013H 20 in @1600x900
Case Dell Precision T3600 Chassis
Audio Device(s) Beyerdynamic DT770 Pro 80 // Fiio E7 Amp/DAC
Power Supply 630w Dell T3600 PSU
Mouse Logitech G700s/G502
Keyboard Logitech K740
Software Linux Mint 20
Benchmark Scores Network: APs: Cisco Meraki MR32, Ubiquiti Unifi AP-AC-LR and Lite Router/Sw:Meraki MX64 MS220-8P
neat. case same name as my cat lol that's what's got me here .
 
Joined
Jan 17, 2010
Messages
12,280 (2.36/day)
Location
Oregon
System Name Juliette // HTPC
Processor Intel i7 9700K // AMD Ryzen 5 5600G
Motherboard ASUS Prime Z390X-A // ASRock B550 ITX-AC
Cooling Noctua NH-U12 Black // Stock
Memory Corsair DDR4 3600 32gb //G.SKILL Trident Z Royal Series 16GB (2 x 8GB) 3600
Video Card(s) ASUS RTX4070 OC// GTX 1650
Storage Samsung 970 EVO NVMe 1Tb, Intel 665p Series M.2 2280 1TB // Samsung 1Tb SSD
Display(s) ASUS VP348QGL 34" Quad HD 3440 x 1440 // 55" LG 4K SK8000 Series
Case Seasonic SYNCRO Q7// Silverstone Granada GD05
Audio Device(s) Focusrite Scarlett 4i4 // HDMI to Samsung HW-R650 sound bar
Power Supply Seasonic SYNCRO 750 W // CORSAIR Vengeance 650M
Mouse Cooler Master MM710 53G
Keyboard Logitech 920-009300 G512 SE
Software Windows 10 Pro // Windows 10 Pro
Cool design and story
 
Joined
Aug 26, 2016
Messages
78 (0.03/day)
Location
Germany
Thx to all and my cat´s name is Santa´s little helper "Rubrecht" XD

Kapitel 2

Now it goes to the reservoir.

First I cut me a 5mm thick aluminum rail as a carrier for mounting


this then provided with the corresponding holes


and shaped the ends to match the housing screws


Now I had to equip the premium AGB holders of Bitspower with an additional thread


Now I drew the cover of the reservoir on 2mm aluminum.
Before, of course, there were tons of paper templates before I decided to design.


After that, all openings were sawed out


Before bending the aluminum, I cut all the edges to be bent by about half with the flex.


After that I could bend it relatively easily by means of a cheap bending bench.


Now everything was prepared as usual for painting and painted black.


Now I've made an S-light for indirect lighting for the reservoirs.
For this I cut myself 8mm plexiglass and scored this every 2mm with a cutter knife.


Now I needed a white translucent Plexiglas disc that scatters the light and a small strip on which I glue the LED Stripe


Lack of space, I glued from below and at the ends no plexiglass. All unnecessary openings were simply filled with polyester putty.
I now taped the white diffuser and painted the whole S-light black.
The other plate later serves as a side PSU cover


Not bad, that's how I imagined it


The S-Light I have now attached from the inside with double-sided tape


In order to blind the lower part of the reservoir, I cut myself 0.75 mm aluminum sheet,
curved in shape, painted black and covered with 4D carbon foil on the outside


Okay I hope it was interesting.
To be continued;)
 
Joined
Aug 26, 2016
Messages
78 (0.03/day)
Location
Germany
Chapter 3

Hello and on we go.
By the way, the Strix 1070ti had to be converted to water cooling.


Now it was up to the attachment of the round elements.
The two small holes are for attachment and the big hole is for the shaft on which the wings are attached.


Now the drive.
I had disassembled a defective printer and removed all existing engines.
Here I have chosen a suitable and now built a small bracket for it.
Basically, this is just a small aluminum L-profile which I have edited something for the engine and a small
Piece of aluminum sheet for attachment to the housing .


To adjust the engine, the holes were ground in slots


Now the pump has been modified a bit.
First, I cut a Plexiglas tube and glued both ends with Plexiglas


I cut a triangle into the visible opening


and then work the outside edge with the router


The holder for the pump is 2mm aluminum sheet.
I crimped this at the ends, using a POM tube in the diameter of the pump.


The whole thing fits together like that


Now I have painted the pump attachment and the holder black


and mounted on the rear foot of the Case


After the paint had hardened well I covered the back with chrome foil.
The cables were then hidden in cable protection conduits from the hardware store.


As a pad for the pump holder, I cut now 8mm Plexiglas


have chamfered edges and cut a groove for an LED Sripe


The edges have now been sanded with 600 grit sandpaper and the underside simply covered with black foil


Now the LEDs are mounted and attached to the housing together with the pump


So that the whole construction fits into the overall picture, I have built this small element which is then screwed onto the pump from above.


Joined
Sep 17, 2014
Messages
20,906 (5.97/day)
Location
The Washing Machine
Processor i7 8700k 4.6Ghz @ 1.24V
Motherboard AsRock Fatal1ty K6 Z370
Cooling beQuiet! Dark Rock Pro 3
Memory 16GB Corsair Vengeance LPX 3200/C16
Video Card(s) ASRock RX7900XT Phantom Gaming
Storage Samsung 850 EVO 1TB + Samsung 830 256GB + Crucial BX100 250GB + Toshiba 1TB HDD
Display(s) Gigabyte G34QWC (3440x1440)
Case Fractal Design Define R5
Audio Device(s) Harman Kardon AVR137 + 2.1
Power Supply EVGA Supernova G2 750W
Mouse XTRFY M42
Keyboard Lenovo Thinkpad Trackpoint II
Software W10 x64
Subbed.

You have some crafty hands, sir. Every part looks like its laser cut. Awesome.
 
Joined
Aug 26, 2016
Messages
78 (0.03/day)
Location
Germany

Chapter 4

Time for cable laying and everything that goes with it.
For the small round element, I attached a potentiometer to the rear end of the upper case cover.


For the wing, I glued a small piece of Plexiglas and sanded it into shape, which can easily be attached and now I can use it to regulate the speed of the motor.


In the SSD tray, a hole had to be set for the piping because it rests in the lower area directly on the front radiator


Now I began to purchase all attachments of the housing with chrome foil


The loop has now been relocated. The position of the ball valve was still changed because I did not like this and the black angle Fittings were finally exchanged for chrome, I had miscalculated something.
The loop thus passes from the pump into the VGA and then to the CPU


From the CPU down into the upper radiator


From there it goes with two pipes above the IO panel over and into the front radiator again purely. One of the two tubes I have taken out of action with a silicone grafting (photo follows)


From the front radiator it goes inside out through the SSD tray and then dual through both reservoirs


and finally back to the pump.


In order to still have the wlan antennas standing around separately, a small aluminum angle was cut here


and above the motherboard attached to the case and later also painted and partly covered with foil.


For a reasonably orderly cable laying had to be drilled here and there still holes.
This is directly under the IO Panel. A fan assembly from the outside is probably not intended for this case.


For the 24er ATX cable I have built a short extension and pushed in 4-strands through the cable conduits.


in order to keep the cable conduits in position, there still had to be needle and thread. This makes it possible to keep even normal sleeved cables in a relatively inconspicuous shape.


Now I did not like the optics on the right side of the mainboard so I made a strip of Plexiglas, satinized the cut edges


and glued on the back still 1cm thick Plexiglas as a spacer on it.


This strip I have now stuck with spy film. After 10 attempts without satisfactory success, everything did not help
and I had to foil it directly under the water in the bathtub to avoid getting dust inclusions and Blisters.


The Z-Caps with LEDs of the reservoir I have directly connected to the cables of my S-Lights.


in order to connect everything directly to the board, adapters were needed


So that I can continue to open the cover of the Conquer I fixed the cable from the potentiometer inconspicuously from the inside with black insulating tape.


Okay, I have not documented every smallest cable, but on the whole it was.
It lacks only a small reactor for the front and then I would be ready but more on that later.​
 
Joined
Aug 26, 2016
Messages
78 (0.03/day)
Location
Germany
Chapter 5


Happy 4th Advent and welcome to Chapter 5, the last update.
Even though I was already more than happy with the whole project,
In spite of all this, I decided to add another round element to the front, the reactor.

First, I took some thermoforming foil and a fruit bowl and made an impression of the fruit bowl


I cut this and stuck it in a 1cm thick Plexiglas ring which I previously beveled to 60 degrees.


In addition, he got a 3mm bottom plate


which I now attached from below


Now I stuck the whole inner area with white matt foil and protect the later glowing places with black foil


Now I painted the white foil silver. Unfortunately, I was not able to obtain the range with the chrome foil, because it is much more stable than the white foil and I can not expose the thermoforming film so too high temperatures.


As the paint dries, I cut another 1 cm thick circle, slanted the edges back to 60 degrees and worked it a bit with the router.


Now I cut my logo out of 3mm Plexiglas


and satin, the cut edges with 600 wet sandpaper


After I painted the circle once outside black, I took the lying surfaces with chrome foil which is plotted in the area of my logo.
So I can make the logo shine through backlight.


After the reactor had hardened I protected the silver area with foil and painted the rest black.
After everything was done, I removed all the foil (except for the silver painted understood) and varnished everything again with semi-gloss varnish..
Now I have stuck the reactor with two chrome rings and finished.


Now I placed in the reactor still digital LEDs and provided them immediately with a plug to continue to remove the front can.


The other circle I have now also provided with a few accents.
I now position this exactly on the backplate of the CPU.


For lighting, I soldered a LED stripe to a small square and put it in the recessed area on the back of my logo.


Soooo that was it again.
The project is finished, in the next post, all final photos will follow as soon as possible.​
 
Joined
Aug 26, 2016
Messages
78 (0.03/day)
Location
Germany

Hi,
I wish you all a Happy New Year!

Here finally all the final pictures, first without lighting and then with lighting ;)


I hope you enjoyed it, I am already fully engrossed in the next project.
After three years, it's about time, next follows Project "Cheops" :)
 
Joined
May 13, 2010
Messages
5,688 (1.12/day)
System Name RemixedBeast-NX
Processor Intel Xeon E5-2690 @ 2.9Ghz (8C/16T)
Motherboard Dell Inc. 08HPGT (CPU 1)
Cooling Dell Standard
Memory 24GB ECC
Video Card(s) Gigabyte Nvidia RTX2060 6GB
Storage 2TB Samsung 860 EVO SSD//2TB WD Black HDD
Display(s) Samsung SyncMaster P2350 23in @ 1920x1080 + Dell E2013H 20 in @1600x900
Case Dell Precision T3600 Chassis
Audio Device(s) Beyerdynamic DT770 Pro 80 // Fiio E7 Amp/DAC
Power Supply 630w Dell T3600 PSU
Mouse Logitech G700s/G502
Keyboard Logitech K740
Software Linux Mint 20
Benchmark Scores Network: APs: Cisco Meraki MR32, Ubiquiti Unifi AP-AC-LR and Lite Router/Sw:Meraki MX64 MS220-8P
Glad it turned out well... It shares my cat's name so it'd better.. Lol
 
Top