
- Joined
- Feb 3, 2018
- Messages
- 218 (0.10/day)
hi guys, I proceed on other fronts
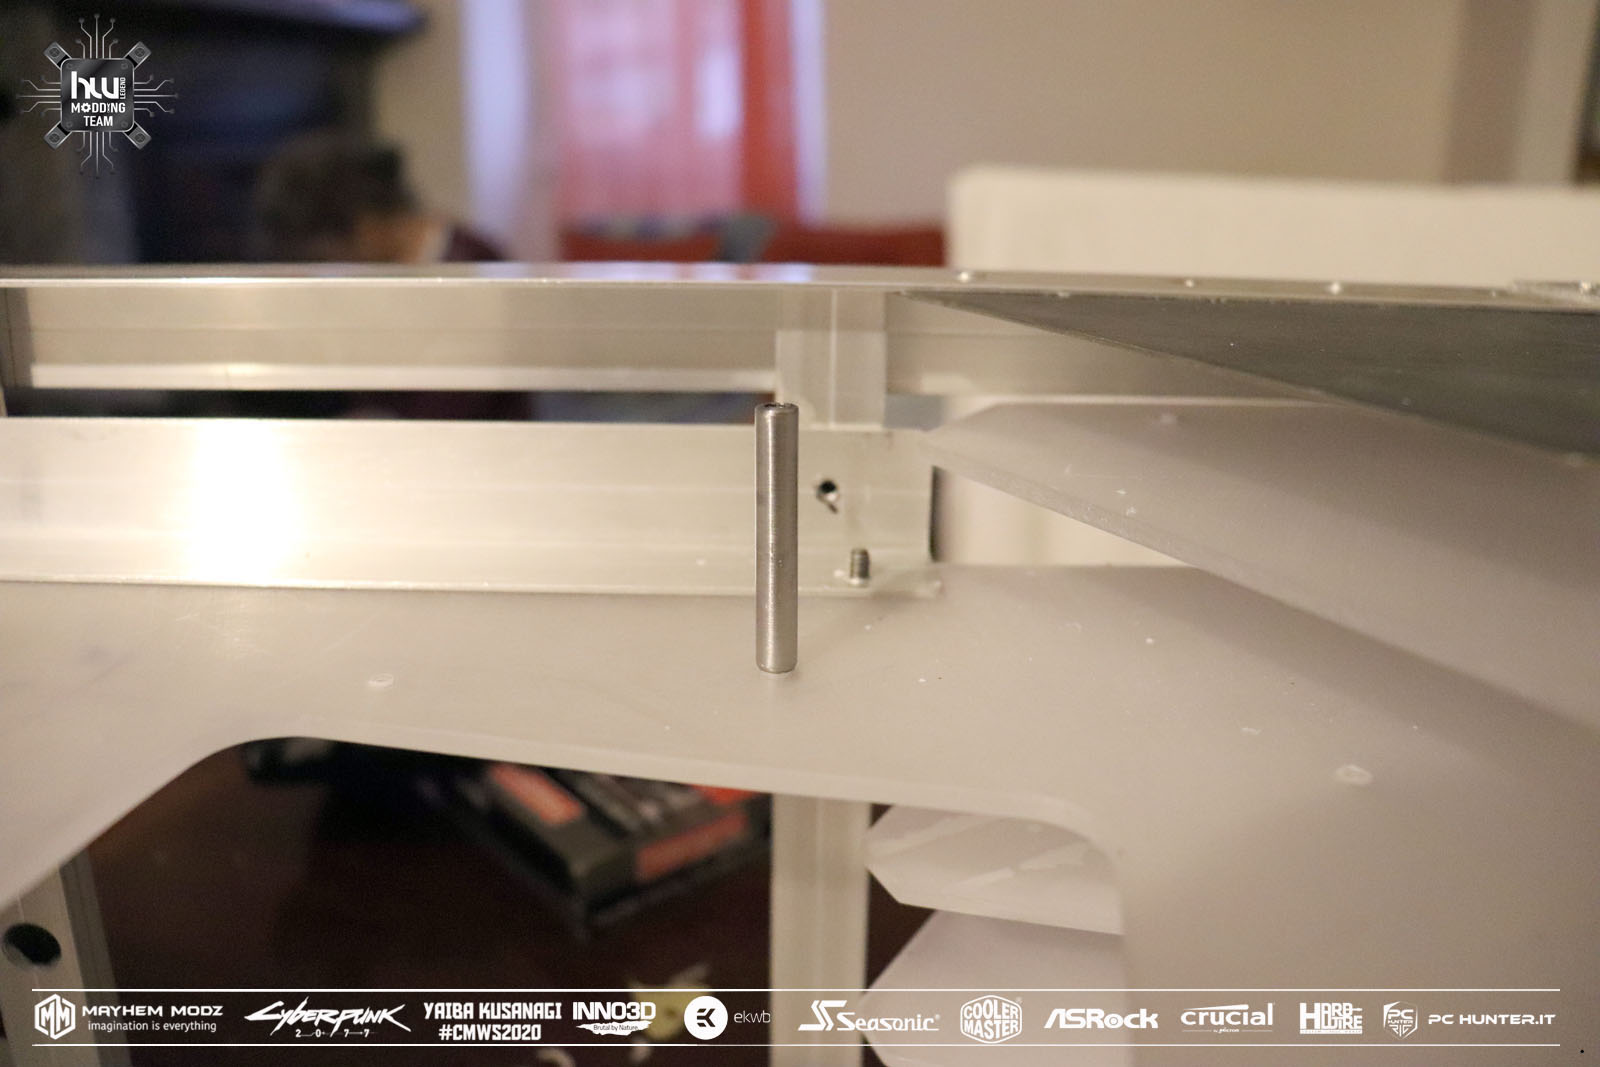
support arrangement to fix the I / O cover on the motherboard I take advantage of a screw already present on the motherboard


supports for fixing the panel steel rods cut with a threaded pipe cutter for M3 screws

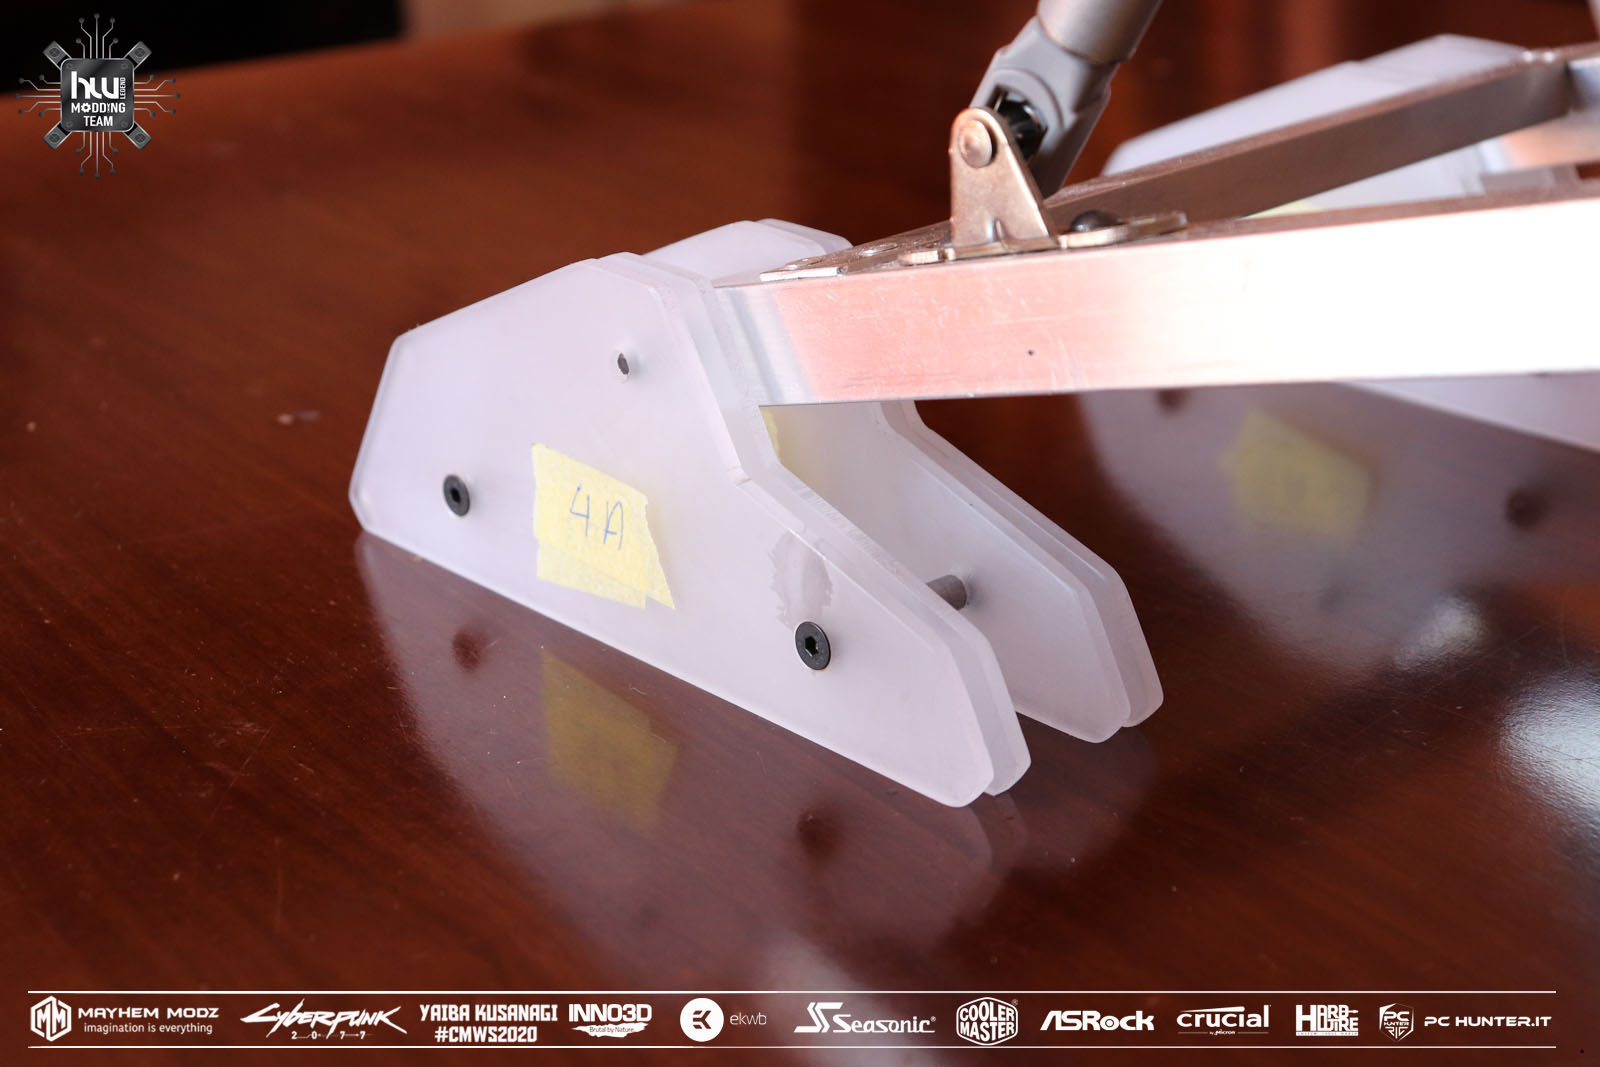
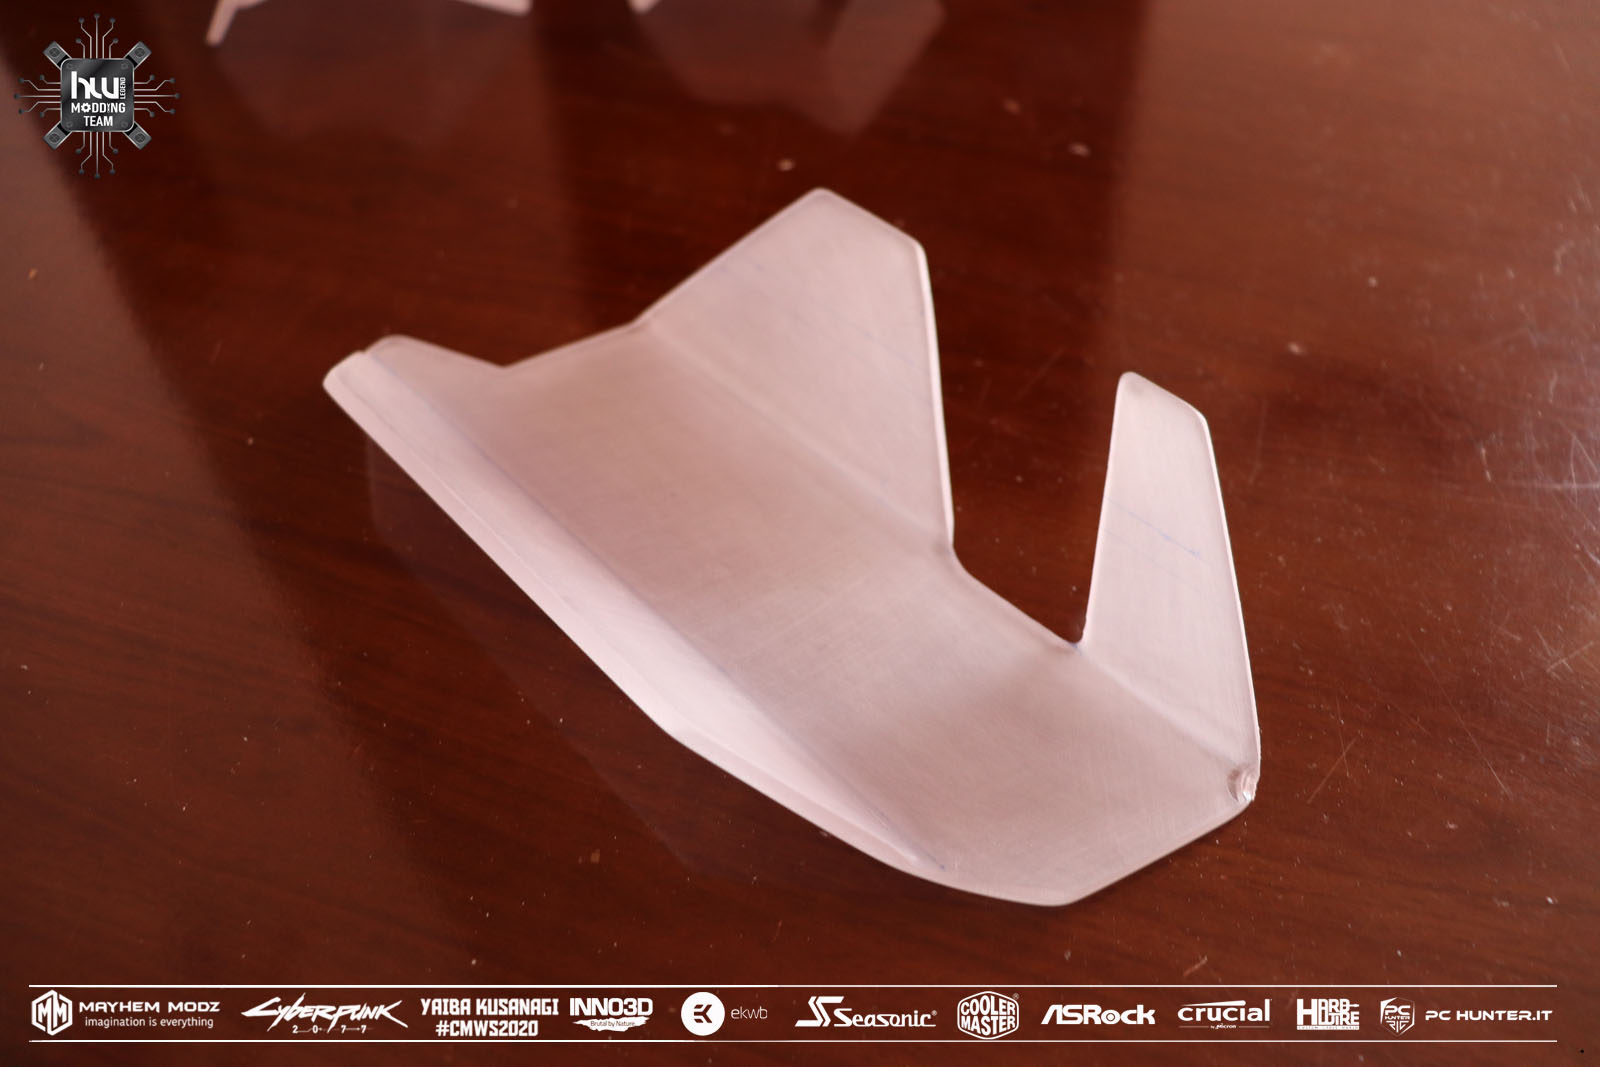
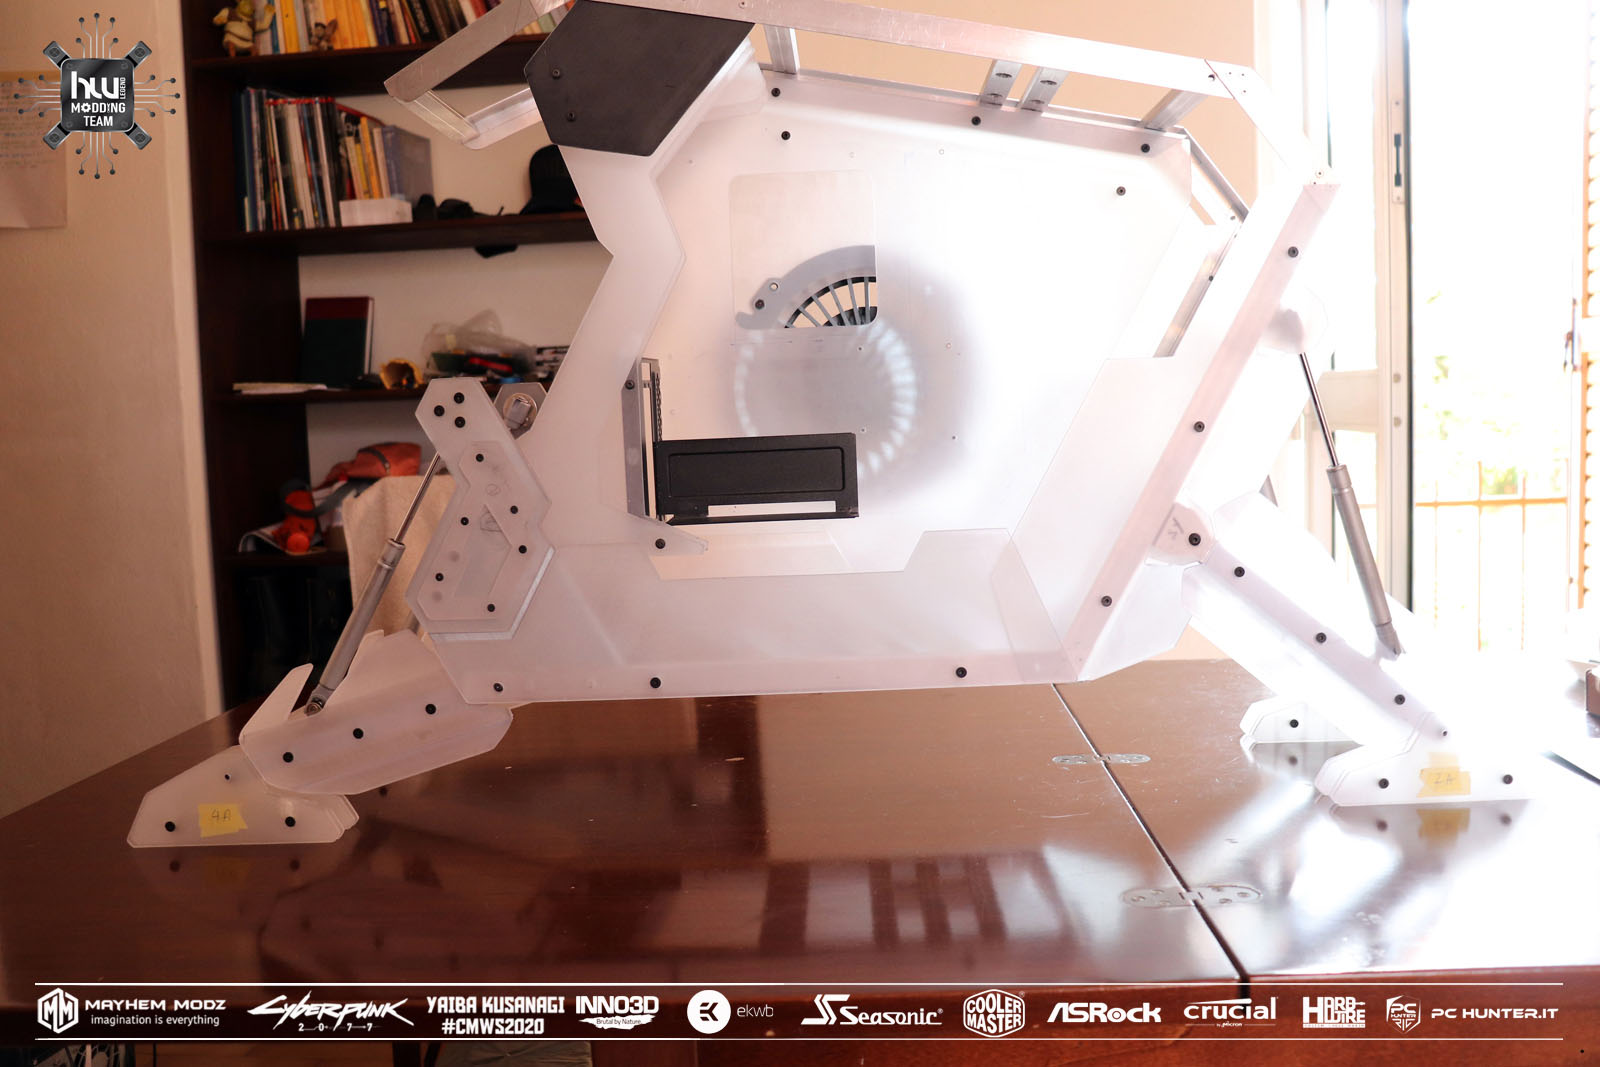
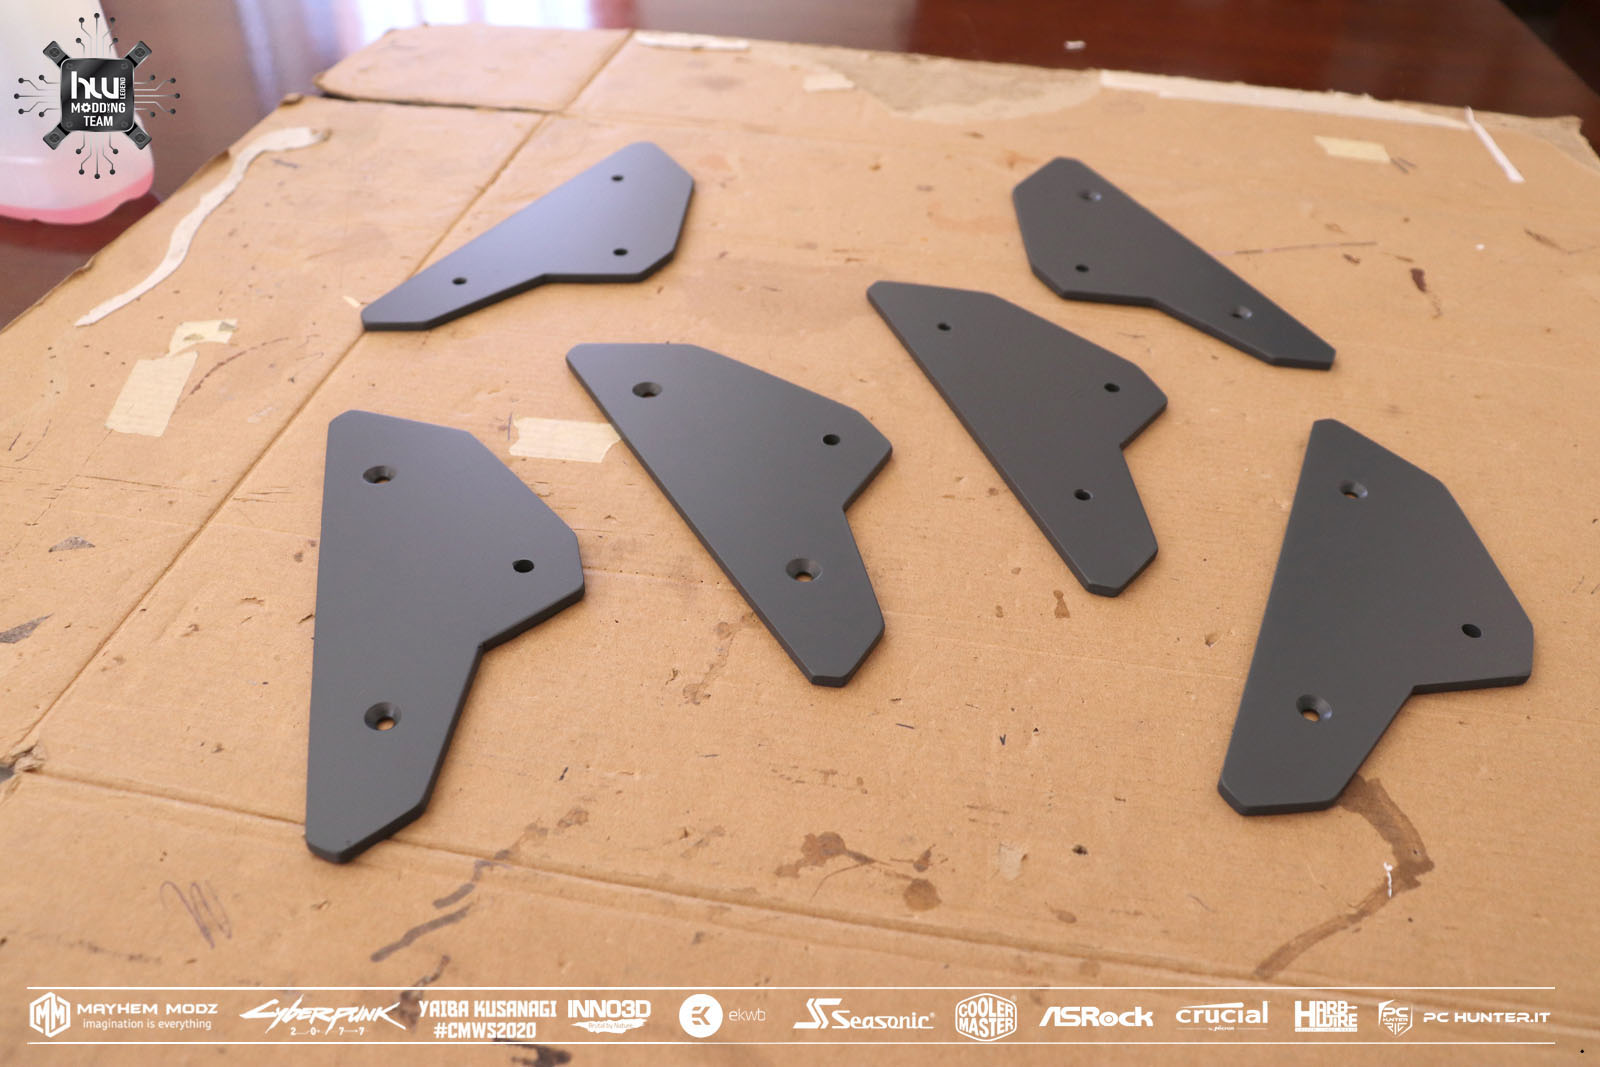
lower "fairing" cover panels and grille fixing for the 200 mm fan
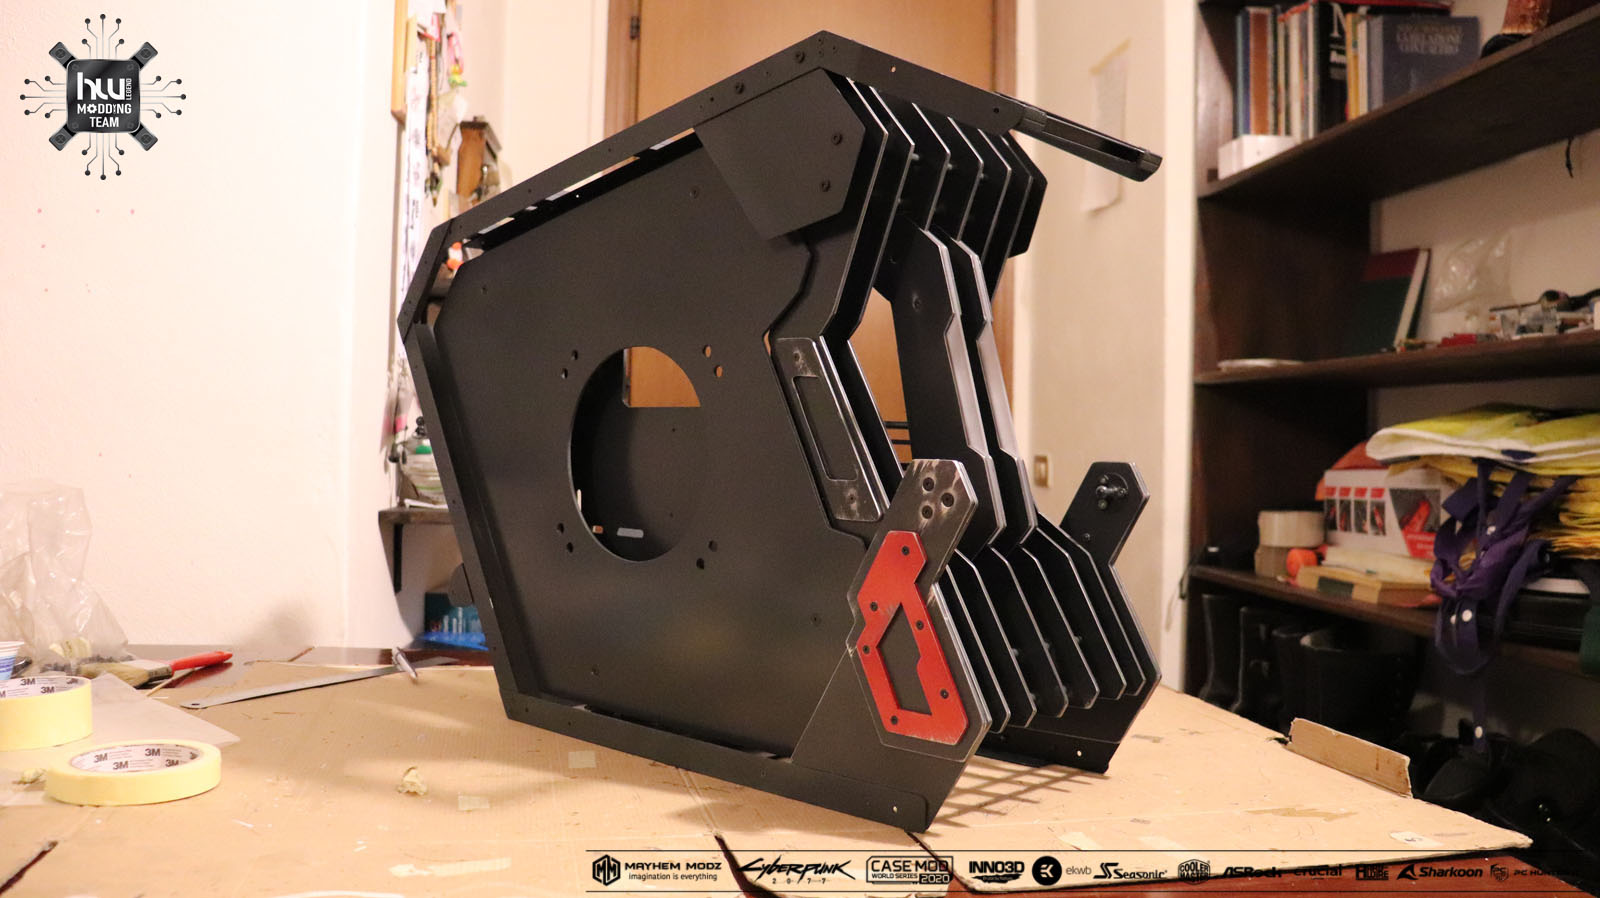
this side will be quite complex because there will be plates that will be overlapping


support arrangement to fix the I / O cover on the motherboard I take advantage of a screw already present on the motherboard
supports for fixing the panel steel rods cut with a threaded pipe cutter for M3 screws
lower "fairing" cover panels and grille fixing for the 200 mm fan
this side will be quite complex because there will be plates that will be overlapping


![[IMG]](/forums/proxy.php?image=https%3A%2F%2Fi.imgur.com%2FB7dK1pY.jpg&hash=d17bcac8199a95e88f26ec06cb557fa8 "[IMG]")
![[IMG]](/forums/proxy.php?image=https%3A%2F%2Fi.imgur.com%2FXuR8TF4.jpg&hash=a878957123dffc84a19edf4ca632d3c7 "[IMG]")
![[IMG]](/forums/proxy.php?image=https%3A%2F%2Fi.imgur.com%2FX2e6ACk.jpg&hash=01268111f2964edf6a0dcbeec40d9ecf "[IMG]")
![[IMG]](/forums/proxy.php?image=https%3A%2F%2Fi.imgur.com%2FA8sM1GJ.jpg&hash=3901fb16be4853240ef28be08516c318 "[IMG]")
![[IMG]](/forums/proxy.php?image=https%3A%2F%2Fi.imgur.com%2FPUXZuzm.jpg&hash=72fa4b20db4753d8bf4bc3c32f0f2951 "[IMG]")
![[IMG]](/forums/proxy.php?image=https%3A%2F%2Fi.imgur.com%2F2OZAHyy.jpg&hash=55e3b11993e63ba6c54c460fea84a596 "[IMG]")
![[IMG]](/forums/proxy.php?image=https%3A%2F%2Fi.imgur.com%2FZOupFDe.jpg&hash=c1250fdba541c4a34adf4ac25922facf "[IMG]")
![[IMG]](/forums/proxy.php?image=https%3A%2F%2Fi.imgur.com%2F55juXMy.jpg&hash=b4a2210affc424935bca82e64661b89f "[IMG]")
![[IMG]](/forums/proxy.php?image=https%3A%2F%2Fi.imgur.com%2FNXsB6Y4.jpg&hash=6839d981381d9db8466a543f4d42a786 "[IMG]")
![[IMG]](/forums/proxy.php?image=https%3A%2F%2Fi.imgur.com%2F3lJQysJ.jpg&hash=8fe540135d347f100701babb1e4e9363 "[IMG]")
![[IMG]](/forums/proxy.php?image=https%3A%2F%2Fi.imgur.com%2FneJHI7j.jpg&hash=bba44f476957b3c492d1f061025951ea "[IMG]")
![[IMG]](/forums/proxy.php?image=https%3A%2F%2Fi.imgur.com%2FPBhj5p2.jpg&hash=acc9e1bcbe3a454cbe790d7017cf1ae9 "[IMG]")
![[IMG]](/forums/proxy.php?image=https%3A%2F%2Fi.imgur.com%2FAaEXn8t.jpg&hash=a2dccd5e3543fb0ec1a3509319e68bfc "[IMG]")
![[IMG]](/forums/proxy.php?image=https%3A%2F%2Fi.imgur.com%2F0YAKv53.jpg&hash=56f7179c62ffd0c884ddba0cbdb72263 "[IMG]")
![[IMG]](/forums/proxy.php?image=https%3A%2F%2Fi.imgur.com%2F48SJCtO.jpg&hash=5a618b84347b9a9701ac79d87fd62df6 "[IMG]")
![[IMG]](/forums/proxy.php?image=https%3A%2F%2Fi.imgur.com%2Fj7yfMfu.jpg&hash=7adf804974b427690c7fe58487c2fb68 "[IMG]")
![[IMG]](/forums/proxy.php?image=https%3A%2F%2Fi.imgur.com%2FWbAm9Rb.jpg&hash=1227bbfc999b57d3b6b68369ac1374fe "[IMG]")
![[IMG]](/forums/proxy.php?image=https%3A%2F%2Fi.imgur.com%2FYxLBsBP.jpg&hash=df2ca07d1edea4a9c7b9f2d36519992c "[IMG]")
![[IMG]](/forums/proxy.php?image=https%3A%2F%2Fi.imgur.com%2FHhBWLqp.jpg&hash=6258aaac58158e2933a4ad385e4826d7 "[IMG]")
![[IMG]](/forums/proxy.php?image=https%3A%2F%2Fi.imgur.com%2FQjS7vvR.jpg&hash=c389d893827434b0d0ffb8a89adc996a "[IMG]")
![[IMG]](/forums/proxy.php?image=https%3A%2F%2Fi.imgur.com%2FCTkhUuc.jpg&hash=9af569b22f1f7aa22c7d3a61536dddd8 "[IMG]")
![[IMG]](/forums/proxy.php?image=https%3A%2F%2Fi.imgur.com%2FvsJJt5D.jpg&hash=a18ab8ecea3eaa2d30bcd880766f8706 "[IMG]")
![[IMG]](/forums/proxy.php?image=https%3A%2F%2Fi.imgur.com%2FHakASZf.jpg&hash=b356503668d621d4d0e6c56c5aaf6897 "[IMG]")
![[IMG]](/forums/proxy.php?image=https%3A%2F%2Fi.imgur.com%2FPwvEX4H.jpg&hash=f7caa7167d86634a682c8a31f39b88df "[IMG]")
![[IMG]](/forums/proxy.php?image=https%3A%2F%2Fi.imgur.com%2FFhdBlNB.jpg&hash=26b39dcd29fe5f1334ac56bd87f54f77 "[IMG]")
![[IMG]](/forums/proxy.php?image=https%3A%2F%2Fi.imgur.com%2F53D8cmu.jpg&hash=30eb04fa96d832c4c993c16148ff3832 "[IMG]")
![[IMG]](/forums/proxy.php?image=https%3A%2F%2Fi.imgur.com%2Fk9ScTqN.jpg&hash=9ba7393644bdd1bf6130fb01c720697e "[IMG]")
![[IMG]](/forums/proxy.php?image=https%3A%2F%2Fi.imgur.com%2FsjBhHzl.jpg&hash=bfadf8a7a3a01b1ecb327eea42c7cd3a "[IMG]")
![[IMG]](/forums/proxy.php?image=https%3A%2F%2Fi.imgur.com%2FXhCLiUS.jpg&hash=0d0d2bda803aceae6b5ed77161ea853e "[IMG]")
![[IMG]](/forums/proxy.php?image=https%3A%2F%2Fi.imgur.com%2FKqfCmZH.jpg&hash=0cb91431f76dbff7194b0c91333b305f "[IMG]")
![[IMG]](/forums/proxy.php?image=https%3A%2F%2Fi.imgur.com%2FeETwySS.jpg&hash=0cfe1a40c42488349f471a1198c44810 "[IMG]")
![[IMG]](/forums/proxy.php?image=https%3A%2F%2Fi.imgur.com%2Fb0TCQpH.jpg&hash=bcfdfa1a72498c36db210d20b37c4289 "[IMG]")
![[IMG]](/forums/proxy.php?image=https%3A%2F%2Fi.imgur.com%2FmxLcGBX.jpg&hash=6774ec5574d708e1a006994a8d2b74ed "[IMG]")
![[IMG]](/forums/proxy.php?image=https%3A%2F%2Fi.imgur.com%2FBTYnGQu.jpg&hash=24cadbb35955f8d8e02b718d1a8d0e17 "[IMG]")
![[IMG]](/forums/proxy.php?image=https%3A%2F%2Fi.imgur.com%2FEo44ZW4.jpg&hash=8c6e9d5df39f2e432b6e7ccc9187adb8 "[IMG]")
![[IMG]](/forums/proxy.php?image=https%3A%2F%2Fi.imgur.com%2FPSadEjE.jpg&hash=77219045b1b5c9b54a1e9b2a0cbb597b "[IMG]")
![[IMG]](/forums/proxy.php?image=https%3A%2F%2Fi.imgur.com%2FAnBxcp7.jpg&hash=c4ebfb1ba0fa433cac8cc59615fde3c7 "[IMG]")
![[IMG]](/forums/proxy.php?image=https%3A%2F%2Fi.imgur.com%2FTxnvI1v.jpg&hash=c458f3930a9c19d3b1d3a9d53fff4756 "[IMG]")
![[IMG]](/forums/proxy.php?image=https%3A%2F%2Fi.imgur.com%2FDu3R95d.jpg&hash=a2cc9134d9dbebb392828cba8735247d "[IMG]")


![[IMG]](/forums/proxy.php?image=https%3A%2F%2Fi.imgur.com%2Fb6nedwk.jpg&hash=b0848eaf2bde4d1d9a228fa2090fca6c "[IMG]")
![[IMG]](/forums/proxy.php?image=https%3A%2F%2Fi.imgur.com%2Fyz3f9ya.jpg&hash=3b1e05a48f45cf1ed4286e021ca8a5ab "[IMG]")
![[IMG]](/forums/proxy.php?image=https%3A%2F%2Fi.imgur.com%2FoPSqVMf.jpg&hash=a7cc22c559a2e3de33abb0a5b0806347 "[IMG]")
![[IMG]](/forums/proxy.php?image=https%3A%2F%2Fi.imgur.com%2F9cxADGZ.jpg&hash=515d48e90a96c9e5685927f27ef18264 "[IMG]")
![[IMG]](/forums/proxy.php?image=https%3A%2F%2Fi.imgur.com%2FyZeNw2N.jpg&hash=fb6fc11c23be61a36173763edcb734fa "[IMG]")
![[IMG]](/forums/proxy.php?image=https%3A%2F%2Fi.imgur.com%2FCzjdM9e.jpg&hash=af3102203547f0ff5ee9836e071d7f55 "[IMG]")
![[IMG]](/forums/proxy.php?image=https%3A%2F%2Fi.imgur.com%2FOi1qD6q.jpg&hash=2f9714ee594507fd9f3dbcbb8de5cd05 "[IMG]")
![[IMG]](/forums/proxy.php?image=https%3A%2F%2Fi.imgur.com%2FWlv3Z3m.jpg&hash=2fc8988bfc053064123c3e033dbf9260 "[IMG]")
![[IMG]](/forums/proxy.php?image=https%3A%2F%2Fi.imgur.com%2FI4MKqFh.jpg&hash=56c1e43f389cec5abea4e6d31dd43428 "[IMG]")
![[IMG]](/forums/proxy.php?image=https%3A%2F%2Fi.imgur.com%2FubBvKhj.jpg&hash=a20232081af3dd3d0c53e8c84c97520a "[IMG]")
![[IMG]](/forums/proxy.php?image=https%3A%2F%2Fi.imgur.com%2F0UZrkSV.jpg&hash=d2b5ab8f8fc7622866e123236e2d44d9 "[IMG]")
![[IMG]](/forums/proxy.php?image=https%3A%2F%2Fi.imgur.com%2F5flOhdR.jpg&hash=996fda5d460311083709623a53ab5e99 "[IMG]")
![[IMG]](/forums/proxy.php?image=https%3A%2F%2Fi.imgur.com%2F154L1ut.jpg&hash=db6b9c1cf041a2b06329aac5e22e3524 "[IMG]")
![[IMG]](/forums/proxy.php?image=https%3A%2F%2Fi.imgur.com%2F0bpZgsj.jpg&hash=56611bdbc6ce0dcf99b053eb82de48e8 "[IMG]")
![[IMG]](/forums/proxy.php?image=https%3A%2F%2Fi.imgur.com%2FJOUfyDZ.jpg&hash=e56c3d1a0c5276fb6fc5b5b80b5ec726 "[IMG]")
![[IMG]](/forums/proxy.php?image=https%3A%2F%2Fi.imgur.com%2FbvWEm1x.png&hash=fb2c050335b9ddc8b475056eae14a551 "[IMG]")
![[IMG]](/forums/proxy.php?image=https%3A%2F%2Fi.imgur.com%2FgYICf38.jpg&hash=0bc195c45ac6fadcf1653feb34a55da8 "[IMG]")
![[IMG]](/forums/proxy.php?image=https%3A%2F%2Fi.imgur.com%2FC2JqNpC.jpg&hash=cb24b243989073383552f3a4286846d3 "[IMG]")
![[IMG]](/forums/proxy.php?image=https%3A%2F%2Fi.imgur.com%2F1R1WEJG.jpg&hash=57857ec93a01d1d125c8ed543432abf4 "[IMG]")
![[IMG]](/forums/proxy.php?image=https%3A%2F%2Fi.imgur.com%2FGGCuYvU.jpg&hash=c3137b1570ed5b8edf1da3db311d1a15 "[IMG]")
![[IMG]](/forums/proxy.php?image=https%3A%2F%2Fi.imgur.com%2FPn2WA4z.jpg&hash=64e6ff5c5fd99e62e07dbccdea22718f "[IMG]")
![[IMG]](/forums/proxy.php?image=https%3A%2F%2Fi.imgur.com%2FjUlTSbB.jpg&hash=ba5f4ebf143c88cf5bed6de195ec2111 "[IMG]")
![[IMG]](/forums/proxy.php?image=https%3A%2F%2Fi.imgur.com%2FnLgne0c.jpg&hash=4ff38be4840ab342d6c201ca59fb42b9 "[IMG]")
![[IMG]](/forums/proxy.php?image=https%3A%2F%2Fi.imgur.com%2FBccJ94x.jpg&hash=71a817a3eeeabb0cfa3d0bdd82b36609 "[IMG]")

![[IMG]](/forums/proxy.php?image=https%3A%2F%2Fi.imgur.com%2FbrBDaWG.jpg&hash=04948d83739f2eb3a7b064f8a059042a "[IMG]")
![[IMG]](/forums/proxy.php?image=https%3A%2F%2Fi.imgur.com%2FotPogXk.jpg&hash=f18f83c7b64293ad66eb582ace0005c1 "[IMG]")
![[IMG]](/forums/proxy.php?image=https%3A%2F%2Fi.imgur.com%2FmBtESMc.jpg&hash=3dfbeced74841906f725e2dd2f14dfda "[IMG]")
![[IMG]](/forums/proxy.php?image=https%3A%2F%2Fi.imgur.com%2FhqWoeKA.jpg&hash=a1b4b238132abc7cc5a028928024bf48 "[IMG]")
![[IMG]](/forums/proxy.php?image=https%3A%2F%2Fi.imgur.com%2FCHow3tl.jpg&hash=6101f382b7b0b001cdb946371ecfe0ec "[IMG]")
![[IMG]](/forums/proxy.php?image=https%3A%2F%2Fi.imgur.com%2FsVX5OyA.jpg&hash=d75a54fd8a76bb1a611e39c52355c2a6 "[IMG]")
![[IMG]](/forums/proxy.php?image=https%3A%2F%2Fi.imgur.com%2FkhpQxsB.jpg&hash=9c0a6837e49bdc7ed1499c562bd0772b "[IMG]")
![[IMG]](/forums/proxy.php?image=https%3A%2F%2Fi.imgur.com%2FisdCaK4.jpg&hash=d5d89fb502d5cf787686affd068ed959 "[IMG]")
![[IMG]](/forums/proxy.php?image=https%3A%2F%2Fi.imgur.com%2FQ34lTuE.jpg&hash=dea93f728ffc6319361832e8f8a507d4 "[IMG]")
![[IMG]](/forums/proxy.php?image=https%3A%2F%2Fi.imgur.com%2FTAqgmBk.jpg&hash=7c77b398b8098d003f41ee2b3c9c2b5b "[IMG]")
![[IMG]](/forums/proxy.php?image=https%3A%2F%2Fi.imgur.com%2FEIifxPH.jpg&hash=2efff21c64a482001eda716ffce352ce "[IMG]")
![[IMG]](/forums/proxy.php?image=https%3A%2F%2Fi.imgur.com%2F4sHo9KN.jpg&hash=735ce6ec50202d18c55d35b23e7d0bdb "[IMG]")
![[IMG]](/forums/proxy.php?image=https%3A%2F%2Fi.imgur.com%2FIBozqoG.jpg&hash=5d5c150116274f4d6b0175c47898e2b7 "[IMG]")
![[IMG]](/forums/proxy.php?image=https%3A%2F%2Fi.imgur.com%2FUAlEd6r.jpg&hash=4b072a660e82c82e41b16c05b5bb8e1f "[IMG]")
![[IMG]](/forums/proxy.php?image=https%3A%2F%2Fi.imgur.com%2FYPfzlMK.jpg&hash=8cd594cc2ffe87177075c5731151f38c "[IMG]")


![[IMG]](/forums/proxy.php?image=https%3A%2F%2Fi.imgur.com%2Fz5HbDij.jpg&hash=eba443babf4232fe0dc674bb373e4c31 "[IMG]")
![[IMG]](/forums/proxy.php?image=https%3A%2F%2Fi.imgur.com%2FB1vxYRu.jpg&hash=5242bc6eeee5b35cab2b88754611f8d9 "[IMG]")
![[IMG]](/forums/proxy.php?image=https%3A%2F%2Fi.imgur.com%2F5sYEqDl.jpg&hash=b3bc81cf5ea5aff626e5c2089979be2b "[IMG]")
![[IMG]](/forums/proxy.php?image=https%3A%2F%2Fi.imgur.com%2FgCxTfkE.jpg&hash=ed19db35d3cd566c97dded228d627fff "[IMG]")
![[IMG]](/forums/proxy.php?image=https%3A%2F%2Fi.imgur.com%2FgbY5Vkb.jpg&hash=a737a65c423a5c2d693ba68965235173 "[IMG]")
![[IMG]](/forums/proxy.php?image=https%3A%2F%2Fi.imgur.com%2FL1Avn7x.jpg&hash=50008b55d14e7c6e94bb125c781949d2 "[IMG]")
![[IMG]](/forums/proxy.php?image=https%3A%2F%2Fi.imgur.com%2FESHn9x3.jpg&hash=0e65e27fdcf8bef22f0132b3f345acf8 "[IMG]")
![[IMG]](/forums/proxy.php?image=https%3A%2F%2Fi.imgur.com%2FCLvluL8.jpg&hash=e3c28bb12b70aaa6a61fc04abd20aa3d "[IMG]")
![[IMG]](/forums/proxy.php?image=https%3A%2F%2Fi.imgur.com%2Frg4zhvJ.jpg&hash=c3bb94f745deb8fe44840ef6dfb1c701 "[IMG]")
![[IMG]](/forums/proxy.php?image=https%3A%2F%2Fi.imgur.com%2Ffhc4jXk.jpg&hash=70a8d12ec31f2aa6f7880937d7384e2c "[IMG]")
![[IMG]](/forums/proxy.php?image=https%3A%2F%2Fi.imgur.com%2FmPZra9k.jpg&hash=a0deac123afa6aa6fe595a021b35062b "[IMG]")
![[IMG]](/forums/proxy.php?image=https%3A%2F%2Fi.imgur.com%2FEntOqnA.jpg&hash=b7afb3ff9757cbe35f1ce099d1ee26d8 "[IMG]")
![[IMG]](/forums/proxy.php?image=https%3A%2F%2Fi.imgur.com%2F6FwbpFu.jpg&hash=20a0c58045998db39278e613848514ed "[IMG]")
![[IMG]](/forums/proxy.php?image=https%3A%2F%2Fi.imgur.com%2FpFjSHTG.jpg&hash=7d57da4300b82cb383f5e4390a63b485 "[IMG]")
![[IMG]](/forums/proxy.php?image=https%3A%2F%2Fi.imgur.com%2FcNonwOF.jpg&hash=fde5758f8dcc8c78d8403d63e31bf1fe "[IMG]")
![[IMG]](/forums/proxy.php?image=https%3A%2F%2Fi.imgur.com%2F2g6HOoP.jpg&hash=1000286ef1a7658dce5f433606544abd "[IMG]")
![[IMG]](/forums/proxy.php?image=https%3A%2F%2Fi.imgur.com%2F7gOFzfA.jpg&hash=9f92b68ce9ee441619c492dd78062125 "[IMG]")
![[IMG]](/forums/proxy.php?image=https%3A%2F%2Fi.imgur.com%2FGTuLjCM.jpg&hash=b65cfd198203a294b927a9c4b89c707d "[IMG]")