-
Welcome to TechPowerUp Forums, Guest! Please check out our forum guidelines for info related to our community.
You are using an out of date browser. It may not display this or other websites correctly.
You should upgrade or use an alternative browser.
You should upgrade or use an alternative browser.
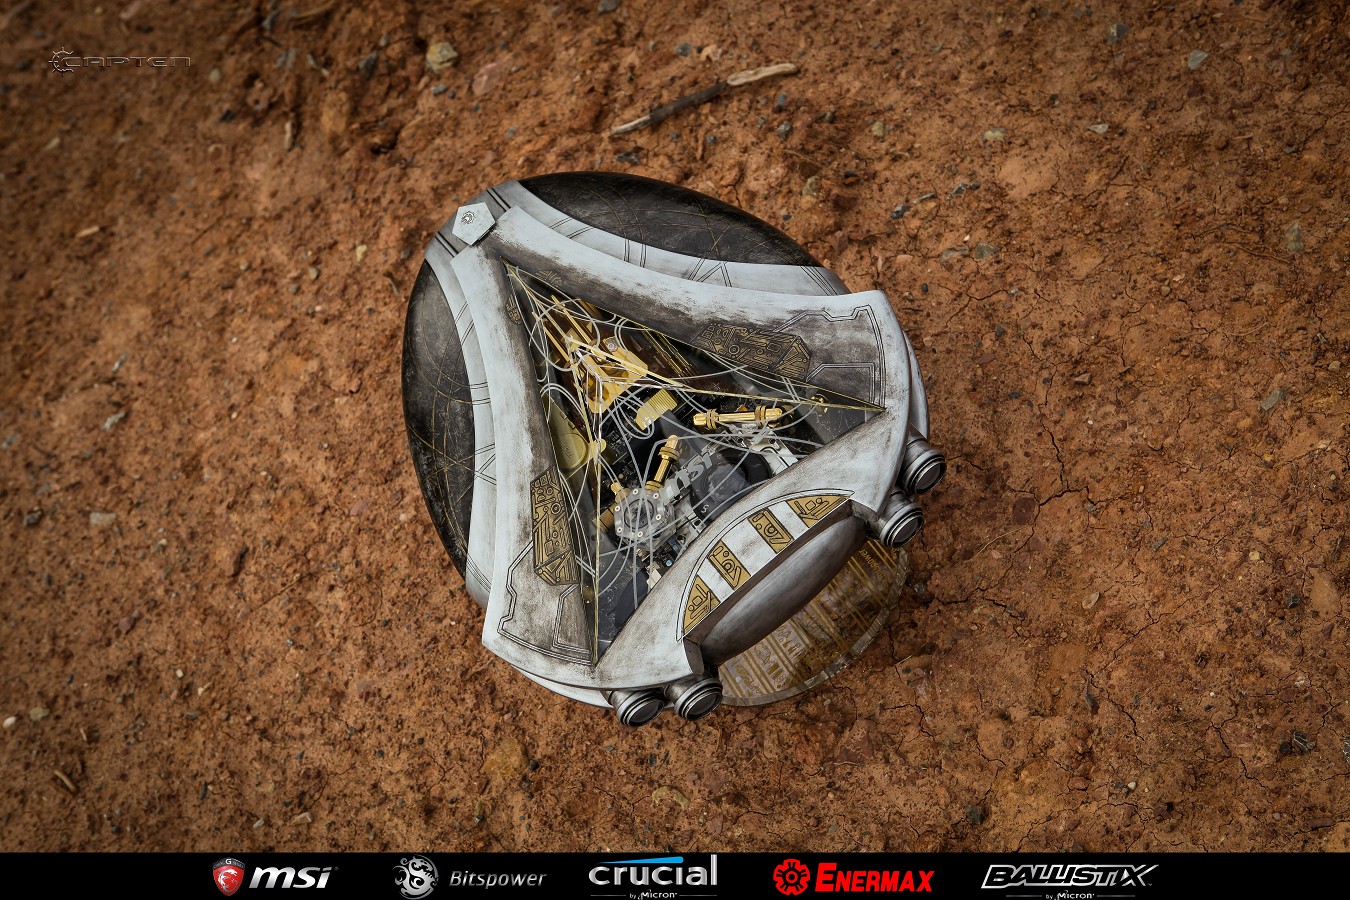
Goa´uld Al´Kesh [scratch build]
- Thread starter CapTen
- Start date


- Joined
- Jun 8, 2011
- Messages
- 15,947 (3.39/day)
- Location
- Somerset, UK
| System Name | Not so complete or overkill - There are others!! Just no room to put! :D |
|---|---|
| Processor | Ryzen Threadripper 3970X |
| Motherboard | Asus Zenith 2 Extreme Alpha |
| Cooling | Lots!! Dual GTX 560 rads with D5 pumps for each rad. One rad for each component |
| Memory | Viper Steel 4 x 16GB DDR4 3600MHz not sure on the timings... Probably still at 2667!! :( |
| Video Card(s) | Asus Strix 3090 with front and rear active full cover water blocks |
| Storage | I'm bound to forget something here - 250GB OS, 2 x 1TB NVME, 2 x 1TB SSD, 4TB SSD, 2 x 8TB HD etc... |
| Display(s) | 3 x Dell 27" S2721DGFA @ 7680 x 1440P @ 144Hz or 165Hz - working on it!! |
| Case | The big Thermaltake that looks like a Case Mods |
| Audio Device(s) | Onboard |
| Power Supply | EVGA 1600W T2 |
| Mouse | Corsair thingy |
| Keyboard | Razer something or other.... |
| VR HMD | No headset yet |
| Software | Windows 11 OS... Not a fan!! |
| Benchmark Scores | I've actually never benched it!! Too busy with WCG and FAH and not gaming! :( :( Not OC'd it!! :( |
I don't know how you guys do it but wow I'm glad you do!! Gives us normal guys something to look at and think wow at!! How many hours did you put into this??? I'd guess it must have been in the hundreds??
- Joined
- Aug 26, 2016
- Messages
- 78 (0.03/day)
- Location
- Germany
And on it goes, I completely forgot that the Modding Masters already on 2.-3.6.18 is.
I really wanted to be done so now we have a Deadline.
As I mentioned earlier, there was a lot to fill and to grind.


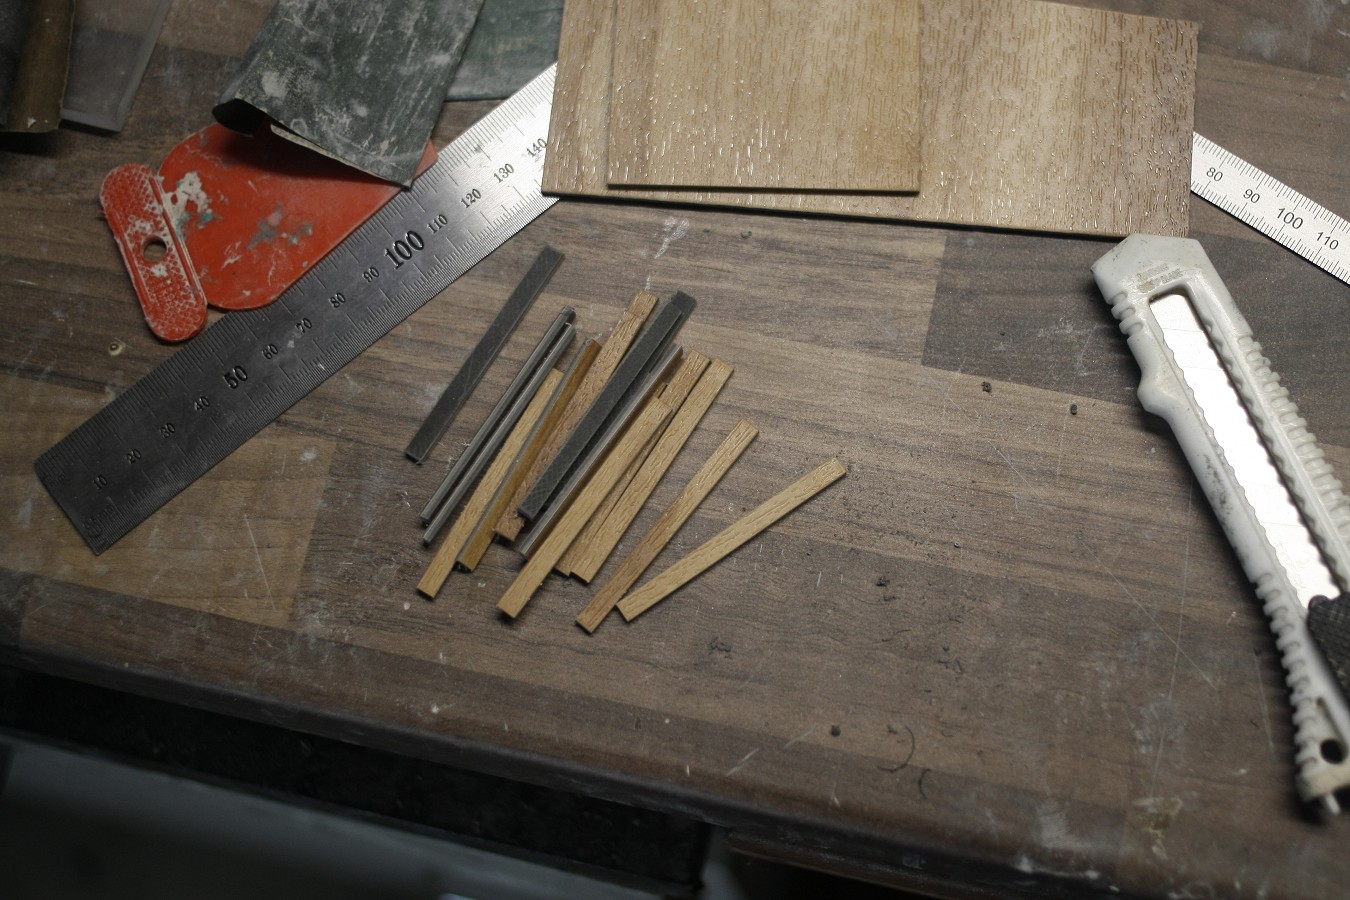
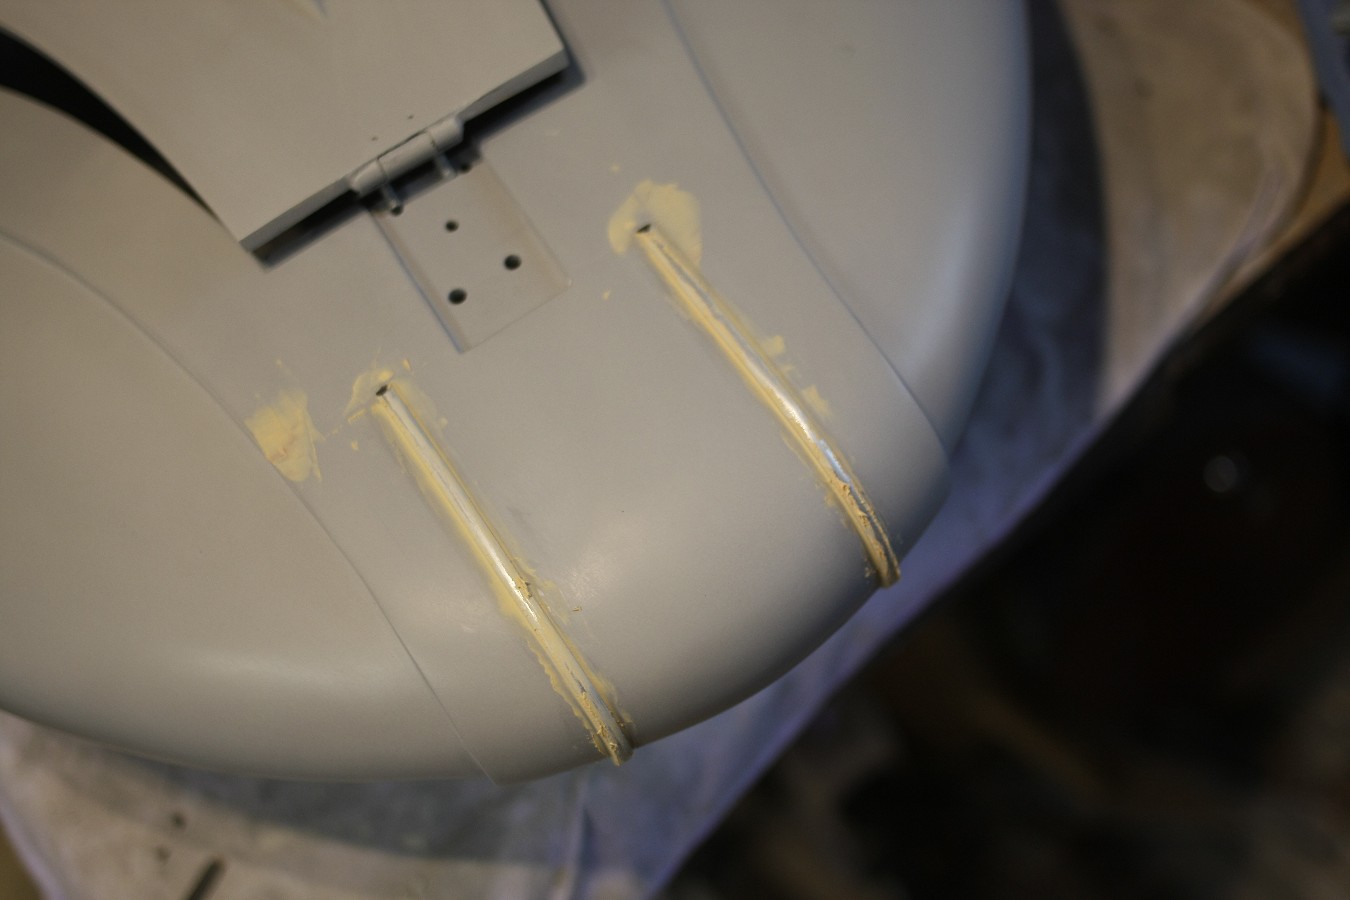
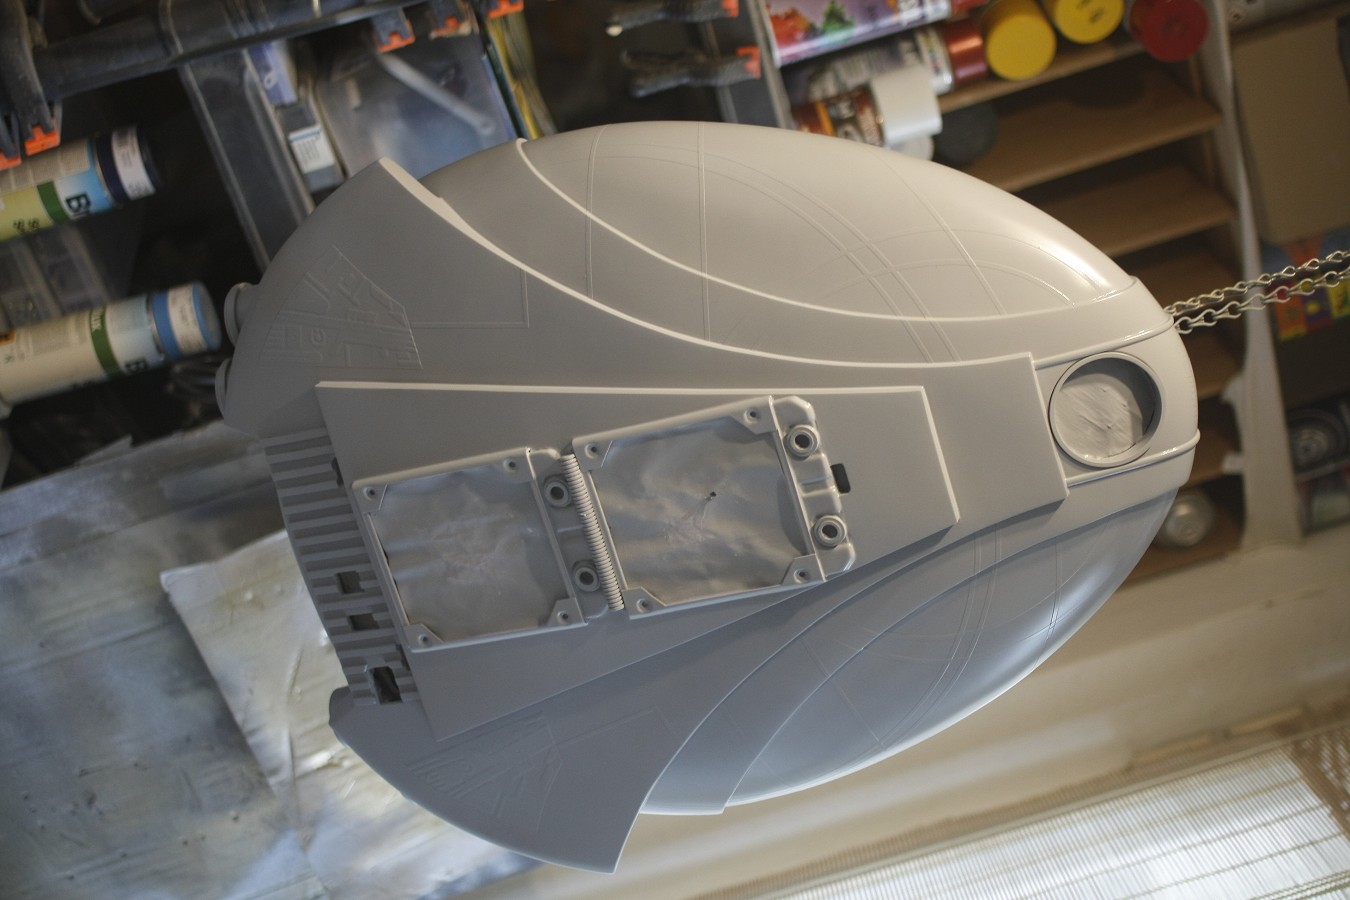
The IO panel should still be clad with ribs, after long thinks whether Plexi or Alu I have decided jokingly for a PVC design flooring.
The surface is like everything else slightly arched, so I was reluctant to bend ALU or Plexi for.
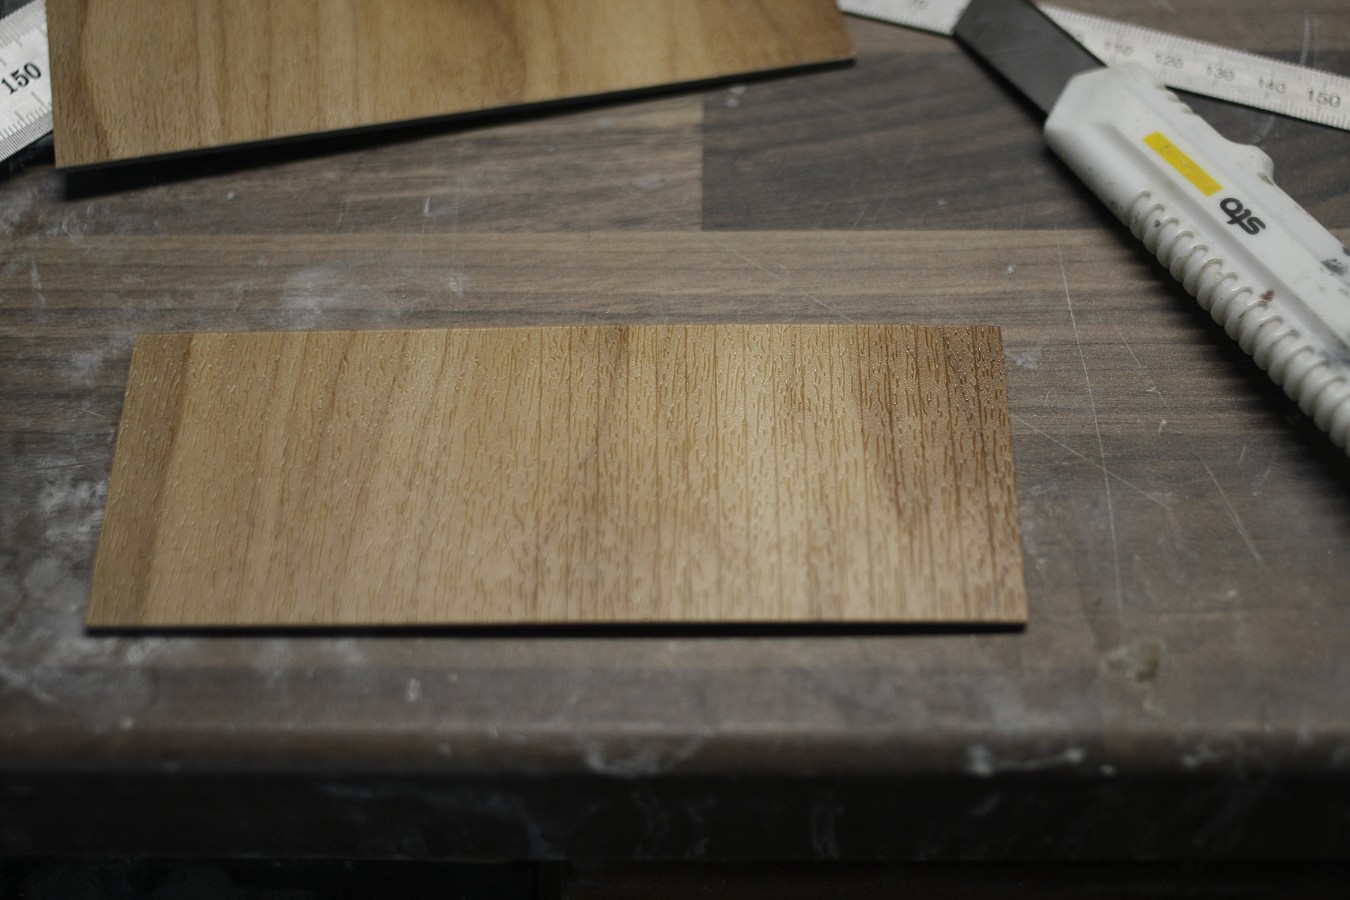
I then cut this 16 times in 5mm strips, sanded some edges and glued with mounting glue in 7mm distance on the IO panel
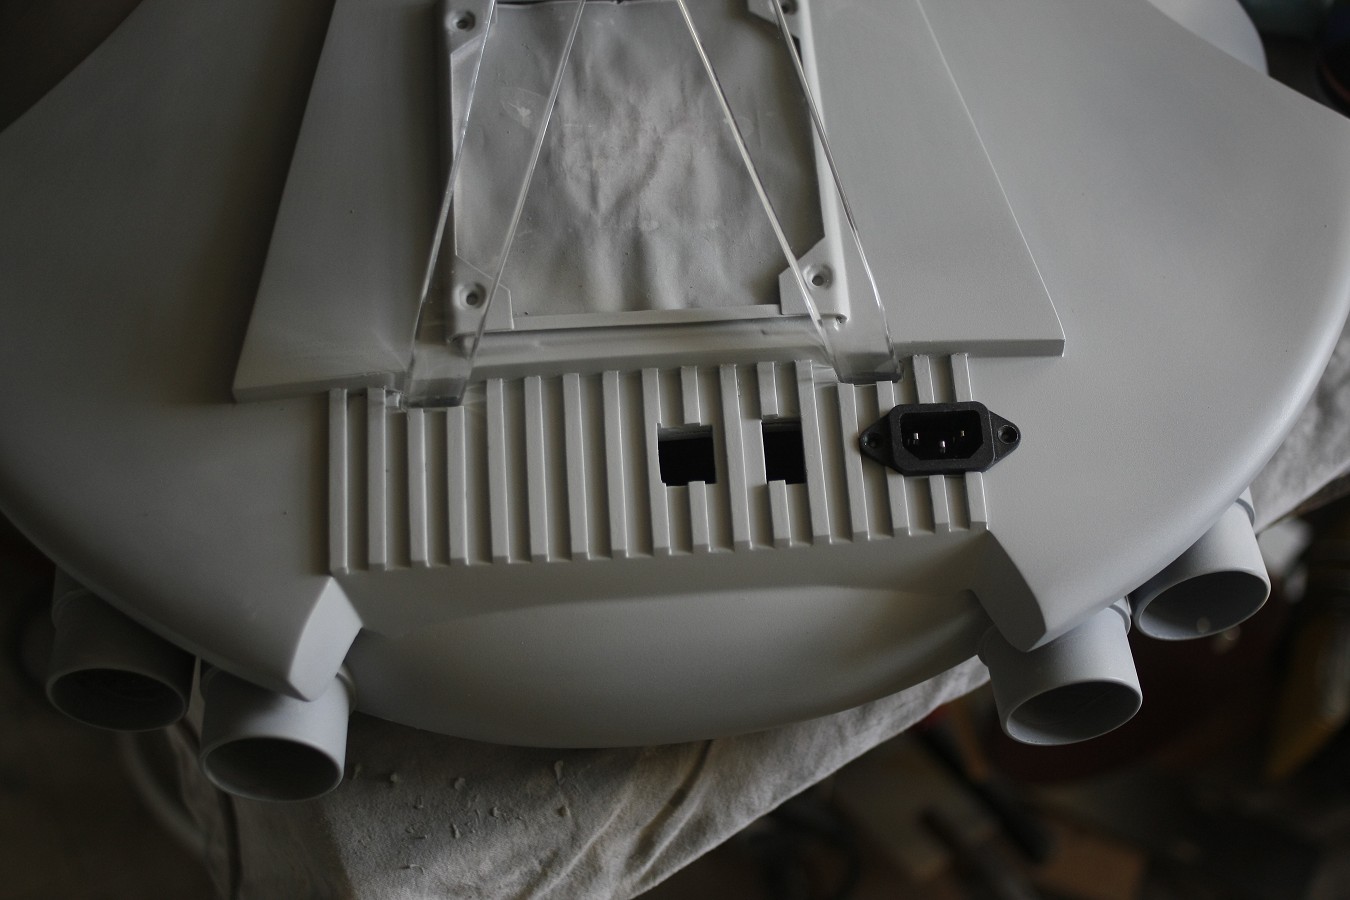
oh so and the Alkesh would then slowly ready for the paint job


After curing, I then sanded the supernatants, a little more leveled and primed
As I mentioned in some forums, blue LEDs are not bright enough for the drive so I rebuilt the lens without the holes for LEDs on the back.
Here is just a white high density LED stripe behind the lens. The effect is really cool because you go blind: rofl:
but a slight blue tint, I would have been happy.

I have here now two lenses back with light and dark blue painted but except that the light intensity decreases does not bring much synonymous.
The blue effect comes only from the reflection of the plexiglass on the side, but the light itself remains white.
No plan then I'll leave it White.


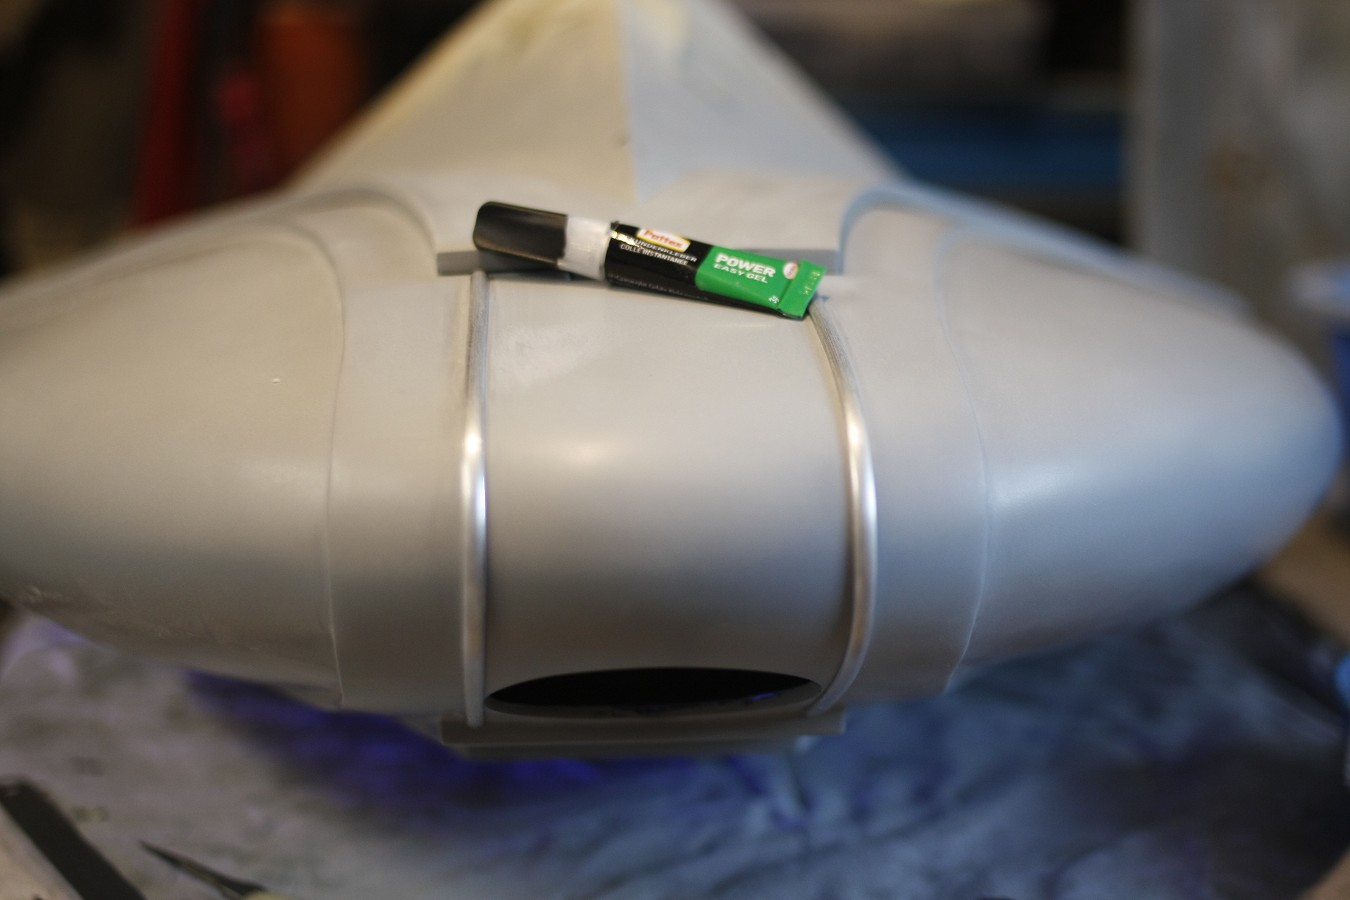
so I had a roll of 4mm trim in chrome, they fit perfectly to the front of the Alkesh's.
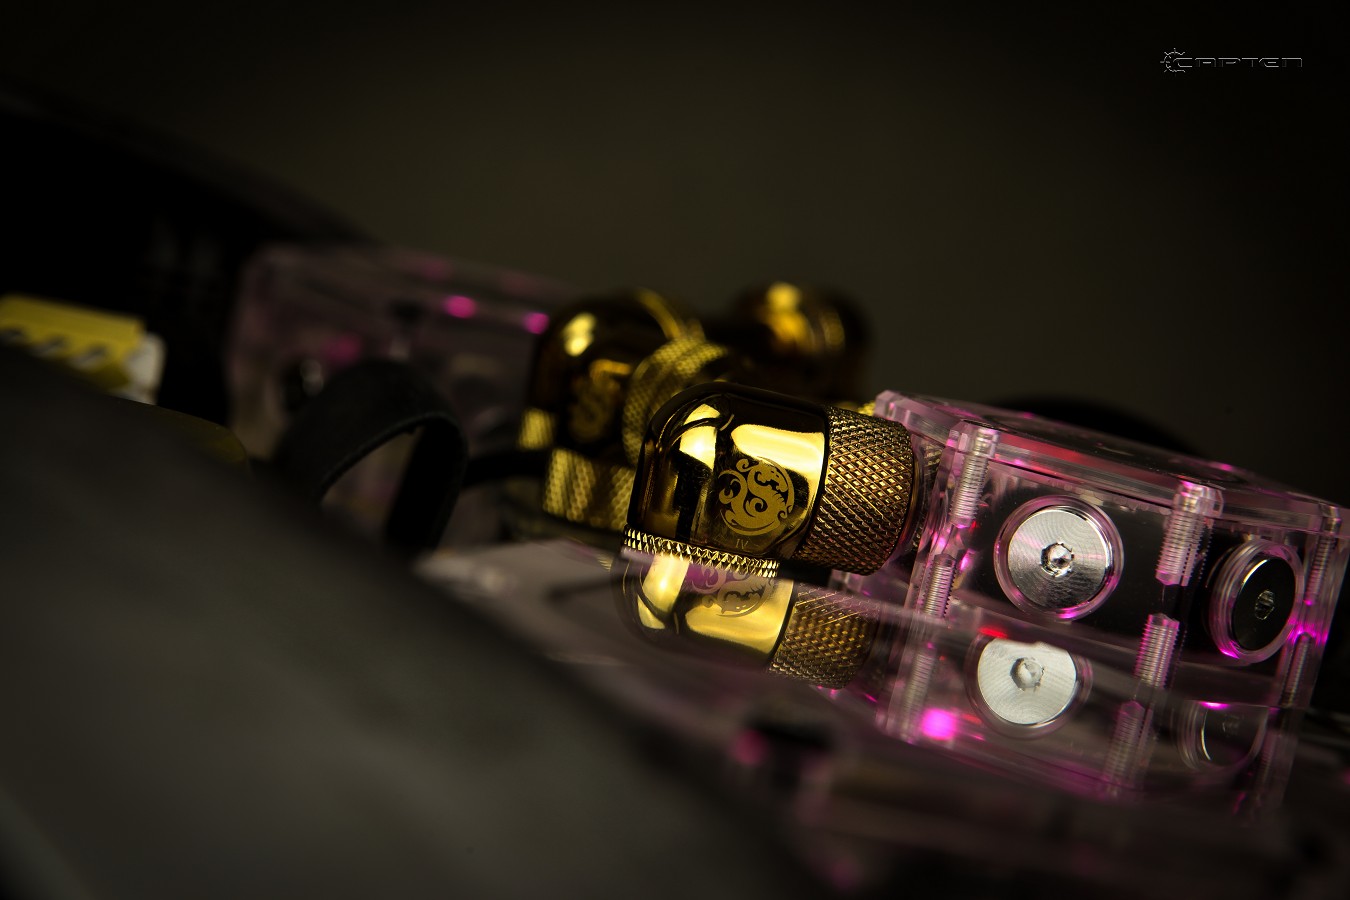
Normally, two more lines would cross in the middle, but at this point the Bitspower Dragon is supposed to. As this is very similar to the symbols of Jaffa Tattoos.
Attached with superglue, keeps bomb
When I wanted to paint the cockpit, I noticed that the part of times something crooked is so I was allowed to build me a new cockpit.
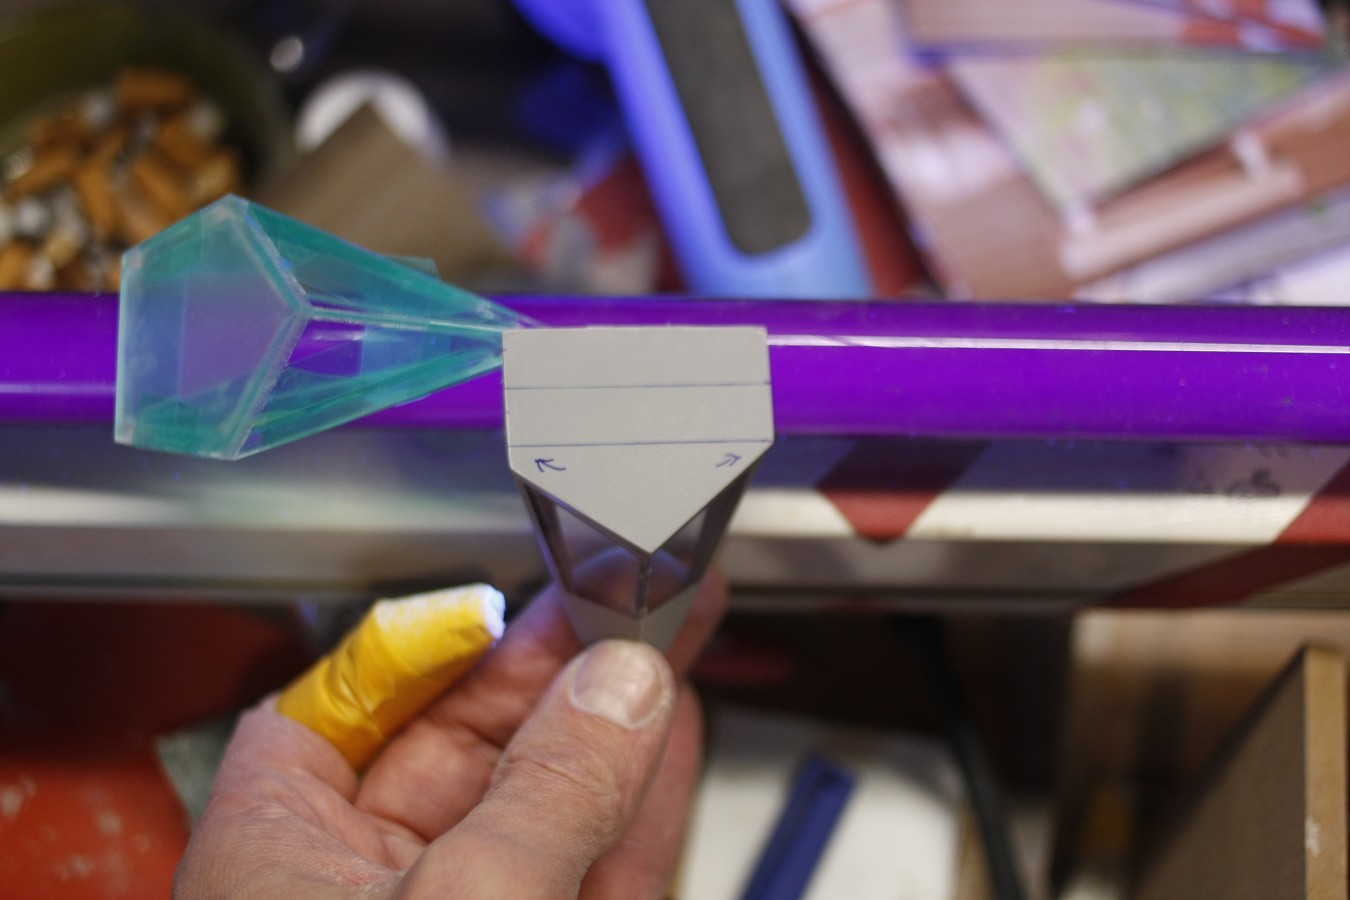
Since the moldings are rounded down, I still had everything neatly trowel here
and so that I can still open the lid properly, the ends were still bevelled.

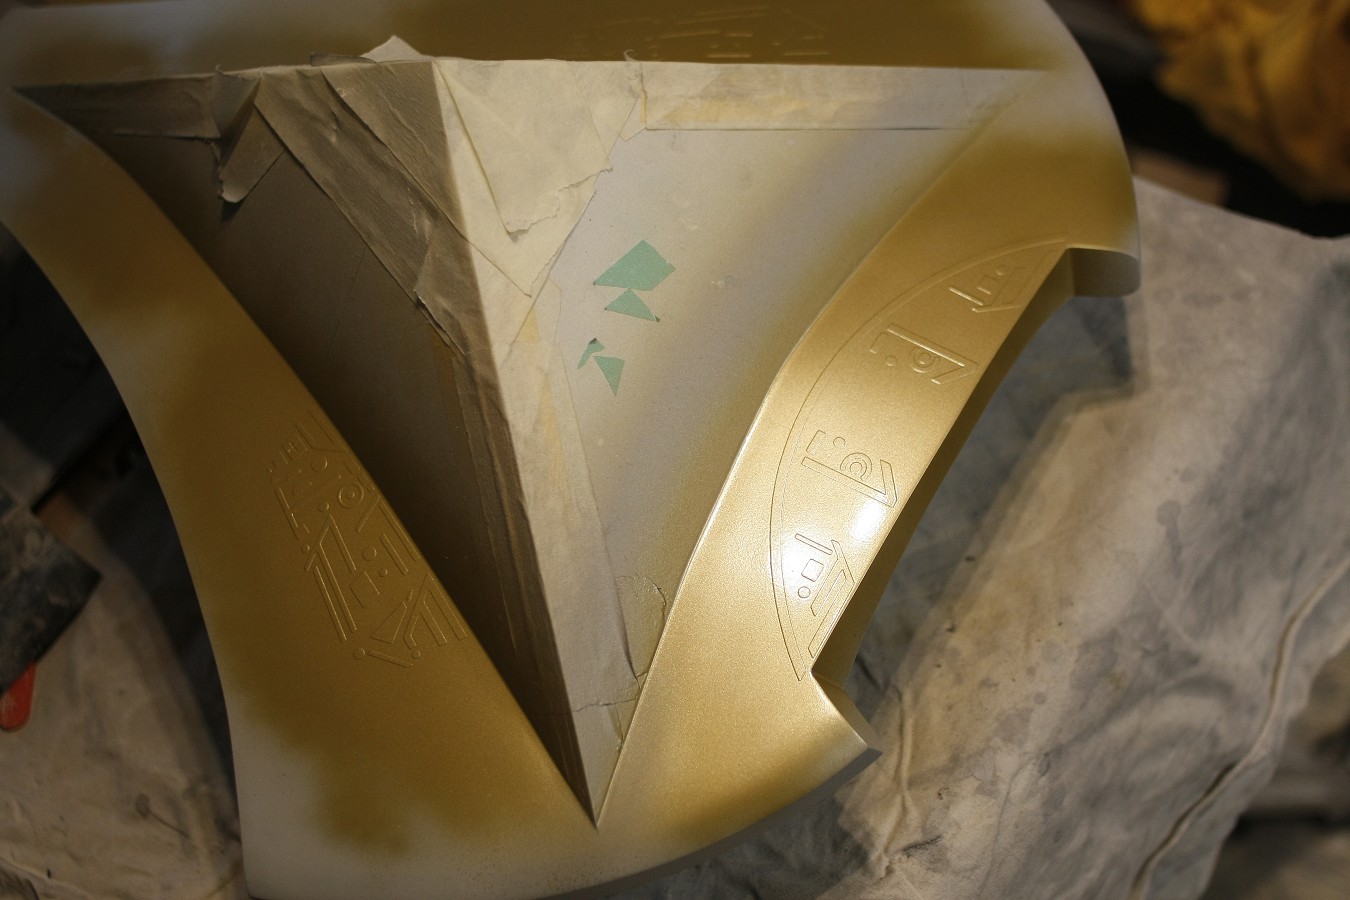
Now I've taken a day off the weekend and made various patterns for the Alkesh.

then plotted out

and glued on the Alkesh


I then primed all of them and painted them in a dark gold.
Just like other surfaces.
If anyone knows the Tel'Tak, guess what I intend to do")


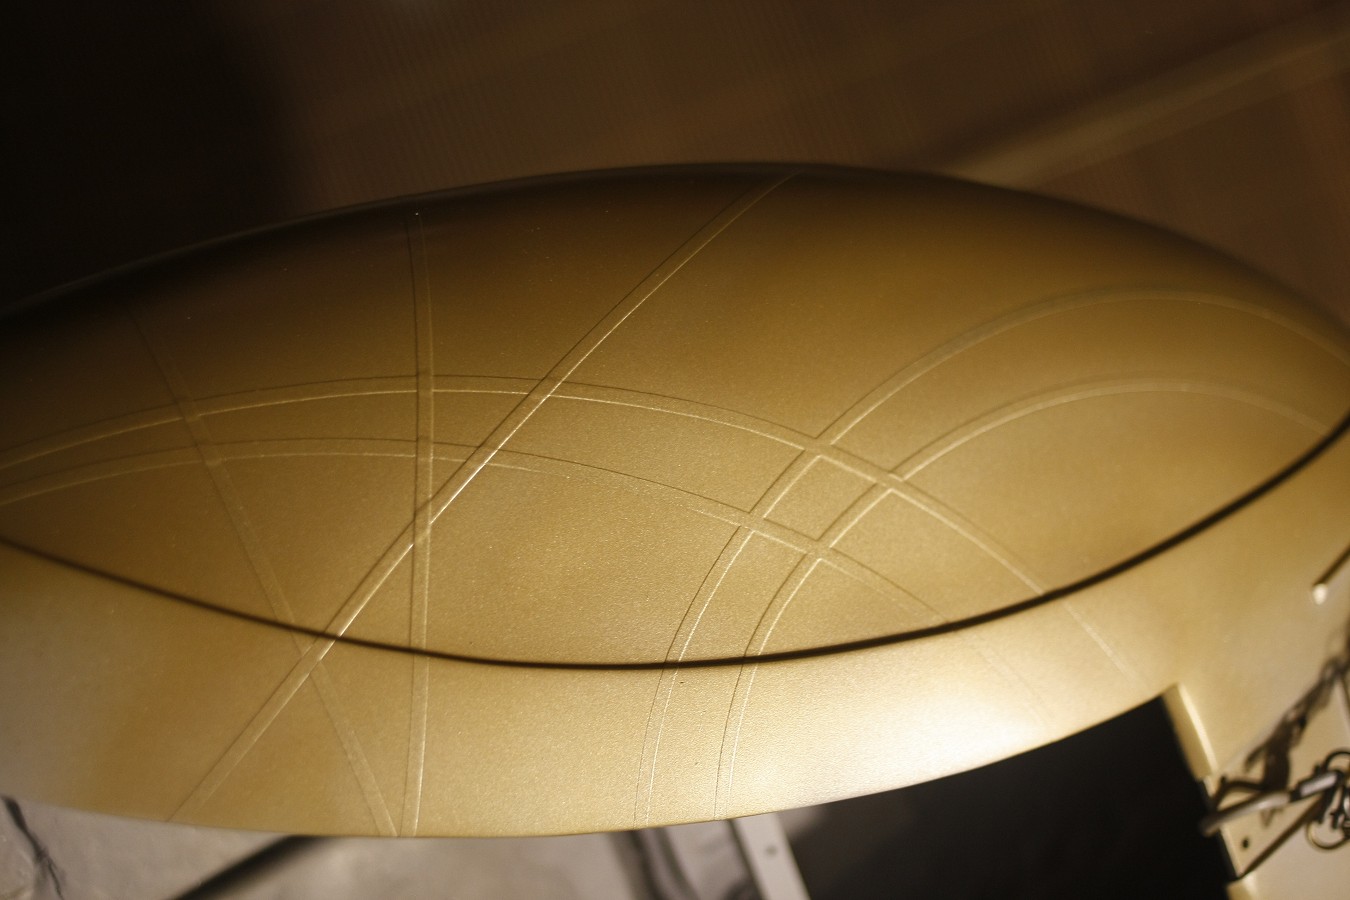
Well, I experimented with circles and ellipses for a while until I had the radii of the Alkesh.
These were then plotted out.

and then stuck to the Alkesh.
Yes, and that was not easy to get both sides top AND bottom identically. : Banana:
in parallel, the gold-painted decals were taped again so that only certain areas remain gold.
The lines are almost exactly the same, the foil is removed later so that only the lines are gold


partly also other decals were set which are only painted and then visually stand out from the surface.

So that the color does not run under the foil later on, I painted all the relevant spots a few more times in gold.

Well, just before then I primed everything again slightly. This should dry now that I can once again sand everything with 600 wet and can check off the final paint.
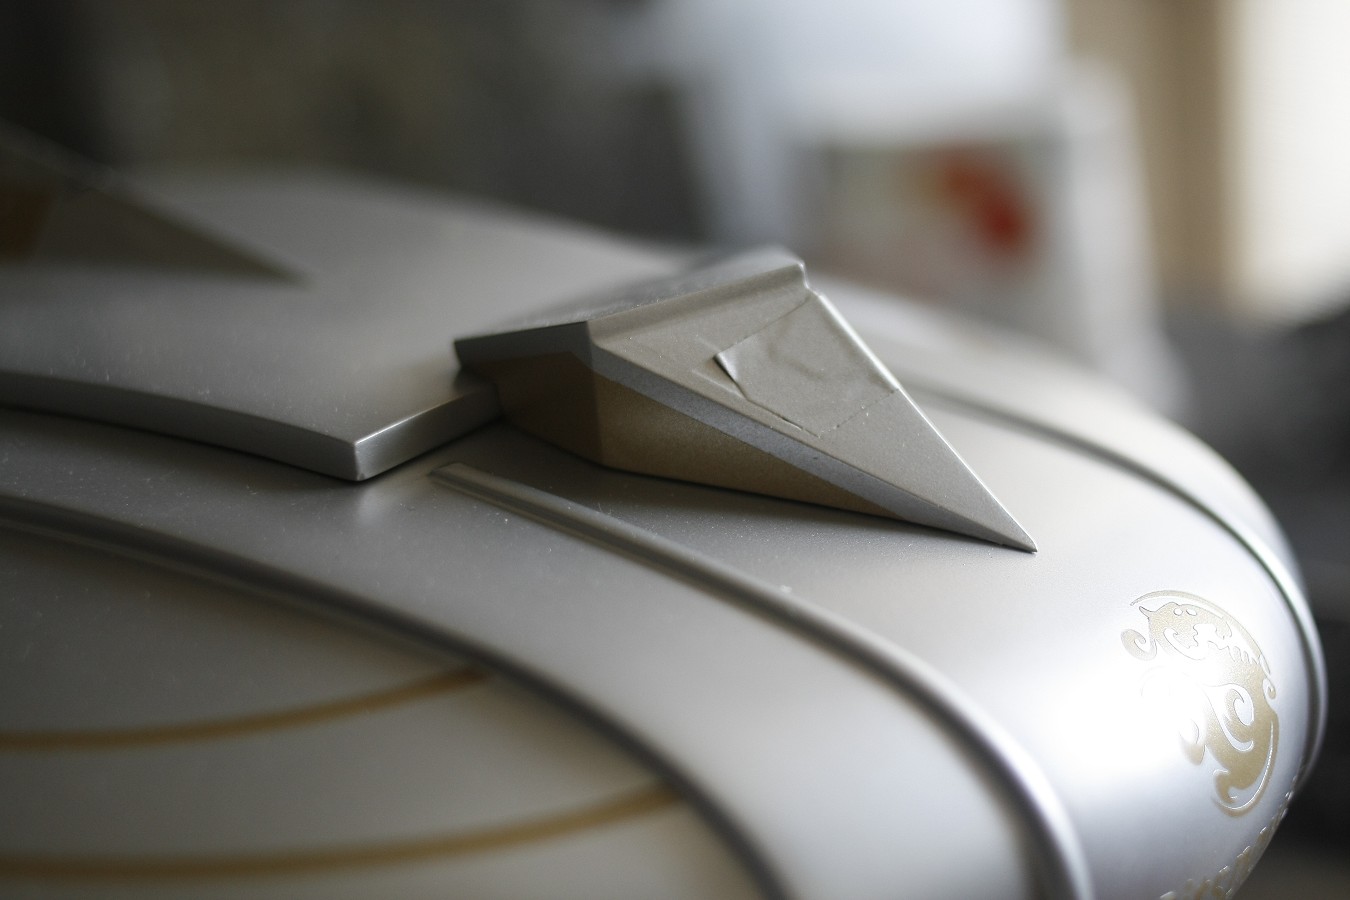
The Alkesh is now painted in silver and then the whole spaceship gets a Washing Effect (YouTube)
As I said before, a dark gray would be the right shade, but with gray I just do not have the metal effect, so it's now painted silver.
See you next time, now it's moving forward
I really wanted to be done so now we have a Deadline.
As I mentioned earlier, there was a lot to fill and to grind.
The IO panel should still be clad with ribs, after long thinks whether Plexi or Alu I have decided jokingly for a PVC design flooring.
The surface is like everything else slightly arched, so I was reluctant to bend ALU or Plexi for.
I then cut this 16 times in 5mm strips, sanded some edges and glued with mounting glue in 7mm distance on the IO panel
oh so and the Alkesh would then slowly ready for the paint job
After curing, I then sanded the supernatants, a little more leveled and primed
As I mentioned in some forums, blue LEDs are not bright enough for the drive so I rebuilt the lens without the holes for LEDs on the back.
Here is just a white high density LED stripe behind the lens. The effect is really cool because you go blind: rofl:
but a slight blue tint, I would have been happy.
I have here now two lenses back with light and dark blue painted but except that the light intensity decreases does not bring much synonymous.
The blue effect comes only from the reflection of the plexiglass on the side, but the light itself remains white.
No plan then I'll leave it White.
so I had a roll of 4mm trim in chrome, they fit perfectly to the front of the Alkesh's.
Normally, two more lines would cross in the middle, but at this point the Bitspower Dragon is supposed to. As this is very similar to the symbols of Jaffa Tattoos.
Attached with superglue, keeps bomb
When I wanted to paint the cockpit, I noticed that the part of times something crooked is so I was allowed to build me a new cockpit.
Since the moldings are rounded down, I still had everything neatly trowel here
and so that I can still open the lid properly, the ends were still bevelled.
Now I've taken a day off the weekend and made various patterns for the Alkesh.
then plotted out
and glued on the Alkesh
I then primed all of them and painted them in a dark gold.
Just like other surfaces.
If anyone knows the Tel'Tak, guess what I intend to do
Well, I experimented with circles and ellipses for a while until I had the radii of the Alkesh.
These were then plotted out.
and then stuck to the Alkesh.
Yes, and that was not easy to get both sides top AND bottom identically. : Banana:
in parallel, the gold-painted decals were taped again so that only certain areas remain gold.
The lines are almost exactly the same, the foil is removed later so that only the lines are gold
partly also other decals were set which are only painted and then visually stand out from the surface.
So that the color does not run under the foil later on, I painted all the relevant spots a few more times in gold.
Well, just before then I primed everything again slightly. This should dry now that I can once again sand everything with 600 wet and can check off the final paint.
The Alkesh is now painted in silver and then the whole spaceship gets a Washing Effect (YouTube)
As I said before, a dark gray would be the right shade, but with gray I just do not have the metal effect, so it's now painted silver.
See you next time, now it's moving forward
- Joined
- Aug 26, 2016
- Messages
- 78 (0.03/day)
- Location
- Germany
Here I am again.
This time there were many low blows but it goes ahead.
Where had I stopped?
Achso, the Alkesh I have now completely painted outside silver.


and then remove all the tapes.
Although the film is good for masking because no color runs behind but the paint has decomposed the film that remained the adhesive on the spaceship.
In addition, you needed so much power to remove that I went to 30% everywhere the color with.
In the dark places you can see very well the glue residues here.
Okay, so only the removal of the residue has cost me smooth 3h and from the repair of the paint damage, we need not even talk.
All affected areas taped again or partly plotted first and repainted.

Now it was up to the interior and the MB Tray.
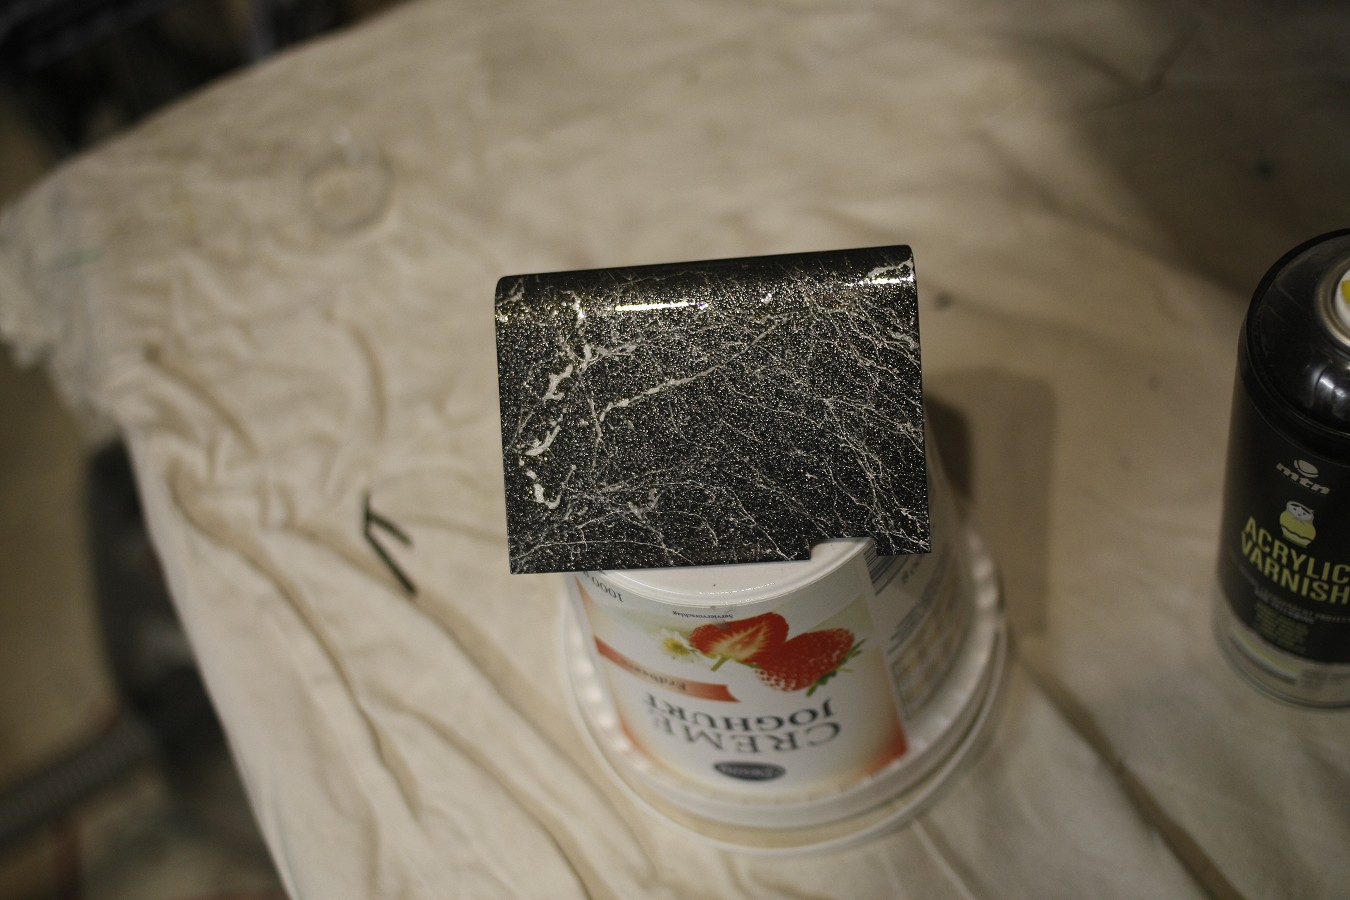
At first I painted all of this anthracite,

and then sprayed with two colors, silver and white, marble effect spray. I've put a few shades with gray and black shadow spray and provided everything with a gold glitter spray
the very end I still have sealed everything with semi-gloss varnish.

The cockpit I have set off laterally in gold
then finally the upper bracket glued to the acrylic tube.

The rings of the drive could now be glued to the scattering lenses.
Before that taped so that the diffusion lenses when washing effect not be dirty.


Now it went to the LEDs for the drive.
Without words, I have tried other LED positions but this is the best choice.

I then stuck the stripes in the drives with hot glue

and from the inside everything still wired clean.

on the door to the PSU I have drawn lines with a golden edding

before I stuck the pillars on it. Superglue is just perfect.
Cooooooool

now something went on in the interior.
Fan PSU and a few Fittings mounted.

The HDMI connection by itself and the USB 3.0, I fixed with hot glue and then poured completely with epoxy glue.

I was able to solder the 230V extension of the SFX Revolution.
On sunday it finally got to the cable.
Probably the shortest extensions I was allowed to do.
First, the 24pin ATX cable to about 10cm.
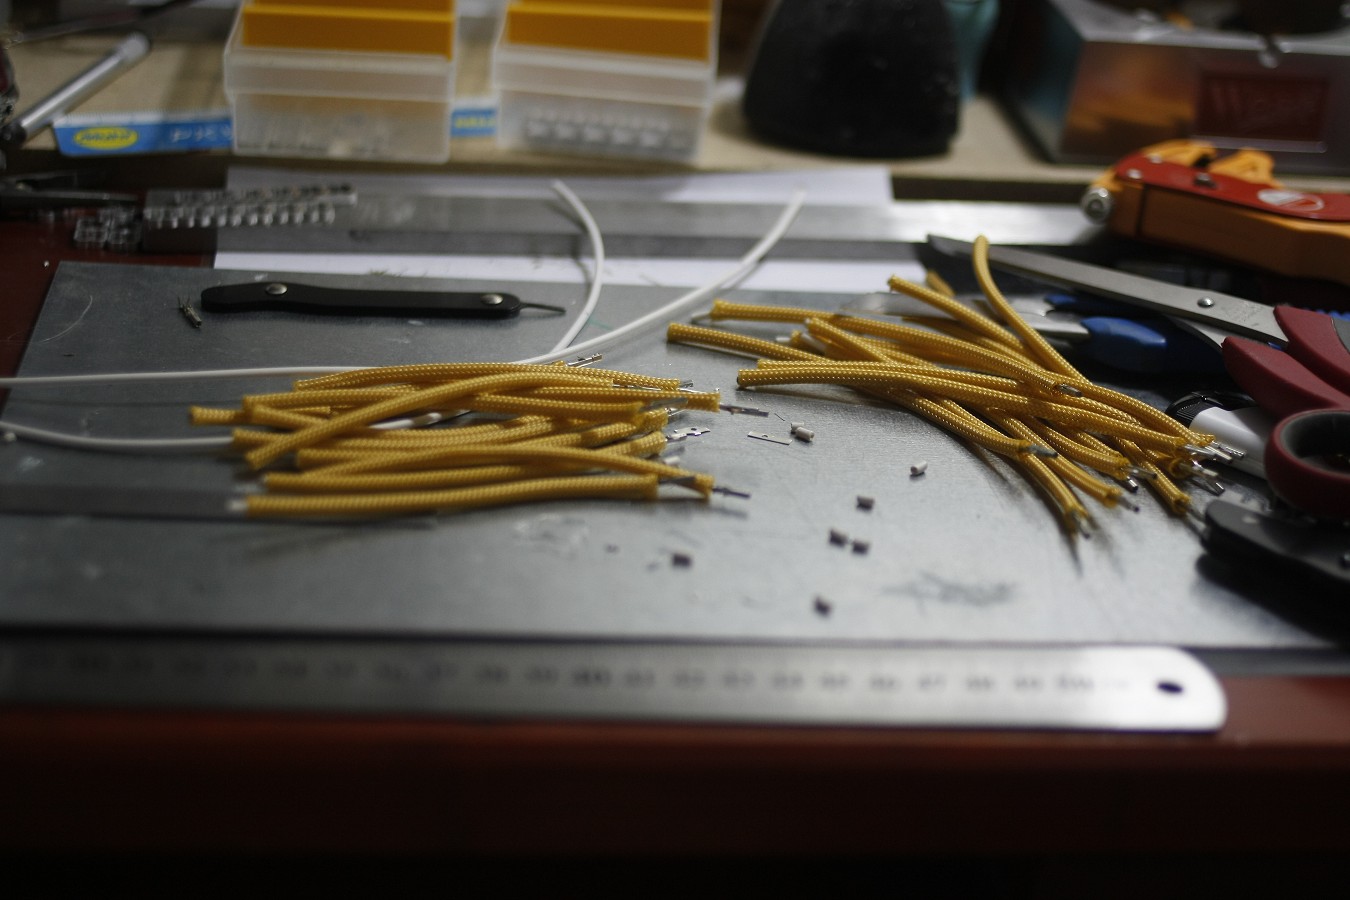
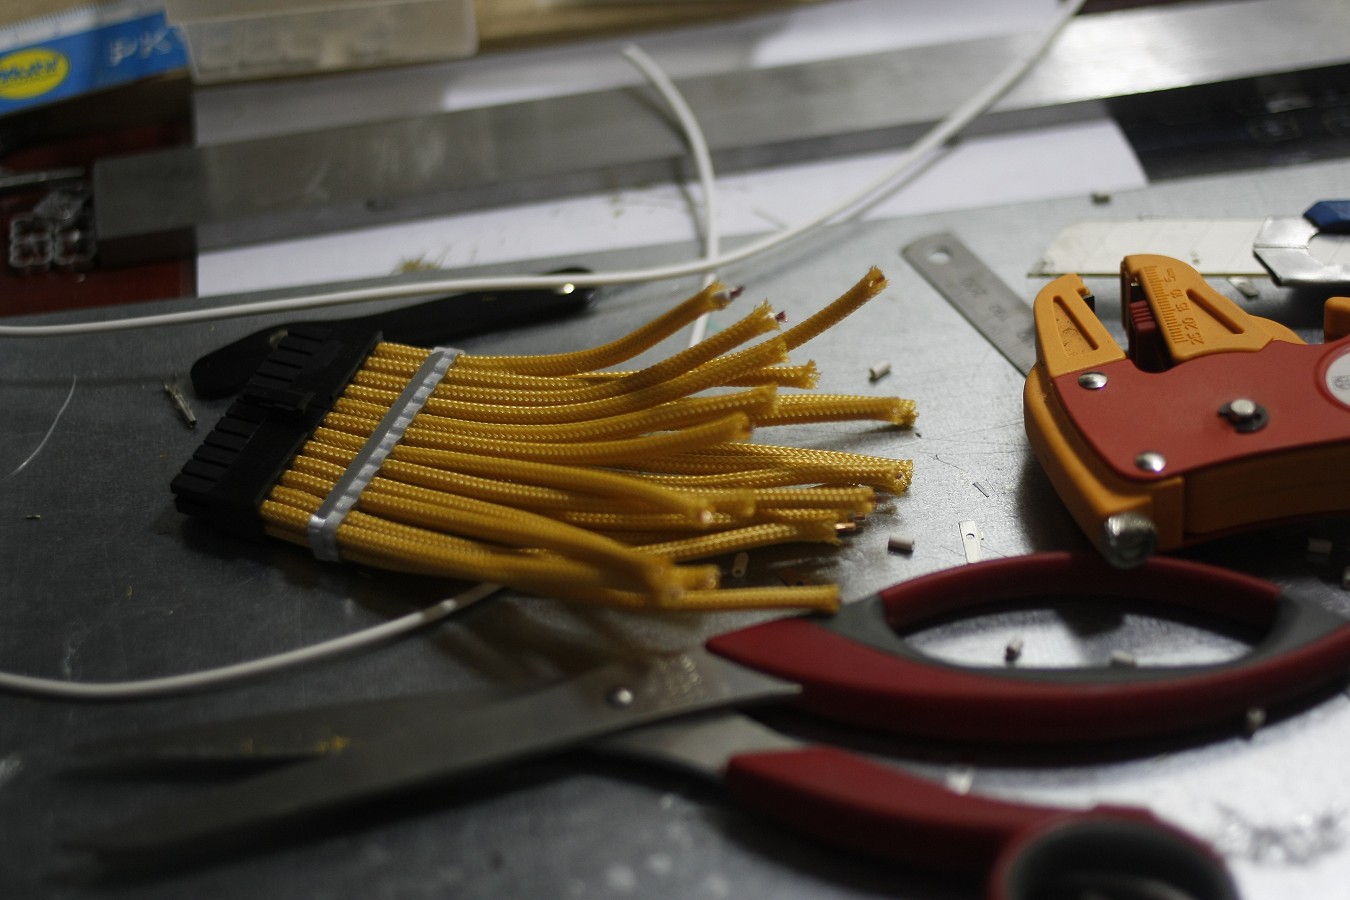
then the PCIe cable to 20cm, because the original would be too short.

And the 8pin EPS cable I could 1: 1 sleeving.
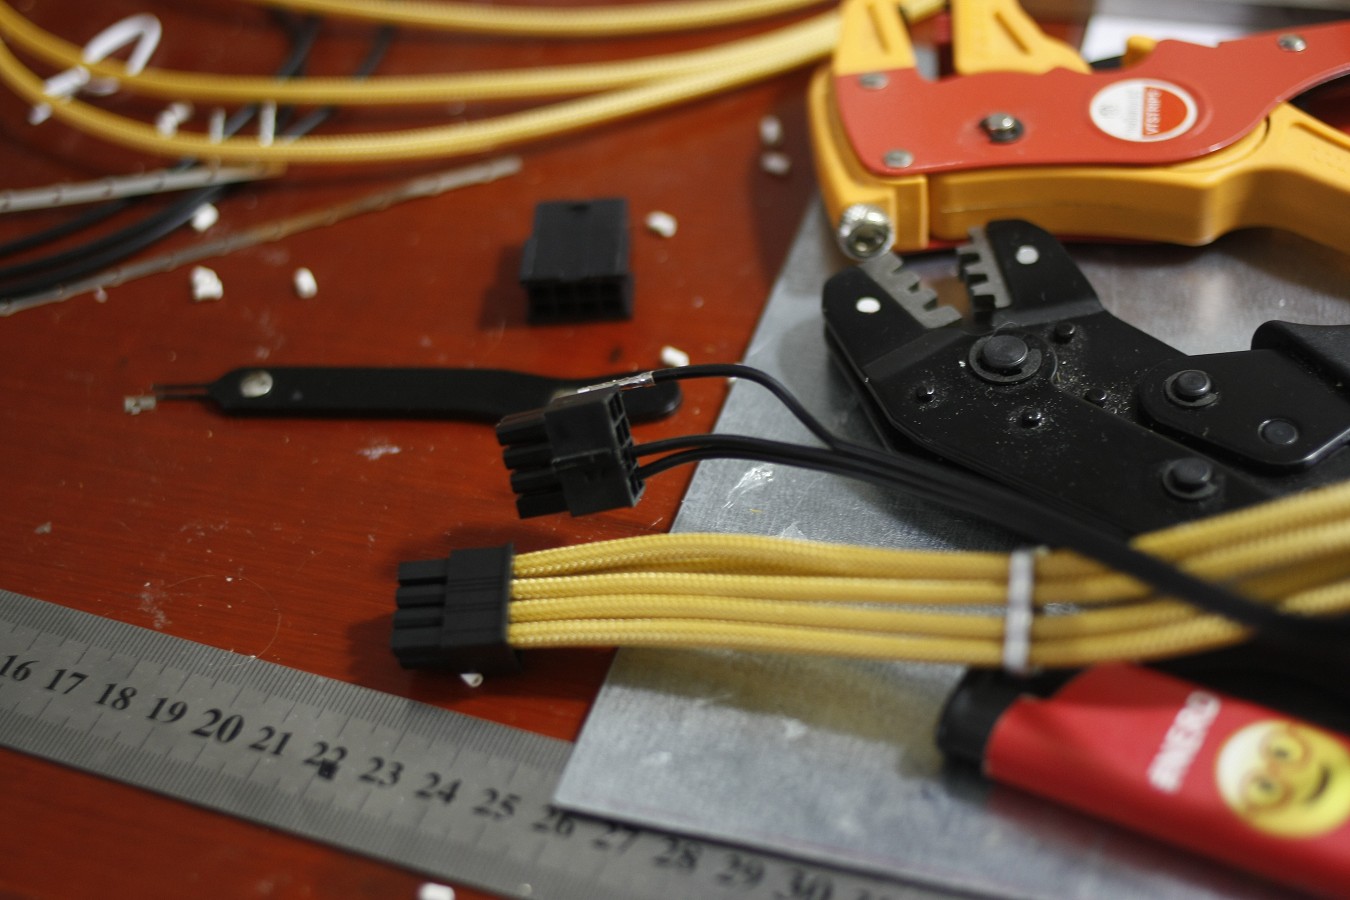
Ahso and the pump cables are the same.

I do not even know where to start but I have so much spanking this weekend.
This is not even the half of the photos I had.
But without words.
Yeah the digital LEDs for the bomb I wanted to fix with velvet ring with hot glue from the inside but please let brain rain.
The hot glue has of course destroyed the whole shape :wall:

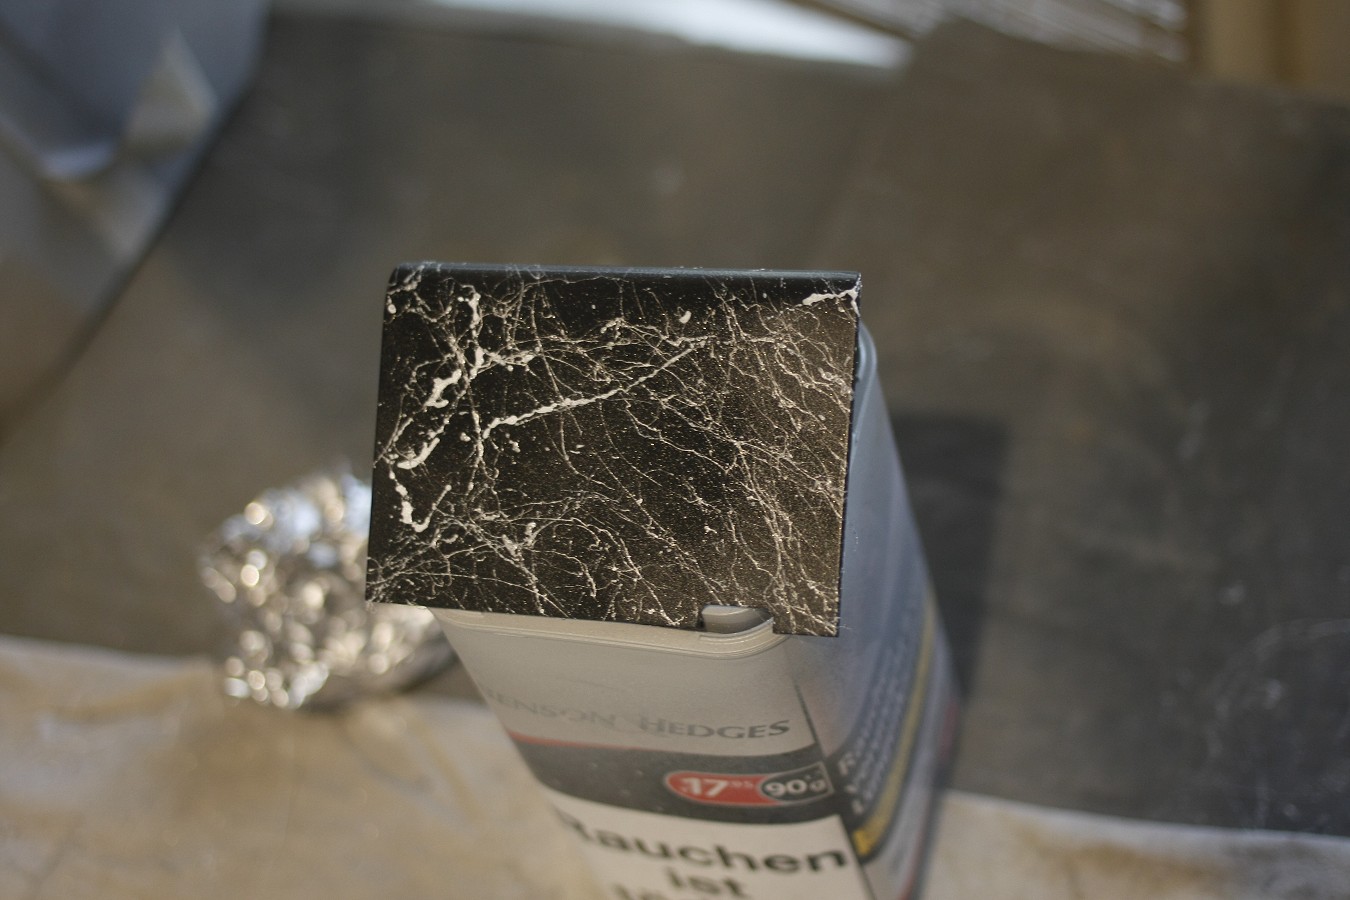
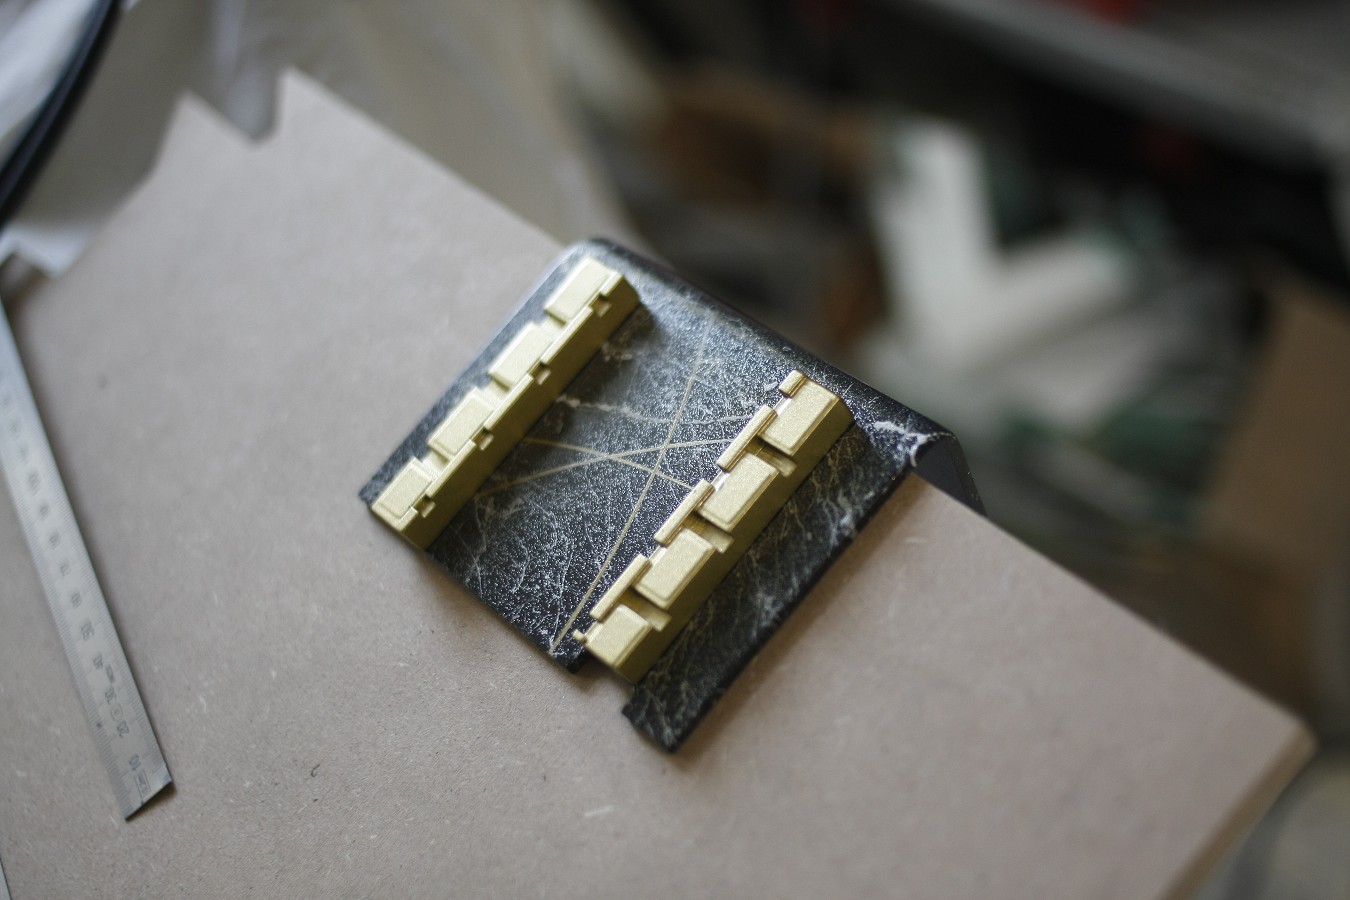
Well for the bomb, I've still cut a base plate, chamfered the edges and also immediately painted black.

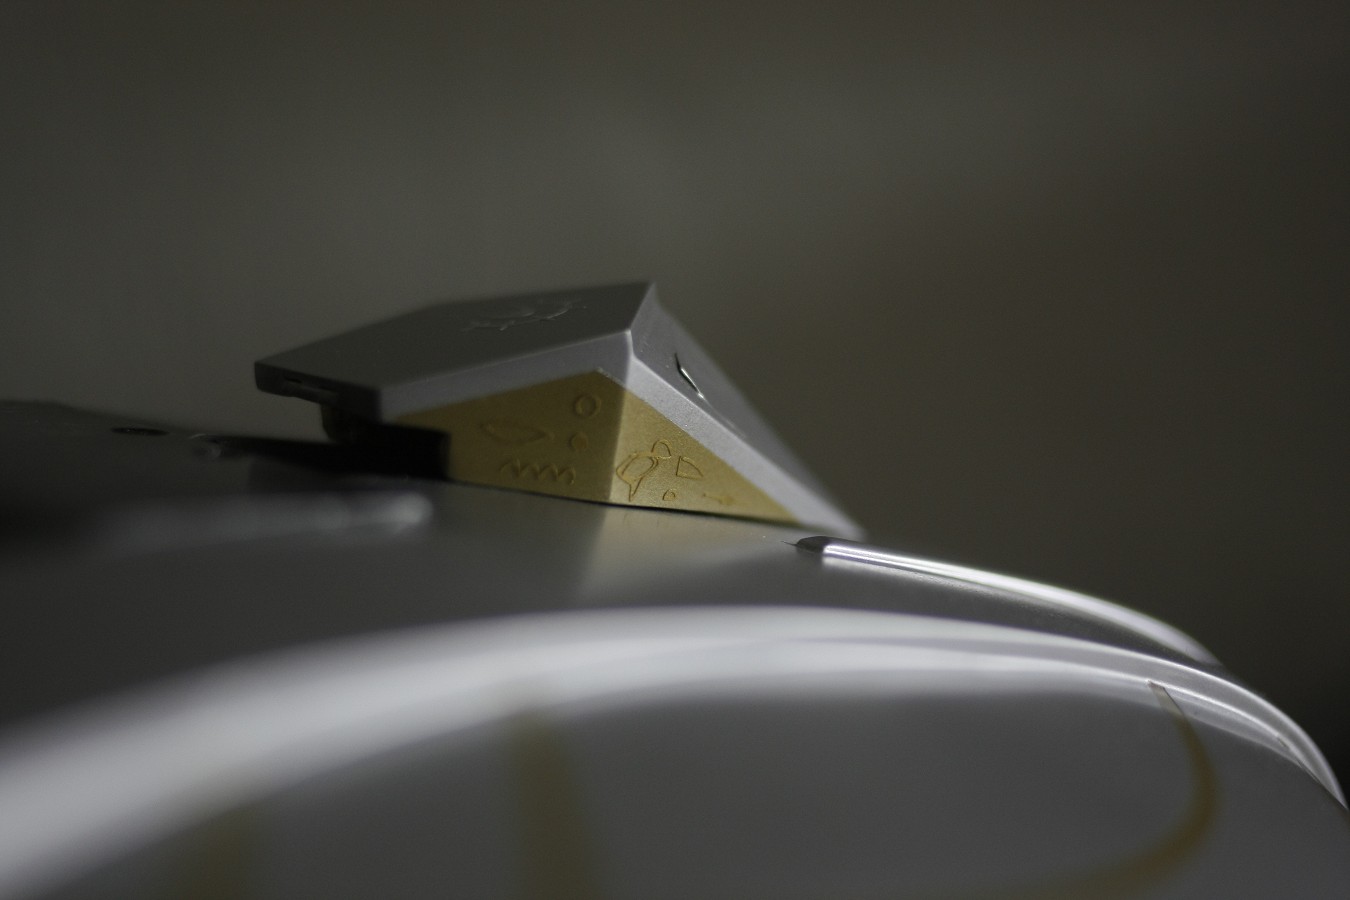
The cockpit I have now provided with Goa'uld font, but without meaning, there would be no room for it.
I then opted only for optically matching hieroglyphics.

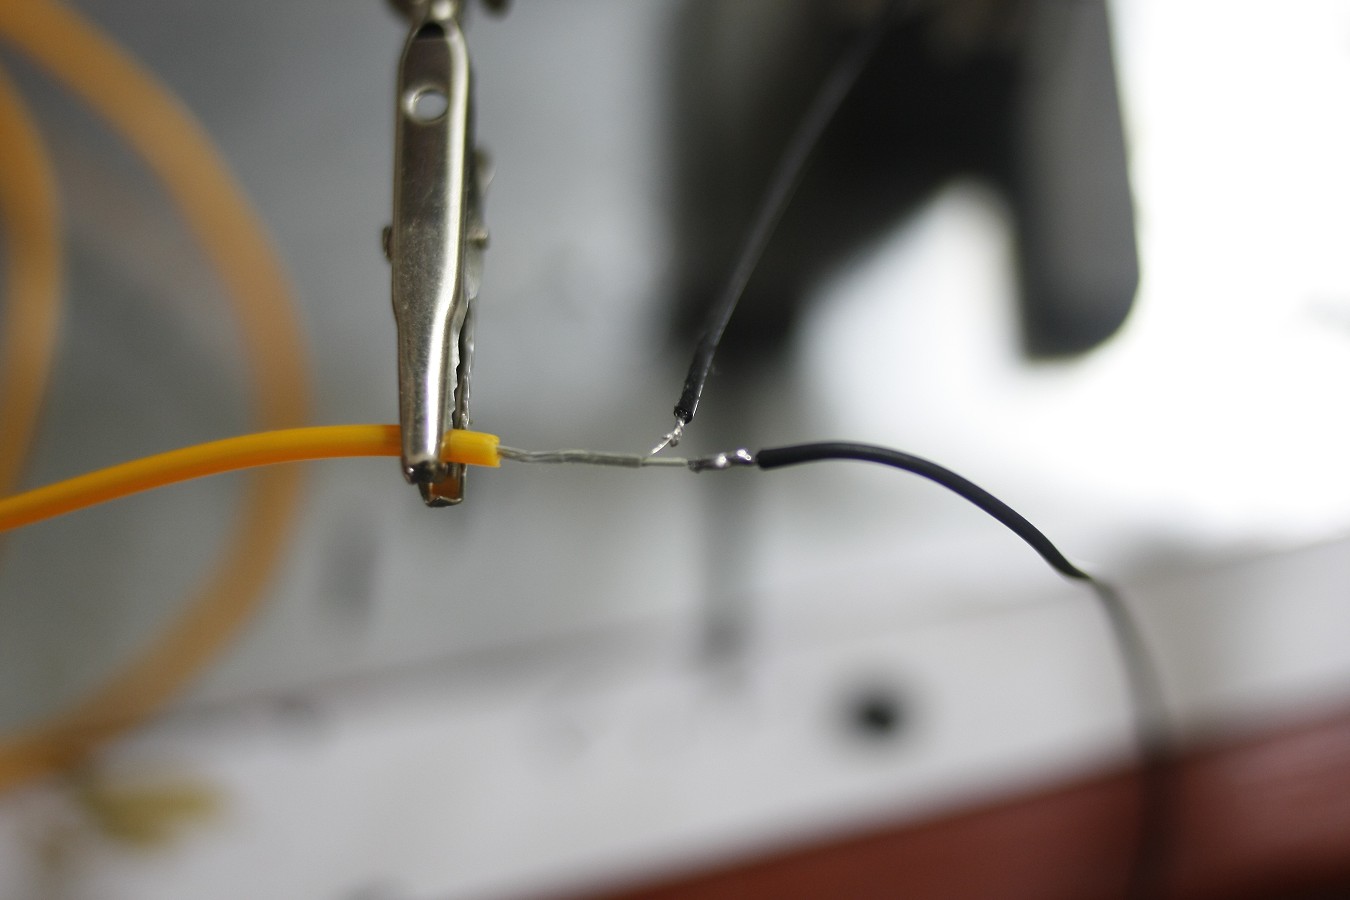
I have dissected a light cord, which I originally wanted to use but then discarded again, and found that lead the only one strand for the mass.
Just soldered some cables.
Because of the split tray, I need two cords, but have only bought one and did not want to install two extra separate.
This should then serve as edge interior lighting.
okay, I then soldered the second string to the controller and it works, yeah!
Via 5V

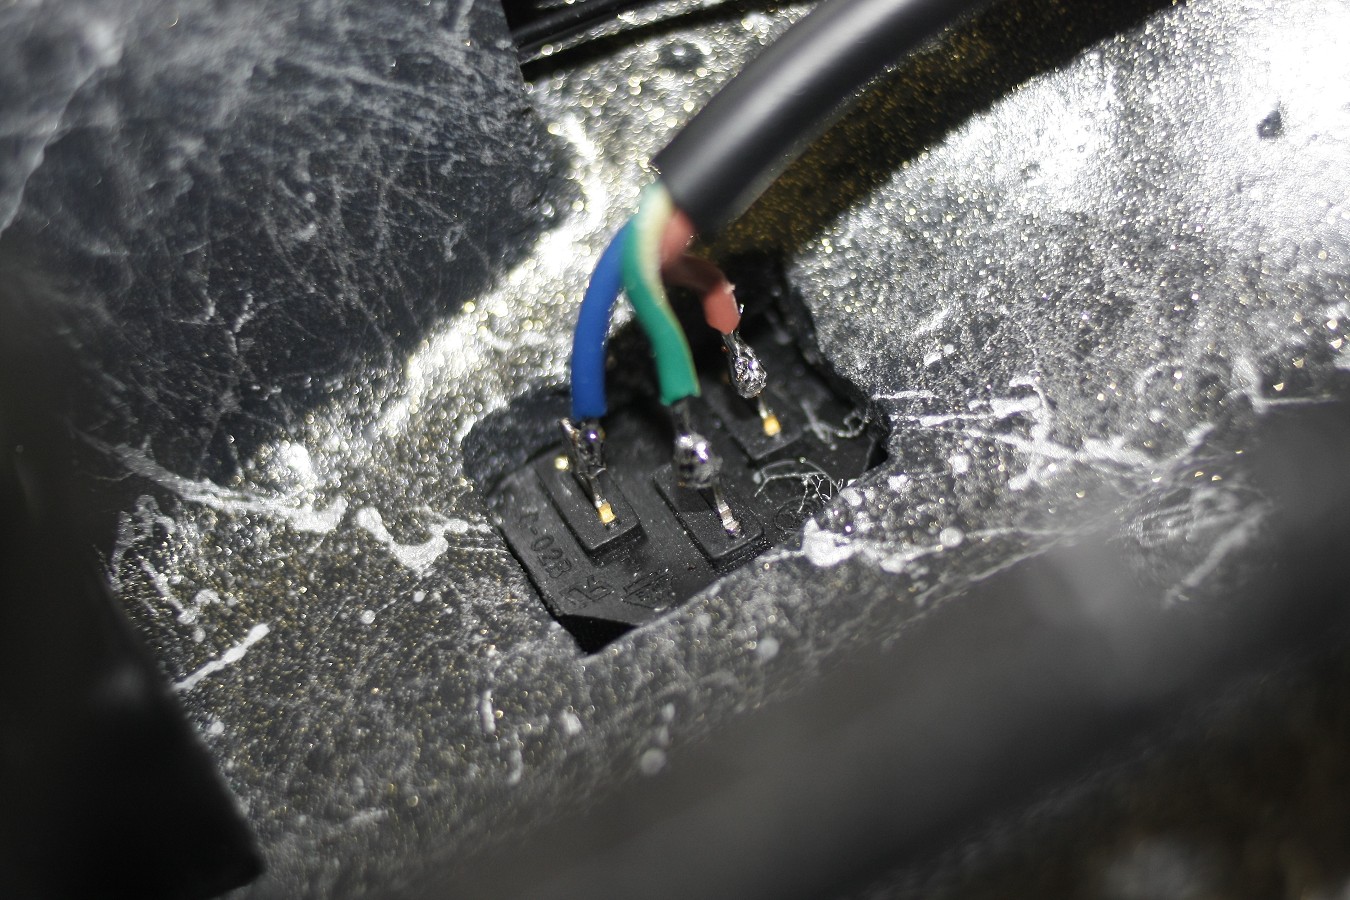
Okay for the 5V still a small distributor made in black
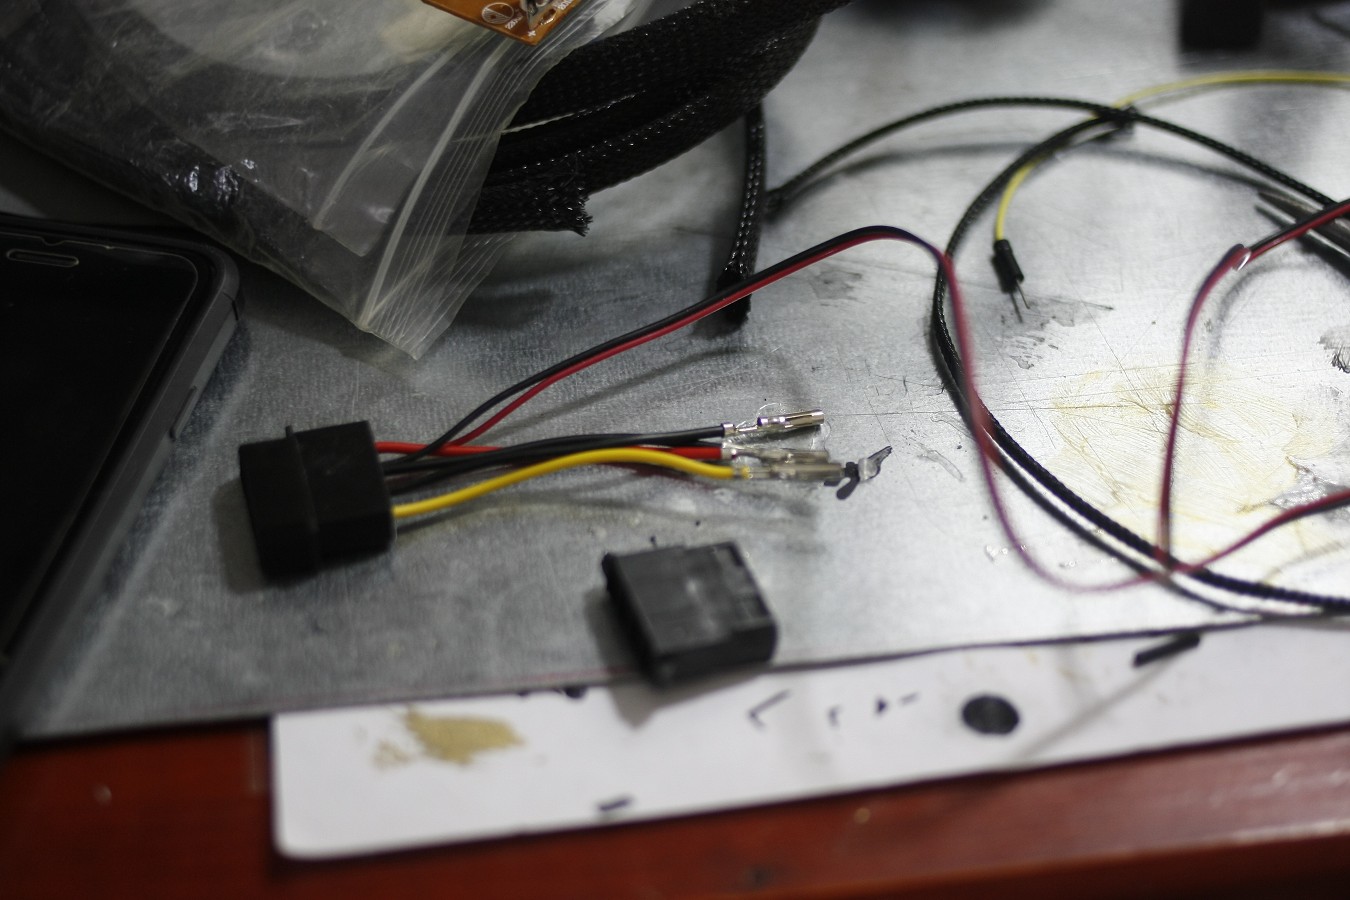
glued a 3pin connector to the PCB and soldered it to the battery poles.

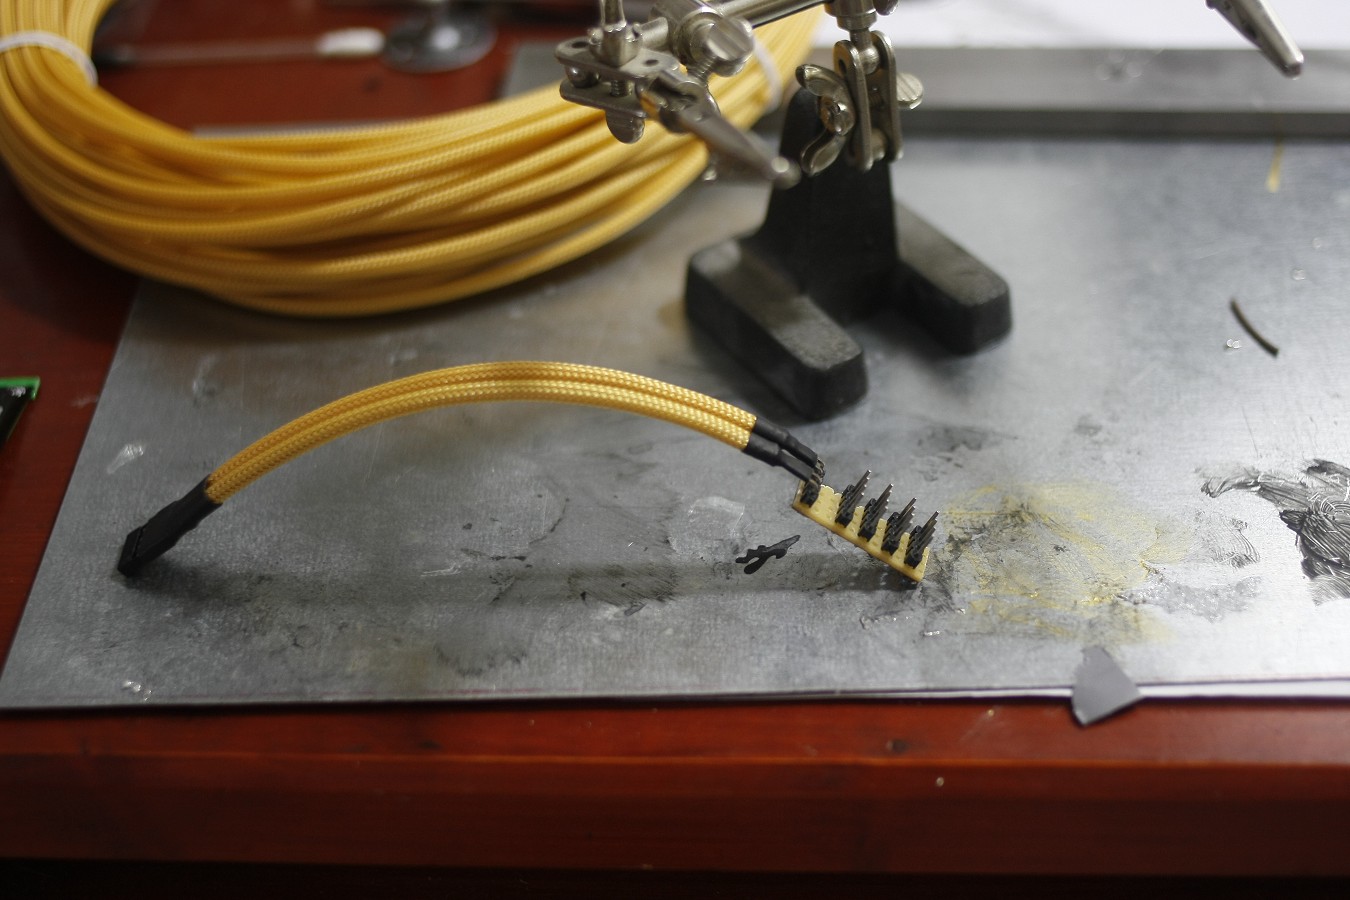
Yes and I wanted to use these homemade combs for a long time xD.
Sorry that no sharp photo at is when you always double photographed everything on cell phone and camera does that happen.

I simply screwed the entire board to the tray from below with a plastic spacer.
Before, of course, the holes drilled in the tray.
I also find cool on what you do not come for ideas if you have a long time. :rofl:

Okay and then I stuck the string to the tray, fixed it with adhesive and then reinforced it with epoxy glue from the outside.
Sorry at such late times I'm always really unable to shoot sharp photos, too dark too much energy drinks and so on

Slowly I'm running out of ideas.
Oh yes, there was something else: crystal control panel, but first I want to finish the coating so that all tapes can go away.
The pyramid still has to be polished, the bomb is still to be programmed and otherwise only minor things
THX a lot
Capten
This time there were many low blows but it goes ahead.
Where had I stopped?
Achso, the Alkesh I have now completely painted outside silver.
and then remove all the tapes.
Although the film is good for masking because no color runs behind but the paint has decomposed the film that remained the adhesive on the spaceship.
In addition, you needed so much power to remove that I went to 30% everywhere the color with.
In the dark places you can see very well the glue residues here.
Okay, so only the removal of the residue has cost me smooth 3h and from the repair of the paint damage, we need not even talk.
All affected areas taped again or partly plotted first and repainted.
Now it was up to the interior and the MB Tray.
At first I painted all of this anthracite,
and then sprayed with two colors, silver and white, marble effect spray. I've put a few shades with gray and black shadow spray and provided everything with a gold glitter spray
the very end I still have sealed everything with semi-gloss varnish.
The cockpit I have set off laterally in gold
then finally the upper bracket glued to the acrylic tube.
The rings of the drive could now be glued to the scattering lenses.
Before that taped so that the diffusion lenses when washing effect not be dirty.
Now it went to the LEDs for the drive.
Without words, I have tried other LED positions but this is the best choice.
I then stuck the stripes in the drives with hot glue
and from the inside everything still wired clean.
on the door to the PSU I have drawn lines with a golden edding
before I stuck the pillars on it. Superglue is just perfect.
Cooooooool
now something went on in the interior.
Fan PSU and a few Fittings mounted.
The HDMI connection by itself and the USB 3.0, I fixed with hot glue and then poured completely with epoxy glue.
I was able to solder the 230V extension of the SFX Revolution.
On sunday it finally got to the cable.
Probably the shortest extensions I was allowed to do.
First, the 24pin ATX cable to about 10cm.
then the PCIe cable to 20cm, because the original would be too short.
And the 8pin EPS cable I could 1: 1 sleeving.
Ahso and the pump cables are the same.
I do not even know where to start but I have so much spanking this weekend.
This is not even the half of the photos I had.
But without words.
Yeah the digital LEDs for the bomb I wanted to fix with velvet ring with hot glue from the inside but please let brain rain.
The hot glue has of course destroyed the whole shape :wall:
Well for the bomb, I've still cut a base plate, chamfered the edges and also immediately painted black.
The cockpit I have now provided with Goa'uld font, but without meaning, there would be no room for it.
I then opted only for optically matching hieroglyphics.
I have dissected a light cord, which I originally wanted to use but then discarded again, and found that lead the only one strand for the mass.
Just soldered some cables.
Because of the split tray, I need two cords, but have only bought one and did not want to install two extra separate.
This should then serve as edge interior lighting.
okay, I then soldered the second string to the controller and it works, yeah!
Via 5V
Okay for the 5V still a small distributor made in black
glued a 3pin connector to the PCB and soldered it to the battery poles.
Yes and I wanted to use these homemade combs for a long time xD.
Sorry that no sharp photo at is when you always double photographed everything on cell phone and camera does that happen.
I simply screwed the entire board to the tray from below with a plastic spacer.
Before, of course, the holes drilled in the tray.
I also find cool on what you do not come for ideas if you have a long time. :rofl:
Okay and then I stuck the string to the tray, fixed it with adhesive and then reinforced it with epoxy glue from the outside.
Sorry at such late times I'm always really unable to shoot sharp photos, too dark too much energy drinks and so on
Slowly I'm running out of ideas.
Oh yes, there was something else: crystal control panel, but first I want to finish the coating so that all tapes can go away.
The pyramid still has to be polished, the bomb is still to be programmed and otherwise only minor things
THX a lot
Capten
- Joined
- Jun 8, 2011
- Messages
- 15,947 (3.39/day)
- Location
- Somerset, UK
| System Name | Not so complete or overkill - There are others!! Just no room to put! :D |
|---|---|
| Processor | Ryzen Threadripper 3970X |
| Motherboard | Asus Zenith 2 Extreme Alpha |
| Cooling | Lots!! Dual GTX 560 rads with D5 pumps for each rad. One rad for each component |
| Memory | Viper Steel 4 x 16GB DDR4 3600MHz not sure on the timings... Probably still at 2667!! :( |
| Video Card(s) | Asus Strix 3090 with front and rear active full cover water blocks |
| Storage | I'm bound to forget something here - 250GB OS, 2 x 1TB NVME, 2 x 1TB SSD, 4TB SSD, 2 x 8TB HD etc... |
| Display(s) | 3 x Dell 27" S2721DGFA @ 7680 x 1440P @ 144Hz or 165Hz - working on it!! |
| Case | The big Thermaltake that looks like a Case Mods |
| Audio Device(s) | Onboard |
| Power Supply | EVGA 1600W T2 |
| Mouse | Corsair thingy |
| Keyboard | Razer something or other.... |
| VR HMD | No headset yet |
| Software | Windows 11 OS... Not a fan!! |
| Benchmark Scores | I've actually never benched it!! Too busy with WCG and FAH and not gaming! :( :( Not OC'd it!! :( |
Utterly jaw droppingly, amazing attention to detail.. ") Jaw successfully dropped and having trouble picking it up again.... Just wow...
Jaw successfully dropped and having trouble picking it up again.... Just wow...
Jaw successfully dropped and having trouble picking it up again.... Just wow...OneMoar
There is Always Moar
- Joined
- Apr 9, 2010
- Messages
- 8,744 (1.71/day)
- Location
- Rochester area
| System Name | RPC MK2.5 |
|---|---|
| Processor | Ryzen 5800x |
| Motherboard | Gigabyte Aorus Pro V2 |
| Cooling | Enermax ETX-T50RGB |
| Memory | CL16 BL2K16G36C16U4RL 3600 1:1 micron e-die |
| Video Card(s) | GIGABYTE RTX 3070 Ti GAMING OC |
| Storage | ADATA SX8200PRO NVME 512GB, Intel 545s 500GBSSD, ADATA SU800 SSD, 3TB Spinner |
| Display(s) | LG Ultra Gear 32 1440p 165hz Dell 1440p 75hz |
| Case | Phanteks P300 /w 300A front panel conversion |
| Audio Device(s) | onboard |
| Power Supply | SeaSonic Focus+ Platinum 750W |
| Mouse | Kone burst Pro |
| Keyboard | EVGA Z15 |
| Software | Windows 11 +startisallback |
Lord Apophis will be pleased

- Joined
- Jul 5, 2013
- Messages
- 25,559 (6.49/day)
Apophis is dead. Long Live Lord Ba'al.Lord Apophis will be pleased
Last edited:
OneMoar
There is Always Moar
- Joined
- Apr 9, 2010
- Messages
- 8,744 (1.71/day)
- Location
- Rochester area
| System Name | RPC MK2.5 |
|---|---|
| Processor | Ryzen 5800x |
| Motherboard | Gigabyte Aorus Pro V2 |
| Cooling | Enermax ETX-T50RGB |
| Memory | CL16 BL2K16G36C16U4RL 3600 1:1 micron e-die |
| Video Card(s) | GIGABYTE RTX 3070 Ti GAMING OC |
| Storage | ADATA SX8200PRO NVME 512GB, Intel 545s 500GBSSD, ADATA SU800 SSD, 3TB Spinner |
| Display(s) | LG Ultra Gear 32 1440p 165hz Dell 1440p 75hz |
| Case | Phanteks P300 /w 300A front panel conversion |
| Audio Device(s) | onboard |
| Power Supply | SeaSonic Focus+ Platinum 750W |
| Mouse | Kone burst Pro |
| Keyboard | EVGA Z15 |
| Software | Windows 11 +startisallback |
GODS CAN NOT DIEApophis is dead. Long Live Lord Ba'al.
- Joined
- Aug 26, 2016
- Messages
- 78 (0.03/day)
- Location
- Germany


Lets go, it was a bit stressful the last two weeks but it was worth it.
That's what he looks like now the "Washing Effect".

I have used black acrylic paint for this and also some of metallic effect colors on acrylic base (black, silver, anthracite, gold)
The colors are simply diluted down to water, applied, and then wiped off again with a fuselage-free rag.
Depending on your preference you wipe them in some places more on others less down.
This results in a very nice wear effect after 5-8 passes.
Unfortunately, I could not count because I was very often dissatisfied and the colors have completely wiped down.
As always there were some problems:
- Water colors or school colors do not work, they dissolve each time you work again
- as the first colors are permanently beaded off the rim varnish I sanded the Alkesh again completely with 1000 sandpaper.

Since the curves pardu did not want to get darker, I felt different here.
I wrapped the rag around my index finger, dipping the finger lightly into black undiluted paint and distributing it evenly.
But in very small steps so max 5-10 square centimeters.
Immediately after applying, I began to beat the color like a madman with a finger.
This resulted in this beautiful hammered effect.
Okay, after I had finished, I stuck the interior completely off and painted the whole Alkesh Clear.

After the third Goa'uld bomb was finally finished I was able to deal with the programming of the Arduino


I like it. I also had a short video of it on Facebook uploaded

The control for the light string I had provided with the hot glue, then it was quiet.
Unfortunately, it was suddenly loud after installation. Try the whole thing again with candle wax.
The whole control I do not want to pour only the throttle.

Okay, when I touched the Al'Kesh one day later I realized that I had applied a lot of dirt with the "washing effect"
So everything was ground again smooth and once again painted clear.

On the bottom plate, I put a Chrome logo as a Tauri sign and the sponsors to match in matt gold.

For all the RGB LEDs, I have tinkered with a small distributor to control all over the Motherboard.


so for the cockpit I put a yellow LED in a small reflector
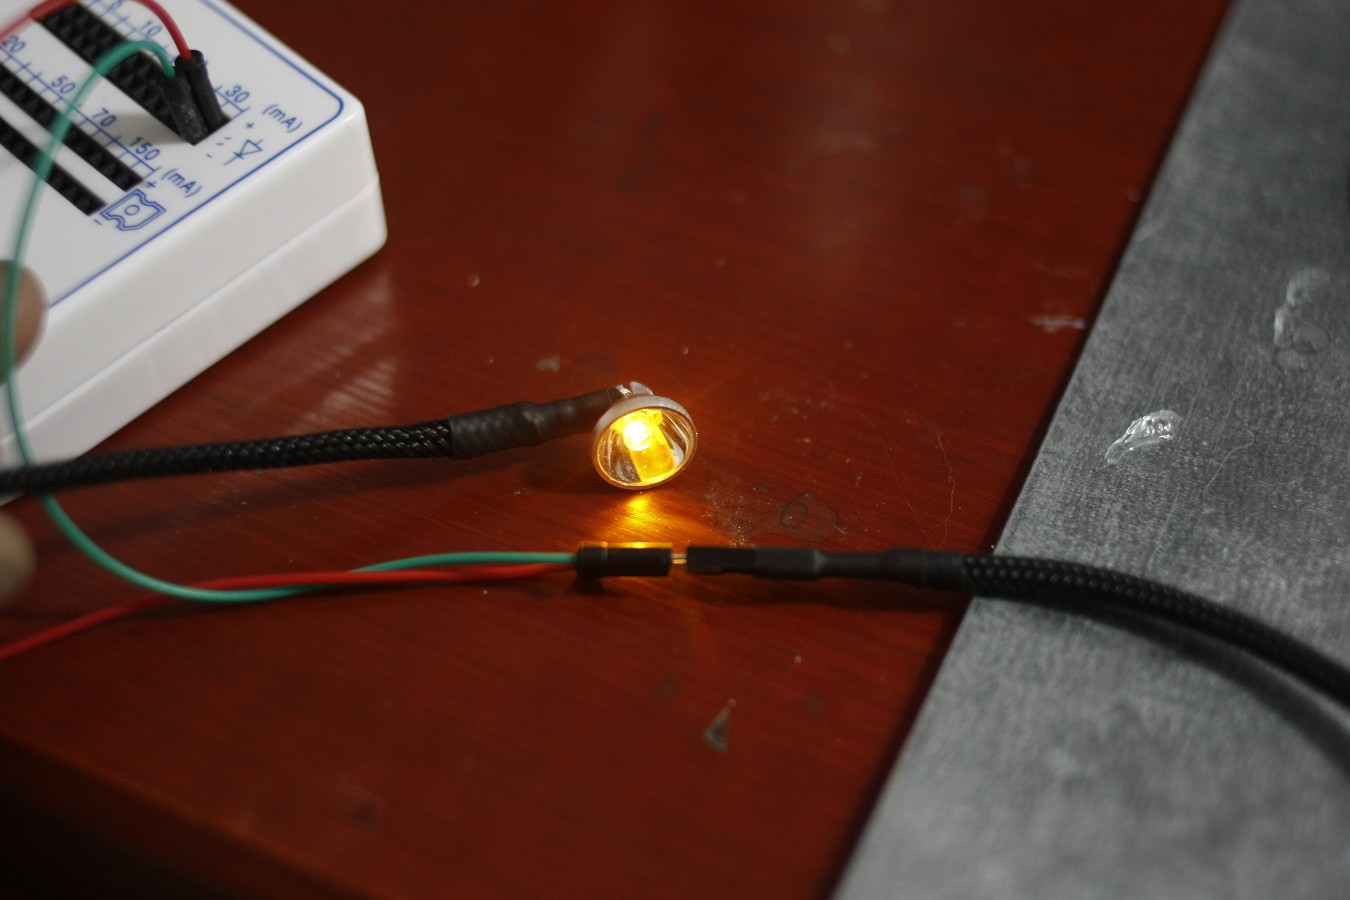
took me a small bulb and made me with the thermoforming of it an imprint.

I then cut it into shape and stuck it on the reflector
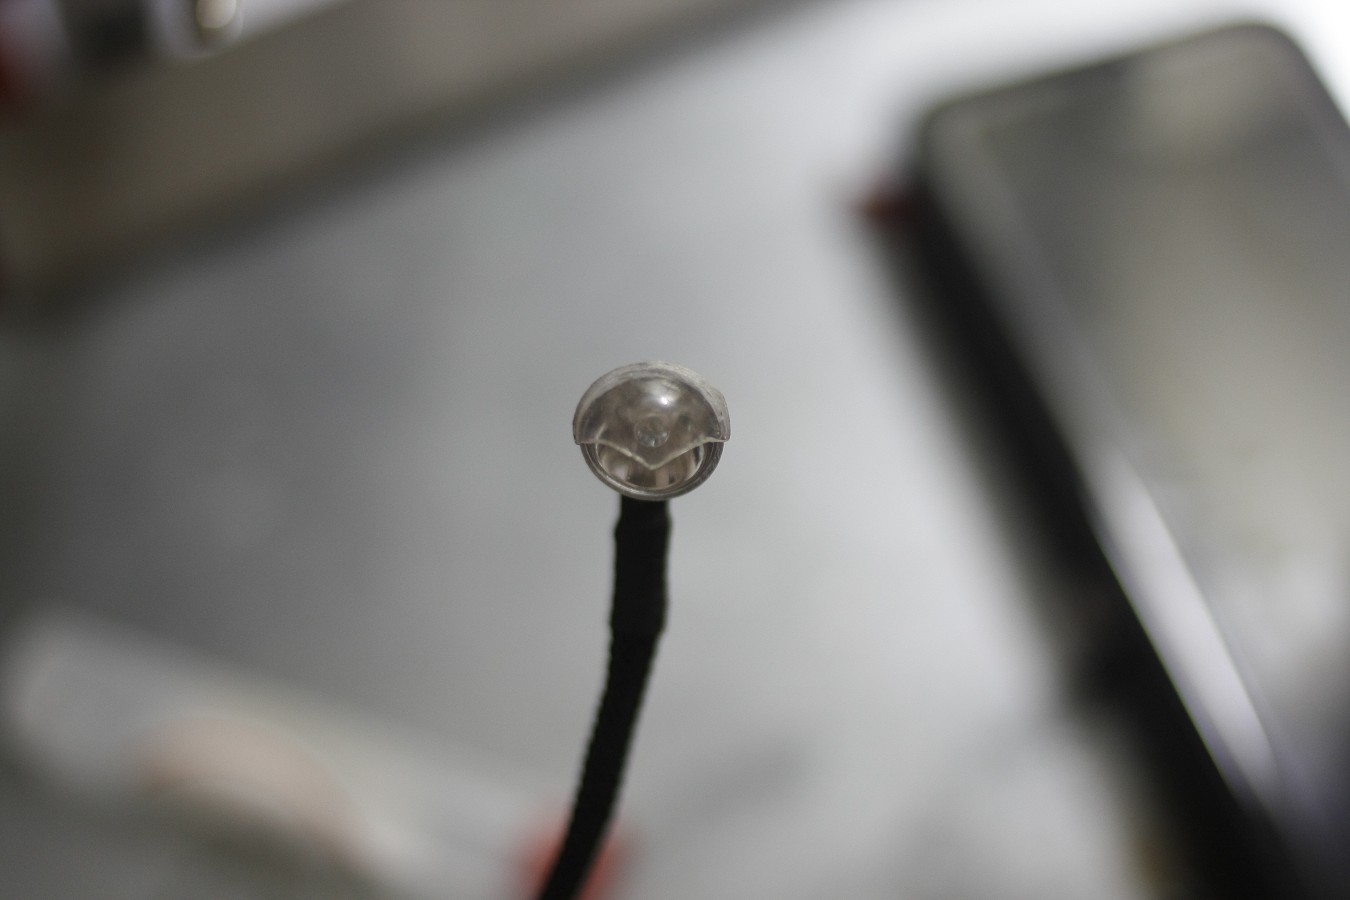
then painted in gold

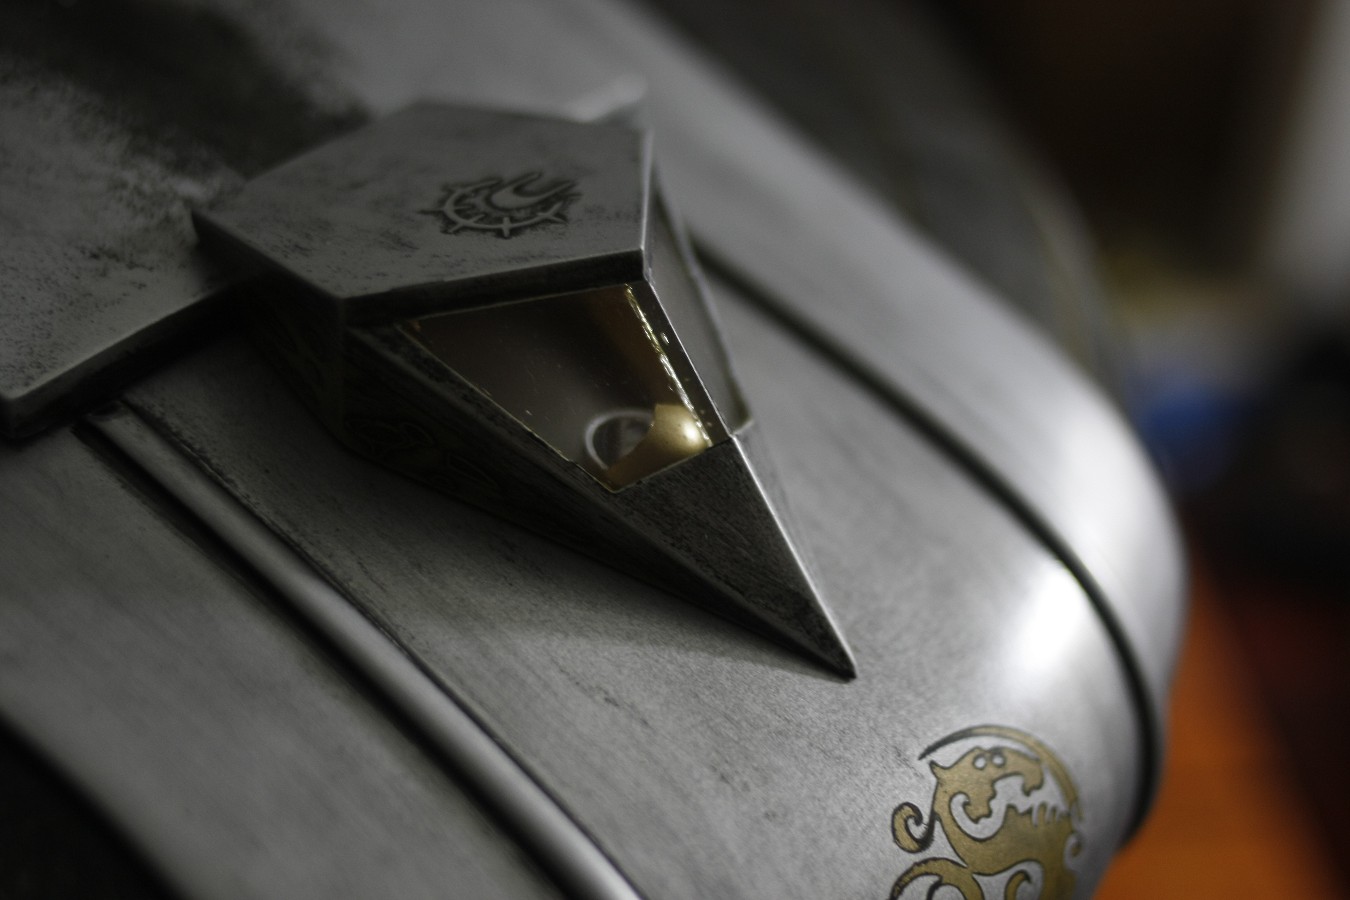
To recognize something bad, but finally, after the foil was removed from the pyramid, I polished the cut edges of the window

The reflector I stuck now in the cockpit, previously drilled a hole for the cable of course

So now Tialc also has a steering wheel to fly XD
The Arduino was now soldered to a board, in addition to the LEDs of the bomb, I still put the connection for the yellow cockpit LED and the drives.
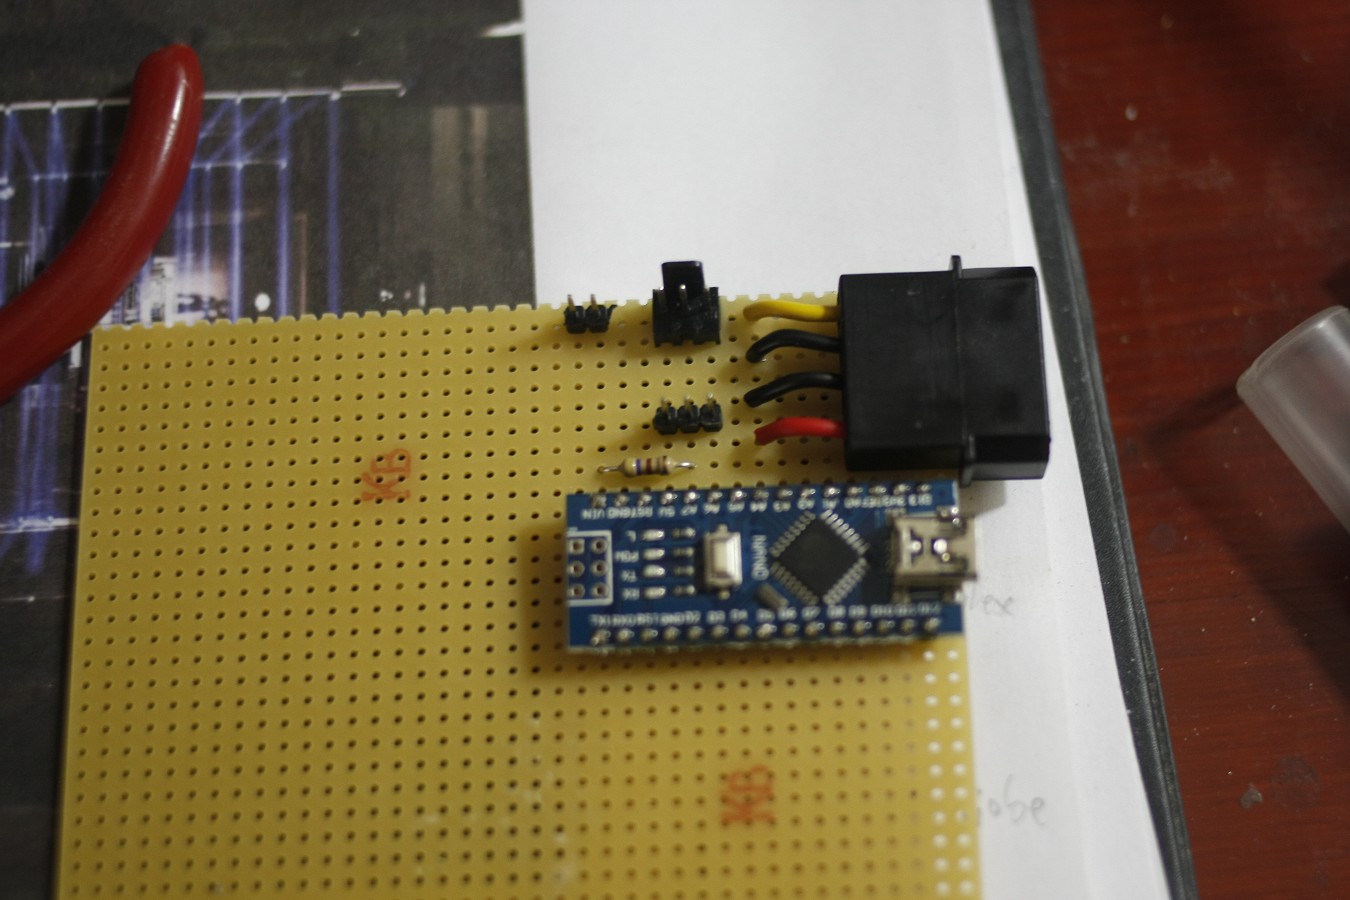

Finally, I glued a 3mm Plexiglas plate with hot glue from below so that there is no short circuit here.


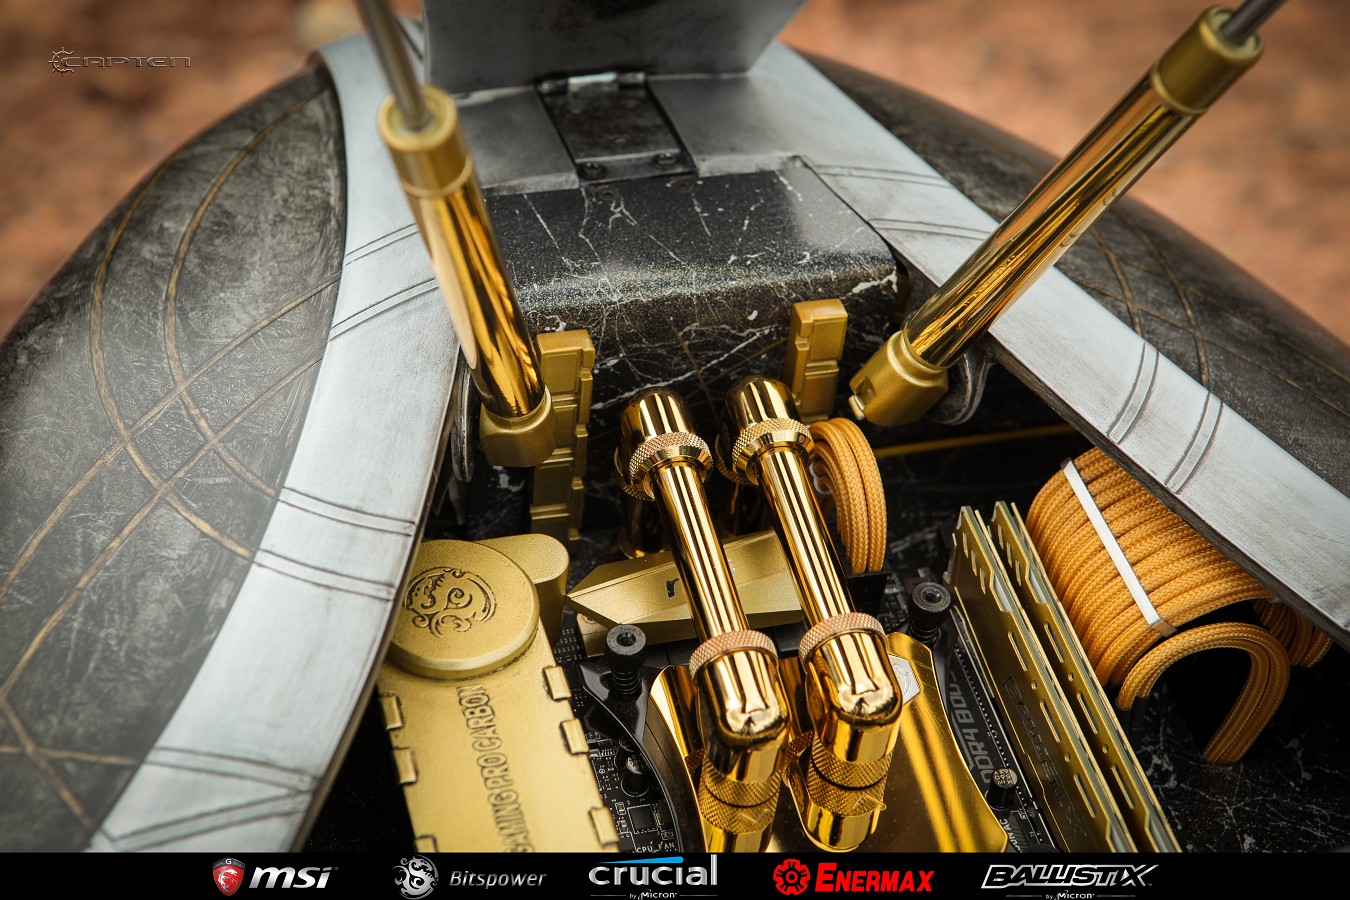
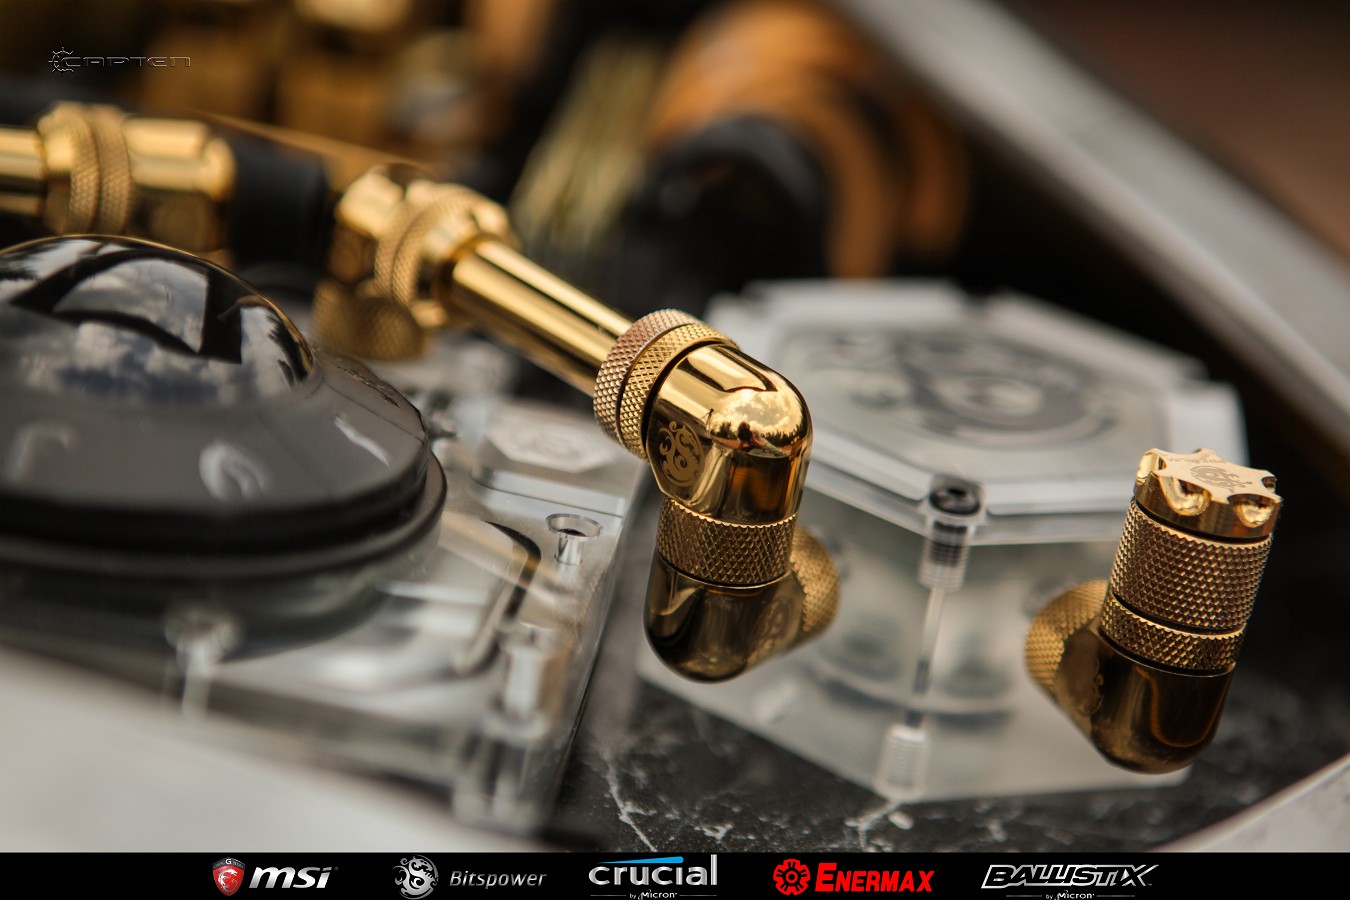
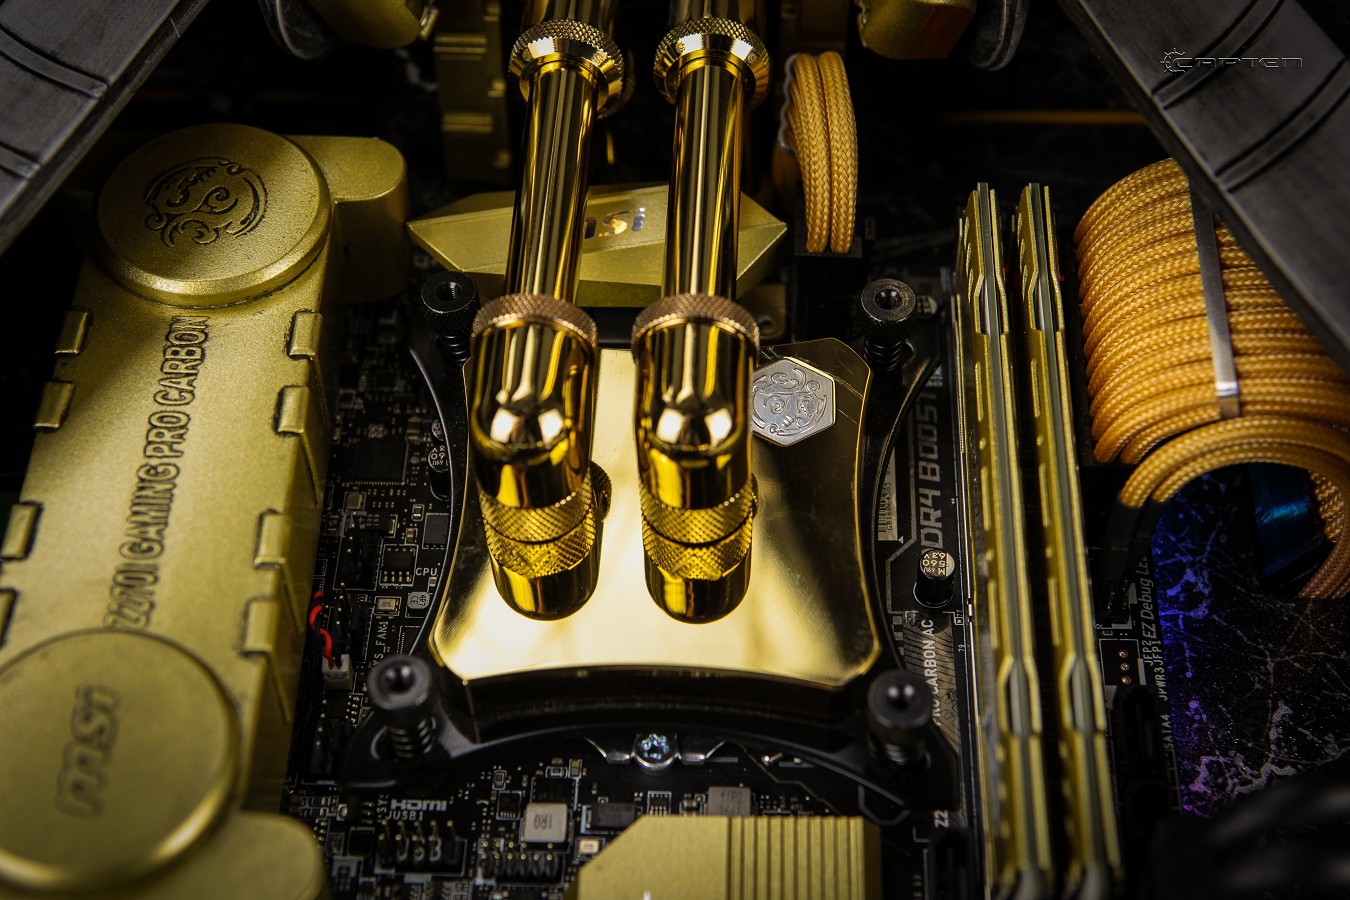
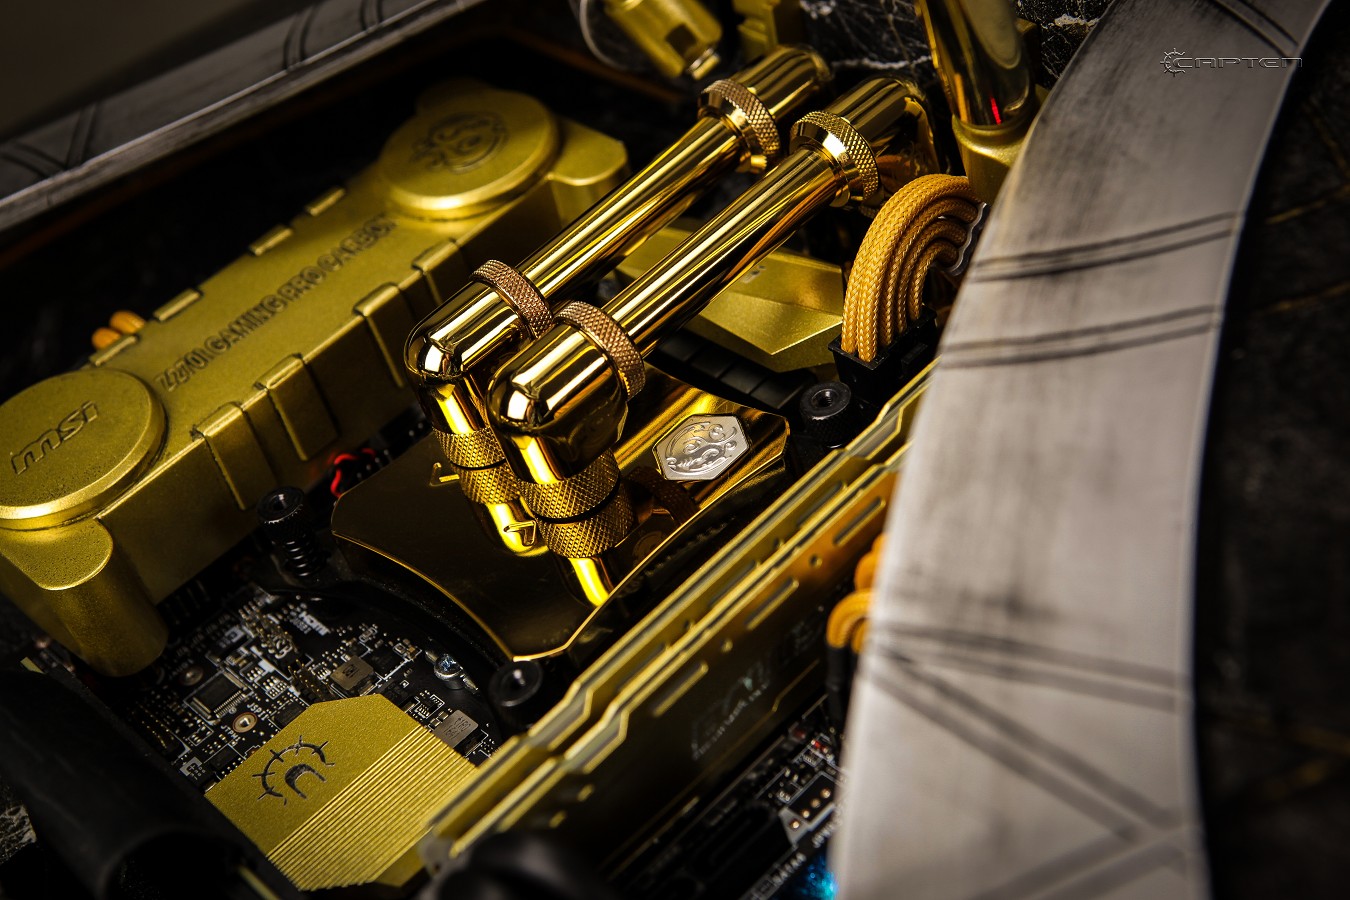
Well the cables are all sitting, time for hardware installation.

There's not much to say about cutting tubes.
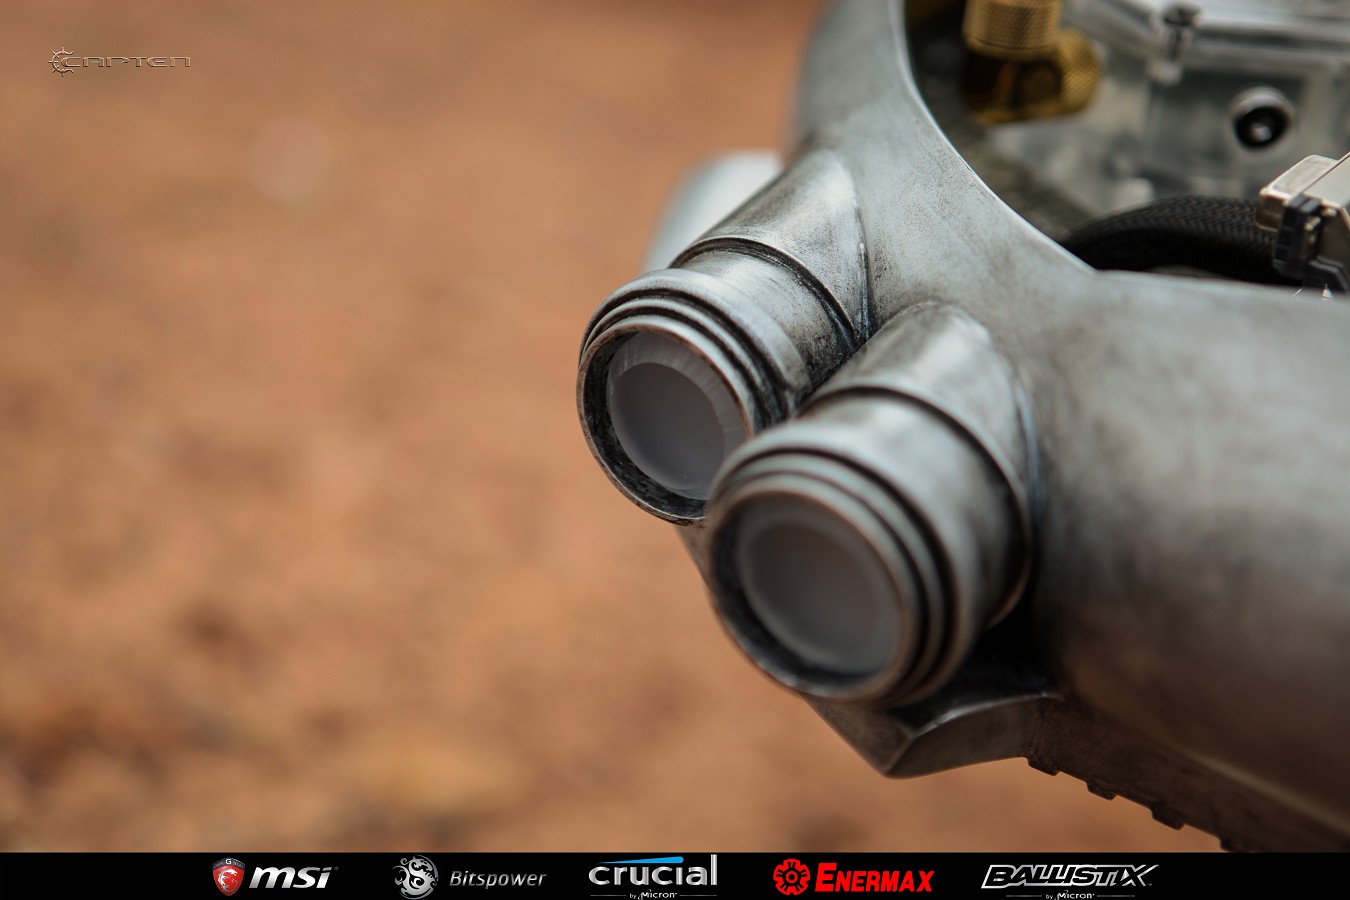
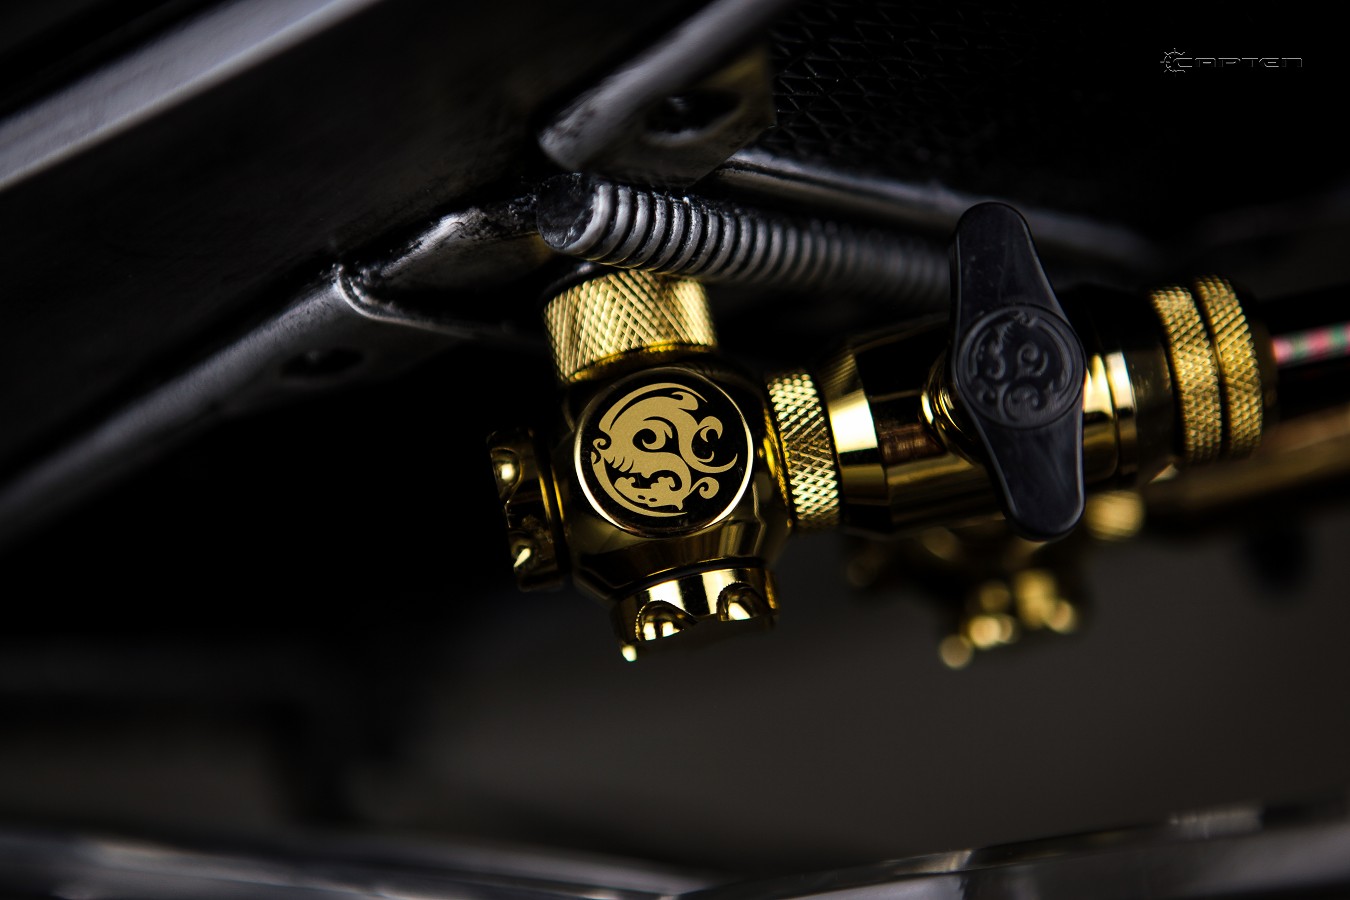
For the ball valves under the Alkesh I cut two 4cm tubes to 45 degrees.

and then edited them with the Bunsen burner.
The effect is super cool. We would then have the mouths of the ship's cannons.
Again, no photo ... fuck.
I feared that the ball valves with Q-distributor would be too big for the Al'Kesh but quite the opposite.
They fit perfectly.

Okay, at least something I photographed.
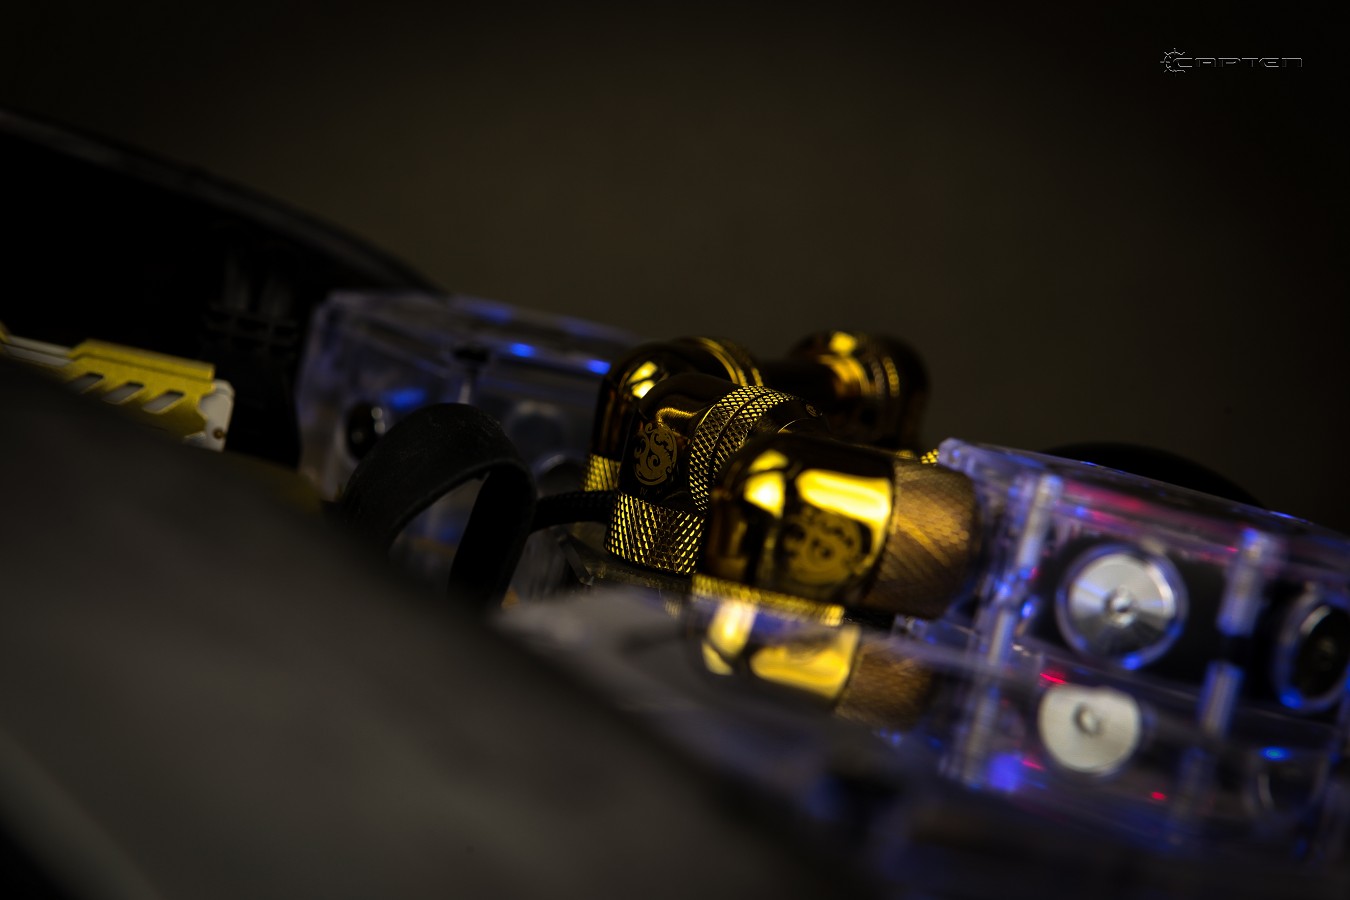
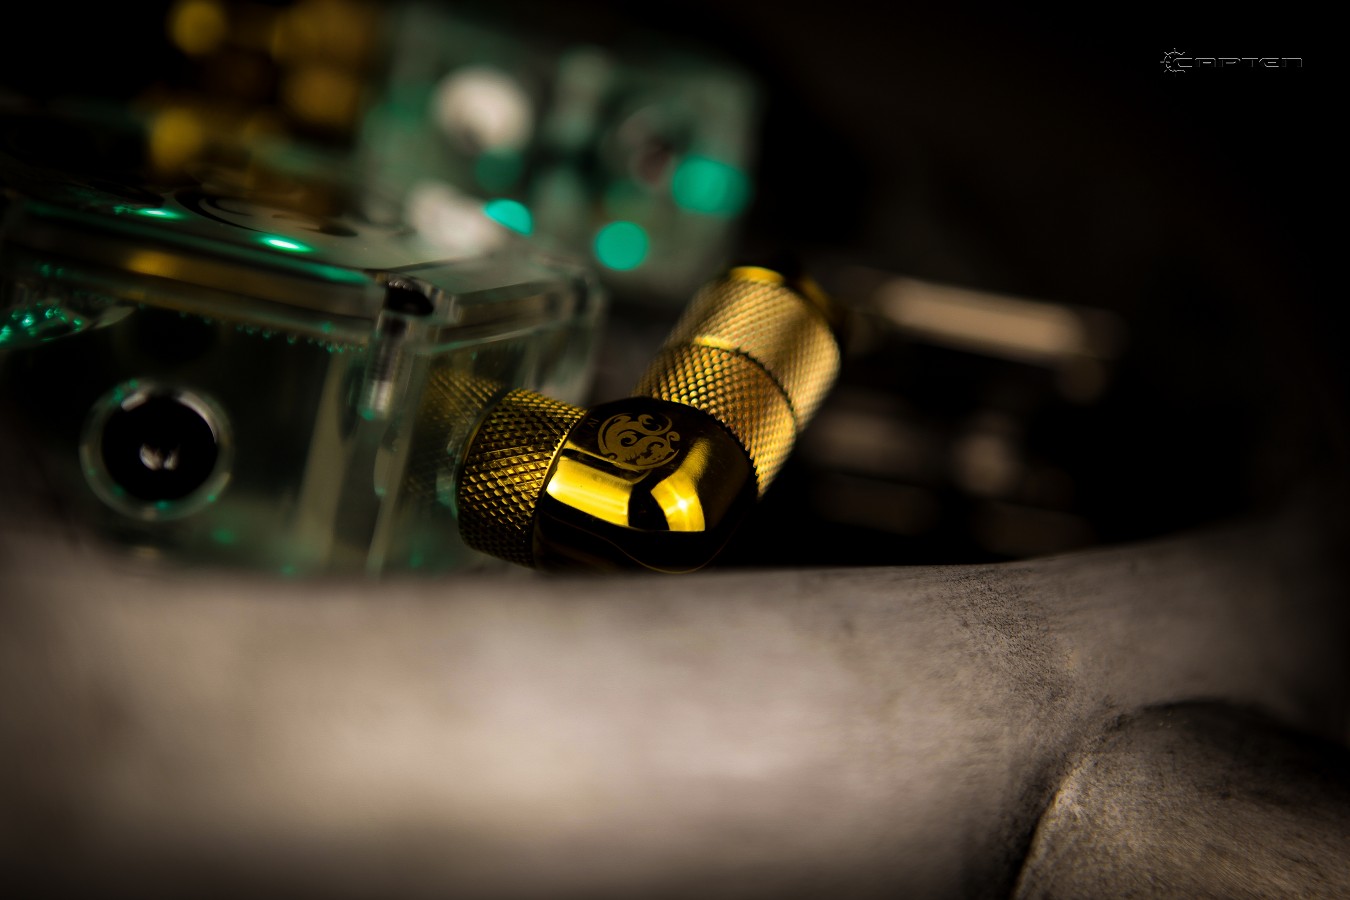
The finished loop

Soo we went to Modding Masters in Friedrichshafen.
I had not registered the Alkesh because the ROG Carbine was not there yet.
This won but smooth the first place for scratch build and additionally the audience Award.
YEAAAAAAAAH !
I still had a Casemod at which there is not even a worklog and also this one won the second prize. Really unexpected because I just cobbled this just for fun together.
But since there has been something in the case for over a year, there was plenty of work in it.

Okay, I really do not want to torment you, but it should still be a little exciting.
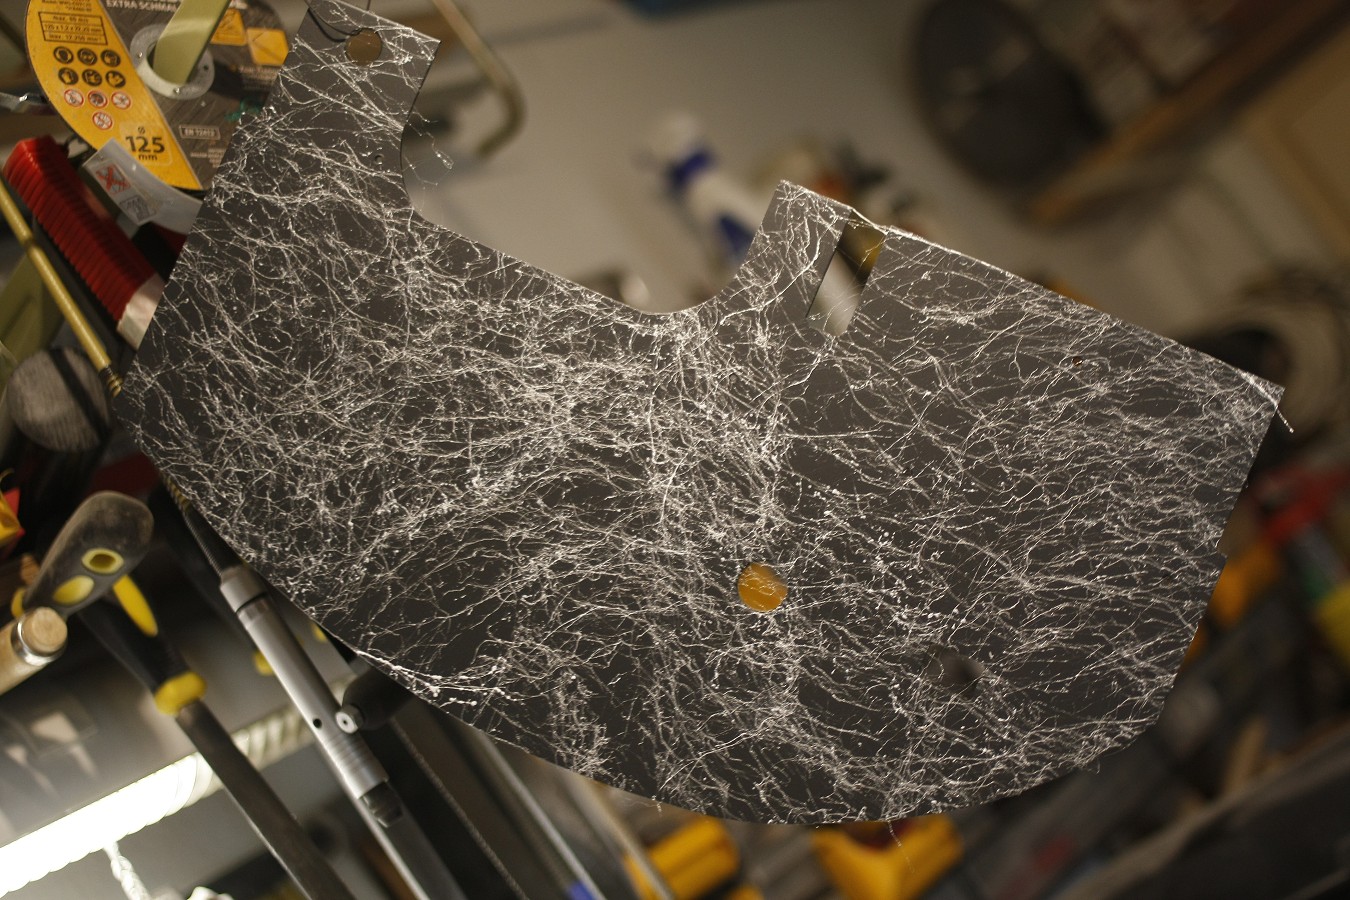
The holder for the Alkesh made of 8mm Plexiglas was a bit shaky for me.
It has held but also the orientation does not tell me so completely so I started yesterday just after the car unload a new bracket from 1cm thick Plexiglas to build.
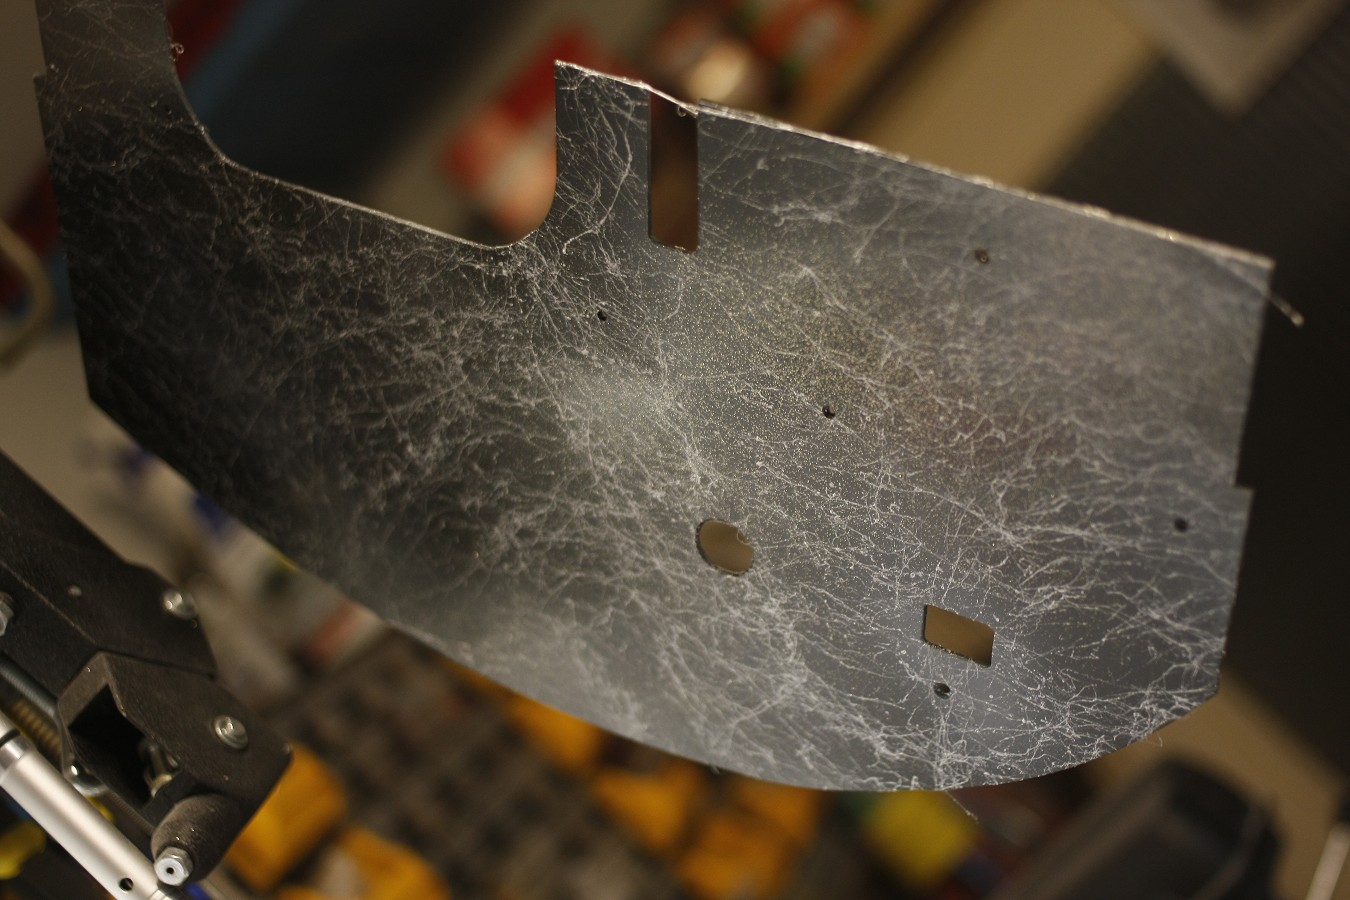
First cut the bottom plate again with the jigsaw

and then chamfered edges and polished the same everything.
Then I cut the star, the chamfering, bending and polishing will come tomorrow.

Okay that was it again, a few little things are still to be done, until Gamescom I have so much time again
That's what he looks like now the "Washing Effect".
I have used black acrylic paint for this and also some of metallic effect colors on acrylic base (black, silver, anthracite, gold)
The colors are simply diluted down to water, applied, and then wiped off again with a fuselage-free rag.
Depending on your preference you wipe them in some places more on others less down.
This results in a very nice wear effect after 5-8 passes.
Unfortunately, I could not count because I was very often dissatisfied and the colors have completely wiped down.
As always there were some problems:
- Water colors or school colors do not work, they dissolve each time you work again
- as the first colors are permanently beaded off the rim varnish I sanded the Alkesh again completely with 1000 sandpaper.
Since the curves pardu did not want to get darker, I felt different here.
I wrapped the rag around my index finger, dipping the finger lightly into black undiluted paint and distributing it evenly.
But in very small steps so max 5-10 square centimeters.
Immediately after applying, I began to beat the color like a madman with a finger.
This resulted in this beautiful hammered effect.
Okay, after I had finished, I stuck the interior completely off and painted the whole Alkesh Clear.
After the third Goa'uld bomb was finally finished I was able to deal with the programming of the Arduino
I like it. I also had a short video of it on Facebook uploaded
The control for the light string I had provided with the hot glue, then it was quiet.
Unfortunately, it was suddenly loud after installation. Try the whole thing again with candle wax.
The whole control I do not want to pour only the throttle.
Okay, when I touched the Al'Kesh one day later I realized that I had applied a lot of dirt with the "washing effect"
So everything was ground again smooth and once again painted clear.
On the bottom plate, I put a Chrome logo as a Tauri sign and the sponsors to match in matt gold.
For all the RGB LEDs, I have tinkered with a small distributor to control all over the Motherboard.
so for the cockpit I put a yellow LED in a small reflector
took me a small bulb and made me with the thermoforming of it an imprint.
I then cut it into shape and stuck it on the reflector
then painted in gold
To recognize something bad, but finally, after the foil was removed from the pyramid, I polished the cut edges of the window
The reflector I stuck now in the cockpit, previously drilled a hole for the cable of course
So now Tialc also has a steering wheel to fly XD
The Arduino was now soldered to a board, in addition to the LEDs of the bomb, I still put the connection for the yellow cockpit LED and the drives.
Finally, I glued a 3mm Plexiglas plate with hot glue from below so that there is no short circuit here.
Well the cables are all sitting, time for hardware installation.
There's not much to say about cutting tubes.
For the ball valves under the Alkesh I cut two 4cm tubes to 45 degrees.
and then edited them with the Bunsen burner.
The effect is super cool. We would then have the mouths of the ship's cannons.
Again, no photo ... fuck.
I feared that the ball valves with Q-distributor would be too big for the Al'Kesh but quite the opposite.
They fit perfectly.
Okay, at least something I photographed.
The finished loop
Soo we went to Modding Masters in Friedrichshafen.
I had not registered the Alkesh because the ROG Carbine was not there yet.
This won but smooth the first place for scratch build and additionally the audience Award.
YEAAAAAAAAH !
I still had a Casemod at which there is not even a worklog and also this one won the second prize. Really unexpected because I just cobbled this just for fun together.
But since there has been something in the case for over a year, there was plenty of work in it.
Okay, I really do not want to torment you, but it should still be a little exciting.
The holder for the Alkesh made of 8mm Plexiglas was a bit shaky for me.
It has held but also the orientation does not tell me so completely so I started yesterday just after the car unload a new bracket from 1cm thick Plexiglas to build.
First cut the bottom plate again with the jigsaw
and then chamfered edges and polished the same everything.
Then I cut the star, the chamfering, bending and polishing will come tomorrow.
Okay that was it again, a few little things are still to be done, until Gamescom I have so much time again
- Joined
- Jun 8, 2011
- Messages
- 15,947 (3.39/day)
- Location
- Somerset, UK
| System Name | Not so complete or overkill - There are others!! Just no room to put! :D |
|---|---|
| Processor | Ryzen Threadripper 3970X |
| Motherboard | Asus Zenith 2 Extreme Alpha |
| Cooling | Lots!! Dual GTX 560 rads with D5 pumps for each rad. One rad for each component |
| Memory | Viper Steel 4 x 16GB DDR4 3600MHz not sure on the timings... Probably still at 2667!! :( |
| Video Card(s) | Asus Strix 3090 with front and rear active full cover water blocks |
| Storage | I'm bound to forget something here - 250GB OS, 2 x 1TB NVME, 2 x 1TB SSD, 4TB SSD, 2 x 8TB HD etc... |
| Display(s) | 3 x Dell 27" S2721DGFA @ 7680 x 1440P @ 144Hz or 165Hz - working on it!! |
| Case | The big Thermaltake that looks like a Case Mods |
| Audio Device(s) | Onboard |
| Power Supply | EVGA 1600W T2 |
| Mouse | Corsair thingy |
| Keyboard | Razer something or other.... |
| VR HMD | No headset yet |
| Software | Windows 11 OS... Not a fan!! |
| Benchmark Scores | I've actually never benched it!! Too busy with WCG and FAH and not gaming! :( :( Not OC'd it!! :( |
Utterly amazing.... Congrats on such an amazing project!!
- Joined
- Aug 26, 2016
- Messages
- 78 (0.03/day)
- Location
- Germany
Sooo the wait is over.
Here is the last update.
Next it went to the new 1cm bracket.
After all edges were beveled I bent them now differently to change the angle of Al`kesh something.
So it feels a bit more coherent and you can look much better into it.


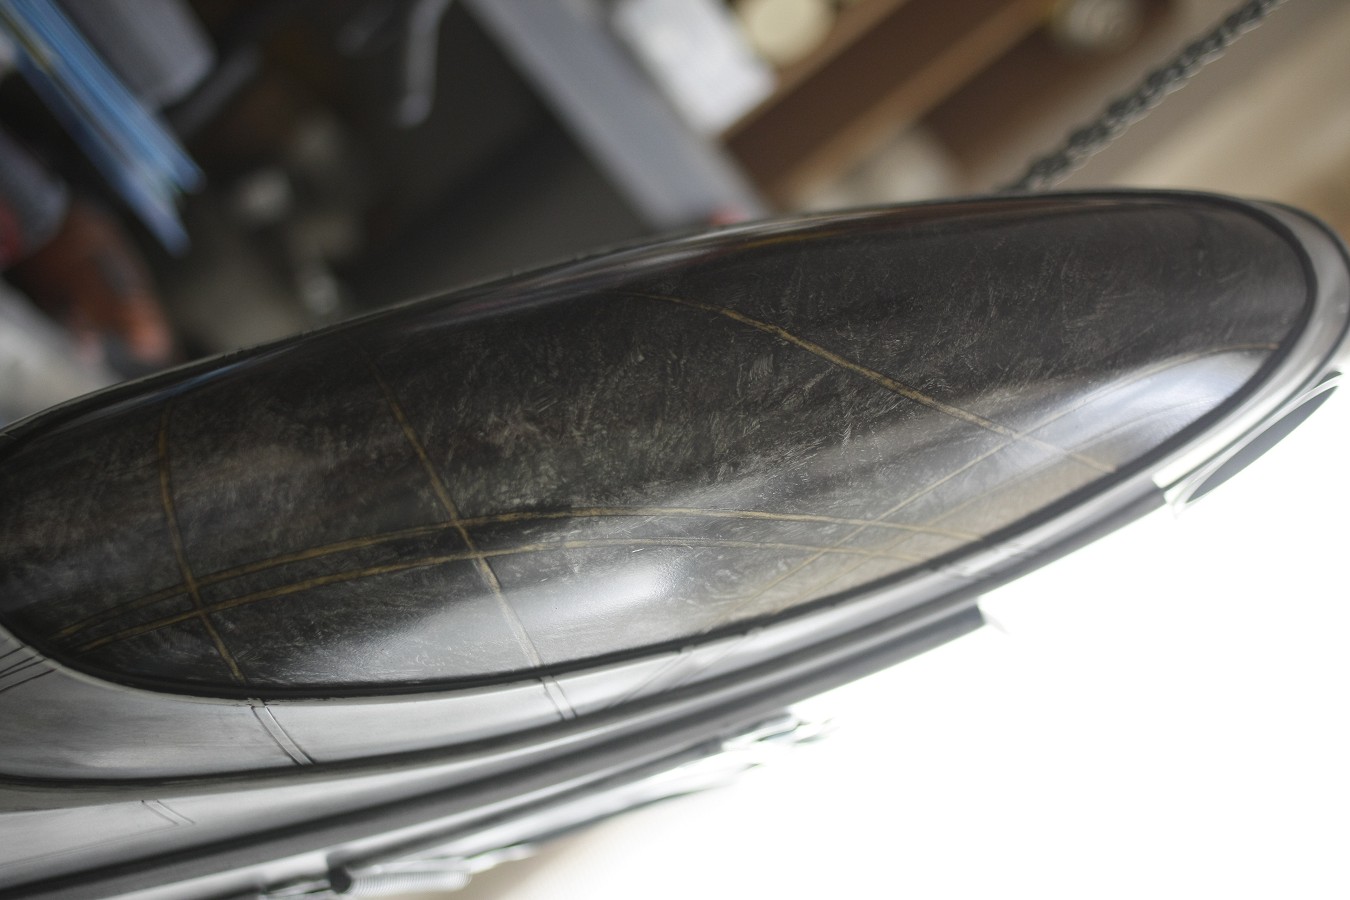
The whole pyramid was now covered with frosted glass foil,
really took a while until I had created a design which optimally fits the transparency and now
the pyramid is not quite as invisible as on the Modding Masters.
More photos will be available at the end of the article.

Now I took some time to design a few decals for the bottom plate.
This time it's the original Goa'uld font combined with the sponsor logos.

After these were transferred to the base plate, she got anti-skid and finished.

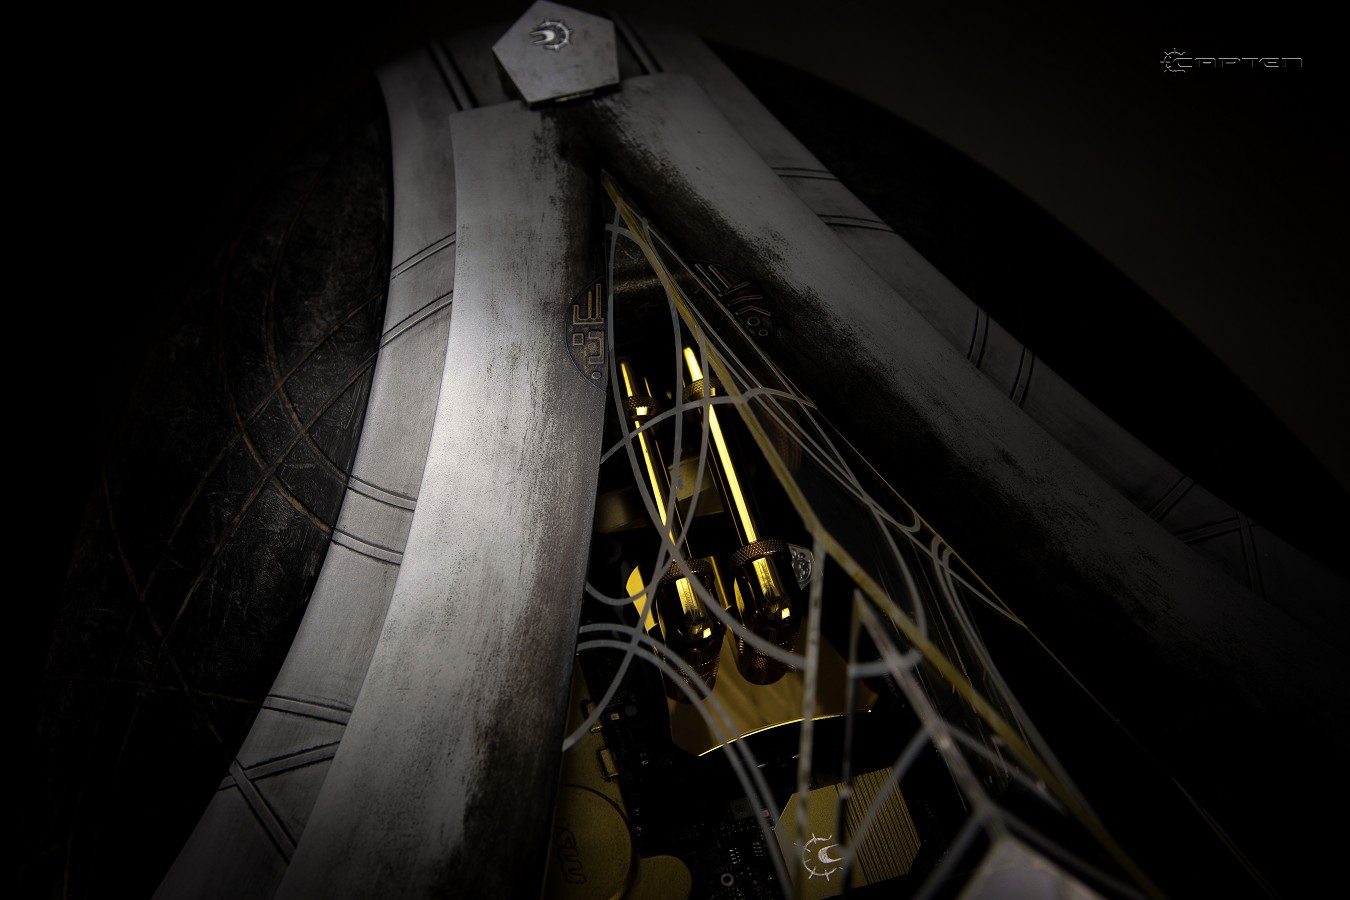
Now the first outdoor finalpics.
With the lighting you have to wait a bit, after removing the hot glue of the light string control it will not work anymore.
I have already ordered new but unfortunately, the earliest comes until the end of this month.
The system is running anyway, OS is not on it yet.
After one or two hours of bios, the temps were at 36 degrees, which I find okay for two 120mm Slim.
But see for yourself, what do you think?
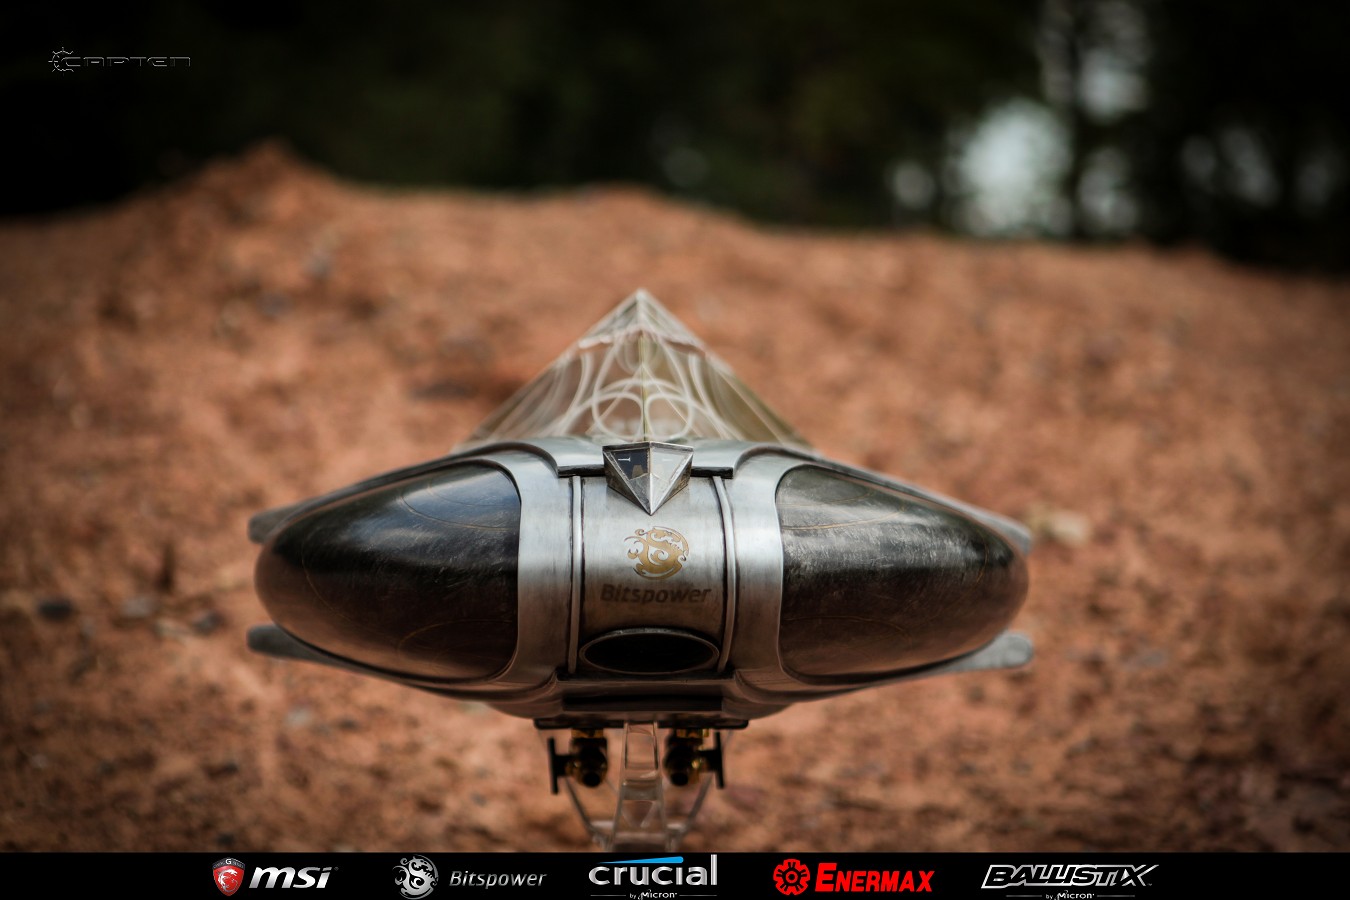


Okay, so if I look at this myself I think it's pretty PORN: banana:
Yeah I finally have an AL`KESH: D
For the drives, I had extra with a 9Volt battery taken but the performance was unfortunately not sufficient despite cloudy day.
Well, no matter what you see at the next indoor photo shoot.
Hope this happens this month but now I have to move on to the next project.
This time again a Casemod name "Anubis" :hmm::d
OneMoar
There is Always Moar
- Joined
- Apr 9, 2010
- Messages
- 8,744 (1.71/day)
- Location
- Rochester area
| System Name | RPC MK2.5 |
|---|---|
| Processor | Ryzen 5800x |
| Motherboard | Gigabyte Aorus Pro V2 |
| Cooling | Enermax ETX-T50RGB |
| Memory | CL16 BL2K16G36C16U4RL 3600 1:1 micron e-die |
| Video Card(s) | GIGABYTE RTX 3070 Ti GAMING OC |
| Storage | ADATA SX8200PRO NVME 512GB, Intel 545s 500GBSSD, ADATA SU800 SSD, 3TB Spinner |
| Display(s) | LG Ultra Gear 32 1440p 165hz Dell 1440p 75hz |
| Case | Phanteks P300 /w 300A front panel conversion |
| Audio Device(s) | onboard |
| Power Supply | SeaSonic Focus+ Platinum 750W |
| Mouse | Kone burst Pro |
| Keyboard | EVGA Z15 |
| Software | Windows 11 +startisallback |
INDEED
- Joined
- Apr 3, 2012
- Messages
- 4,355 (0.99/day)
- Location
- St. Paul, MN
| System Name | Bay2- Lowerbay/ HP 3770/T3500-2+T3500-3+T3500-4/ Opti-Con/Orange/White/Grey |
|---|---|
| Processor | i3 2120's/ i7 3770/ x5670's/ i5 2400/Ryzen 2700/Ryzen 2700/R7 3700x |
| Motherboard | HP UltraSlim's/ HP mid size/ Dell T3500 workstation's/ Dell 390/B450 AorusM/B450 AorusM/B550 AorusM |
| Cooling | All stock coolers/Grey has an H-60 |
| Memory | 2GB/ 4GB/ 12 GB 3 chan/ 4GB sammy/T-Force 16GB 3200/XPG 16GB 3000/Ballistic 3600 16GB |
| Video Card(s) | HD2000's/ HD 2000/ 1 MSI GT710,2x MSI R7 240's/ HD4000/ Red Dragon 580/Sapphire 580/Sapphire 580 |
| Storage | ?HDD's/ 500 GB-er's/ 500 GB/2.5 Samsung 500GB HDD+WD Black 1TB/ WD Black 500GB M.2/Corsair MP600 M.2 |
| Display(s) | 1920x1080/ ViewSonic VX24568 between the rest/1080p TV-Grey |
| Case | HP 8200 UltraSlim's/ HP 8200 mid tower/Dell T3500's/ Dell 390/SilverStone Kublai KL06/NZXT H510 W x2 |
| Audio Device(s) | Sonic Master/ onboard's/ Beeper's! |
| Power Supply | 19.5 volt bricks/ Dell PSU/ 525W sumptin/ same/Seasonic 750 80+Gold/EVGA 500 80+/Antec 650 80+Gold |
| Mouse | cheap GigaWire930, CMStorm Havoc + Logitech M510 wireless/iGear usb x2/MX 900 wireless kit 4 Grey |
| Keyboard | Dynex, 2 no name, SYX and a Logitech. All full sized and USB. MX900 kit for Grey |
| Software | Mint 18 Sylvia/ Opti-Con Mint KDE/ T3500's on Kubuntu/HP 3770 is Win 10/Win 10 Pro/Win 10 Pro/Win10 |
| Benchmark Scores | World Community Grid is my benchmark!! |
Awesome build!! It is 'indeed' porn (is what I believe he is indeed-ing)!

- Joined
- Jul 5, 2013
- Messages
- 25,559 (6.49/day)
There is nothing not complete badass about this build! Well nice and well done!

- Joined
- Feb 7, 2017
- Messages
- 53 (0.02/day)
- Location
- Spain
| Processor | AMD Ryzen 3700X |
|---|---|
| Motherboard | Gigabyte AB350N-Gaming |
| Memory | 16 GB Corsair Vengeance 3200 |
| Video Card(s) | Nvidia RTX 2080 |
| Storage | Samsung 850 EVO 512 GB |
| Display(s) | 1 x ASUS Predator 3440x1440 | 2 x HPZR24w 1920x1200 |
| Case | Corsair Obsidian 800D |
| Power Supply | EVGA 600B |
| Software | Windows 10 Home |
Looks really fantastic, i've been following since you started it, and oh my! congratulations! 

- Joined
- Aug 26, 2016
- Messages
- 78 (0.03/day)
- Location
- Germany
Hi, sorry for my delay, I had a sick cat at home the last few weeks and had to go to the vet almost daily.
At the moment my cat seems to be better but the cause still could not be found.
So I still fear daily for his life

So as promised here a short video of the Alkesh and the last photos on the fly.
For all who go to Gamsecom, you can see the Goa'uld Bomber there at the ECOM booth, hall 10.1, booth B.20.


- Joined
- Aug 26, 2016
- Messages
- 78 (0.03/day)
- Location
- Germany
Hey guys,
The DCMM (germany´s casemodding championship) is now taking place in Leipzig on the Dreamhack.
And what can I say .... YEAHHH, I was able to defend my title and have actually again occupied the 1st place in the category CaseCons(scratch build) with the "Alkesh". :rock::grin:

The DCMM (germany´s casemodding championship) is now taking place in Leipzig on the Dreamhack.
And what can I say .... YEAHHH, I was able to defend my title and have actually again occupied the 1st place in the category CaseCons(scratch build) with the "Alkesh". :rock::grin:
- Joined
- May 28, 2005
- Messages
- 4,994 (0.72/day)
- Location
- South of England
| System Name | Box of Distraction |
|---|---|
| Processor | Ryzen 7 1800X |
| Motherboard | Crosshair VI Hero |
| Cooling | Custom watercooling |
| Memory | G.Skill TridentZ 2x8GB @ 3466MHz CL14 1T |
| Video Card(s) | EVGA 1080Ti FE. WC'd & TDP limit increased to 360W. |
| Storage | Samsung 960 Evo 500GB & WD Black 2TB storage drive. |
| Display(s) | Asus ROG Swift PG278QR 27" 1440P 165hz Gsync |
| Case | Phanteks Enthoo Pro M |
| Audio Device(s) | Phillips Fidelio X2 headphones / basic Bose speakers |
| Power Supply | EVGA Supernova 750W G3 |
| Mouse | Logitech G602 |
| Keyboard | Cherry MX Board 6.0 (mx red switches) |
| Software | Win 10 & Linux Mint |
| Benchmark Scores | https://hwbot.org/user/infrared |
Congrats!! Wish I'd been there to check out all the awesome systems
- Joined
- Mar 17, 2013
- Messages
- 451 (0.11/day)
- Location
- Earth
| System Name | Game / Work |
|---|---|
| Processor | Amd 1800X @3900 / Intel 9600kf @ 4600 |
| Motherboard | Asus C VI H / Msi z390 A pro |
| Cooling | air atm / liquid |
| Memory | 16gb 4000mhz @3400 / 16 gb 3600 mhz |
| Video Card(s) | Msi 1080ti / Amd Radeon pro w5500 |
| Storage | Ocz rd400 512 gb m2 + Seagate Exos 4 tb / 250gb Kingston A2000 + WD 2tb Gold |
| Display(s) | Aoc 32" qhd |
| Case | Working on a new project |
| Audio Device(s) | Beyerdynamics DT 770 pro + Logitech Z 623 |
| Power Supply | seasonic 1050 snow white / CM V750 Gold |
| Mouse | Razer Basilisk |
| Keyboard | Gskill Ripjaws KM 780 MX |
| Software | W 10 pro 64 / W 10 pro 64 |
| Benchmark Scores | Just checked, the computer still works. |
Congrats for the first place, well done.