
- Joined
- Aug 13, 2013
- Messages
- 80 (0.02/day)
To view this case mod, go here.


Specs:
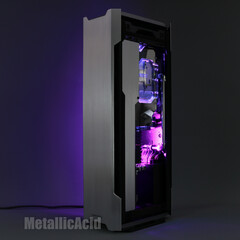
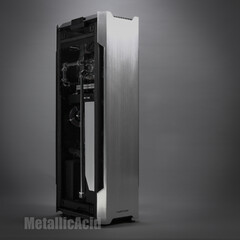
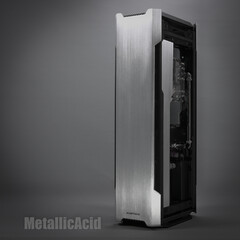
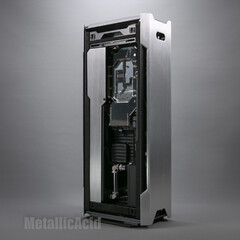
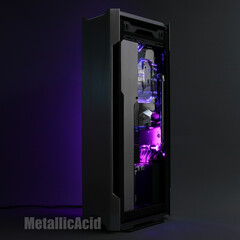
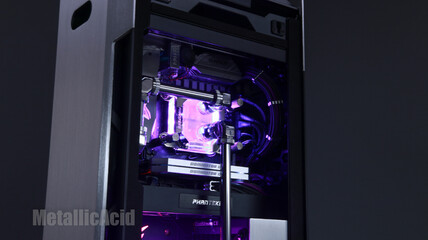
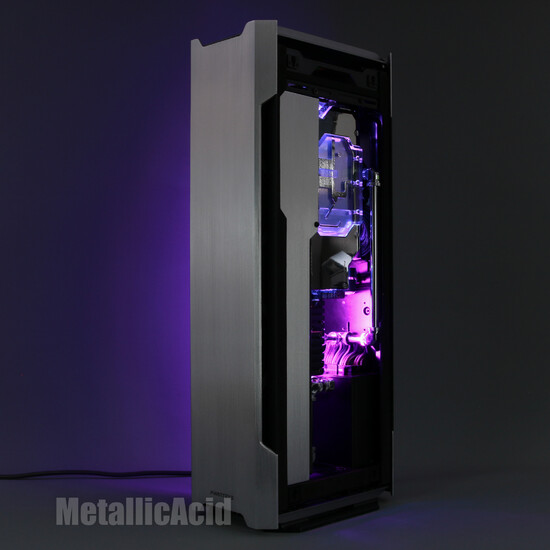
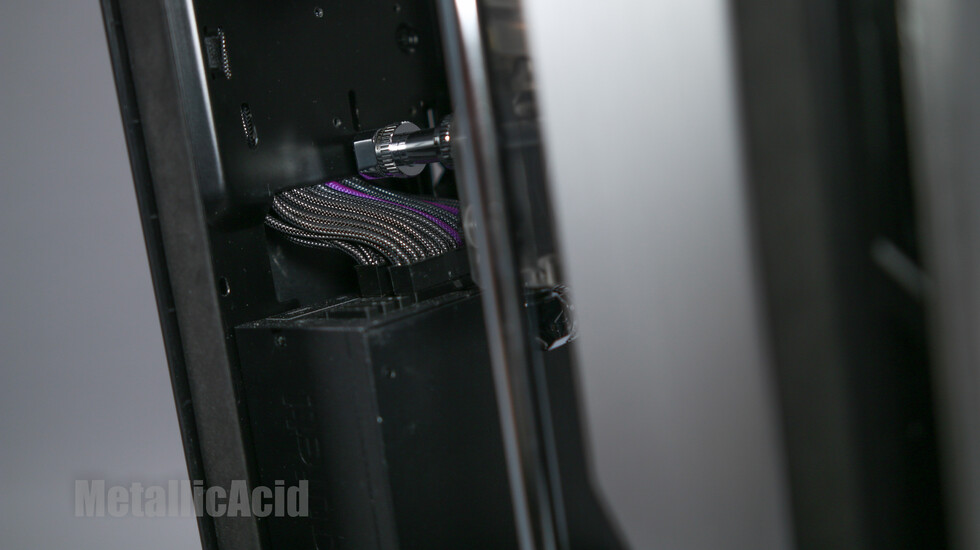
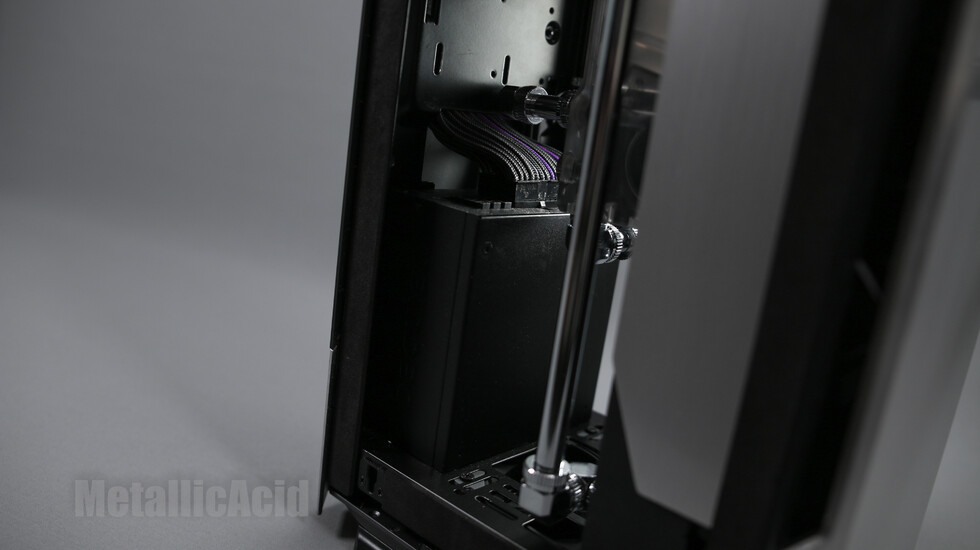
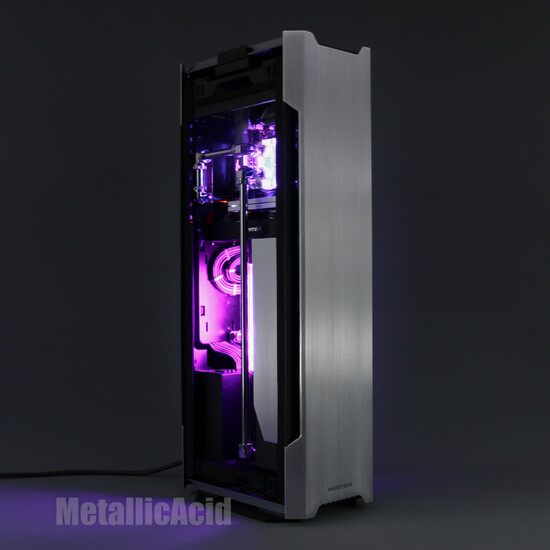
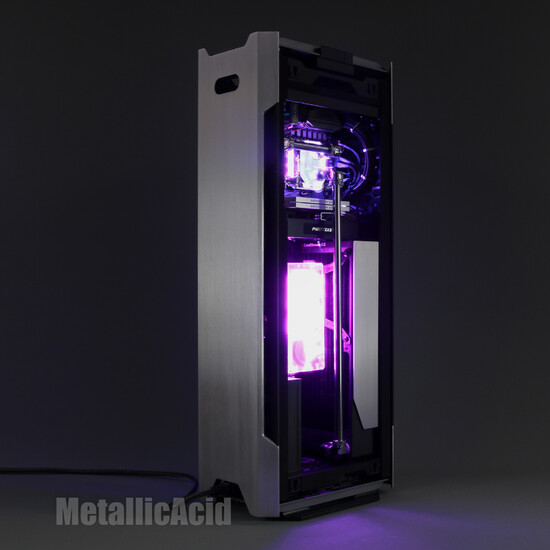
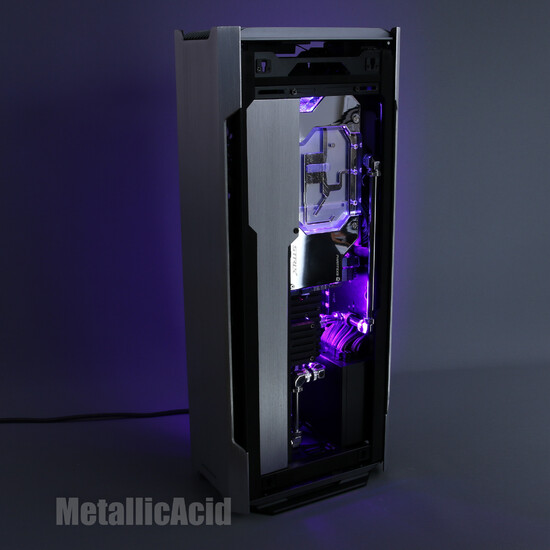
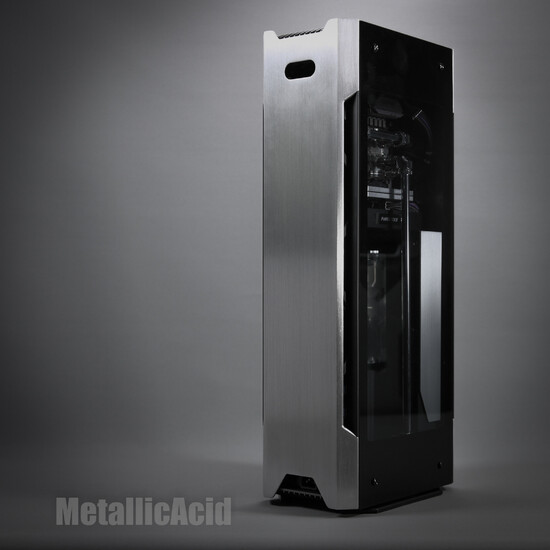
Ryzen 1700xASUS ROG Strix X370-IBe Quiet! SFX-L 600wASUS GTX1080 StrixCorsair Dominator Platinum 16GB 2800mhzSamsung 960 Pro 512GB M.2 SSDPhanteks Evolv Shift XPhanteks 140mm HP fansPhanteks watercoolingEKWB CE 280 radiator
Mods:
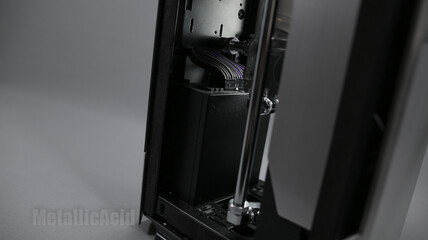
Sanded all panels to bare aluminiumBrushed all panels for premium lookCreated new internal aluminium panelsBrushed all custom panelsCut bits from internal section to properly fit all partsCustom water loop with chromed copper pipes
Hi guys and gals.I have had the honour to make a project together with Phanteks, Inet, PCB Distribution, ASUS and Be Quiet! and CableMod to create an aesthetically pleasing project with the Evolv Shift X. and coming up soon is another project featuring the Evolv X, which will be coming soon.So the project plans for this chassis was to sand the entire aluminium panel back from the anodised aluminium sand blasted finish, to around 600 grit, which gave me a very flat and bare aluminium finish, then to give all of these panels a brushed finish using 80 grit sandpaper. Giving these panels a brushed finish with sandpaper was a very long process. Firstly, removing the anodising and sanding with a machine to 600 grit took many hours and many pads of sandpaper. Total time for pro phase was around 4 hours. Once the panels were prepped and ready for brushing, I had to set these panels into a custom made jig which held the panels securely in place so that they would not move or slip while I was sanding. If any of my sanding strokes were not straight, then the overall result of the finish would not look appealing as the sanding strokes don't run parallel to each other. This sanding/brushing process took around 10 hours. Once the panels where sanded to a satisfactory standard, I took those panels into my garage, and gave them 2 coats of acrylic clearcoat. This helps against scratches and oxidisation.After the exterior was completed, I installed the components, then agonised over how the water loop should be for a couple of weeks. This is very normal..... unfortunately it is not the best for workflow and productivity though, haha! Then to top it off, I made some extra dress panels from aluminium, and also gave them the brushed finish treatment as well. Here is the finished result. I hope that you enjoy the photos. I have tried to experiment with lighting techniques, so I hope that you can appreciate the time it took to make this project photography stand out")


Specs:
Ryzen 1700xASUS ROG Strix X370-IBe Quiet! SFX-L 600wASUS GTX1080 StrixCorsair Dominator Platinum 16GB 2800mhzSamsung 960 Pro 512GB M.2 SSDPhanteks Evolv Shift XPhanteks 140mm HP fansPhanteks watercoolingEKWB CE 280 radiator
Mods:
Sanded all panels to bare aluminiumBrushed all panels for premium lookCreated new internal aluminium panelsBrushed all custom panelsCut bits from internal section to properly fit all partsCustom water loop with chromed copper pipes
Hi guys and gals.I have had the honour to make a project together with Phanteks, Inet, PCB Distribution, ASUS and Be Quiet! and CableMod to create an aesthetically pleasing project with the Evolv Shift X. and coming up soon is another project featuring the Evolv X, which will be coming soon.So the project plans for this chassis was to sand the entire aluminium panel back from the anodised aluminium sand blasted finish, to around 600 grit, which gave me a very flat and bare aluminium finish, then to give all of these panels a brushed finish using 80 grit sandpaper. Giving these panels a brushed finish with sandpaper was a very long process. Firstly, removing the anodising and sanding with a machine to 600 grit took many hours and many pads of sandpaper. Total time for pro phase was around 4 hours. Once the panels were prepped and ready for brushing, I had to set these panels into a custom made jig which held the panels securely in place so that they would not move or slip while I was sanding. If any of my sanding strokes were not straight, then the overall result of the finish would not look appealing as the sanding strokes don't run parallel to each other. This sanding/brushing process took around 10 hours. Once the panels where sanded to a satisfactory standard, I took those panels into my garage, and gave them 2 coats of acrylic clearcoat. This helps against scratches and oxidisation.After the exterior was completed, I installed the components, then agonised over how the water loop should be for a couple of weeks. This is very normal..... unfortunately it is not the best for workflow and productivity though, haha! Then to top it off, I made some extra dress panels from aluminium, and also gave them the brushed finish treatment as well. Here is the finished result. I hope that you enjoy the photos. I have tried to experiment with lighting techniques, so I hope that you can appreciate the time it took to make this project photography stand out