• Welcome to TechPowerUp Forums, Guest! Please check out our forum guidelines for info related to our community.

The TrashCan - 3D Printed SFF Build

Joined
Dec 31, 2008
Messages
311 (0.06/day)
Location
Silicon Valley, CA
Hey TPU folks!

I haven't done a build log in YEARS, my professional life has gotten in the way of documenting creativity even though I tend to get the build-itch once a year and part-out an old system to make room for a new one. This year I got the SSF itch. Two years ago I did a SFF build using the NCase M1 (V3) which was friggin sweet, however, it wasn't much of a challenge in terms of cramming hardware in there... and I like a good challenge.

A little about me: I'm in my mid-twenties, I work from home as a Cloud Engineer (AWS) for a local tech company, I am a musician and love being creative in general. I was born and raised here in the Bay Area of CA and grew up in my Father's wood shop. I mention that because you'll see some of his handy work here later. :cool:

Down to business:
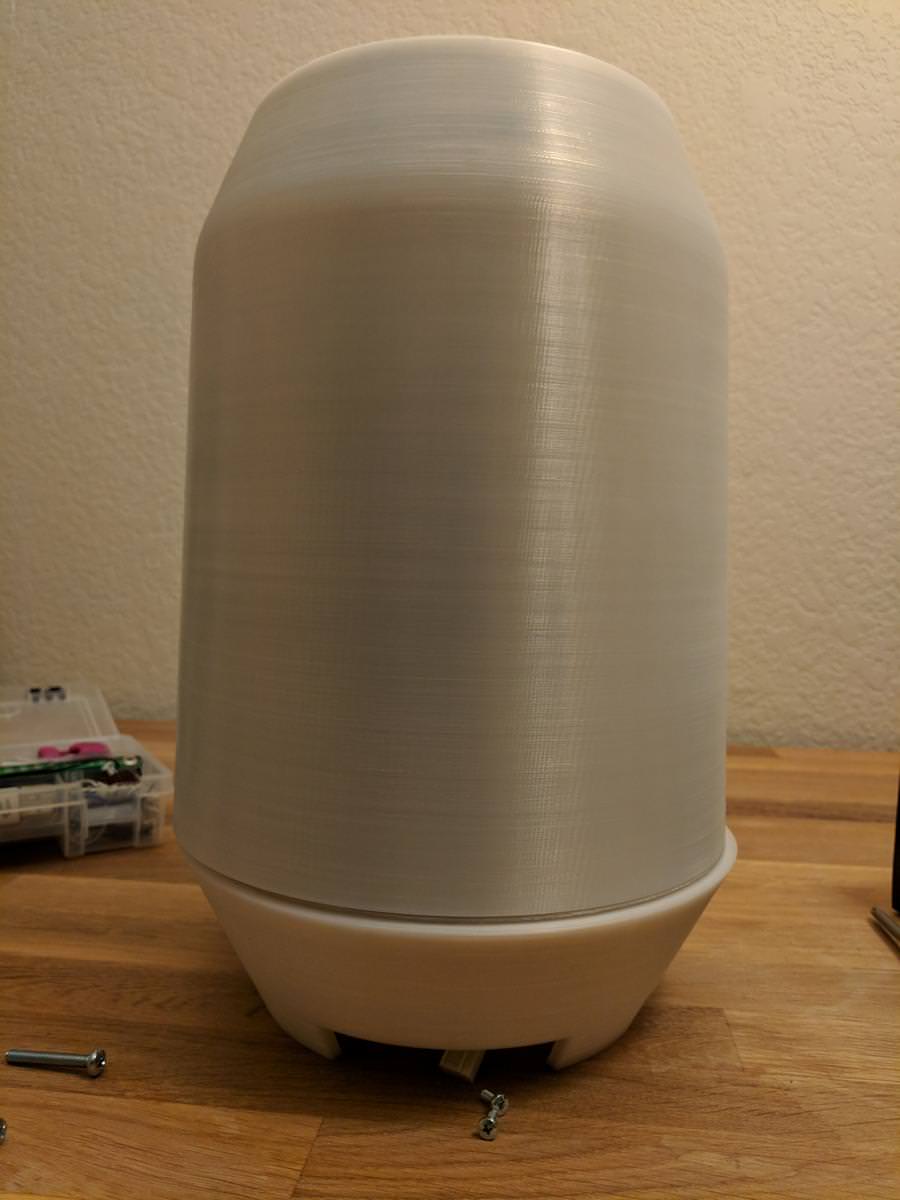
First off, I don't have a 3D printer and did not design or create this case! I was lurking eBay and came across this 3D Printed mini-ITX case that someone created as a project for his HTPC at home. His friends said, "Hey, that's pretty neat, you should make a few more and sell them online!" Here is the eBay listing:
https://www.ebay.com/itm/NEW-Mini-I...e-Custom-Designed-Rugged-Stylish/112738026600
(In case that link goes bad in the future, here is a backup album of all the seller's original photos from the listing: )

Upon receiving the case I pinged the guy asking for more details about the build, asked if he had a build log somewhere (he did not). He only sent me a few more pictures of the case which aren't in the eBay listing. I let him know I'd do a build log online and give him the credit for the case.

For $99 I couldn't pass it up and bought it with the justification that, "It's about time I built a SFF computer."

For rather obvious reasons, I dub this build: The TrashCan


Parts list:

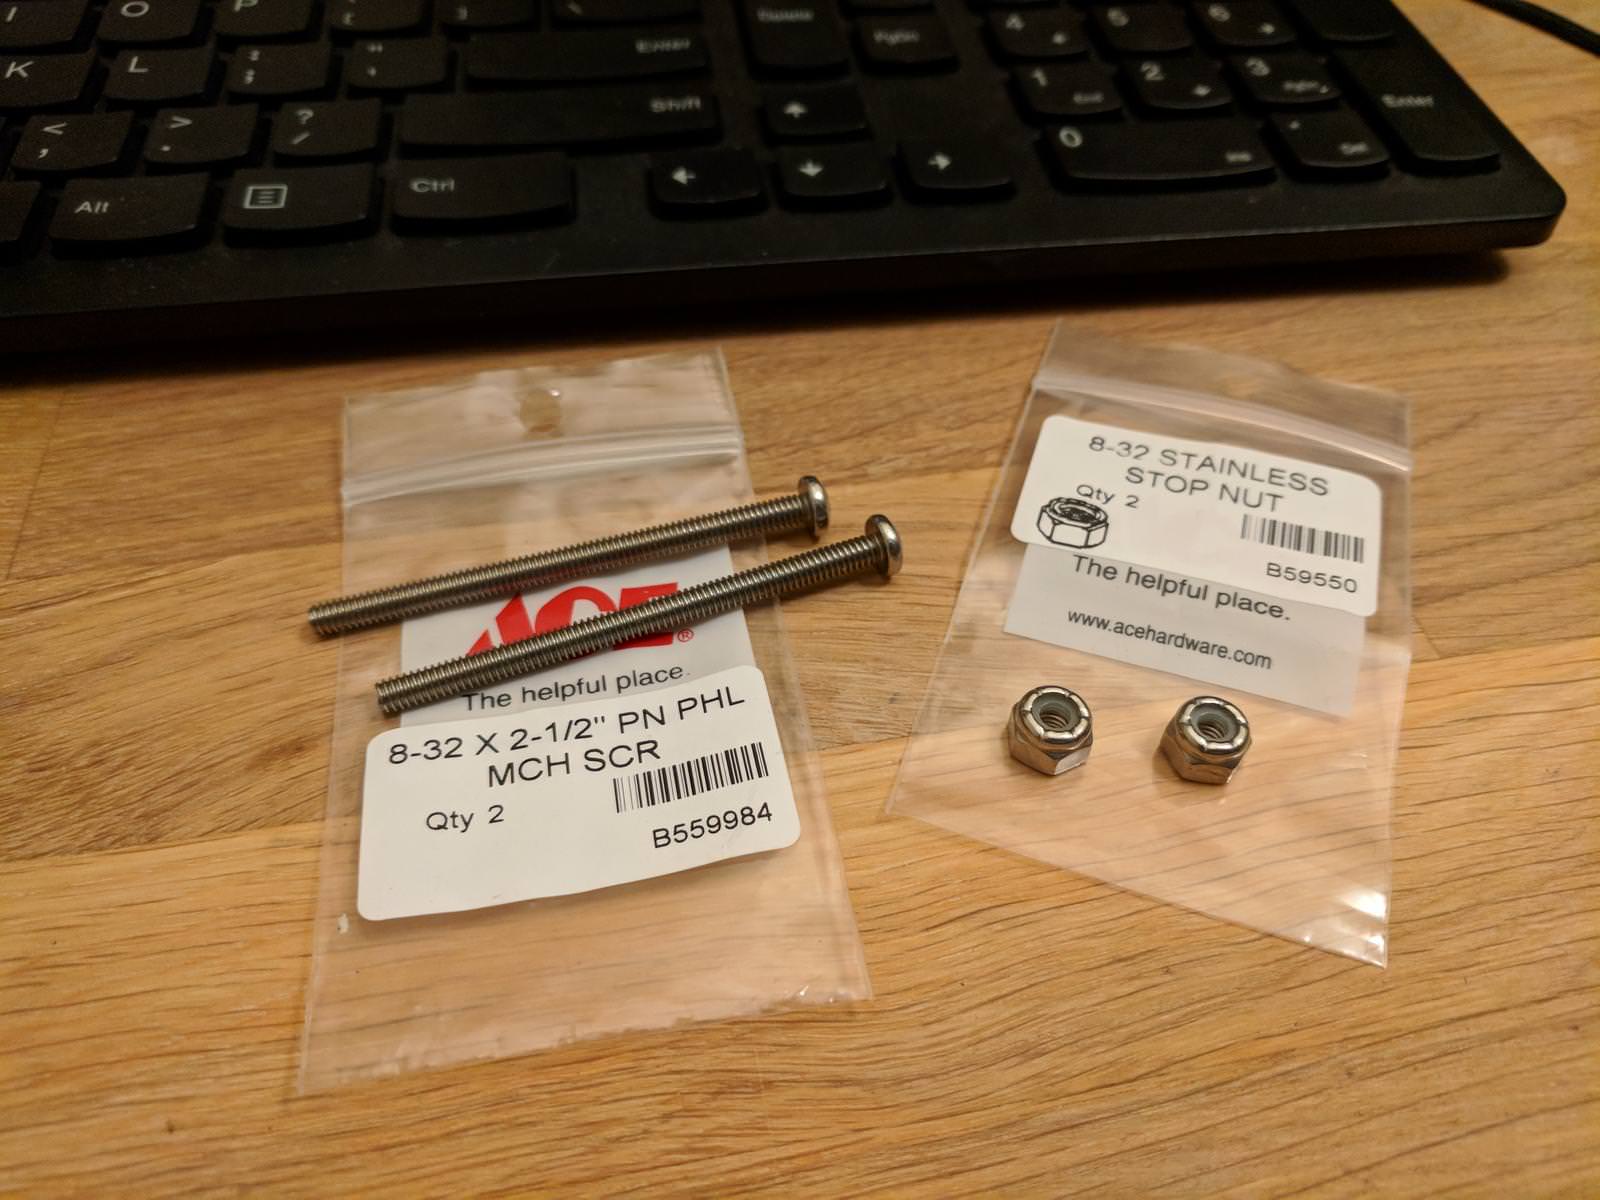
Some of these parts I already had on hand, all others have been ordered or I need to pickup at the local comp shop. I also plan to build a control box for this thing.
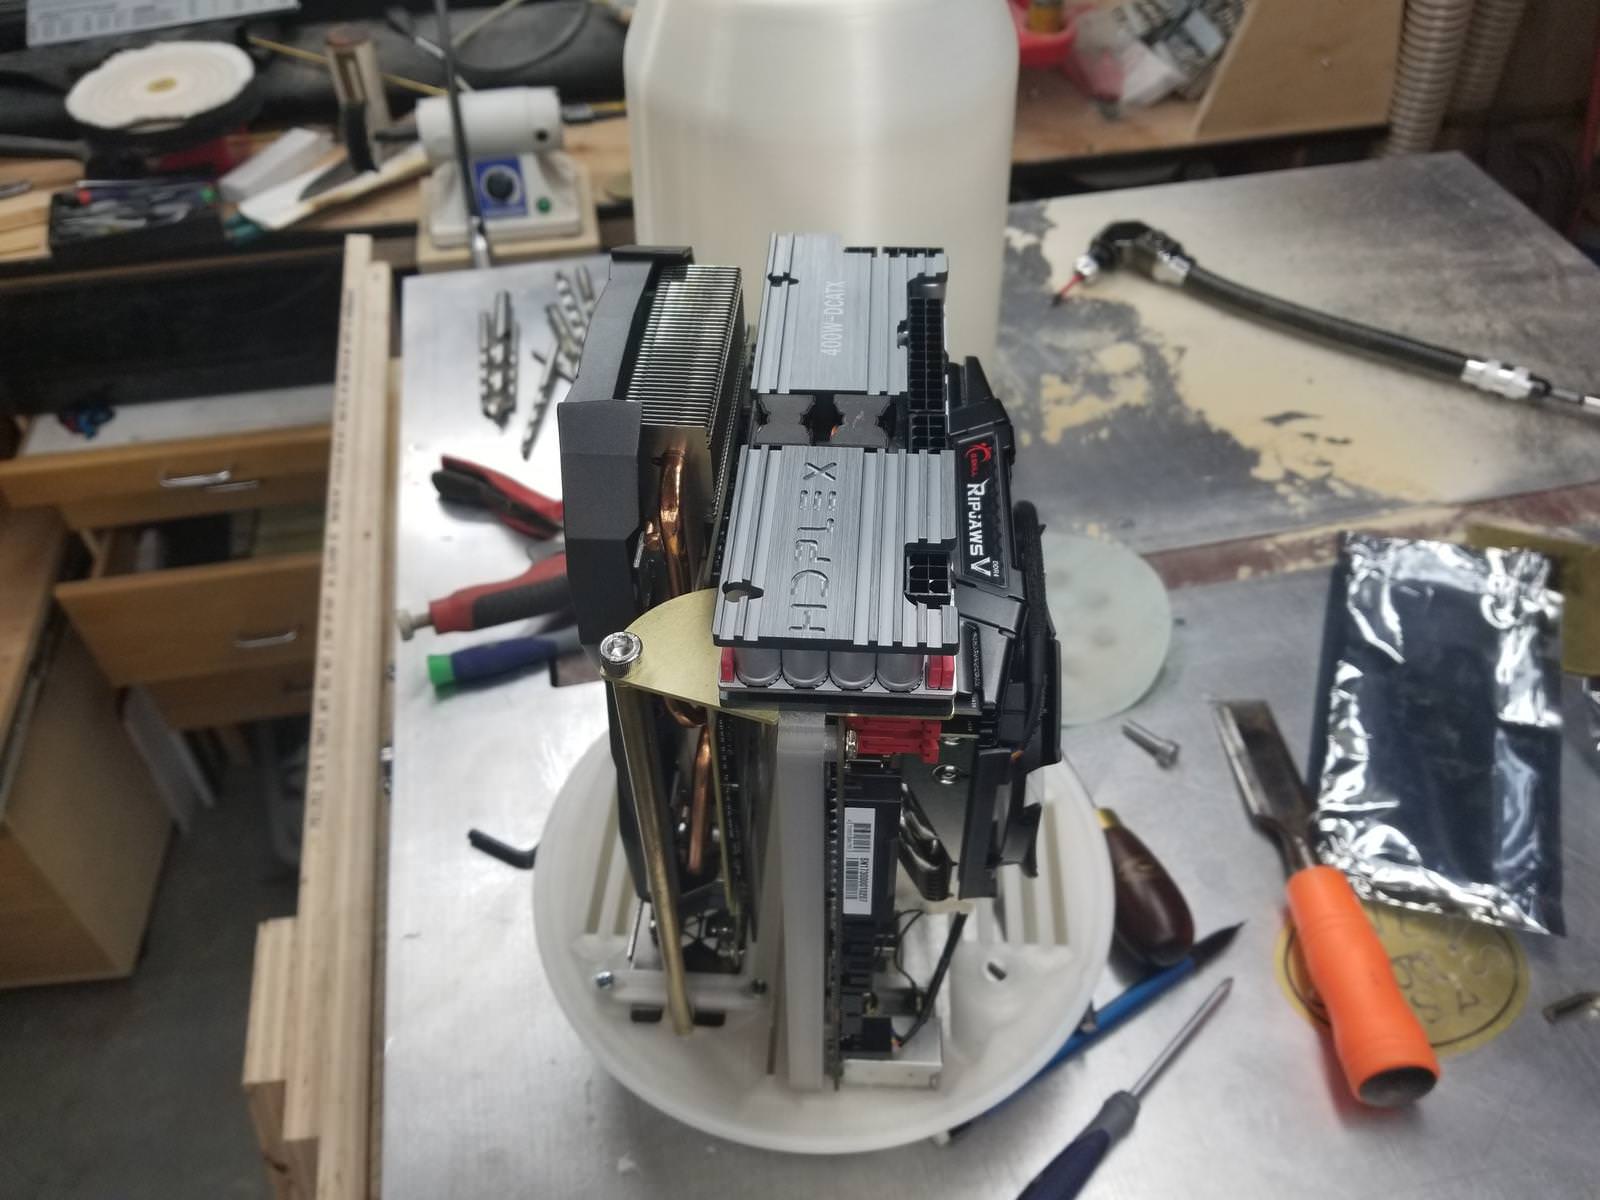
CPU - Ryzen 1700
GPU - Zotac GTX 1080 Mini
MB - Gigabyte AB350 Gaming Mini ITX
RAM - G.Skill DDR4 16GB 3200Mhz
PSU - HDPlex 400W + Dell 330W
SSD - Samsung NVMe 250GB M.2 + Crucial MX500GB SATA SSD

Cooling:
GPU = Stock
CPU = Cryorig C7 Low Profile
Top Exhaust Fan = 120mm (140mm??) ~ TBD ~

External Control box:
Temp Sensors
On/Off switch for computer
On/Off switch for AC-DC power
Fan Controller?

~~~~~~

Overall, this is going to be a tricky case to cram all this hardware in. Obviously, a dell brick is not going to fit in there but I've got a plan for that. More pics are coming as I've been working on this all week already, just been late to posting online. Stay tuned!!

~smee
 
Joined
Dec 31, 2008
Messages
311 (0.06/day)
Location
Silicon Valley, CA
More pics and an unfortunate mishap with USPS. :mad:

Showing the top vent and the Zotac 1080 mini peaking through...


Clear view of the mobo mount and SSD mount:


And now for the bad news... I bought a refurbished GA-AB350N-Gaming for $90, thought I'd save a few bucks. The package arrived looking quite sad:


The box inside (There was NO additional packaging or barrier to protect the mobo):


Mobo was sliding around freely, the severe scuffing of the bag were more red flags...


:eek::eek::eek::eek::eek: Someone either stepped on the box or it got smashed in between something during transit...


Okay so regardless, I wanted to test the fit to the case:


The mobo mount actually doesn't secure to the base as I thought it would, there are two nubs that insert into the base and it stands upright by utilizing the USB and Audio hubs on either corner of I/O.

Regarding the bent mobo: I've already returned it, ordered and received a brand new mobo. :p

More pics coming!!
 

stinger608

Dedicated TPU Cruncher & Folder
Joined
Nov 11, 2008
Messages
11,115 (1.97/day)
Location
Wyoming
System Name Dean Machine/2020 Ryzenfall
Processor Intel 4790K/AMD Ryzen 3700X
Motherboard MSI 1150 Gaming mATX/Gigabyte AORUS ELITE B550
Cooling Cooler Master Hyper 212 LED/SilverStone AH240 AIO
Memory 16 gigs Crucial Ballistix Tactical Tracer/16 gigs G.Skill TridentZ NEO DDR4
Video Card(s) Gigabyte 1660 Super/Gigabyte GTX 1660
Storage Crucial SSD 256 and 2TB spinner/Dual Samsung 980 Pro M2 NVME 4.0
Display(s) Overlord 27" 2560 x 1440
Case Corsair Air 540
Audio Device(s) On board
Power Supply Seasonic modular 850 watt Platinum/EVGA T2-850 Titanium
Software Windows 10 Pro/Windows 10 Pro
This is going to be epic @smee !!!!!!!!!!!
 
Joined
Dec 31, 2008
Messages
311 (0.06/day)
Location
Silicon Valley, CA
This is going to be epic @smee !!!!!!!!!!!

I am PSYCHED man, this is the smallest and most unique build I've ever done. Thanks for following man!! :D

~~~~~~~~~~~~
UPDATE #2!

Alright, a LOT has happened. The timeline of this whole thread vs the timeline of all progress I've made is a bit off, so I am going to catch you all up here with a lot of photos!

First: I built myself a new desk, this is where the computer will reside and my music equipment will be ready for recording on a whim! Built from an Oak IKEA Countertop. Using 2x4's bolted into studs, this thing is solid.


Glamor shot of some parts that I already had in hand!


One of the reasons I chose this board was due to the fact that it has wifi (Green) and I liked the location of the ATX power connection (Blue). Please also note the (Red) nubs on the mobo mount. The mobo simply sits atop the base of the case. This design is NOT my favorite, however, I've got some plans... 8)


One of the important aspects of this board is the USB/PS2 and Audio connections being on opposite corners. This will help support the board due to the design I mentioned above.


Here we see the board standing tall, albeit not incredibly secure, I'll tackle this issue in a bit.


Another angle, RAM installed.


I swear I spend 75% of my time taking pictures...


OKAY, I wasn't sure how long of a PCIe extender I'd need, so I bought the Thermaltake 200mm (left) and the EZDIY 250mm (right) on Amazon.


Testing the 200mm fit first....


Not long enough :(


The EZDIY 250mm was the winner!


It's absolutely a perfect fit, it was an incredibly satisfying moment....


Alright, I will have more to add here later today!

Cheers,
~smee
 
Joined
Dec 31, 2008
Messages
311 (0.06/day)
Location
Silicon Valley, CA
~~~~~~~~~~~~
UPDATE #3!

Alright, I gotta make sure this thing posts... But I at the time of this photo I was waiting for Cryorig to ship me a free AM4 mounting kit so in the meantime I used an extra AM4 cpu cooler (from a previous gen APU)... thought I'd show a comparison to the Cryorig C7.


Pretty impressive how low profile they made this thing.


Picked up a Ryzen from someone over at [H] forums! $200, great deal.


Babamn.


Woo, pretty lights, it posts!


Used a spare PSU XD


NEXT issue to tackle.... The case was around a slightly shorter mini GPU. The screws for a 120mm fan are too short to hold the fan up above the Zotac. xD


Local hardware store pickup:


Perrrfect!


Trying the top enclosure....


DAMN. So close.


I bet if I cut down the four corners of the fan I would be able to close the case completely. But I also wonder if I could fit a 140mm fan in here......


Lastly, HDPlex 400W has arrived!!


More coming this weekend! How the hell am I going to fit this thing in there??

~smee
 
Joined
Sep 10, 2016
Messages
809 (0.29/day)
Location
Riverwood, Skyrim
System Name Storm Wrought | Blackwood (HTPC)
Processor AMD Ryzen 9 5900x @stock | i7 2600k
Motherboard Gigabyte X570 Aorus Pro WIFI m-ITX | Some POS gigabyte board
Cooling Deepcool AK620, BQ shadow wings 3 High Spd, stock 180mm |BQ Shadow rock LP + 4x120mm Noctua redux
Memory G.Skill Ripjaws V 2x32GB 4000MHz | 2x4GB 2000MHz @1866
Video Card(s) Powercolor RX 6800XT Red Dragon | PNY a2000 6GB
Storage SX8200 Pro 1TB, 1TB KC3000, 850EVO 500GB, 2+8TB Seagate, LG Blu-ray | 120GB Sandisk SSD, 4TB WD red
Display(s) Samsung UJ590UDE 32" UHD monitor | LG CS 55" OLED
Case Silverstone TJ08B-E | Custom built wooden case (Aus native timbers)
Audio Device(s) Onboard, Sennheiser HD 599 cans / Logitech z163's | Edifier S2000 MKIII via toslink
Power Supply Corsair HX 750 | Corsair SF 450
Mouse Microsoft Pro Intellimouse| Some logitech one
Keyboard GMMK w/ Zelio V2 62g (78g for spacebar) tactile switches & Glorious black keycaps| Some logitech one
VR HMD HTC Vive
Software Win 10 Edu | Ubuntu 22.04
Benchmark Scores Look in the various benchmark threads
That looks so cool, I like what you've done with it. Are you planning on putting a wrap around the case or decorating it in some way.

Also subbed.
 
Joined
Dec 31, 2008
Messages
311 (0.06/day)
Location
Silicon Valley, CA
That looks so cool, I like what you've done with it. Are you planning on putting a wrap around the case or decorating it in some way.

Also subbed.


Thanks Nuckles! I think that I will sand down and then polish/or paint the case. It's a fairly rough finish and although I like it, I think this thing will look even more sleek if it's done up. Thanks for the sub!

~~~~~~~~~~~~
UPDATE #4!

Package time!


The Cryorig AM4 mounting plate came! Free, courtesy of Cryorig's awesome customer service.


Love the clean cable line with the CPU mounted, very easy to mount this thing.


Another package!


Dell 330W, this thing is huge!! HDPlex for comparison. Definitely not fitting the Dell inside the case. XD


Now to figure out how the hell I'm going to fit the HDPlex inside...


Trying...


It gets pressed up to close to the CPU cooler methinks...


Thinking of some other possibilities.


Mounting it in the center of the case seems to be the only way.


Time to go to Dad's shop, we need to do some modding. :cool:
 
Joined
Dec 31, 2008
Messages
311 (0.06/day)
Location
Silicon Valley, CA
~~~~~~~~~~~~
UPDATE #5!


I called up Pops and said, "Hey, I have to figure out how to mount this piece of trash in a trashcan, can you help?" XD

Spent the whole afternoon with him today!! This is going to be a long update with LOTS of pictures and a few videos!

Discussing ideas on the back patio, taking measurements and drinking some iced tea...


This is my initial sketch the mounting plate which would be affixed to the top of the Mobo frame and further support the frame using those two extended posts (although this design changed later). The HDPlex would be mounted directly atop the plate (with holes to support both orientations).


Pops is the magician here when it comes to designing it in 3D using vCarve Pro software.


First order of business was to cut down the those posts on the Mobo frame using his Band Saw.


Video:

Excellent! PLA is easier to cut than I thought. Never had to cut a 3D print before.


Introducing my Pops and his beautiful machine. This CNC is his own creation, entirely built by him. It is the 3rd iteration of the "Xtreme CNC" as he calls it. The first iteration of the machine had to be hand cut using traditional power tools (i.e. table saw, router, skill saws, etc...). It was much smaller and had it's issues. His solution? Use it to cut ALL of the pieces for the 2nd iteration, this version was MUCH more precise and could handle larger cuts/maneuvers. Finally, he used the 2nd iteration of the machine to build a much larger and more industrial version. This has been his baby for the last 2 years and he himself has said he's never worked on a project more complex and continues to learn more every time he uses it. It's never quite been finished and he's always tweaking it. Pretty much everything in his shop was built by him over the years.


Video:

We tweaked the design a bit:


Cut out a prototype using wood to make sure we got all the measurements right (don't mind the extra holes, we had to re-adjust the placement of the wood before cutting the edges).


Video:

Holding the HDPlex and wood cut out to verify that the holes line up!


The fit was PERFECT, using the 3D frame posts as additional support.


He's always using brass for different projects and had this piece with enough space for the cut at the end.


And so it begins!


About half way through.


Here is a 5minute video, nothing exciting, but you do get to see some of the process here. He uses kerosene as a lubricant for the bit.

The entire cut took approx 30min or so. If you notice, we also changed the diameter of the hole on the extended portion of the plate, you'll see why later. ;)


A light sanding to clean it up.


Gotta clean up those edges too!


Nice and cleaned up, this is why we changed the diameter of that hole.


Tapping the holes to be used for the HDPlex.


Holes tapped!


Countersunk holes to mount the plate to the Mobo frame.


Two coats of clearcoat to protect the brass from tarnish


Drilled a few holes into the Mobo frame, decided to use pre-threaded brass dowels as a nut, they make it easy to tighten with fingers.


It's a thing of beauty when it all just fits perfectly.


HDPlex mounted without issue. Needed to cut off those small screws though, they might touch the RAM!


Back side shot.


We honestly got lucky with the clearance of the GPU here! o_O


So the idea was for the plate to not only act as a mount for the HDPlex but to further secure the Mobo frame as there was no other support other than gravity. Here is a mockup using an iron rod found in Pops' shop.


Gotta cut a hole in the base of the frame, just kinda eyeballed it straight up and down.


Pop's really enjoyed working on this little project, I let him take control and was really just the photographer for this process! I grew up in the shop working with him and always enjoy building things together.


Nice clean hole.


Happened to find a brass rod, he had the crazy idea to thread it on both ends.


Cutting down one of the bolts (there are two, one for the top and one for underneath in the base).


Threading the brass rod nearly broke through, we got lucky and IMO it looks pretty rad like this. This is also as far as we could thread it (hence cutting down the bolt).


Introducing another one of his creations, the Belt Sander. Entirely cut by his CNC. Pretty nifty! Used it to clean up the ends of the brass rod.


DAMN it fit perfect. Measure twice, cut once. (The second bolt comes through underneath in the base)


GPU side view.


Everything standing upright, very secure.


And there we have it, Folks! HDPlex is mounted and the Mobo is now secure! Thank you Pops!!! Where would I be without him?;)


Brought her home and took a few additional shots:


We used some washers to make sure the brass wasn't resting on the Mobo and to give some extra clearance/ventilation for the RAM. Not sure how hot the HDPlex gets...


It's really starting to come together!!! :cool::cool:


Next steps will be to determine the cleanest cable management... that might be tough.
I also ordered some fans off Amazon, need to make sure this thing doesn't overheat!

Let me know what you think! I'm going to relax for a bit now. XD

Cheers,
~smee
 
Top