 10
10
Akasa Mirage-62 Review
Installation & Finished Look »A Closer Look


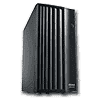
The first thing that becomes apparent when seeing the case is its width. It is at least 3-4 cm wider compared to normal Midi towers these days. The back of the case shows off the mirror finish metal of the mainboard tray. All screws are the thumb variant, so opening and closing the case should be quite easy. The power supply can be mounted in any way you like. It can be turned upside down, although this is not suggested for power supplies equipped with a 120 mm fan. There are no thumb screws for mounting the power supply itself.
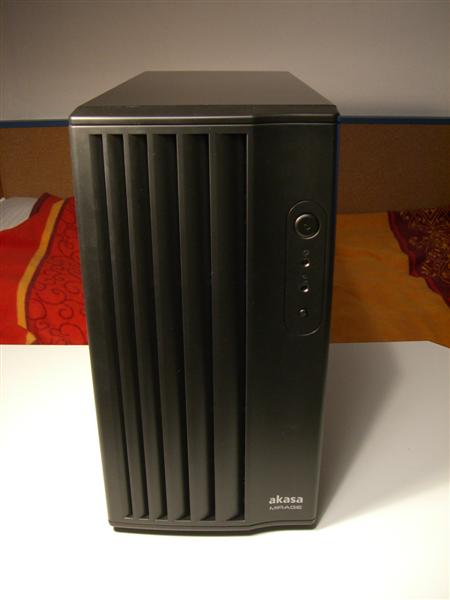

The front looks great with the wide door. The plastic used is not the strongest, but holds up quite nicely. It is made of actual black plastic, so you will not need to worry about the paint scratching or pealing. The door is held in place by magnets and can be opened up nice and wide. Akasa has a small, very elegant white logo on the bottom right of the case.


The sides of the Mirage are nothing out of the ordinary. Both sides are completely closed off and do not offer any fans or windows. Akasa does offer optional side panels for the case. They were kind enough to send the "thermal enhanced side panel" along. There is also a window side panel available for the case.


The outside of the panel upgrade sports a very unique and good looking, but certainly quite useless plastic part, holding a thick honeycomb grill. Akasa could have just used a dust filter, while keeping the honeycomb theme. The fan on the upgraded side is a 12 cm Akasa labeled fan with a mainboard header. I am always a fan of such headers as you can let the mainboard take care of the fan speed, an adapter to 12V Molex would have been a nice addition.


The power and reset buttons can be pressed when the door is closed. The functionality of the LEDs can be seen through the door as well. It is great that Akasa has thought about the fact that users may not want to open the door to power up the computer. The side sports the usual two USB, one Firewire and audio connectors. As you can see, the holes do not line up so that you will have difficulties plugging something in. I unscrewed the connectors and screwed them back on. That solved the problem. This was just a one time thing, so expect any other Mirage-62 to have the connectors lined up properly. The cables reaching into the case are the usual standard connectors, even the light grey color is the same as in any other case.


Once the side panels are removed, the black interior of the case is shown. It is quite refreshing to see a different color inside a case, instead of the usual plain steel silver. The mainboard tray is made of steel and has a complete mirror finish. I chose the above picture as you can see my tripod and camera, along with my soccer ball.
One of the big highlights of this case is the possibility to remove all panels and the front, leaving you the bare case. This presents the best possible scenario for building and wiring anything in your case. The drive bays are covered by metal parts which need to be broken out, but can be screwed back on if need be.


The bottom of the bare case holds the filter for the 12 cm fan. There are four thumb screws and two normal screws present. These hold the drive cages in place. There is a removable dust filter in front. This can be easily removed and cleaned out. The mount of the fan resides right under the filter.


The afore mentioned drive cages can be removed. There are three cages in total: one for up to two floppy drives or hard drives, one for two hard drives and another one for five hard drives. All of these can be taken out, making an installation of drives quite easy. The mainboard tray can be removed by unscrewing five thumb screws in the back. It is good that Akasa chose steel for this part of the case, as it will carry a lot of weight with CPU coolers easily reaching the one kilo mark and graphic cards getting longer and heavier all the time. You will definitely appreciate the steel construction when using QuadSLI.


The back of the mainboard tray sports 8 expansion slots, which is interesting as most mainboards only have seven. This gives the user the option to connect things like USB brackets to the bottom, unused slot, without loosing any expansion space. There are also two punch-outs for the use with legacy connectors like parallel ports. I would have loved to see two different sized punch outs so serial ports could be routed through the back as well. The fan grill uses the honeycomb form as well, making it quite sturdy without offering any air resistance. The other end of the mainboard tray features a little plastic part with the purpose of routing cables through them. It also sports the speaker to be connected to the mainboard. This rounds up a very well engineered mainboard tray.
So let's install the parts and take a look at it up and running.
Apr 19th, 2024 18:39 EDT
change timezone
Latest GPU Drivers
New Forum Posts
- Roccat Kone AIMO has developed a double left click, when I click it once. Any fix out there? (33)
- AMD RX 7000 series GPU Owners' Club (1067)
- The TPU UK Clubhouse (24738)
- XFX RX580 stock Bios (7)
- Looks like the Z80 is finished (2)
- AAF Optimus DCH Audio Modded Driver for Windows 10/11 - For ALL HDAUDIO Enumerator Chips (642)
- What can be changed in a VBIOS file? (PCI vendor etc) (5)
- Whats your favourite Linux Distro? (53)
- GPU-Z reporting wrong ReBar info for RTX 20 series (1)
- [WIN11] 5700x3d Security processor Attestation: Not supported? (9)
Popular Reviews
- Horizon Forbidden West Performance Benchmark Review - 30 GPUs Tested
- PowerColor Radeon RX 7900 GRE Hellhound Review
- Fractal Design Terra Review
- Corsair 2000D Airflow Review
- Thermalright Phantom Spirit 120 EVO Review
- Minisforum EliteMini UM780 XTX (AMD Ryzen 7 7840HS) Review
- Creative Pebble X Plus Review
- FiiO KB3 HiFi Mechanical Keyboard Review - Integrated DAC/Amp!
- ASUS GeForce RTX 4090 STRIX OC Review
- NVIDIA GeForce RTX 4090 Founders Edition Review - Impressive Performance
Controversial News Posts
- Sony PlayStation 5 Pro Specifications Confirmed, Console Arrives Before Holidays (111)
- NVIDIA Points Intel Raptor Lake CPU Users to Get Help from Intel Amid System Instability Issues (102)
- US Government Wants Nuclear Plants to Offload AI Data Center Expansion (98)
- Windows 10 Security Updates to Cost $61 After 2025, $427 by 2028 (82)
- AMD "Strix Halo" Zen 5 Mobile Processor Pictured: Chiplet-based, Uses 256-bit LPDDR5X (82)
- Developers of Outpost Infinity Siege Recommend Underclocking i9-13900K and i9-14900K for Stability on Machines with RTX 4090 (82)
- TechPowerUp Hiring: Reviewers Wanted for Motherboards, Laptops, Gaming Handhelds and Prebuilt Desktops (72)
- Intel Realizes the Only Way to Save x86 is to Democratize it, Reopens x86 IP Licensing (70)