 2
2
Akasa Omega Review
Assembly & Finished Looks »A Closer Look - Inside
Opening the case is done by removing two thumb screws in the rear of the Omega. There are no indents or handles to aid in pulling the panels out, which means you will need to use your fingernails or a flat head screw driver if it won't budge.

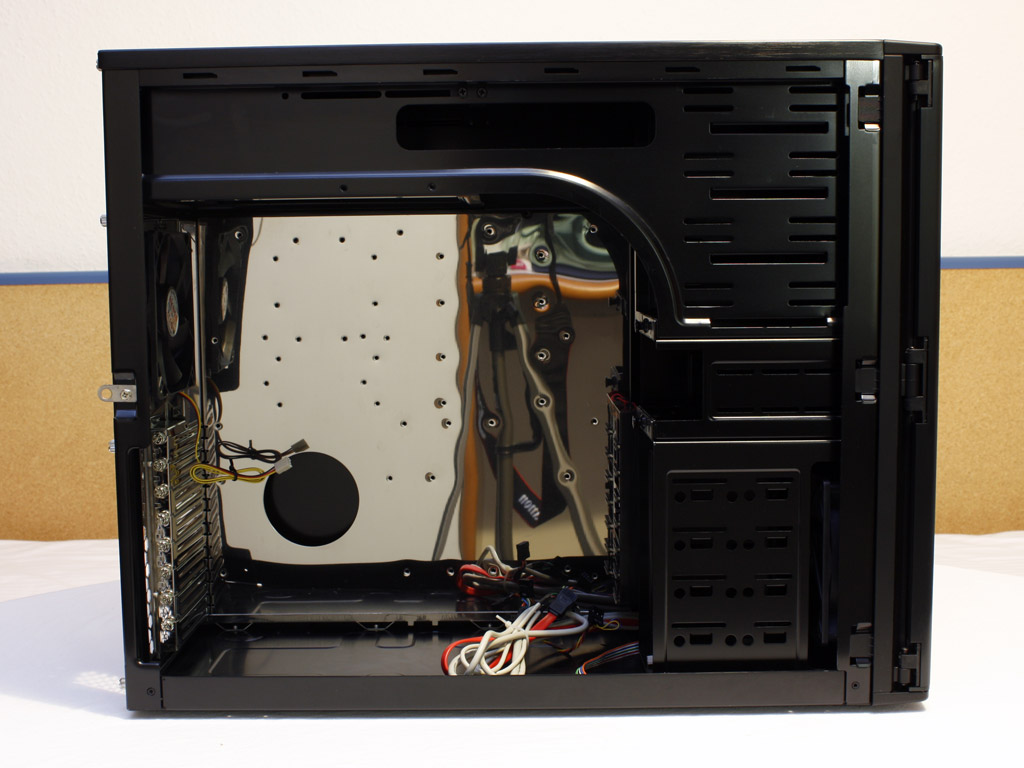
The 3.5 inch bays look identical to those of the Mirage-62. The same goes for the 5.25 inch ones. Looks like Akasa has kept the internal steel structure of the case and added a few changes to the outside of the case.


To release the mainboard tray, you will need to unscrew five thumb screws. As soon as I removed them, the rear of the mainboard tray jumped out at me. Seems like the tray does not have a 90 degree angle and has been forced in place by the screws. The tray itself has not changed either and the one found in the Mirage-62 did not have this problem. Thus, I expect this misalignment to be an exception.


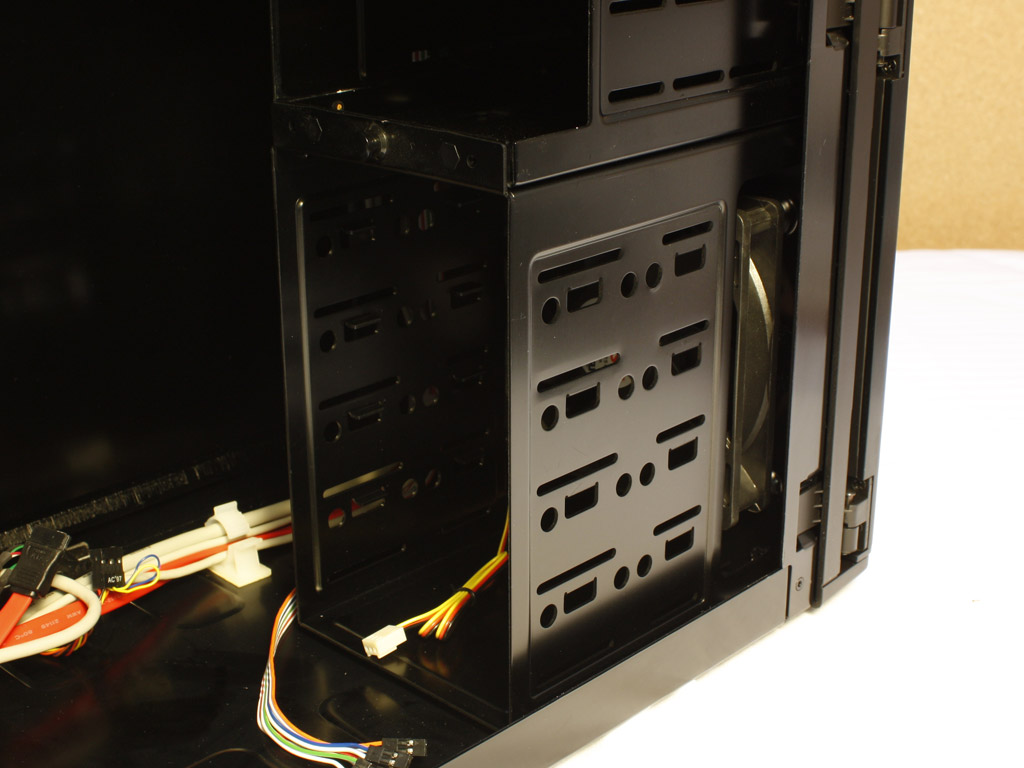
The rear fan comes with a mainboard header, but no adapter to use the Molex connector of your power supply. The PCI brackets are held in place by thumb screws and can be reused as well. Akasa is still using the very unique and certainly useful plastic construction, to route cables nicely to the mainboard. The little speaker can also be found here.


As the internal structure has remained identical to that of previous cases in this series, you will still need to remove the front cover completely to gain access to the dust filter and to release the 3.5 inch drive cages. The Omega has space for five hard drives, but the external bays may also be used for hard drives as well.


The dust filter is removable, but you will need to unscrew the four thumb screws, which hold the hard drive cage in place first. Behind the dust filter is a honeycomb grill with a second 120 mm fan. It also has a mainboard connector and seems to be identical to the fan found in the rear of the chassis.

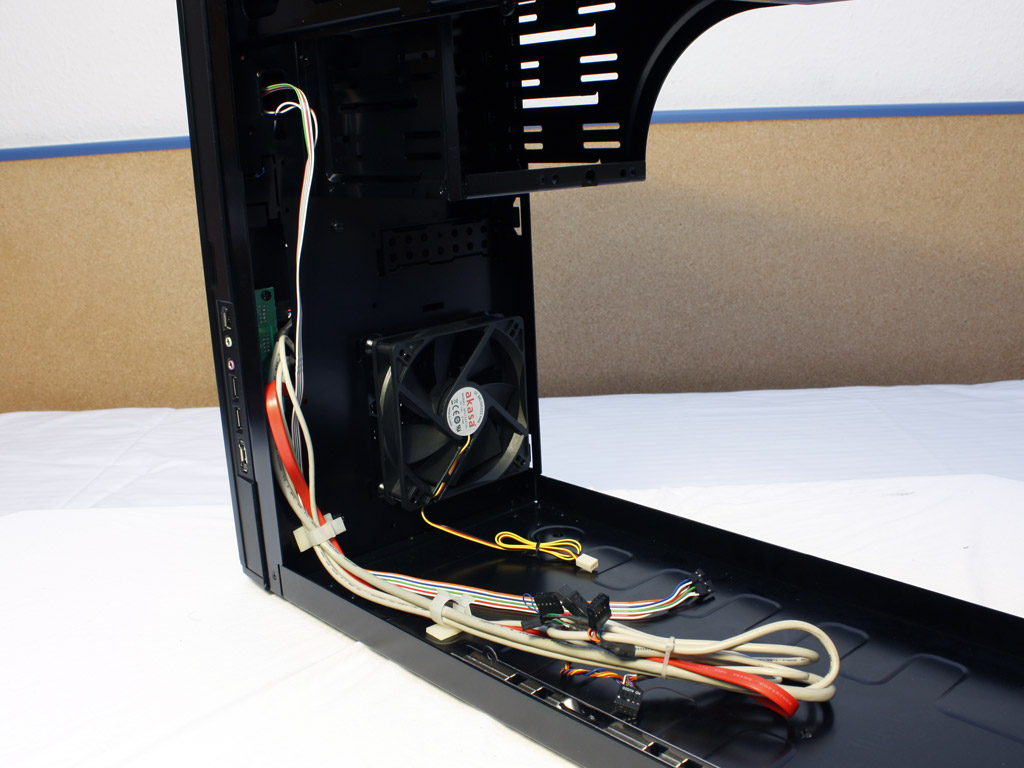
The bare case also holds a small improvement over the Mirage-62. Akasa has chosen to route all chassis cables nicely to end up right where the mainboard will be once installed. So you will not need to invest a lot of time for a nice clean look.
Apr 19th, 2024 20:16 EDT
change timezone
Latest GPU Drivers
New Forum Posts
- GTX 1060 6GB ASUS GPU Shuts Down after 5min of Gaming (1)
- AMD RX 7000 series GPU Owners' Club (1068)
- I just succesfully baked DDR4 (69)
- I9 13890HX undervolting Suggestions (4)
- Undervolting Dell XPS 14 9440 is it possible? (7)
- Share your AIDA 64 cache and memory benchmark here (2884)
- Roccat Kone AIMO has developed a double left click, when I click it once. Any fix out there? (34)
- The TPU UK Clubhouse (24738)
- XFX RX580 stock Bios (7)
- Looks like the Z80 is finished (2)
Popular Reviews
- Horizon Forbidden West Performance Benchmark Review - 30 GPUs Tested
- Fractal Design Terra Review
- Corsair 2000D Airflow Review
- Thermalright Phantom Spirit 120 EVO Review
- Minisforum EliteMini UM780 XTX (AMD Ryzen 7 7840HS) Review
- Creative Pebble X Plus Review
- FiiO KB3 HiFi Mechanical Keyboard Review - Integrated DAC/Amp!
- ASUS GeForce RTX 4090 STRIX OC Review
- NVIDIA GeForce RTX 4090 Founders Edition Review - Impressive Performance
- ASUS GeForce RTX 4090 Matrix Platinum Review - The RTX 4090 Ti
Controversial News Posts
- Sony PlayStation 5 Pro Specifications Confirmed, Console Arrives Before Holidays (111)
- NVIDIA Points Intel Raptor Lake CPU Users to Get Help from Intel Amid System Instability Issues (102)
- US Government Wants Nuclear Plants to Offload AI Data Center Expansion (98)
- AMD "Strix Halo" Zen 5 Mobile Processor Pictured: Chiplet-based, Uses 256-bit LPDDR5X (84)
- Windows 10 Security Updates to Cost $61 After 2025, $427 by 2028 (82)
- Developers of Outpost Infinity Siege Recommend Underclocking i9-13900K and i9-14900K for Stability on Machines with RTX 4090 (82)
- TechPowerUp Hiring: Reviewers Wanted for Motherboards, Laptops, Gaming Handhelds and Prebuilt Desktops (72)
- Intel Realizes the Only Way to Save x86 is to Democratize it, Reopens x86 IP Licensing (70)