 2
2
BitFenix Aurora Review
Assembly & Finished Looks »A Closer Look - Inside


To gain access to the interior simply remove the four thumb screws holding each side panel in place. The interior of the BitFenix Aurora looks pretty standard if you take into account the fact that the chassis has no external drive bays. The motherboard tray comes with numerous, rubber-grommet-equipped openings for clean cable routing and management alongside a larger one for easy access to the CPU area's underside. Bitfenix has also placed the RGB PCB here, which allows you to extend the lighting array by adding more LED strips, for example. This small board gives you the means to control the lighting even if you do not own a motherboard with the standard 4-pin RGB header. There are also two 2.5" mounting brackets on this side of the motherboard tray.


In the front, you will find a 3.5" hard-drive cage on the bottom of the chassis. It is far enough away for you to utilize it with a thin radiator and fan combo in the front. The front allows for a radiator of up to 280 mm in size to be installed without issue. BitFenix has also placed a third 2.5" bracket into the interior of the chassis for which you are supposed to use the SSD Chroma bracket. In the very top are two spots for 3.5'' hard drives instead of 5.25" drive bays. This brings the total number of possible storage units within the Aurora to seven without having to sacrifice any of them when placing two 280 mm radiators and fan assemblies inside the chassis.
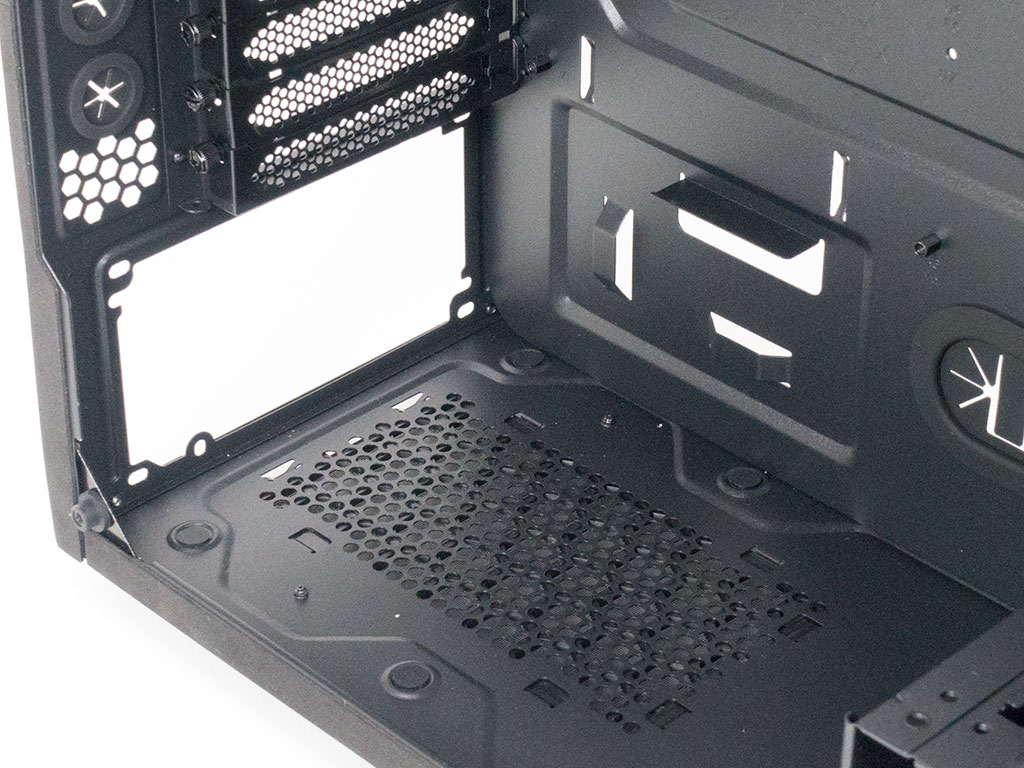

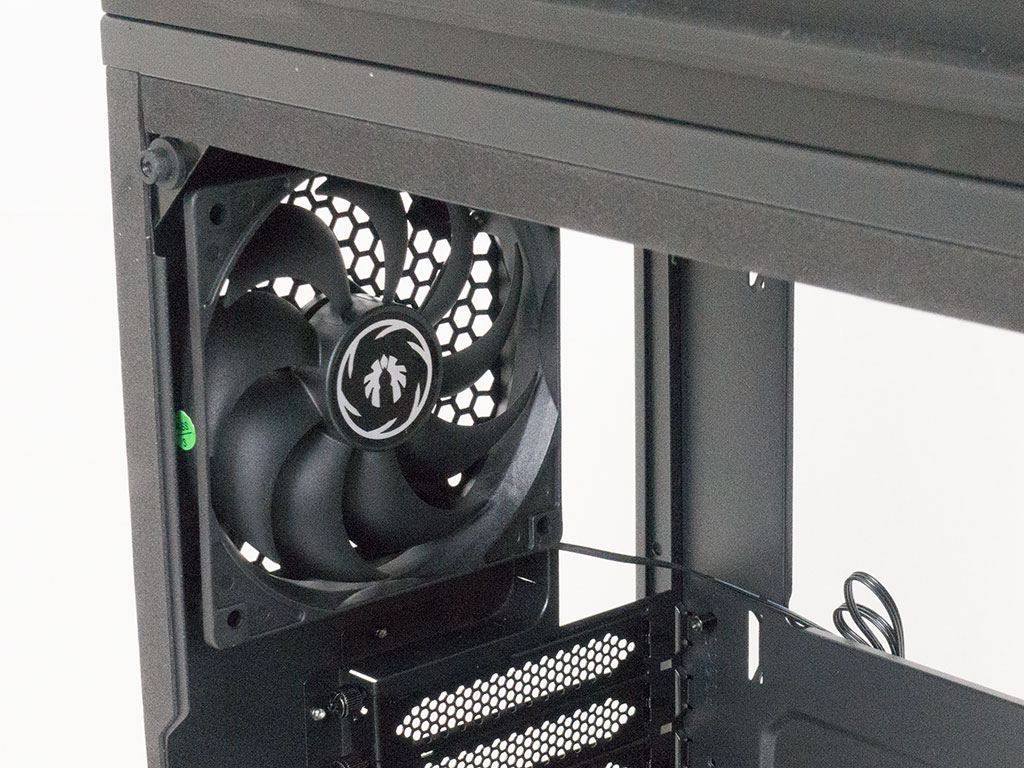
The bottom-mounted PSU bay in the rear bears no surprises and comes with thin foam pads on which any power unit will rest. Above that are the seven expansion slot covers, each held in place by a thumb screw. The 120 mm fan in the very top is of a pretty basic variety with its black fins and frame. It would have been nice to see a retail-grade, RGB-equipped fan from BitFenix here to add to the "Chroma" theme BitFenix earmarked as a selling point.

Taking a look at the ceiling, you can see the mounting bracket for the two 120 or 140 mm fans, mimicking the same system as in the front of the Aurora. Here, you will also find the part to mount a reservoir to, which is a really nice touch.


All the cables within the BitFenix Aurora are sleeved black and come with their usual connectors. One noteworthy mention are the flat cables BitFenix uses for both the USB 2.0 and audio, as these are usually circular.
Apr 19th, 2024 20:40 EDT
change timezone
Latest GPU Drivers
New Forum Posts
- The Official Linux/Unix Desktop Screenshots Megathread (688)
- GTX 1060 6GB ASUS GPU Shuts Down after 5min of Gaming (3)
- Official Board Game Discussion (0)
- AMD RX 7000 series GPU Owners' Club (1068)
- I just succesfully baked DDR4 (69)
- I9 13890HX undervolting Suggestions (4)
- Undervolting Dell XPS 14 9440 is it possible? (7)
- Share your AIDA 64 cache and memory benchmark here (2884)
- Roccat Kone AIMO has developed a double left click, when I click it once. Any fix out there? (34)
- The TPU UK Clubhouse (24738)
Popular Reviews
- Horizon Forbidden West Performance Benchmark Review - 30 GPUs Tested
- Fractal Design Terra Review
- Corsair 2000D Airflow Review
- Thermalright Phantom Spirit 120 EVO Review
- Minisforum EliteMini UM780 XTX (AMD Ryzen 7 7840HS) Review
- Creative Pebble X Plus Review
- FiiO KB3 HiFi Mechanical Keyboard Review - Integrated DAC/Amp!
- ASUS GeForce RTX 4090 STRIX OC Review
- NVIDIA GeForce RTX 4090 Founders Edition Review - Impressive Performance
- ASUS GeForce RTX 4090 Matrix Platinum Review - The RTX 4090 Ti
Controversial News Posts
- Sony PlayStation 5 Pro Specifications Confirmed, Console Arrives Before Holidays (111)
- NVIDIA Points Intel Raptor Lake CPU Users to Get Help from Intel Amid System Instability Issues (102)
- US Government Wants Nuclear Plants to Offload AI Data Center Expansion (98)
- AMD "Strix Halo" Zen 5 Mobile Processor Pictured: Chiplet-based, Uses 256-bit LPDDR5X (84)
- Windows 10 Security Updates to Cost $61 After 2025, $427 by 2028 (82)
- Developers of Outpost Infinity Siege Recommend Underclocking i9-13900K and i9-14900K for Stability on Machines with RTX 4090 (82)
- TechPowerUp Hiring: Reviewers Wanted for Motherboards, Laptops, Gaming Handhelds and Prebuilt Desktops (72)
- Intel Realizes the Only Way to Save x86 is to Democratize it, Reopens x86 IP Licensing (70)