 38
38
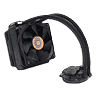
Cooler Master Seidon 120XL Review
Installed »Installation

Installing the Cooler Master Seidon 120XL on Intel's Socket 2011 platform is amazingly easy. Enthusiasts on other sockets will find the process a bit more involved because of the backplate; however, it's, even then, a very simple process. Users will just need to screw in the four LGA2011 standoffs. Cooler Master even provided a socket of sorts that can be paired with a Philips head screwdriver to make installing them quick and painless.


After installing all the thumbscrews, users will need to attach the proper mounting brackets. A small indentation on the pump allows for the mounting bracket to be slotted into place. From there, screwing the bracket to the pump with the provided short screws is an easy task that leaves users with a strong, stable mounting platform. This design is really a huge step forward compared to the designs I have become familiar with through competing products from Asetek.


At this point, apply the thermal paste to the chip and make sure the screws on the mounting bracket are in the proper position. Once set properly, line up the four screws on the bracket with the four standoffs before tightening it down. That is it. The worst of it is now out of the way. Easy, wasn't it?


At this point, users will slip the rubber gaskets onto the fans before screwing them to the radiator for a nice, snug, and vibration-free fit. Now connect the fans and the pump to the motherboard fan headers using the Y-cable. The Seidon 120XL is ready to go.
The overall process of installing the Cooler Master Seidon 120XL was extremely easy. I would rate it a 9 on a scale of 1 (hardest) to 10 (easiest). For an AIO liquid CPU cooler, this design is superb when compared to other competing products.
Apr 23rd, 2024 14:04 EDT
change timezone
Latest GPU Drivers
New Forum Posts
- No POST, and no display (2)
- Shadow Of The Tomb Raider - CPU Performance and general game benchmark discussions (524)
- Drop fps (3)
- Embracer Group is breaking into 3 smaller companies... lol who saw this coming, what a joke (9)
- FINAL FANTASY XIV: Dawntrail Official Benchmark (69)
- Which new games will you be buying? (296)
- DTS DCH Driver for Realtek HDA [DTS:X APO4 + DTS Interactive] (1908)
- Is there a technical reason that Windows 11 doesn't have built into it battery charge limitation? (34)
- hacked (71)
- after hack (3)
Popular Reviews
- Horizon Forbidden West Performance Benchmark Review - 30 GPUs Tested
- Fractal Design Terra Review
- Corsair 2000D Airflow Review
- Thermalright Phantom Spirit 120 EVO Review
- Minisforum EliteMini UM780 XTX (AMD Ryzen 7 7840HS) Review
- ASUS GeForce RTX 4090 STRIX OC Review
- NVIDIA GeForce RTX 4090 Founders Edition Review - Impressive Performance
- ASUS GeForce RTX 4090 Matrix Platinum Review - The RTX 4090 Ti
- Creative Pebble X Plus Review
- MSI GeForce RTX 4090 Gaming X Trio Review
Controversial News Posts
- Sony PlayStation 5 Pro Specifications Confirmed, Console Arrives Before Holidays (116)
- NVIDIA Points Intel Raptor Lake CPU Users to Get Help from Intel Amid System Instability Issues (105)
- AMD "Strix Halo" Zen 5 Mobile Processor Pictured: Chiplet-based, Uses 256-bit LPDDR5X (101)
- US Government Wants Nuclear Plants to Offload AI Data Center Expansion (98)
- Windows 10 Security Updates to Cost $61 After 2025, $427 by 2028 (84)
- Developers of Outpost Infinity Siege Recommend Underclocking i9-13900K and i9-14900K for Stability on Machines with RTX 4090 (83)
- TechPowerUp Hiring: Reviewers Wanted for Motherboards, Laptops, Gaming Handhelds and Prebuilt Desktops (74)
- Intel Realizes the Only Way to Save x86 is to Democratize it, Reopens x86 IP Licensing (70)