 15
15
CM Storm Stryker Review
A Closer Look - Inside »A Closer Look - Outside
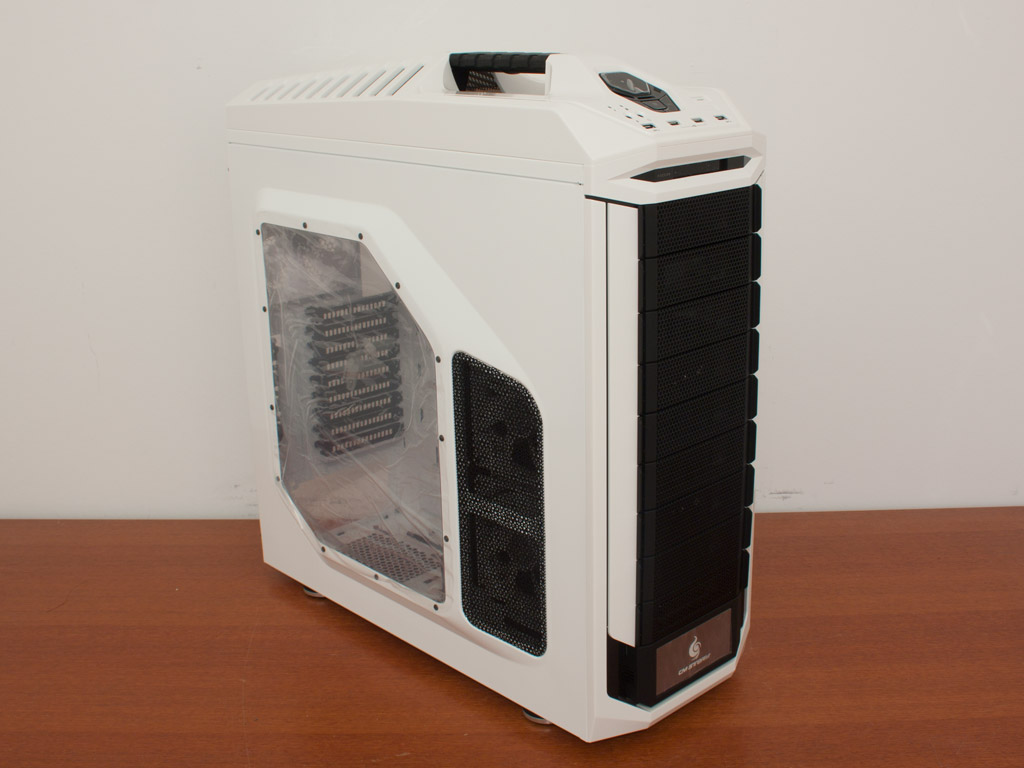
Cooler Master has always been great at creating themed enclosures with a great level of detail. The HAF series is a good example and the new CM Storm Stryker is probably one of the most detailed ones to date. Cooler Master has really managed to create a damn cool looking case upon first inspection.


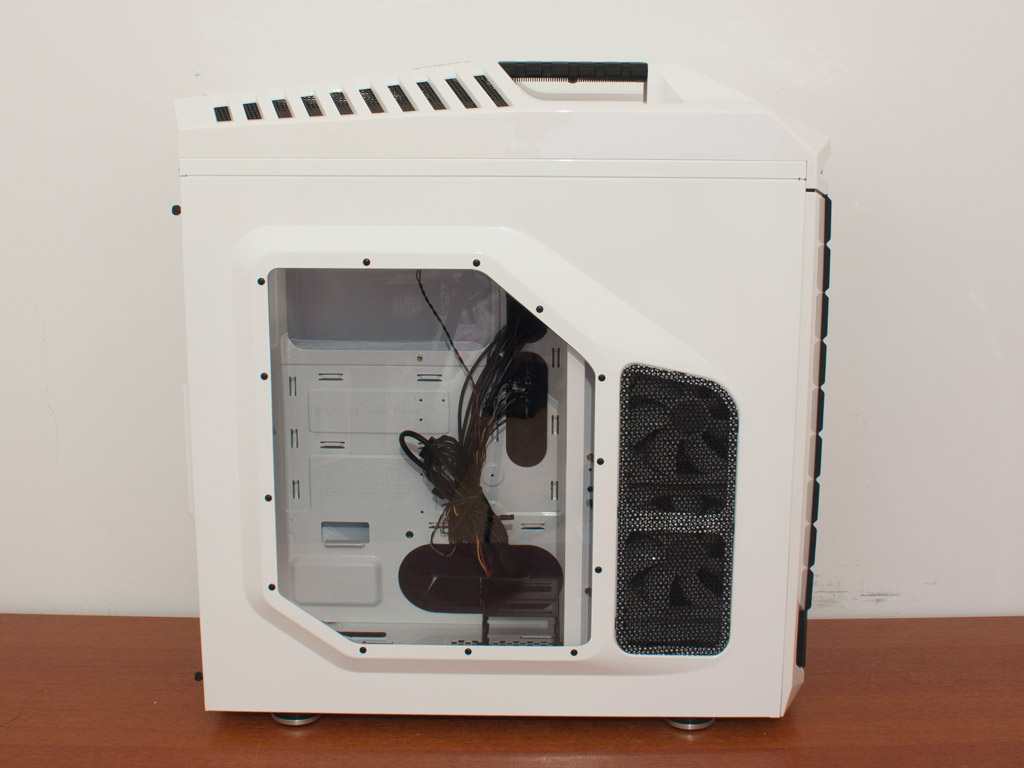

The entire front is lined with a total of nine drive bay covers. Even though you could use all of these for 5.25 inch devices if you wish, only the top three are free right off the bat. In the rear we can see a bottom mounted PSU and a total of 9+1 expansion slots - plenty even for quad-SLI or CrossFire. Both side panels feature an identical extruded part, but Cooler Master has decided to extend the metal mesh part on the main side to allow for more air flow within the chassis. Unlike the CM Storm Trooper, the Stryker ships with a window side panel, with a different design. To keep the look of the chassis, the other side panel has also been changed accordingly.


Taking a closer look at the front, the bottom holds a larger cover with the CM Storm logo above which is a 3.5 to 5.25 inch cover. Each of these covers is easily removable without having to pull off the entire front of the Stryker case. In the very top you will find a 2.5 inch hot-swap bay sandwiched between the very top drive bay and the ceiling of the chassis.


I mentioned before, that the extras of the CM Storm Stryker are actually hidden. Cooler Master has placed them in the bottom compartment which allows you to transport small parts along to the next LAN party. A metal ring also allows you to lock this compartment down, so that nobody can steal its contents in your absence - pretty cool!


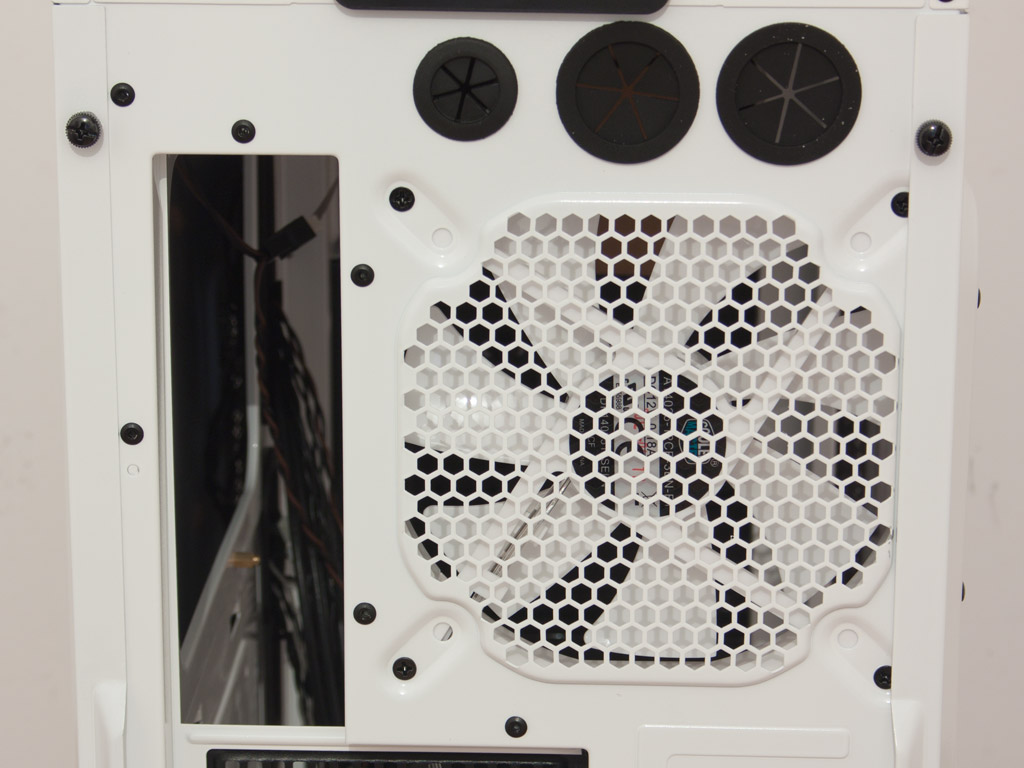
In the rear you will find the bottom mounted PSU bay, which can hold such units with the fan facing up or downward. Above that are nine mainboard expansion bays, allowing you to install four dual-height graphics cards with a single slot remaining free for other items like USB or Firewire brackets. There is a tenth one with the CM Storm signature anti-theft bracket installed. Simply route your mouse and keyboard cables through here and screw it down. Thiefs would then have to cut the cord or enter the chassis to gain access to your valuable peripherals. In the very top there is a 140 mm exhaust fan, pushing air out the back of the case.


The detail of the overall design is clearly focused on the top panel of the CM Storm Stryker. An elaborate I/O panel has been placed here. Along with the large power button, and complete I/O consisting of USB 2.0, 3.0, eSATA and audio connectivity, you will also find controls for the fan speed and internal lighting of the chassis. Behind that, a bit toward the front of the chassis, there is a large and actually quite comfortable handle. It is enforced with steel and bolted to the frame of the chassis. This is a necessity considering that the CM Storm Stryker weighs in at over 14 kg without hardware installed. Last but not least, a removable dust filter in the ceiling protects the ceiling fan from outside dirt.
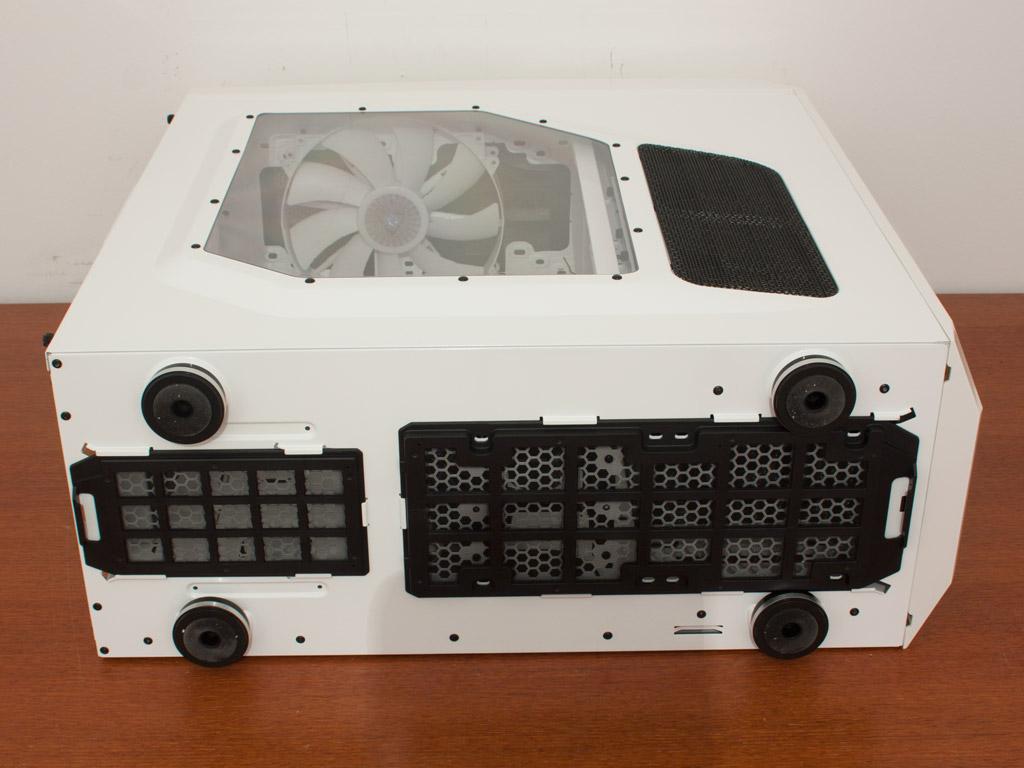
The same goes for all openings on the underside of the chassis, so you can rest assured that the PSU won't suck up all the dust in your carpet over time.
Apr 24th, 2024 12:53 EDT
change timezone
Latest GPU Drivers
New Forum Posts
- Meta Horizon OS (10)
- What are you playing? (20522)
- EK seems to be having major issues (47)
- What phone you use as your daily driver? And, a discussion of them. (1469)
- 14700K + 4070TI New Build. Will become an unRAID server in the future (10)
- How are MX330 and İ5 1135G7 ? (4)
- The TPU UK Clubhouse (24780)
- Disable Turbo OR Undervolt - 12th gen P CPUs in thin or ultrathin design impossible to cool ? (0)
- Core i5-6300U (11)
- Is It The 1080 TI The Best GPU Ever? (207)
Popular Reviews
- Fractal Design Terra Review
- Thermalright Phantom Spirit 120 EVO Review
- Corsair 2000D Airflow Review
- Minisforum EliteMini UM780 XTX (AMD Ryzen 7 7840HS) Review
- ASUS GeForce RTX 4090 STRIX OC Review
- NVIDIA GeForce RTX 4090 Founders Edition Review - Impressive Performance
- ASUS GeForce RTX 4090 Matrix Platinum Review - The RTX 4090 Ti
- MSI GeForce RTX 4090 Gaming X Trio Review
- MSI GeForce RTX 4090 Suprim X Review
- Gigabyte GeForce RTX 4090 Gaming OC Review
Controversial News Posts
- Sony PlayStation 5 Pro Specifications Confirmed, Console Arrives Before Holidays (116)
- NVIDIA Points Intel Raptor Lake CPU Users to Get Help from Intel Amid System Instability Issues (106)
- AMD "Strix Halo" Zen 5 Mobile Processor Pictured: Chiplet-based, Uses 256-bit LPDDR5X (101)
- US Government Wants Nuclear Plants to Offload AI Data Center Expansion (98)
- Windows 10 Security Updates to Cost $61 After 2025, $427 by 2028 (84)
- Developers of Outpost Infinity Siege Recommend Underclocking i9-13900K and i9-14900K for Stability on Machines with RTX 4090 (84)
- TechPowerUp Hiring: Reviewers Wanted for Motherboards, Laptops, Gaming Handhelds and Prebuilt Desktops (78)
- Intel Realizes the Only Way to Save x86 is to Democratize it, Reopens x86 IP Licensing (70)