 7
7
Cubitek Magic Cube AIO Review
Value & Conclusion »Assembly

Installing the motherboard is done by traditional means. Interestingly enough, the factory mislabeled the power switch and LED cables, as both have the label "POWER SW" on them. Cubitek is aware of this issue and has fixed the problem in future shipments of the unit. Regardless of the label, the cables will work fine anyways, so this is not really a deal breaker.


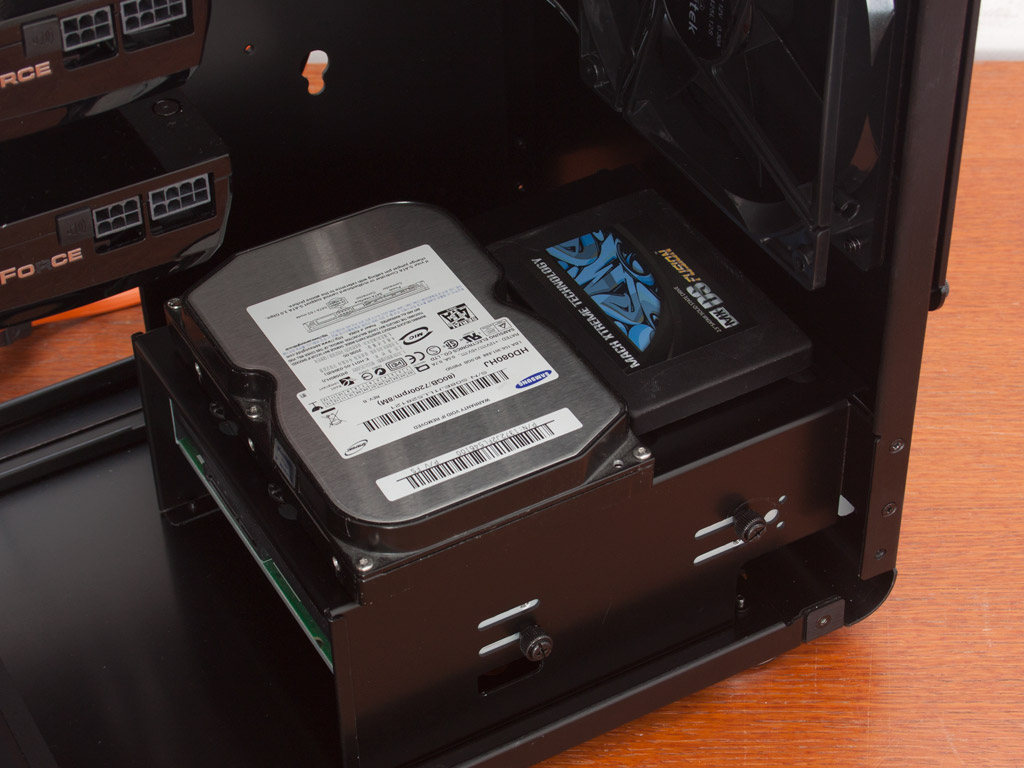

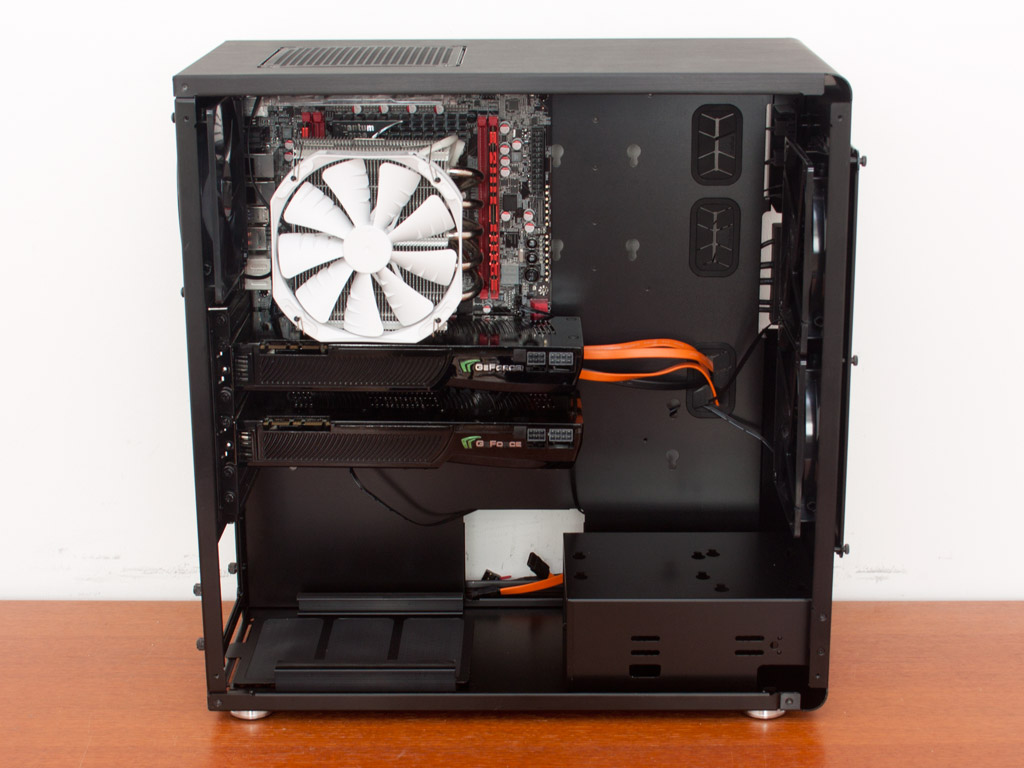
Because of the unique placement of the hard drive bays, we will fill all the unusual ones with drives. This includes the two on top of the 5.25-inch bay and all four behind the motherboard tray. Each of the drives is held in place by screws with rubber rings on them. While this works, the screws do not have such a big head on them, which means that the rubber warps a bit when the drive is in place. As I did not have any chance of securing the cables behind the motherboard tray, I used the hard drive to route them behind these.


Installing the optical drive is quite simple. First, push out the cover and then slide the drive into place. Four thumb screws are included with the chassis to hold the drive in place properly.
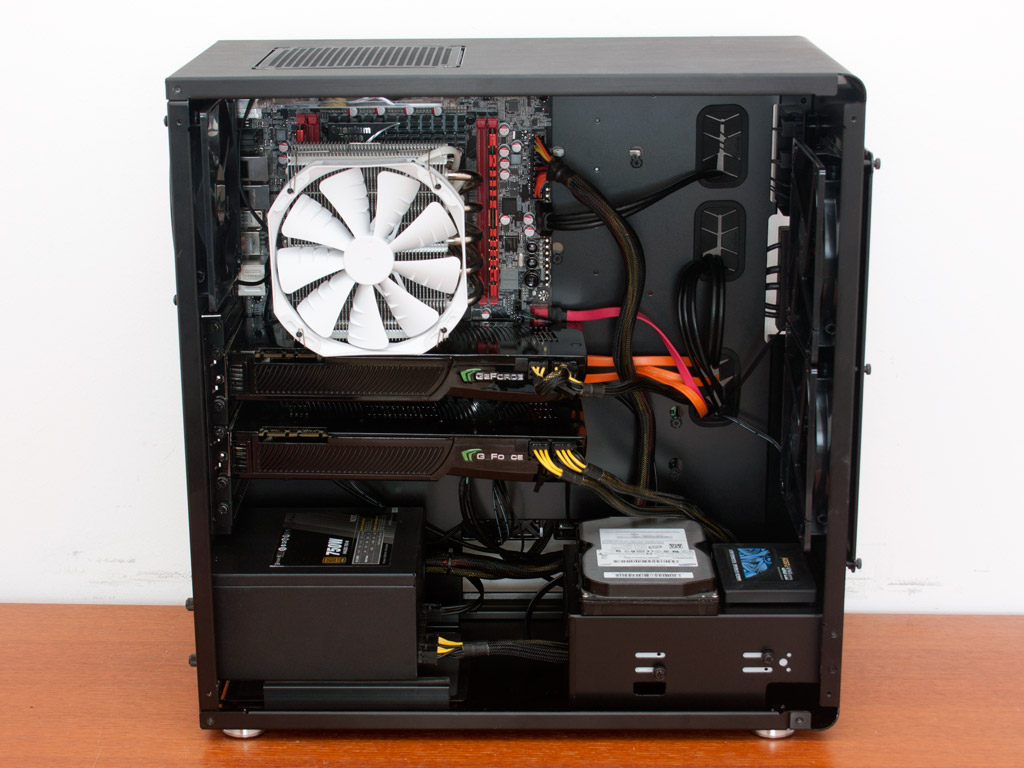

With the PSU in place, the build is complete. As you can see, there is plenty of space for wider eATX boards. Cable management and routing suffer a bit, due to the fact that the placement of the hard drives does not allow for openings closer to the edge of the ATX board, forcing you to route cables to the interior instead.
Finished Looks


Once the side panels are put back into place, the case looks impressive when viewed from a distance. The power LED lights up blue, which goes well with the fan LEDs. The 5.25-inch bay cut-out is a bit big, resulting in some gaps. (Please excuse the dust particles in the picture above. These are not scratches or imperfections in the anodizing.)


While the all-black fans are of good quality, the top 140-mm LED fan is quite inferior. The blades wobble and the rotation does not seem to be smooth either. As expected, the left side panel bulges quite a bit due to the cables routed here. If the chassis had more thumb screws, this issue could have been avoided.
Apr 25th, 2024 11:38 EDT
change timezone
Latest GPU Drivers
New Forum Posts
- WCG Daily Numbers (12494)
- TPU's Rosetta Milestones and Daily Pie Thread (1859)
- ThrottleStop 9.6 Voltage won't change (4)
- Folding Pie and Milestones!! (9008)
- Making Audio Enhancers Work on Windows (2649)
- Random blue screen from winload.efi error (0xc000000e) (1)
- which new soundcard or which 4.1 speakers kits ? (10)
- Alphacool CORE 1 CPU block - bulging with danger of splitting? (8)
- Free Games Thread (3767)
- Only EDP Other in Core? (0)
Popular Reviews
- Fractal Design Terra Review
- Thermalright Phantom Spirit 120 EVO Review
- Corsair 2000D Airflow Review
- Minisforum EliteMini UM780 XTX (AMD Ryzen 7 7840HS) Review
- ASUS GeForce RTX 4090 STRIX OC Review
- NVIDIA GeForce RTX 4090 Founders Edition Review - Impressive Performance
- ASUS GeForce RTX 4090 Matrix Platinum Review - The RTX 4090 Ti
- MSI GeForce RTX 4090 Suprim X Review
- MSI GeForce RTX 4090 Gaming X Trio Review
- Gigabyte GeForce RTX 4090 Gaming OC Review
Controversial News Posts
- Sony PlayStation 5 Pro Specifications Confirmed, Console Arrives Before Holidays (116)
- NVIDIA Points Intel Raptor Lake CPU Users to Get Help from Intel Amid System Instability Issues (106)
- AMD "Strix Halo" Zen 5 Mobile Processor Pictured: Chiplet-based, Uses 256-bit LPDDR5X (101)
- US Government Wants Nuclear Plants to Offload AI Data Center Expansion (98)
- Windows 11 Now Officially Adware as Microsoft Embeds Ads in the Start Menu (92)
- Developers of Outpost Infinity Siege Recommend Underclocking i9-13900K and i9-14900K for Stability on Machines with RTX 4090 (85)
- Windows 10 Security Updates to Cost $61 After 2025, $427 by 2028 (84)
- AMD's RDNA 4 GPUs Could Stick with 18 Gbps GDDR6 Memory (83)