 17
17
Lancool Dragonlord PC-K62 Review
Assembly & Finished Looks »A Closer Look - Inside


To gain access to the chassis, you are simply required to remove a pair of thumb screws holding each side panel in place. As I mentioned before, the interior of the K62 is black and while the overall layout and level of engineering may not seem like much at first sight, the chassis does feature a lot of very functional innovations. Turning the chassis over, we see a large hole under the mainboard tray along with clean, pre-routed cables.


One of the screw-less systems can be found on two of the five external drive bays. These locking bars actually work very well, as we will see later on in the review. The area below the external bays is filled by four hard drive trays made of sturdy metal. You may only remove them after unscrewing a single thumb screw and raising the lock along the left edge of the trays. These are rubber mounted and do not require any screws as well.


Turning our focus toward the rear of the K62, the bottom area is taken by the power supply bay. This one is screw-less as well and the PSU sits on top of rubber spacers to kill any vibration dead in their tracks. Above that are the afore mentioned eight mainboard expansion slots. Seven of them are held in place by incredibly high quality metal locks. This means that all four major areas of the case - external & internal drive bays, PSU area and mainboard expansion are completely screw-less.
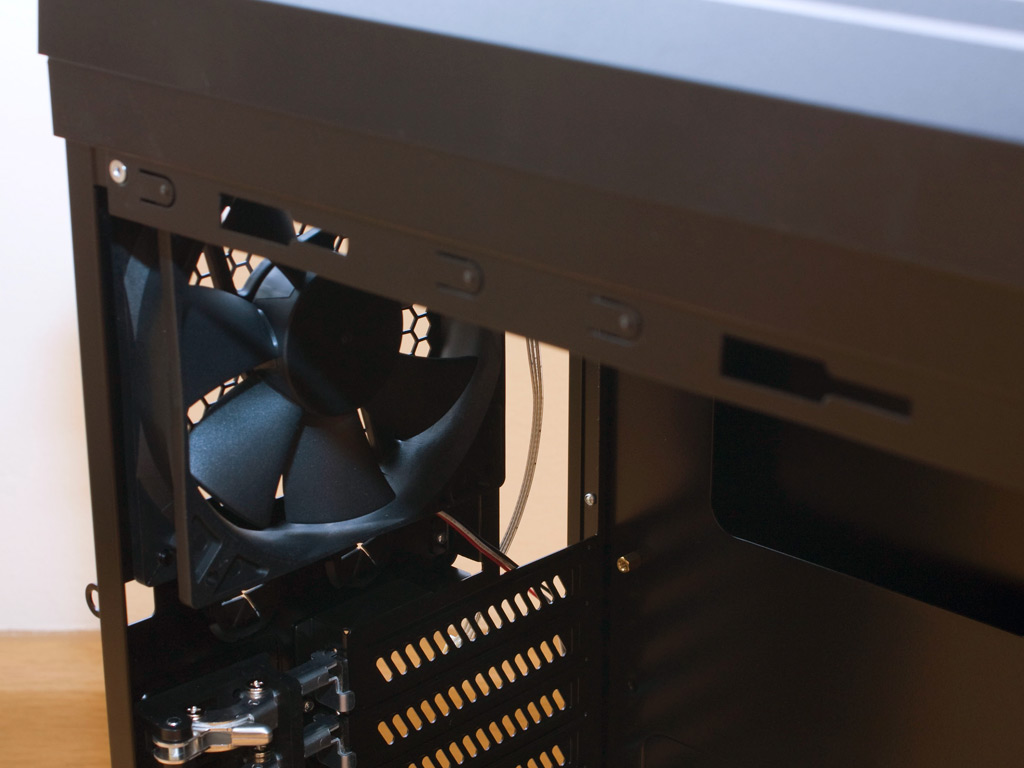

The top part of the chassis is filled by the 120 mm fan, but above that are the two 140 mm ceiling fans. These are held in place by thin metal bars to avoid any obstruction to the airflow. All the fans in the K62 come with mainboard headers. It would have been a nice touch to see four Molex adapters instead of the one lonely piece included.


To aid in cable management Lancool has added various holes in the mainboard tray and has also placed a plastic contraption on the floor of the Dragonlord. This should make securing all the excess PSU cables a much easier task. Laying the chassis down on its side also reveals another very useful feature: a dust filter below the power supply air vent right next to the slightly dusty rubber feet of the case.

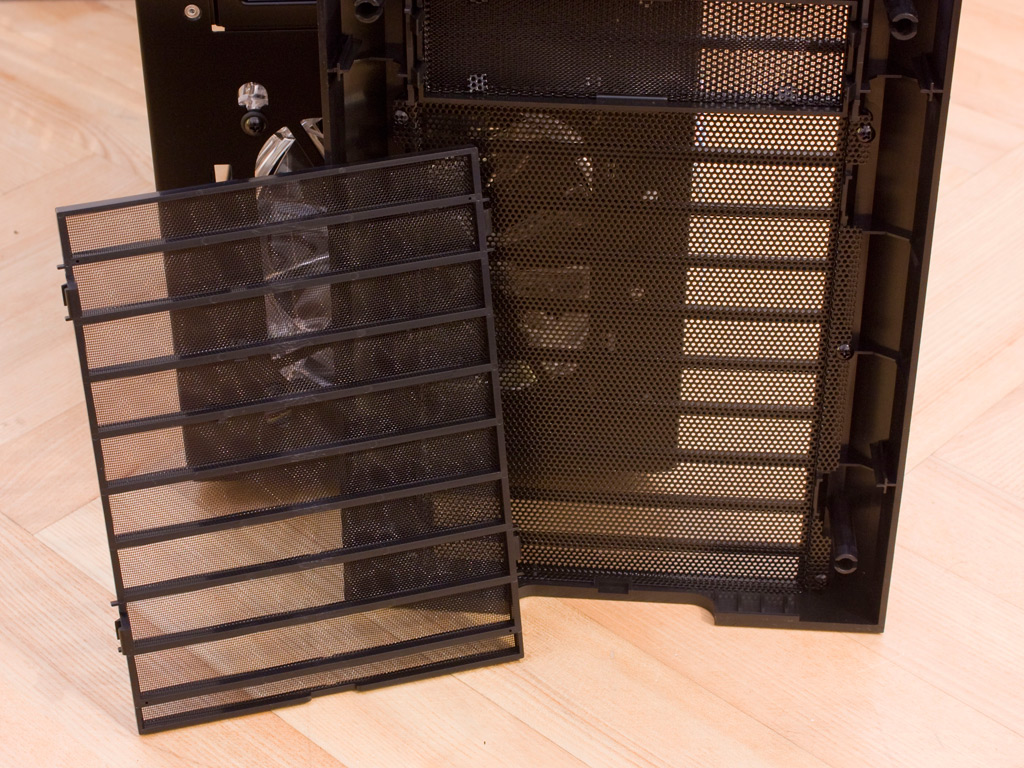
You are required to pull off the front of the case to gain access to the drive bay and the respective covers. Lancool has also added a seperate and removable dust filter for the front intake fan as well, so all spots where air enters the case are covered - well done Lancool.


The cables are nothing out of the ordinary at first sight, but Lancool has decided to supply a 3 pin wide power LED connector, while not using the center pin. This almost certainly means that you need to split this connector apart to use, unless you have installed a very old mainboard.
Apr 23rd, 2024 14:35 EDT
change timezone
Latest GPU Drivers
New Forum Posts
- My computer setup - Request for opinions (8)
- No POST, and no display (4)
- Is there a technical reason that Windows 11 doesn't have built into it battery charge limitation? (35)
- windows 11 (2)
- Cinebench crashed my PC. My Wi-Fi stopped working, and I keep getting a "Please wait" screen when I boot up my PC. (25)
- Shadow Of The Tomb Raider - CPU Performance and general game benchmark discussions (524)
- Drop fps (3)
- Embracer Group is breaking into 3 smaller companies... lol who saw this coming, what a joke (9)
- FINAL FANTASY XIV: Dawntrail Official Benchmark (69)
- Which new games will you be buying? (296)
Popular Reviews
- Horizon Forbidden West Performance Benchmark Review - 30 GPUs Tested
- Fractal Design Terra Review
- Corsair 2000D Airflow Review
- Thermalright Phantom Spirit 120 EVO Review
- Minisforum EliteMini UM780 XTX (AMD Ryzen 7 7840HS) Review
- ASUS GeForce RTX 4090 STRIX OC Review
- NVIDIA GeForce RTX 4090 Founders Edition Review - Impressive Performance
- ASUS GeForce RTX 4090 Matrix Platinum Review - The RTX 4090 Ti
- Creative Pebble X Plus Review
- MSI GeForce RTX 4090 Gaming X Trio Review
Controversial News Posts
- Sony PlayStation 5 Pro Specifications Confirmed, Console Arrives Before Holidays (116)
- NVIDIA Points Intel Raptor Lake CPU Users to Get Help from Intel Amid System Instability Issues (105)
- AMD "Strix Halo" Zen 5 Mobile Processor Pictured: Chiplet-based, Uses 256-bit LPDDR5X (101)
- US Government Wants Nuclear Plants to Offload AI Data Center Expansion (98)
- Windows 10 Security Updates to Cost $61 After 2025, $427 by 2028 (84)
- Developers of Outpost Infinity Siege Recommend Underclocking i9-13900K and i9-14900K for Stability on Machines with RTX 4090 (84)
- TechPowerUp Hiring: Reviewers Wanted for Motherboards, Laptops, Gaming Handhelds and Prebuilt Desktops (74)
- Intel Realizes the Only Way to Save x86 is to Democratize it, Reopens x86 IP Licensing (70)