 22
22
Lian Li PC-A10B Review
Value & Conclusion »Installation
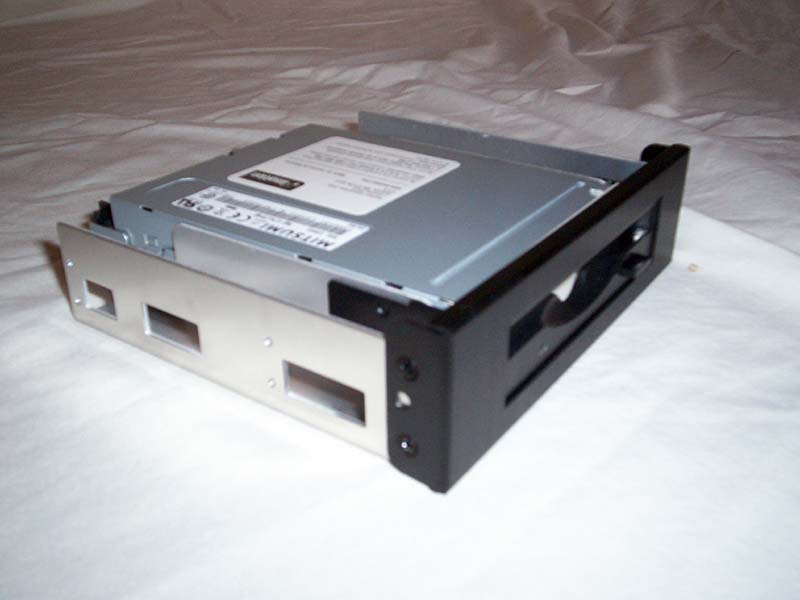
For the installation process I chose to start with mounting the floppy drive in the converter. This was very simple, and I followed the instruction to allow 5mm between the front bezel and the front of the drive. This allows the disk to eject properly and not get bound up. Of course, if you aren’t using a floppy you can skip this step, or if you are using a black floppy drive you can remove the plastic bezel surrounding the opening. Installing this converter into a 5.25” bay is the same as any normal 5.25” device, but if you mount it in the lower bay you will have to use screws to do so.

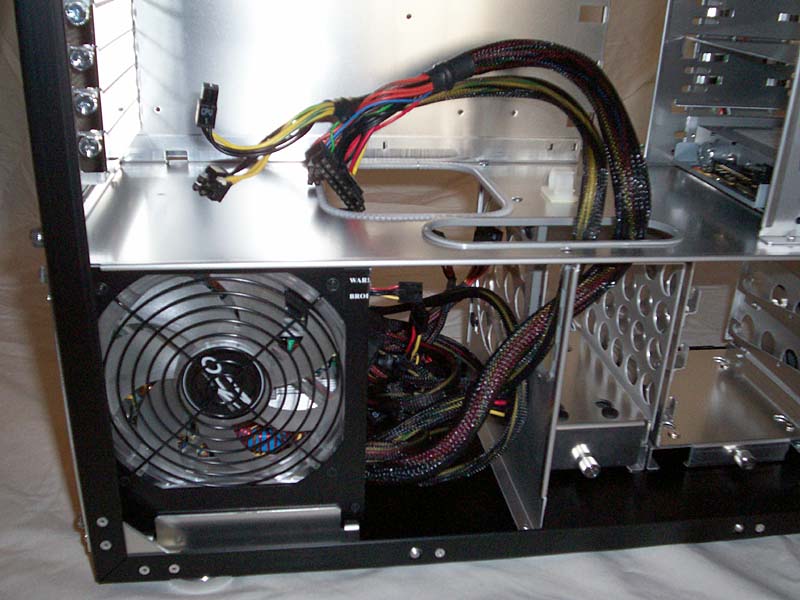
Next I installed the power supply. I chose to use four extra thumbscrews to mount it, then I carefully slid the assembly into the case. At this point it helps to have both side panels off so you can hold the PSU steady and move the cables out of the way.

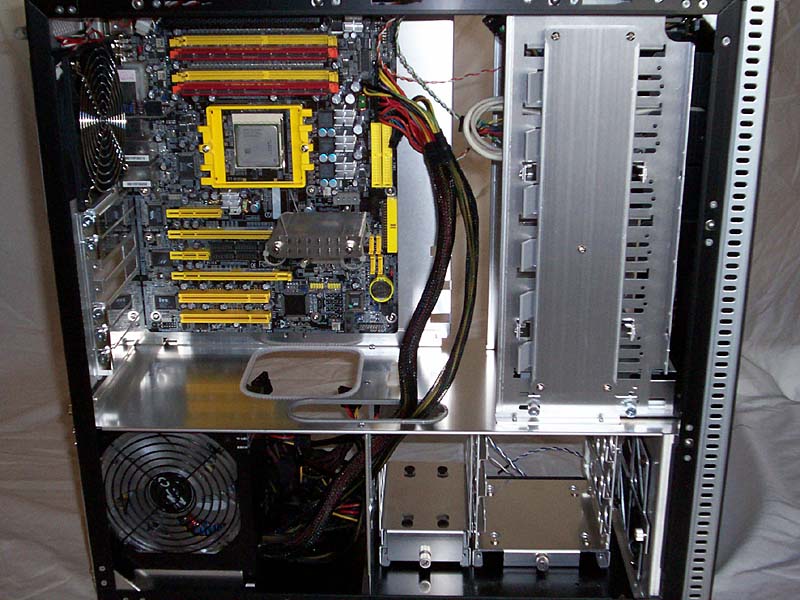
Next I installed the motherboard. The slide out tray made it very easy, and the included nut driver for the stand-offs worked perfectly. Once assembled the whole tray slid back into place and was secured with thumbscrews on the back panel.
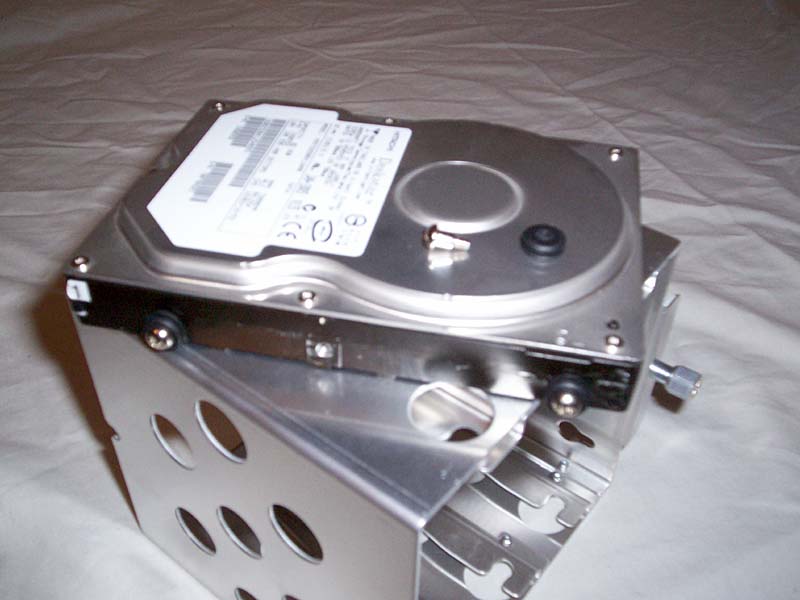
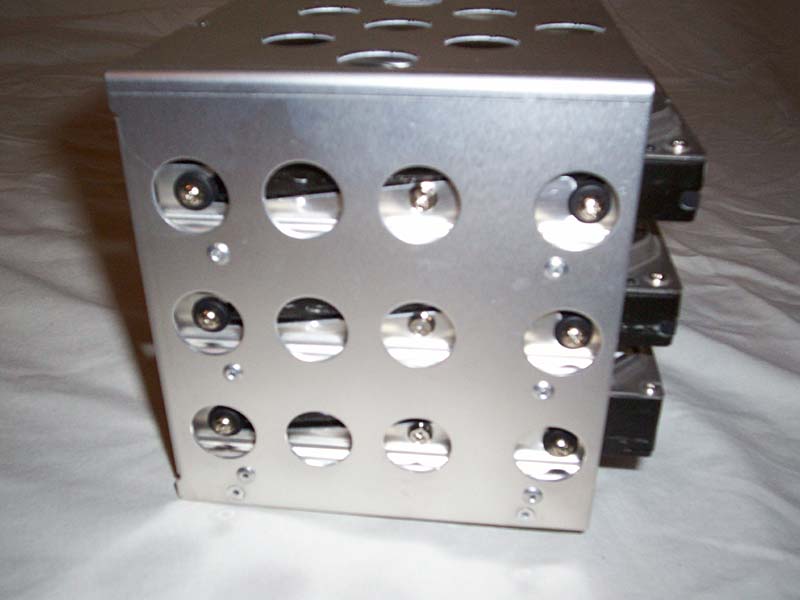
To install drives in the cage that is closest to the front you need to use four grommets and four special screws (similar to shoulder bolts) for each drive. These grommets slide down a rail inside the cage and press into place, making swapping out drives simple and quick. If the case will be moved around from time to time, the user can add another standard screw to the center of each side for each drive, thereby locking it in place. As you can see from the picture, I mounted my two SATA drives and one IDE drive in this cage, but I found that my standard IDE cable was not long enough to reach.
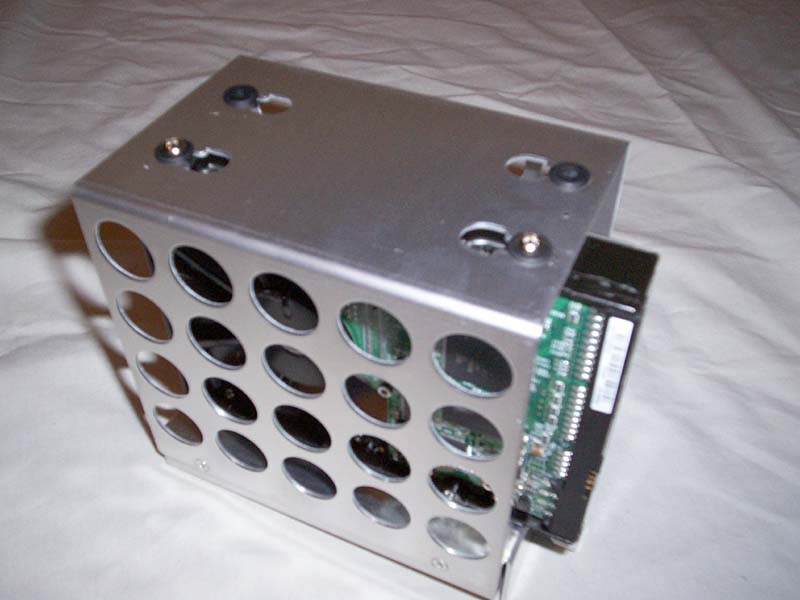

Instead I mounted the IDE drive into the other cage, since it would be closer to the opening to run the cable. In this cage the drive mounts with screws run through more rubber grommets that are already installed for you. I then installed both cages, tightened down the thumbscrews, and ran the power and data cables.
Finished Look
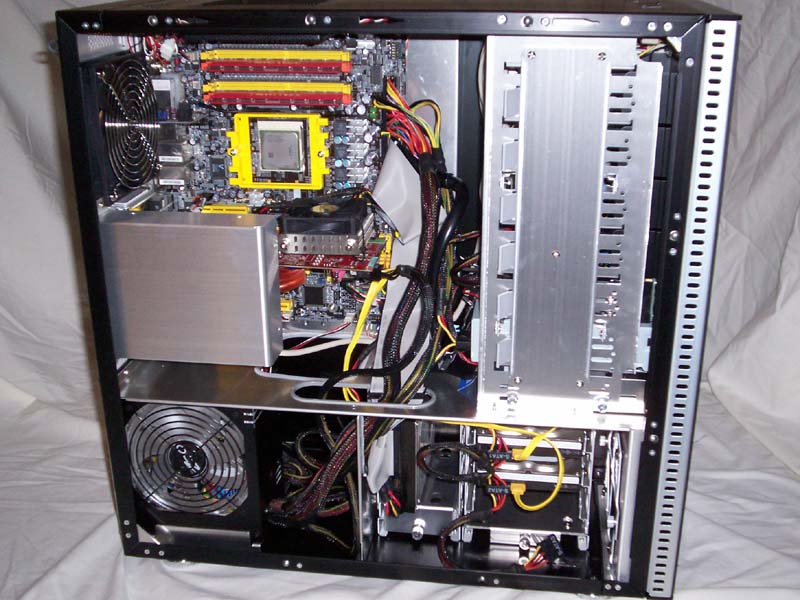
I slid the DVD drive in, using only the tool-less mounting tab to secure it, then installed my favorite fan controller. I ran the rest if the wiring, installed the video card, and replaced the side fan. Except for the CPU cooler, the installation is now complete. With some more time and some new IDE cables I should have the cable management in check soon.
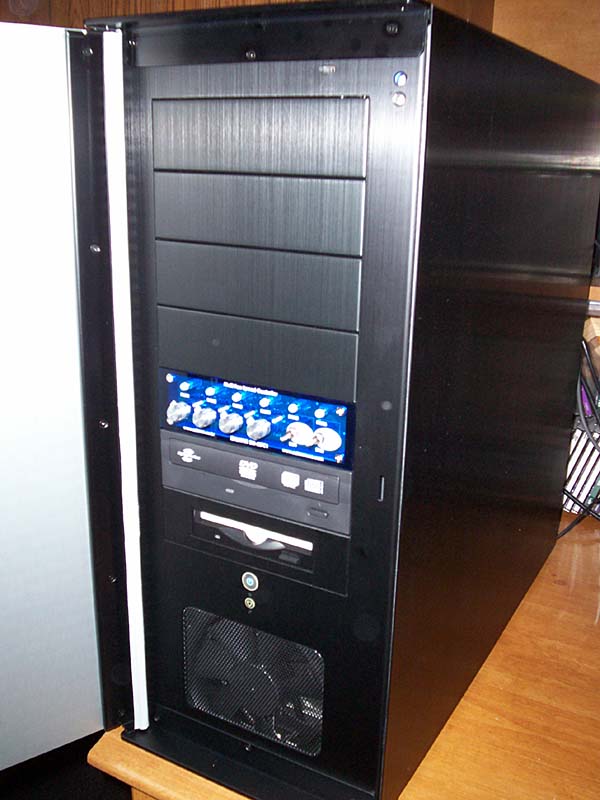

Here you can see the front with the devices installed. As mentioned before, the Power and Reset switches light up as seen in the image with the flash off.
Apr 20th, 2024 00:23 EDT
change timezone
Latest GPU Drivers
New Forum Posts
- Roccat Kone AIMO has developed a double left click, when I click it once. Any fix out there? (39)
- Which air cooler for a ryzen 9 5900x (161)
- Liquidextasy waterblocks (51)
- I just succesfully baked DDR4 (76)
- GPU-Z reporting wrong ReBar info for RTX 20 series (4)
- I9 13890HX undervolting Suggestions (5)
- Official Board Game Discussion (4)
- Cinebench crashed my PC. My Wi-Fi stopped working, and I keep getting a "Please wait" screen when I boot up my PC. (8)
- USB C to USB A hub (43)
- XFX RX580 stock Bios (8)
Popular Reviews
- Horizon Forbidden West Performance Benchmark Review - 30 GPUs Tested
- Fractal Design Terra Review
- Corsair 2000D Airflow Review
- Thermalright Phantom Spirit 120 EVO Review
- Minisforum EliteMini UM780 XTX (AMD Ryzen 7 7840HS) Review
- Creative Pebble X Plus Review
- FiiO KB3 HiFi Mechanical Keyboard Review - Integrated DAC/Amp!
- ASUS GeForce RTX 4090 STRIX OC Review
- NVIDIA GeForce RTX 4090 Founders Edition Review - Impressive Performance
- ASUS GeForce RTX 4090 Matrix Platinum Review - The RTX 4090 Ti
Controversial News Posts
- Sony PlayStation 5 Pro Specifications Confirmed, Console Arrives Before Holidays (111)
- NVIDIA Points Intel Raptor Lake CPU Users to Get Help from Intel Amid System Instability Issues (102)
- US Government Wants Nuclear Plants to Offload AI Data Center Expansion (98)
- AMD "Strix Halo" Zen 5 Mobile Processor Pictured: Chiplet-based, Uses 256-bit LPDDR5X (84)
- Windows 10 Security Updates to Cost $61 After 2025, $427 by 2028 (82)
- Developers of Outpost Infinity Siege Recommend Underclocking i9-13900K and i9-14900K for Stability on Machines with RTX 4090 (82)
- TechPowerUp Hiring: Reviewers Wanted for Motherboards, Laptops, Gaming Handhelds and Prebuilt Desktops (73)
- Intel Realizes the Only Way to Save x86 is to Democratize it, Reopens x86 IP Licensing (70)