 4
4
NZXT Adamas Review
Installation »A Closer Look


The front of the Adamas features a standard layout. It is of very high quality, as is the rest of the enclosure. The company logo is located on the top right corner. The back of the case does not seem to have anything out of the ordinary either. If you look closely at the edges of the back, you will notice that the outside walls of the case extend beyond the back of the enclosure. This may seem unusual, but serves a very specific purpose. More on that later.
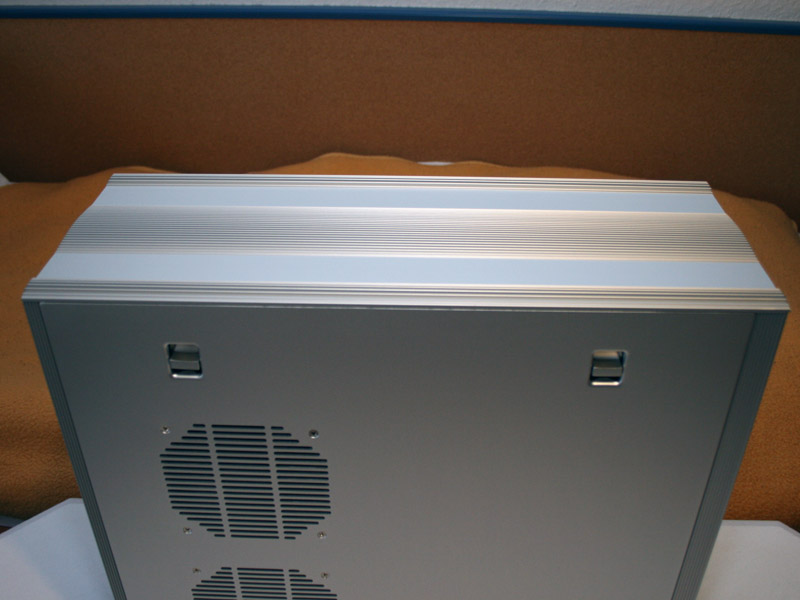


The top and bottom of the case feature solid fins, similar to heatsinks. These are not welded on or cut out of a single, thick piece of aluminum. These shapes can be found all over the case. NZXT has opted for actual hand crafted tuning of the case. The sharp edges have been rounded off by hand, so you will not get hurt while handling the case. Another very impressive part of the case are the very solid feet. These come with foam spacers and are of very high quality as well. The front features a handle to release the entire front from the enclosure. A firm tug does the job to release and a solid push secures it back into place.


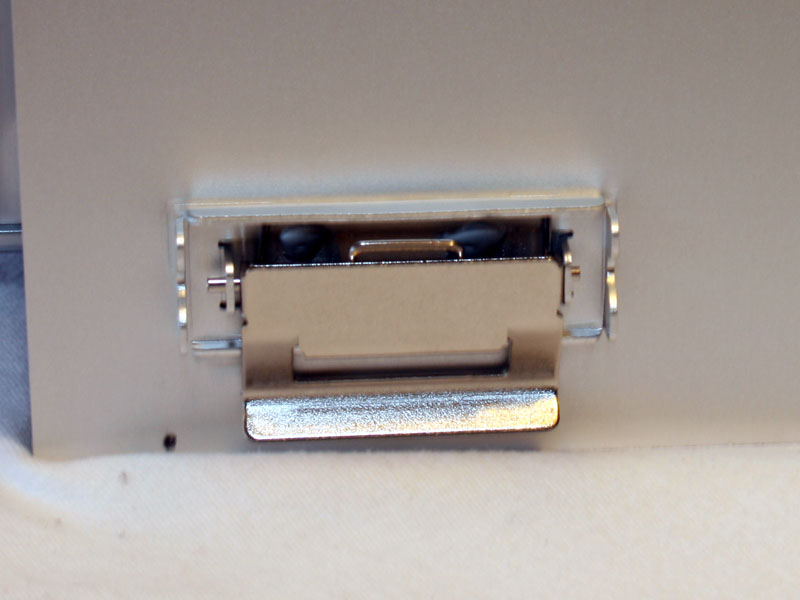
The front of the case houses four 5.25 inch drive bays. The top drive bay cover is a fully functional drive cover made completely out of aluminum. Even the button, which other manufacturers create using plastic, is produced using aluminum. Below these large drive bays you will find two 3.5 inch bays. They both seem to be available at first sight, but the bottom one actually houses the front I/O behind a drop down flap.


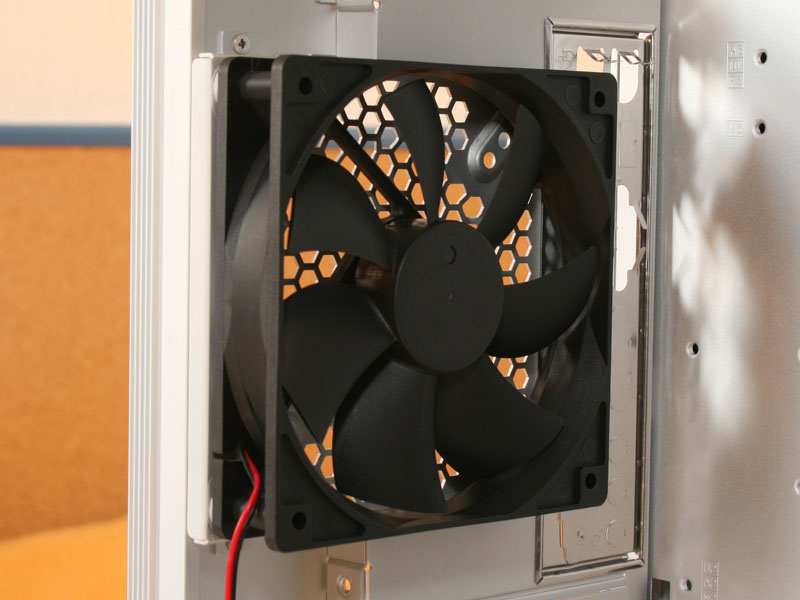
One case side features two NZXT labled 12 cm fans behind cut out air grills. While these are fairly obstructive when compared to traditional screw on grills, the long holes should suffice. These fans are secured by traditional screws. The thick aluminum should absorb most vibrations quite good, so no spacers are needed. All four included fans are connected using Molex plugs. It would have been great if 3 pin connections were used, with possible adapters to Molex. This would give the user the most flexibility when powering and controlling the 12 cm fans.

Even the method of securing both side panels is quite unique. The top are spring loaded locks, which secure the panel in place. The bottom are spring loaded flaps which are pushed in first to hold the panel at the bottom. This method is surely quite expensive when compared to four simple, traditional screws or thumb screws. NZXT went all out on the build quality of this case.


The inner case layout is quite normal. As you can see, there are no rivets inside the case. Everything is either welded or secured by real screws.


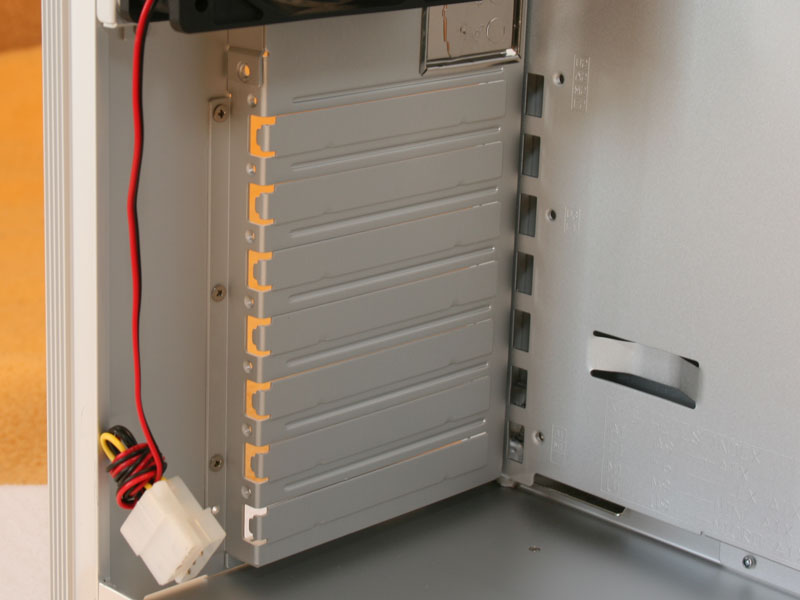
The front houses all the drive bays. The four hard drive variants can be found on the bottom, behind a 12 cm fan. There are foam spacers to reduce case vibrations on either side. The floppy drive bays look quite similar, but cannot be used for additional hard drives. The required holes for correct installation are missing. The 5.25 inch bays are similar as well and feature the same foam spacers. Here you have the option to install the drives with the supplied steel rails. The holes for traditional installation are present as well.
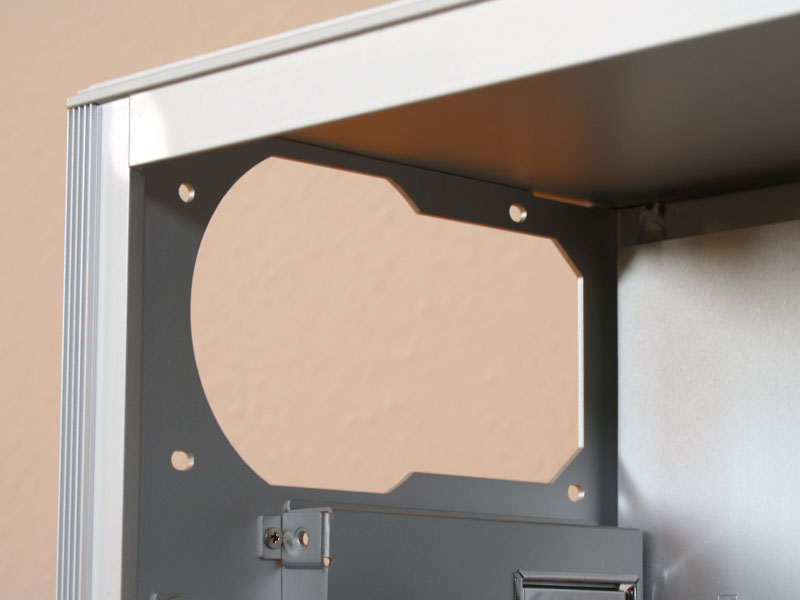
The PCI slots are also constructed of aluminum. The covers need to be broken out to clear way for any such devices. Reusing these covers is not possible. This means you better have some traditional covers at your disposal if you ever remove an installed expansion card or graphic card. NZXT also included a rear fan to blow out of the case. Above that you will find a neatly cut out power supply frame. All of these parts need to be secured with the supplied screws.
Apr 25th, 2024 18:42 EDT
change timezone
Latest GPU Drivers
New Forum Posts
- Alphacool CORE 1 CPU block - bulging with danger of splitting? (16)
- Core PL1 + GPU PL1 + Ring EDP OTHER (7)
- How to check flatness of CPUs and coolers - INK and OPTICAL INTERFERENCE methods (112)
- Best SSD for system drive (78)
- Which new games will you be buying? (314)
- TPU's Nostalgic Hardware Club (18464)
- Post your Cinebench 2024 score (450)
- Ubuntu 24.04 LTS released (2)
- Dell Workstation Owners Club (3054)
- im new to throttelstop and i think i messed it up by copying others any hints would be very much aprreciated (2)
Popular Reviews
- Fractal Design Terra Review
- Thermalright Phantom Spirit 120 EVO Review
- Corsair 2000D Airflow Review
- Minisforum EliteMini UM780 XTX (AMD Ryzen 7 7840HS) Review
- ASUS GeForce RTX 4090 STRIX OC Review
- NVIDIA GeForce RTX 4090 Founders Edition Review - Impressive Performance
- ASUS GeForce RTX 4090 Matrix Platinum Review - The RTX 4090 Ti
- MSI GeForce RTX 4090 Suprim X Review
- MSI GeForce RTX 4090 Gaming X Trio Review
- Gigabyte GeForce RTX 4090 Gaming OC Review
Controversial News Posts
- Sony PlayStation 5 Pro Specifications Confirmed, Console Arrives Before Holidays (117)
- Windows 11 Now Officially Adware as Microsoft Embeds Ads in the Start Menu (106)
- NVIDIA Points Intel Raptor Lake CPU Users to Get Help from Intel Amid System Instability Issues (106)
- AMD "Strix Halo" Zen 5 Mobile Processor Pictured: Chiplet-based, Uses 256-bit LPDDR5X (101)
- US Government Wants Nuclear Plants to Offload AI Data Center Expansion (98)
- AMD's RDNA 4 GPUs Could Stick with 18 Gbps GDDR6 Memory (87)
- Developers of Outpost Infinity Siege Recommend Underclocking i9-13900K and i9-14900K for Stability on Machines with RTX 4090 (85)
- Windows 10 Security Updates to Cost $61 After 2025, $427 by 2028 (84)