 50
50
NZXT H2 Review
Assembly & Finished Looks »A Closer Look - Inside


To gain access to the interior you simply have to remove the thumb screws which hold each side panel in place. As you can see, NZXT has also lined these with the same sound dampening material as on the front of the chassis. As I mentioned before, the entire interior is black as well, while it is white for the white version. The internal quality and paint job is actually excellent and does justify the somewhat higher price tag to some extend. As you can see, most cables have been pre-routed properly so that there is nothing standing in the way of the system assembly.


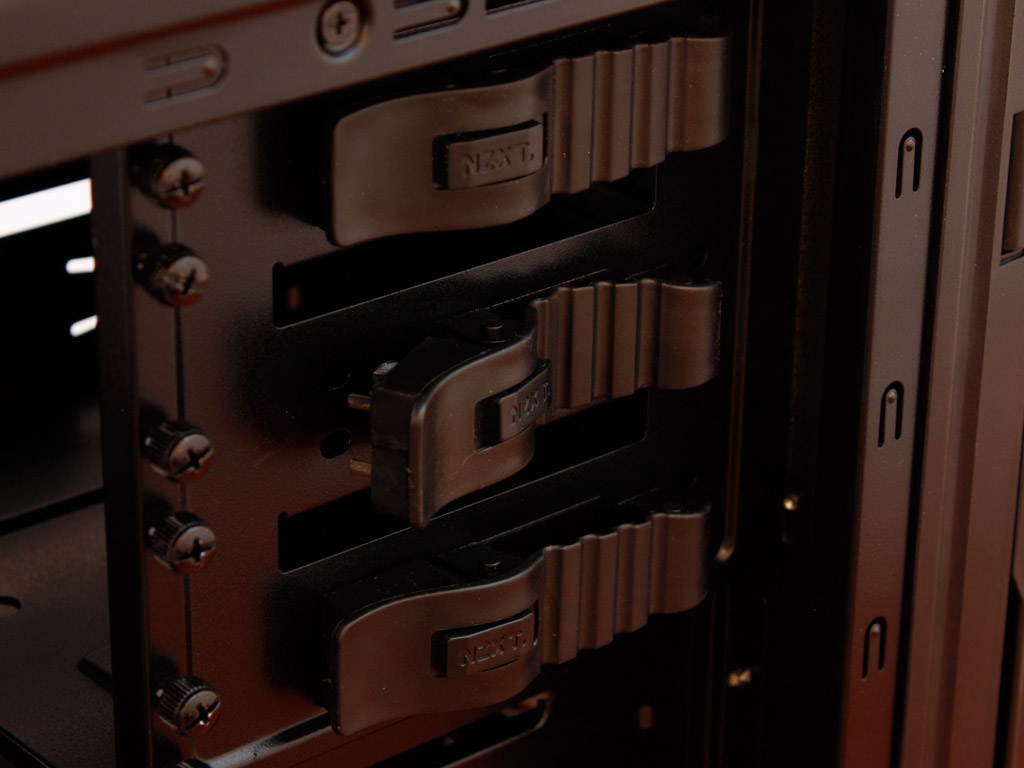
You may install up to eight hard drives into this mid-tower using the included plastic trays. A line of thumb screws gives you the option to pin these down to secure them for transport. While this is not the first time we have seen this, I still love the way that these are lined up within the chassis. Above that are the three external drive bays, which use the same "swing out" locking mechanism we have seen in the Phantom. But - just in case - there are also the appropriate screws present to use instead of these locks.


Turning our focus to the rear of the chassis, the bottom PSU bay is nothing out of the ordinary by today's standards. A few foam pads act as an anti-vibration barrier between the PSU and chassis. Above that are the seven mainboard expansion bays, each secured by thumb screws as well. It is great to see that NZXT has not chosen to use cheap plastic locks for these, so even big graphic cards can be secured without any worries. Then there is the 120 mm fan, which - like all the other cooling units within the H2 utilizes white blades in a black frame.


Last but not least, let us take a quick look at the opening in the top of the fan which is nothing out of the ordinary, but will get the job done just fine. The dust filter on the bottom of the case is the largest I have seen in a chassis. It does not only cover the PSU fan, but almost the entire length of the chassis and thus the floor opening for the fan.


Before we dive into the assembly process, there are still the cables of the H2. The case ones for the power & reset button and the LEDs are of the normal kind and you should not have any issue connecting these to a modern mainboard. Then there are the ones for the fan controller and power LED. These consist of two Molex connectors and four fan connectors, three of which are already used for the included cooling units. The I/O cables are all black as well and you have the choice of using an AC'97 or HD Audio capable mainboard. Lastly there is the blue USB 3.0 cable. It would have been nice if this cable was black as well, as it stands out quite prominently from the rest of the chassis.
Apr 24th, 2024 21:00 EDT
change timezone
Latest GPU Drivers
New Forum Posts
- Cinebench crashed my PC. My Wi-Fi stopped working, and I keep getting a "Please wait" screen when I boot up my PC. (30)
- The TPU UK Clubhouse (24783)
- (Anti) SFF fun house (346)
- Sharing experience with MSI RTX 3070 vBIOS update to enable Resizable Bar with MB Z490 (2)
- Share your AIDA 64 cache and memory benchmark here (2915)
- Will a RTX 4070 TI super bottleneck a Ryzen 9 7950X3D? (58)
- The best *budget* ATX PC case on the market? (24)
- GTX 1070 Ti - TDP Issues - Always Power Throttling (4)
- 2022-X58/1366 PIN Motherboards NVME M.2 SSD BIOS MOD Collection (656)
- Meta Horizon OS (15)
Popular Reviews
- Fractal Design Terra Review
- Thermalright Phantom Spirit 120 EVO Review
- Corsair 2000D Airflow Review
- Minisforum EliteMini UM780 XTX (AMD Ryzen 7 7840HS) Review
- ASUS GeForce RTX 4090 STRIX OC Review
- NVIDIA GeForce RTX 4090 Founders Edition Review - Impressive Performance
- ASUS GeForce RTX 4090 Matrix Platinum Review - The RTX 4090 Ti
- MSI GeForce RTX 4090 Suprim X Review
- MSI GeForce RTX 4090 Gaming X Trio Review
- Gigabyte GeForce RTX 4090 Gaming OC Review
Controversial News Posts
- Sony PlayStation 5 Pro Specifications Confirmed, Console Arrives Before Holidays (116)
- NVIDIA Points Intel Raptor Lake CPU Users to Get Help from Intel Amid System Instability Issues (106)
- AMD "Strix Halo" Zen 5 Mobile Processor Pictured: Chiplet-based, Uses 256-bit LPDDR5X (101)
- US Government Wants Nuclear Plants to Offload AI Data Center Expansion (98)
- Windows 10 Security Updates to Cost $61 After 2025, $427 by 2028 (84)
- Developers of Outpost Infinity Siege Recommend Underclocking i9-13900K and i9-14900K for Stability on Machines with RTX 4090 (84)
- TechPowerUp Hiring: Reviewers Wanted for Motherboards, Laptops, Gaming Handhelds and Prebuilt Desktops (78)
- AMD's RDNA 4 GPUs Could Stick with 18 Gbps GDDR6 Memory (72)