 6
6
NZXT Lexa Blackline Review
A Closer Look »The Case

The front of the case looks great and very uniform. NZXT hat added a black plastic piece on top, so that the overall look becomes even. Interestingly enough, there is no company logo anywhere on the outer surface of the case. The only mention can be found on the inner side of the plastic door and on the side panel lock.


Another very unusual piece can be found on the back of the case. NZXT has done everything to keep the round silhouette on both ends of the enclosure. This "cage" doubles as a cable management system. To gain access to the doors, you need to remove the cage first.

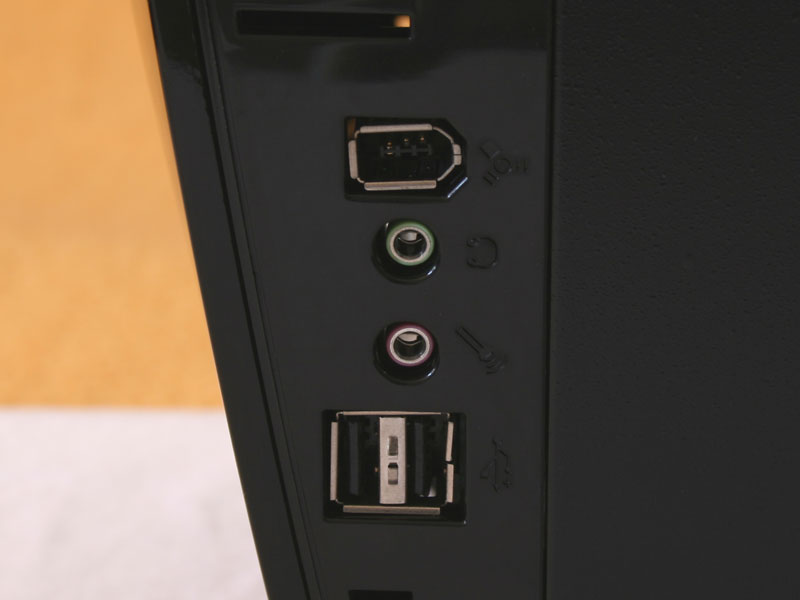
The left case side is completely plain. There is no window or lock on this side. The front I/O is actually located on the right side of the case. If you have your case under the desk, chances are it will be toward the right of your chair simply because the door opens from left to right. This would make it hard to access these connectors. It would have been better to see them on the left side or the front of the case.


The right side features a large window and also sports a lock. This is the only place where you will find the NZXT logo. The plastic locking mechanism can further be secured with the included key, to keep intruders out. This is good especially since everyone will be able to see your high end components inside the case. The side fan is covered with a dust filter. This is a great addition, as many other manufacturers do not include such a barrier, allowing dust to easily enter the system right where the graphic card fan is spinning.


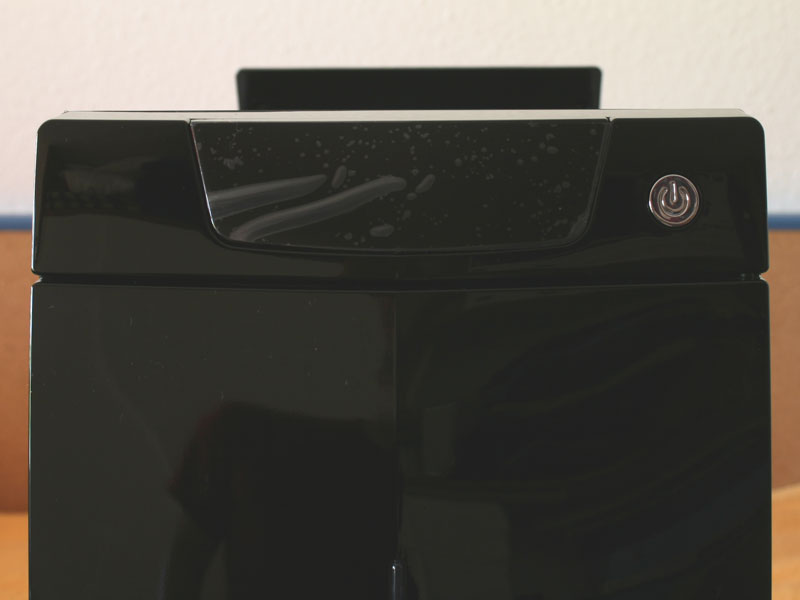
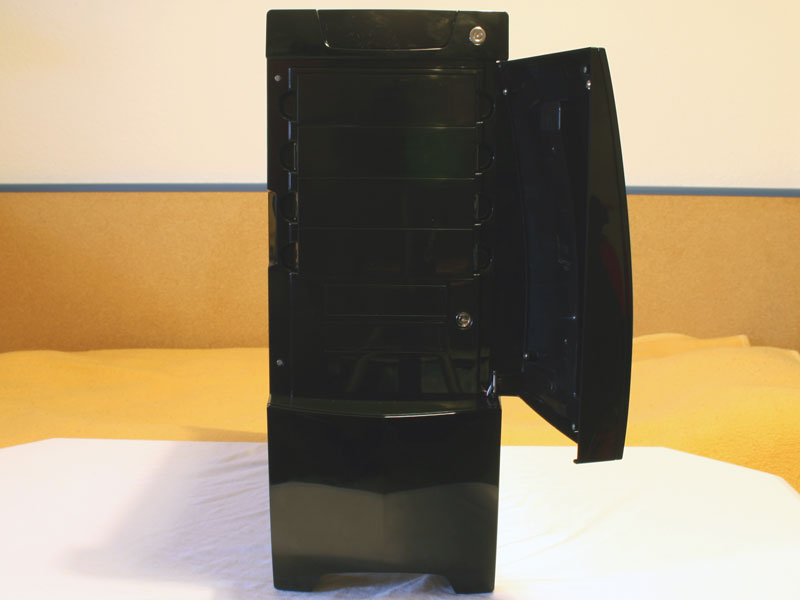
The front of the Lexa Redline is very clean and the glossy black somewhat swallows the edges and folds of the case. you will find the reset button, which has been placed to the right of the external 3.5 inch bays behind the door. This is actually not that bad, as you would only push that button in emergencies. Above that you will find the four 5.25 inch bays. The front covers of the smaller bays need to be pushed out from inside the case, while the 5.25 inch ones can easily be pulled out from the front of the case. The power button is placed on the top right corner, which is perfect if the case is standing under the table. NZXT has decided to make the LCD screen invisible while the system is turned off, so even though you cannot see it, the display is to the left of the power button - a very nice effect.


The bottom rear of the case houses seven PCI expansion slots which utilize reusable covers. Right next to that are two holes to pass water cooling tubes through, a very nice and currently very popular feature among case manufacturers. The middle segment is reserved for the usual mainboard backplate and the rear fan. You may mount an 80 mm, 92 mm or 120 mm fan in this location. NZXT already includes the biggest variant, which is the best possible choice. The top is meant for the PSU, which can only be mounted one way.
Apr 23rd, 2024 02:58 EDT
change timezone
Latest GPU Drivers
New Forum Posts
- Sexy Mechanical Keyboard Thread (480)
- Red Dead Redemption using emu (2)
- Cinebench crashed my PC. My Wi-Fi stopped working, and I keep getting a "Please wait" screen when I boot up my PC. (23)
- Which new games will you be buying? (294)
- What are you playing? (20517)
- EK seems to be having major issues (23)
- The TPU UK Clubhouse (24764)
- Why MS buying all of these Studios is bad for Gaming (12)
- Linus watercools (56)
- ASRock Deskmini Owner's Club (27)
Popular Reviews
- Horizon Forbidden West Performance Benchmark Review - 30 GPUs Tested
- Fractal Design Terra Review
- Corsair 2000D Airflow Review
- Thermalright Phantom Spirit 120 EVO Review
- Minisforum EliteMini UM780 XTX (AMD Ryzen 7 7840HS) Review
- ASUS GeForce RTX 4090 STRIX OC Review
- NVIDIA GeForce RTX 4090 Founders Edition Review - Impressive Performance
- ASUS GeForce RTX 4090 Matrix Platinum Review - The RTX 4090 Ti
- Creative Pebble X Plus Review
- MSI GeForce RTX 4090 Gaming X Trio Review
Controversial News Posts
- Sony PlayStation 5 Pro Specifications Confirmed, Console Arrives Before Holidays (115)
- NVIDIA Points Intel Raptor Lake CPU Users to Get Help from Intel Amid System Instability Issues (105)
- AMD "Strix Halo" Zen 5 Mobile Processor Pictured: Chiplet-based, Uses 256-bit LPDDR5X (101)
- US Government Wants Nuclear Plants to Offload AI Data Center Expansion (98)
- Windows 10 Security Updates to Cost $61 After 2025, $427 by 2028 (84)
- Developers of Outpost Infinity Siege Recommend Underclocking i9-13900K and i9-14900K for Stability on Machines with RTX 4090 (82)
- TechPowerUp Hiring: Reviewers Wanted for Motherboards, Laptops, Gaming Handhelds and Prebuilt Desktops (74)
- Intel Realizes the Only Way to Save x86 is to Democratize it, Reopens x86 IP Licensing (70)