 5
5
NZXT Phantom 630 Review
Assembly & Finished Looks »A Closer Look - Inside


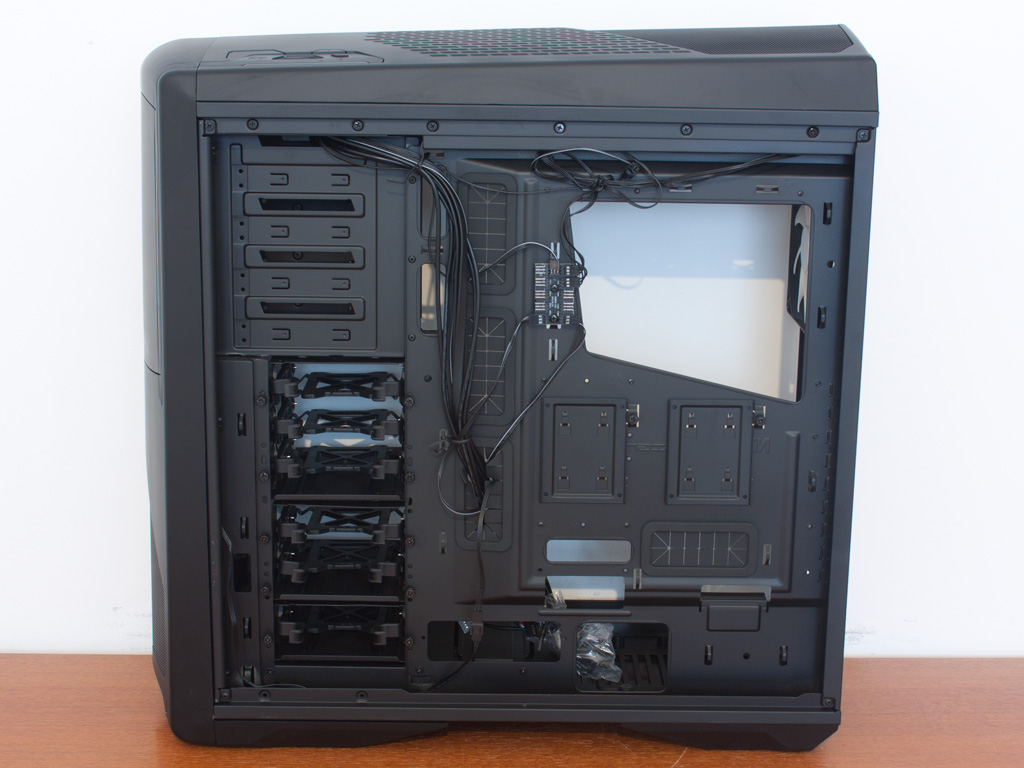
Gaining access to the interior is simply achieved by removing the thumb screws holding each panel in place. You will find the previously mentioned 200 mm fan on the main side panel. It and all other cooling units within the case ship with 3-pin connectors and all-black cabling. Looking at the other side of the case makes how elaborately designed of a case this is apparent: NZXT designed everything from the asymmetric opening in the motherboard tray to the primary and secondary holes for cable routing, and nothing is a simple rebrand.
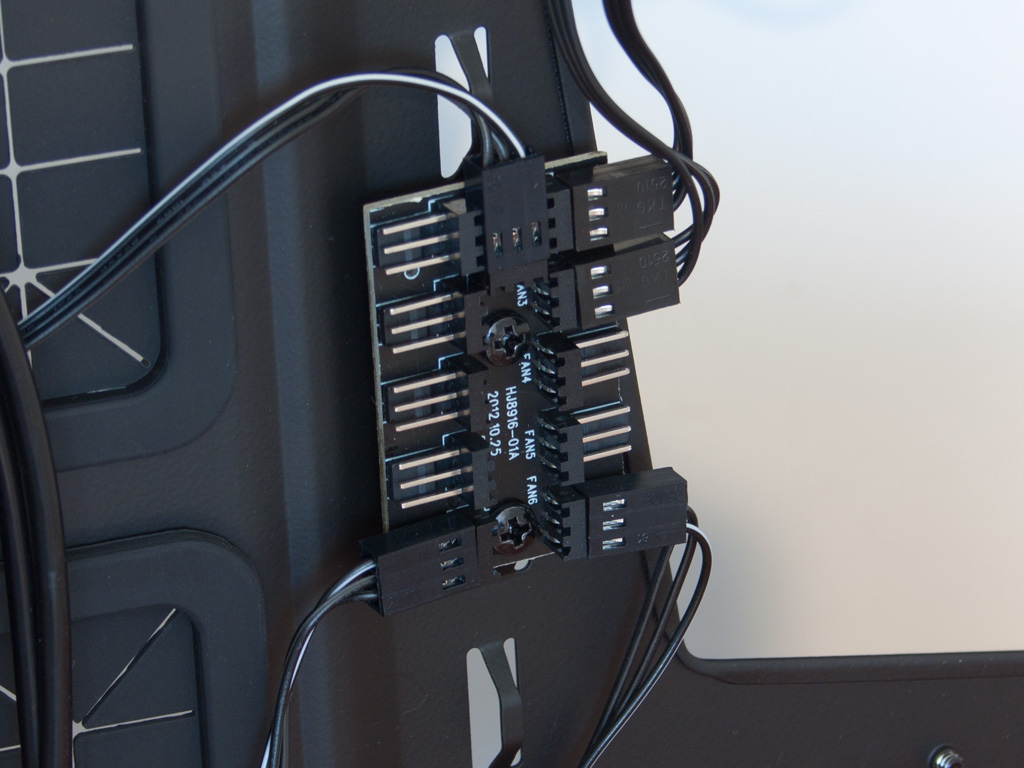

There are two unique features on the underside of the motherboard tray. Firstly, there is a pre-wired PCB for up to eight fans to connect directly to the fan controller above. While this is fine, considering the fact that the controller only manages 30W, it means you will only have 3.75 W for each fan if you were to fill the case up completely. Right out of the box, this PCB can handle all pre-installed fans though, so you can wire things up nicely without having to use the motherboard headers. Below the opening in the motherboard tray are also two trays for 2.5 inch drives, each held in place by a single thumb screw. These extra bays allow you to install SSDs - perfect for OS drives, for example, and NZXT has spaced things in such a way that you have a good 30 mm of free space behind the motherboard tray.


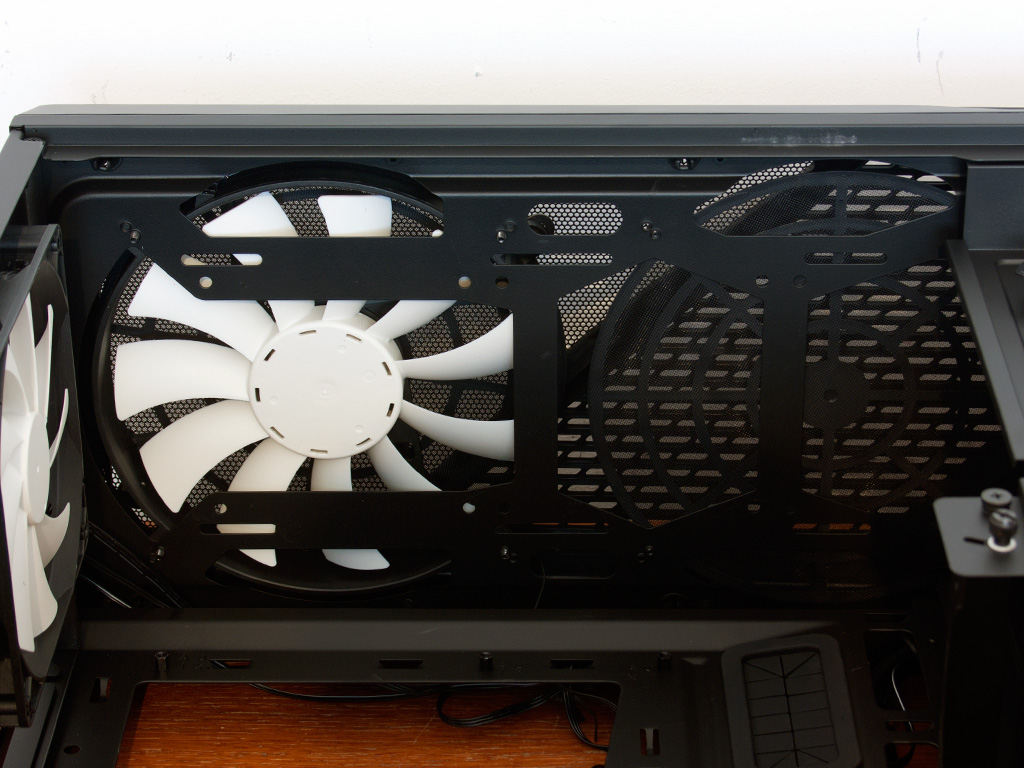
NZXT has divided the six 3.5" hard-drive bays into six cages with capacities for 1, 2, or 3 drives. Each of these holds plastic drive trays which may be pulled out through the main side of the chassis. You may also remove all three cages if only having two 2.5" bays behind the motherboard tray is sufficient for your needs, or if you simply need the extra space.


Removing things completely will also reveal the 200 mm intake fan completely. You may shuffle things around with the cages, but are limited by having to put the single drive cage into the middle of the chassis, because only an opening on the opposite side will fit this tray. If you really want to go all out on water cooling, you may also remove the bottom base to reveal the two 120/140 mm fan placements. This spot may also be used for a radiator; that is, if you are so inclined.

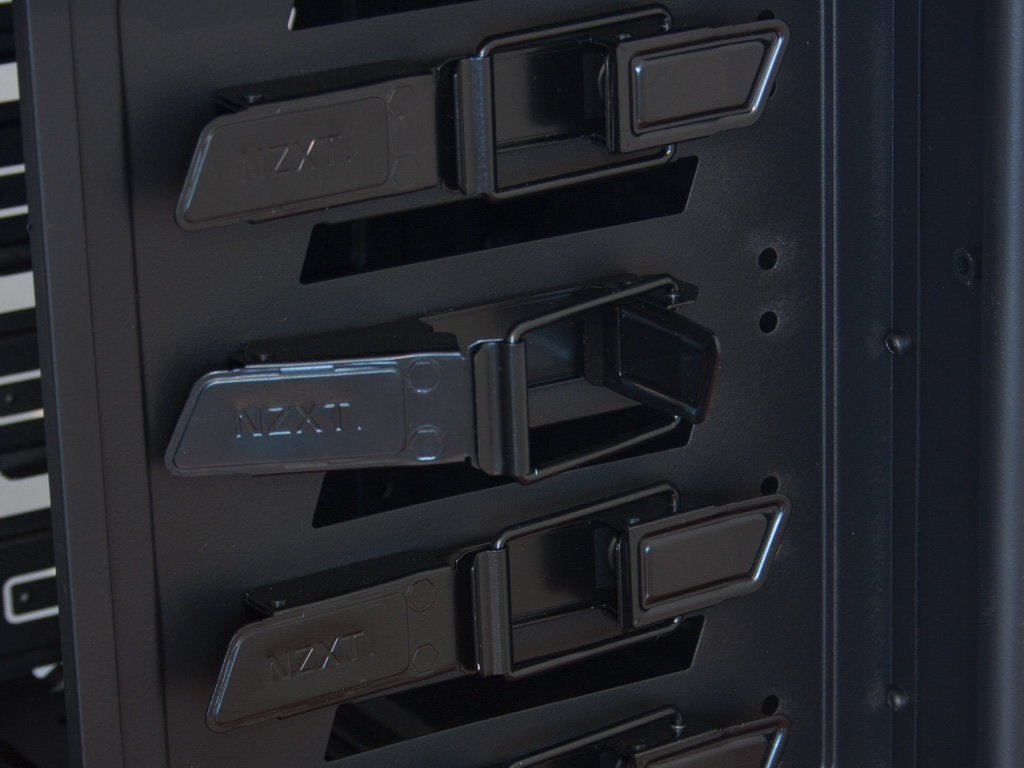
Above the drives, you will find the four 5.25 inch bays. NZXT has once more changed the locking mechanism with this chassis, finally moving from plastic variants to all metal constructions. This new tension lock is actually quite sturdy and makes a very good impression.


In the rear, the bottom PSU bay has six little foam-covered bumps on which the PSU can rest. You may install long units here without any issue. The entire length of this bay has an air vent, so regardless of where the fan of the power supply will be, it can easily access fresh air. Above this contraption are the nine expansion slots, held in place with, for some strange reason, normal screws. Every other Phantom to date has had thumb screws for these, so it is really weird and quite the let-down to see normal screws instead.
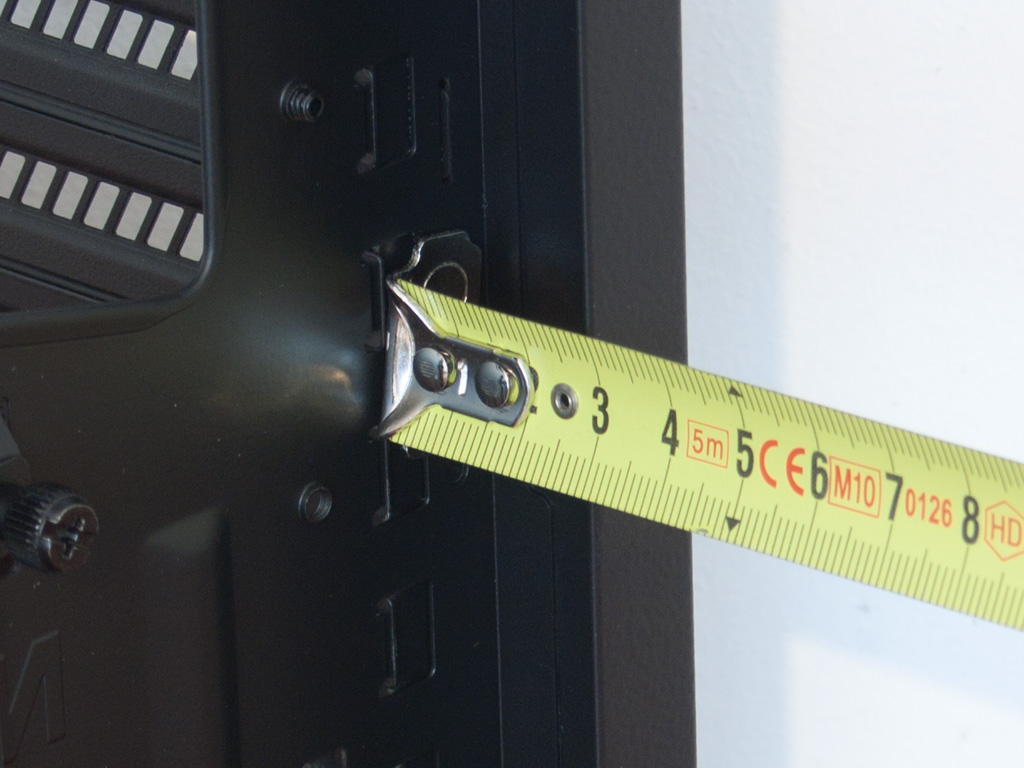
Taking a quick peek at the top, the 200 mm unit has been placed right above the motherboard CPU area. You may install a second such fan next to it, or opt for any water-cooling setup between 120 to 280 mm instead.


Before diving into the assembly process, let us take a quick look at the cables. All of them are sleeved black to go with the general design of the chassis. Both case and I/O connectivity are of the usual kind, but the SD card reader takes up two USB 2.0 ports instead of one. A molex connector is used to provide power to the fan controller.
Apr 23rd, 2024 12:37 EDT
change timezone
Latest GPU Drivers
New Forum Posts
- Unlock the shaders - AMD Radeon RX 560D (324)
- What's your latest tech purchase? (20299)
- FINAL FANTASY XIV: Dawntrail Official Benchmark (67)
- Is there a technical reason that Windows 11 doesn't have built into it battery charge limitation? (30)
- Asus Crosshair X670E - CPU Package temps (10)
- Core PL1 + GPU PL1 + Ring EDP OTHER (4)
- 5.1 or 7.1 software solutions (1)
- SOYO RX580 2048SP Original Bios (8)
- Possible near-future 2024 Arrow Lake build.... (49)
- What are you playing? (20521)
Popular Reviews
- Horizon Forbidden West Performance Benchmark Review - 30 GPUs Tested
- Fractal Design Terra Review
- Corsair 2000D Airflow Review
- Thermalright Phantom Spirit 120 EVO Review
- Minisforum EliteMini UM780 XTX (AMD Ryzen 7 7840HS) Review
- ASUS GeForce RTX 4090 STRIX OC Review
- NVIDIA GeForce RTX 4090 Founders Edition Review - Impressive Performance
- ASUS GeForce RTX 4090 Matrix Platinum Review - The RTX 4090 Ti
- Creative Pebble X Plus Review
- MSI GeForce RTX 4090 Gaming X Trio Review
Controversial News Posts
- Sony PlayStation 5 Pro Specifications Confirmed, Console Arrives Before Holidays (116)
- NVIDIA Points Intel Raptor Lake CPU Users to Get Help from Intel Amid System Instability Issues (105)
- AMD "Strix Halo" Zen 5 Mobile Processor Pictured: Chiplet-based, Uses 256-bit LPDDR5X (101)
- US Government Wants Nuclear Plants to Offload AI Data Center Expansion (98)
- Windows 10 Security Updates to Cost $61 After 2025, $427 by 2028 (84)
- Developers of Outpost Infinity Siege Recommend Underclocking i9-13900K and i9-14900K for Stability on Machines with RTX 4090 (82)
- TechPowerUp Hiring: Reviewers Wanted for Motherboards, Laptops, Gaming Handhelds and Prebuilt Desktops (74)
- Intel Realizes the Only Way to Save x86 is to Democratize it, Reopens x86 IP Licensing (70)