 10
10
Noctua NH-L12 Review
Installed »Installation
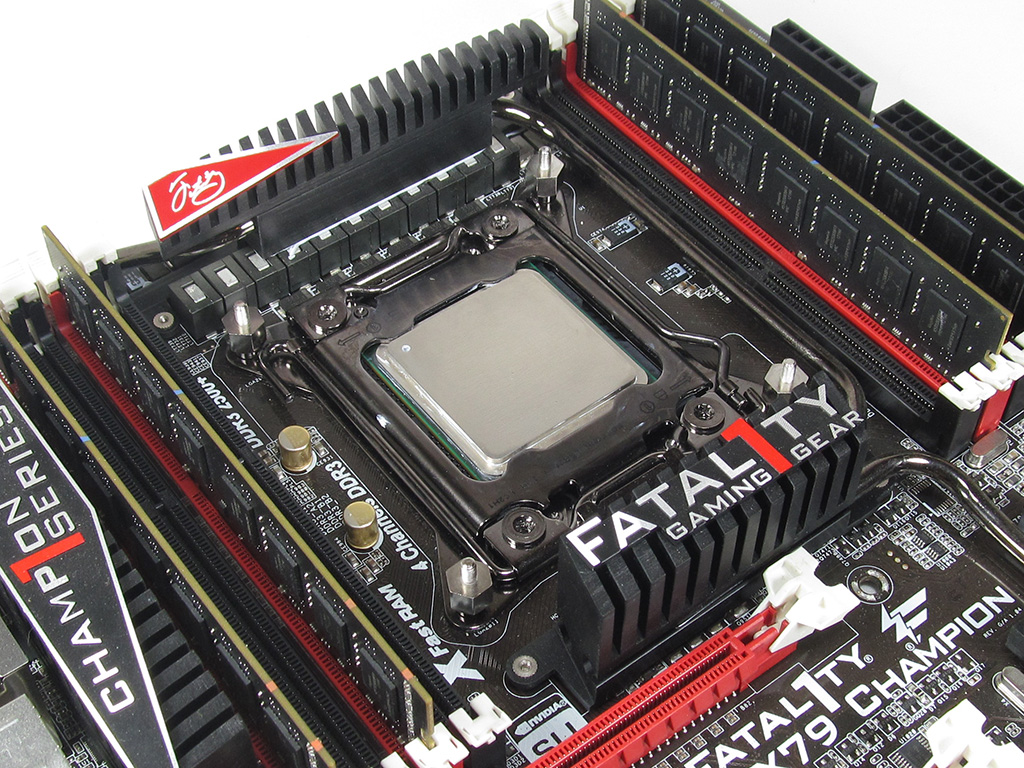


Installing Noctua's NH-L12 is fairly simple. Users will start the installation by screwing the four NM-IBT2 bolts into the M4 threaded holes around the LGA2011 socket. This process is easy: just screw them in by hand until they are tight. After that has been done, place the two NM-IMB2 Intel mounting bars into place and screw them down tight with the four thumbscrews that Noctua has provided.


At this point, as can been seen in these images, the orientation of the cooler will depend on how you install the mounting bars. It should be noted that the proper orientation for most LGA2011 motherboards can be seen in the image on the left. The image on the right shows the other option; however, it does have some issues I will go over later.


The next step is to remove the 120 mm fan so the heatsink can be mounted to the motherboard. This is where the included screwdriver comes in handy. After thermal paste has been applied, line the two screws on the base of the cooler up with the post found on each mounting bar before carefully sliding the screwdriver down through the bottom fan to screw the cooler down tight.


The two available mounting options - with the mounting bars set horizontally to the expansion slots. Either option will work just fine and does not have an impact on cooling performance.

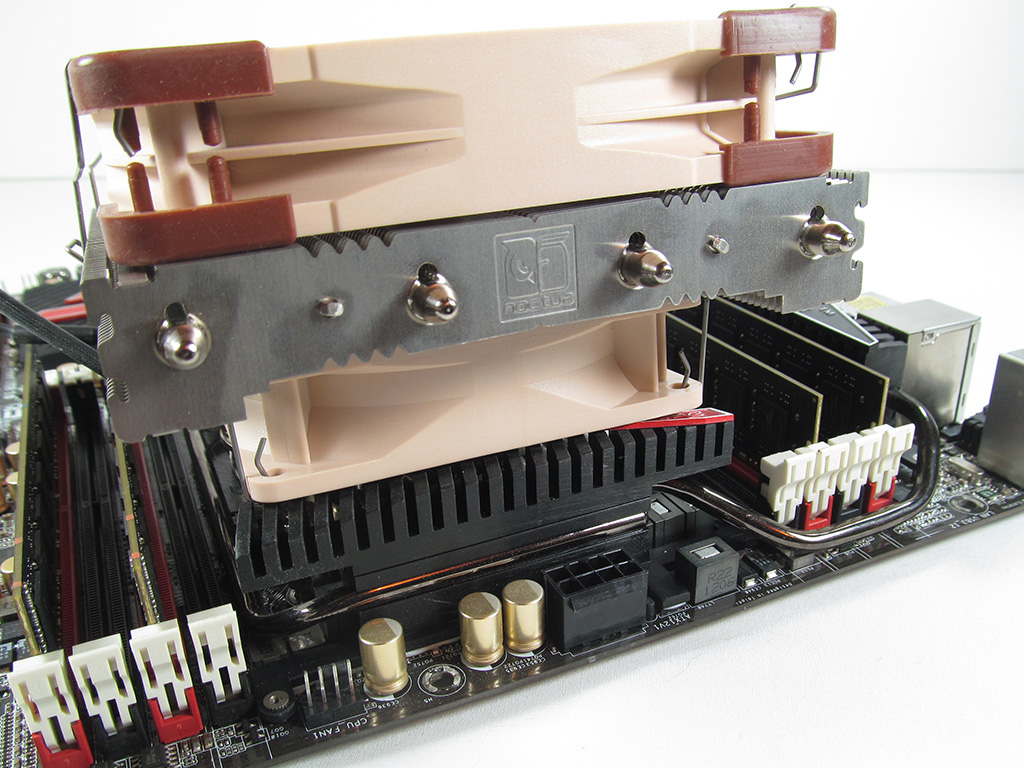
Here is where some problems arise. With the Noctua NH-L12 mounting bars set vertically to the expansion slots, the cooler must be mounted with the bend in the heatpipes facing the expansion slots. When this is done, the 92 mm fan ends up resting on my motherboard's VRM heatsink, which means it cannot be installed. The cooler could be turned, but having the heatpipes face the top of the board would results in less than optimal cooling performance. As such, most users will want to install the cooler as shown in the images below.


At this point, users will want to re-attach the 120 mm fan to the cooler unless they are running the ultra-low profile with the single 92 mm option. It is recommended users use both fans on a high TDP chip. After the fan has been re-attached, users can use Noctua's L.N.A fan wires to lower noise by limiting the fans maximum rotational speed. The cooler's low noise level, however, makes doing so unnecessary.
The overall process of installing the Noctua NH-L12 was extremely easy. The cooler is an 8 on a scale of 1 (hardest) to 10 (easiest). It really is just that easy to install onto socket LGA2011 motherboards.
Apr 23rd, 2024 10:23 EDT
change timezone
Latest GPU Drivers
New Forum Posts
- What are you playing? (20521)
- Windows 12 (142)
- Possible near-future 2024 Arrow Lake build.... (48)
- EK seems to be having major issues (25)
- Odd RTX 3080 behaviour (2)
- Show us your collections thread!! (281)
- Serious bug in PHP reported! (2)
- Upgrade Build (105)
- The Official Linux/Unix Desktop Screenshots Megathread (693)
- Share your AIDA 64 cache and memory benchmark here (2913)
Popular Reviews
- Horizon Forbidden West Performance Benchmark Review - 30 GPUs Tested
- Fractal Design Terra Review
- Corsair 2000D Airflow Review
- Thermalright Phantom Spirit 120 EVO Review
- Minisforum EliteMini UM780 XTX (AMD Ryzen 7 7840HS) Review
- ASUS GeForce RTX 4090 STRIX OC Review
- NVIDIA GeForce RTX 4090 Founders Edition Review - Impressive Performance
- ASUS GeForce RTX 4090 Matrix Platinum Review - The RTX 4090 Ti
- Creative Pebble X Plus Review
- MSI GeForce RTX 4090 Gaming X Trio Review
Controversial News Posts
- Sony PlayStation 5 Pro Specifications Confirmed, Console Arrives Before Holidays (116)
- NVIDIA Points Intel Raptor Lake CPU Users to Get Help from Intel Amid System Instability Issues (105)
- AMD "Strix Halo" Zen 5 Mobile Processor Pictured: Chiplet-based, Uses 256-bit LPDDR5X (101)
- US Government Wants Nuclear Plants to Offload AI Data Center Expansion (98)
- Windows 10 Security Updates to Cost $61 After 2025, $427 by 2028 (84)
- Developers of Outpost Infinity Siege Recommend Underclocking i9-13900K and i9-14900K for Stability on Machines with RTX 4090 (82)
- TechPowerUp Hiring: Reviewers Wanted for Motherboards, Laptops, Gaming Handhelds and Prebuilt Desktops (74)
- Intel Realizes the Only Way to Save x86 is to Democratize it, Reopens x86 IP Licensing (70)