 2
2
Spire MegaPOD III Review
Software & Performance »The Package


The Spire MegaPOD III arrived in a thick card board box with some very flashy colors. I found that the enclosure lays very well protected inside the card board box, which is nice if your country's postal service has a rough handling method. On the back of the package you can read about what you have bought and see some of the other Spire products. The MegaPOD III I got for review is the basic USB 2.0 version with support for IDE hard drives up to 800 GB capacity, which should be enough for most people looking for an easily transportable enclosure.
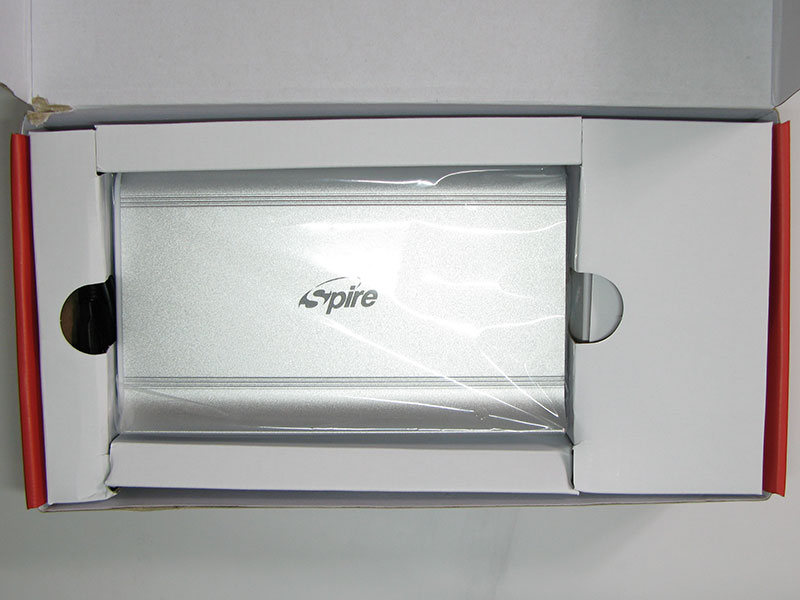

Inside the package everything lays neatly organized within some boxes and room dividers. Besides the enclosure you also get a power supply, USB cable, and a driver CD that contains drivers for Mac OSX and Windows 98/2000/ME/XP.

All of the basic stuff you need in order to get the enclosure to function is in the bundle right from drivers to USB 2.0 cable.
Closer Examination


This bare metal enclosure looks really nice. Its front plate is made of white plastic with some vent holes, however, there are no vents on the back of the enclosure which means that air circulation within the enclosure is almost non-existing.

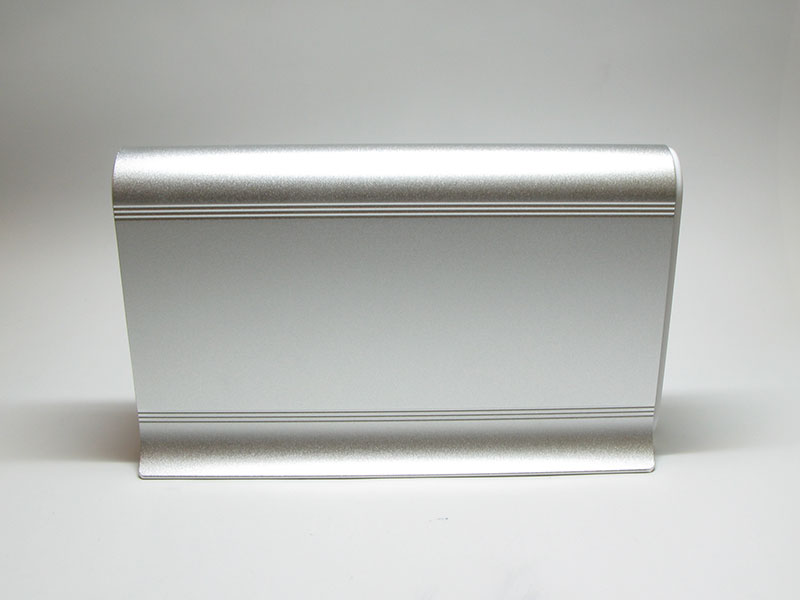
The design concept of the MegaPOD III is very clean and minimalistic, the only detail on the side of the enclosure beside two indents is the small Spire logo. Overall the MegaPOD III's design is a real eye pleaser although not riddled with details which I for one think are nice to see.

The back side features an On/Off button and connectors for USB 2.0 cable and the power supply. All of the connectors are neatly spaced out making it easy to hook them up when in a hurry.
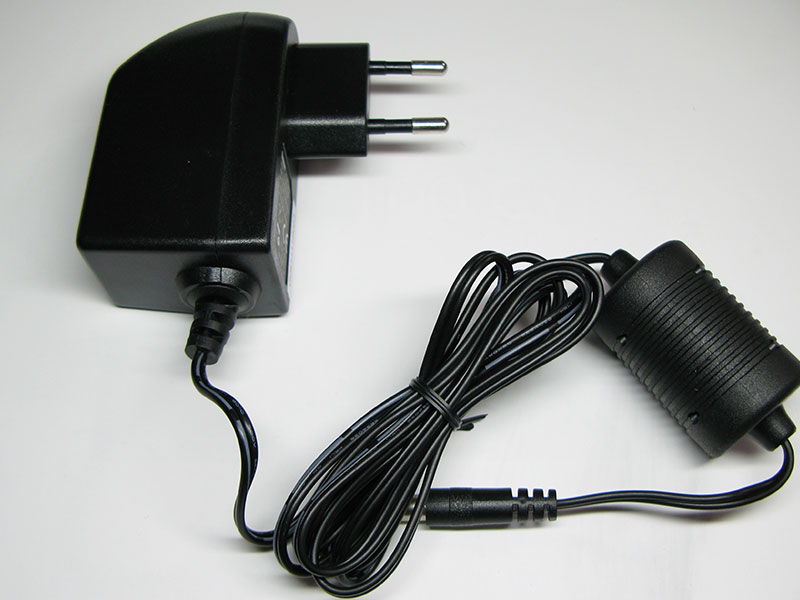

One of the important aspects of a portable hard disk enclosure is its power supply. The one that Spire ships with the SP151 is an extremely light weight version in a reasonably small package (roughly the size of an old Nokia charger).
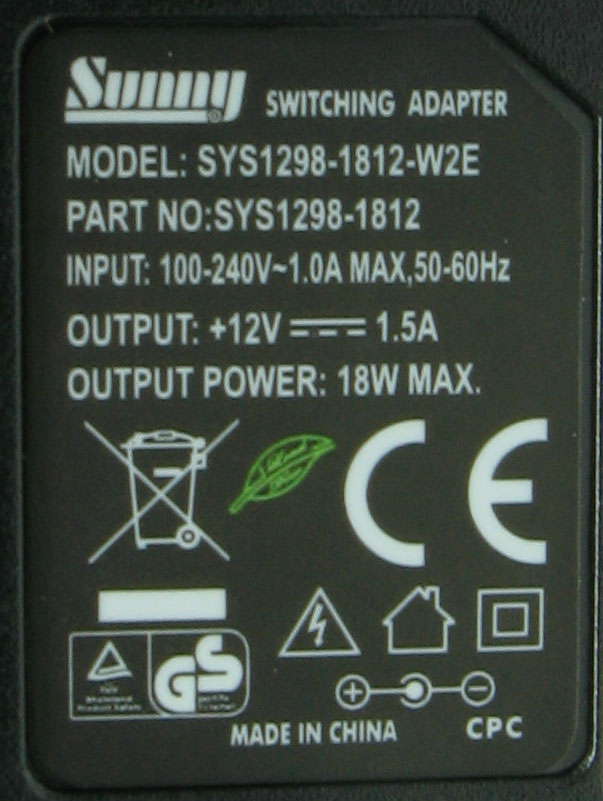
As you can see on the image above the little power supply is capable of delivering up to 18 watts DC (1.5A x 12V). 18 watts should be more than enough for just one ordinary IDE hard disk.

All you need to install a hard drive in this enclosure are four screws, besides the one already mounted on the bottom of the enclosure. In order to dampen the hard drives vibrations Spire includes two Styrofoam like pads that you place inside the hard drive tray.
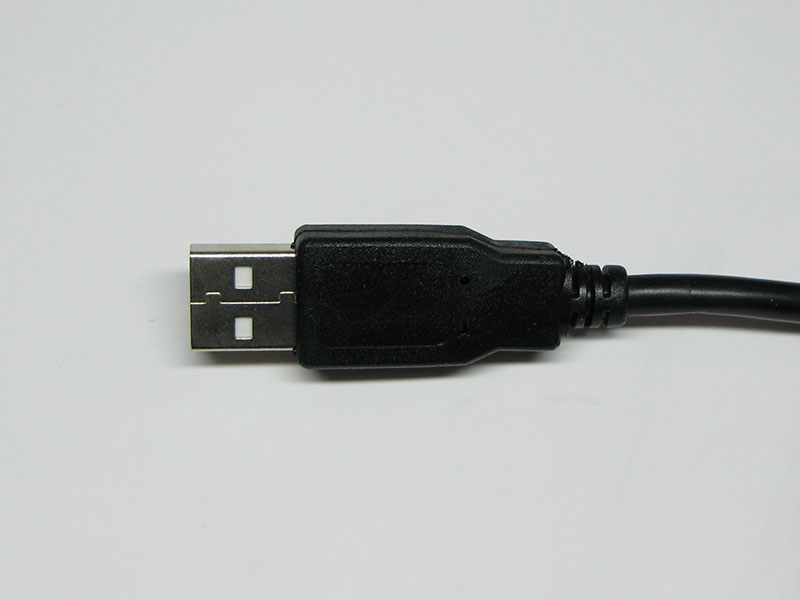

The USB cable is the standard A to B male/male connector. It seems to be quite durable, I slammed my drawer on it (by accident) and there wasn't even a scratch on it.

On the front of the enclosure there are two LEDs. One bright red and one blue. When you hook up the device to your PC the red LED comes on. While transferring data to and from the disk the blue one powers on.

The controller board looks pretty much like any other. All of the components are cleverly spread out across the board making sure that there are no "hot-spots" on the PCB.
Installation


In order to get the tray inside the enclosure loose you need to remove a small philips drive screw on the bottom of the enclosure. After this is done you can slide the tray right out.


Once you got the tray out of the enclosure you will need to place two small hard Styrofoam pads inside the tray. The two pads help to reduce the amount of vibration traveling outwards from the disk. Mounting them was pretty simple, the flat pad goes under the hard drive near the spindle and the higher one fits on the front of the tray.


Once you got the hard disk in place all you need to do is fix it by installing four screws. Before fixing the hard disc you have to hook it up to the enclosure via the IDE cable and Molex connector because after you have fixed the drive in place there is very little room for insertion of the cables on the back side of the drive.

After you installed the hard drive all you need to do is slide the tray back inside the enclosure. The tray is held in place by a small screw on the bottom of the enclosure.

When you are done installing a hard drive in the enclosure it's time to hook it up. On the back of the enclosure you have all the usual features including an On/Off button.
Overall installation was really easy. I think it's safe to say that even a relative newcomer to electronics can install a drive in this enclosure.
Apr 24th, 2024 02:18 EDT
change timezone
Latest GPU Drivers
New Forum Posts
- The TPU UK Clubhouse (24772)
- Random blue screen from winload.efi error (0xc000000e) (0)
- What's your latest tech purchase? (20327)
- Which new games will you be buying? (304)
- Official Board Game Discussion (12)
- need help with motherboard/ ram compability certainty (15)
- Flashing lenovo BIOS (11)
- FINAL FANTASY XIV: Dawntrail Official Benchmark (72)
- What phone you use as your daily driver? And, a discussion of them. (1455)
- I am getting artifacting when I change Windows security settings. Is my GPU failing, or is this just a Windows issue? (9)
Popular Reviews
- Fractal Design Terra Review
- Corsair 2000D Airflow Review
- Thermalright Phantom Spirit 120 EVO Review
- Minisforum EliteMini UM780 XTX (AMD Ryzen 7 7840HS) Review
- ASUS GeForce RTX 4090 STRIX OC Review
- NVIDIA GeForce RTX 4090 Founders Edition Review - Impressive Performance
- ASUS GeForce RTX 4090 Matrix Platinum Review - The RTX 4090 Ti
- MSI GeForce RTX 4090 Suprim X Review
- MSI GeForce RTX 4090 Gaming X Trio Review
- Gigabyte GeForce RTX 4090 Gaming OC Review
Controversial News Posts
- Sony PlayStation 5 Pro Specifications Confirmed, Console Arrives Before Holidays (116)
- NVIDIA Points Intel Raptor Lake CPU Users to Get Help from Intel Amid System Instability Issues (106)
- AMD "Strix Halo" Zen 5 Mobile Processor Pictured: Chiplet-based, Uses 256-bit LPDDR5X (101)
- US Government Wants Nuclear Plants to Offload AI Data Center Expansion (98)
- Windows 10 Security Updates to Cost $61 After 2025, $427 by 2028 (84)
- Developers of Outpost Infinity Siege Recommend Underclocking i9-13900K and i9-14900K for Stability on Machines with RTX 4090 (84)
- TechPowerUp Hiring: Reviewers Wanted for Motherboards, Laptops, Gaming Handhelds and Prebuilt Desktops (76)
- Intel Realizes the Only Way to Save x86 is to Democratize it, Reopens x86 IP Licensing (70)