 1
1
Thermaltake Mini Typhoon Review
Performance »Installation
The installation of the Thermaltake Mini Typhoon is very easy. I would advise to remove the motherboard for easier Socket939 installation because the cooler and the mounting clip are two different parts.
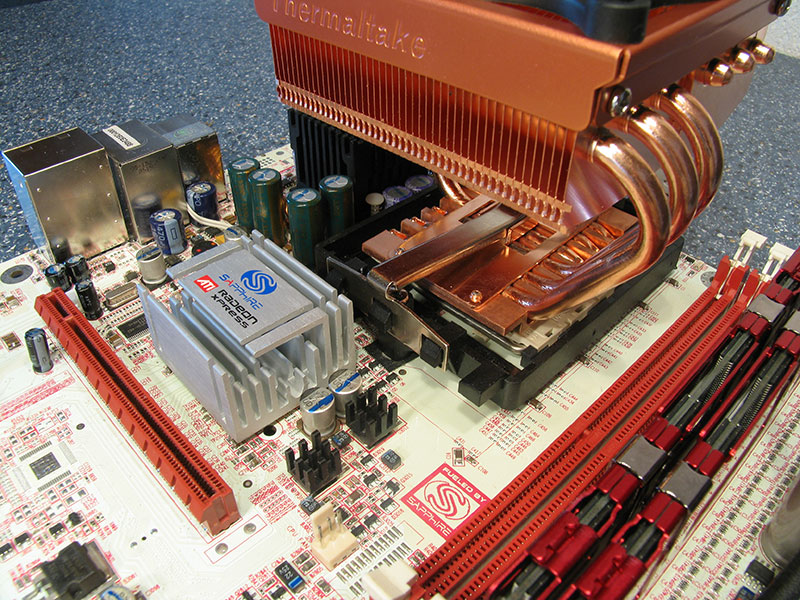

Basically all you have to do is put the heatsink on the CPU and hook the mounting clip into one side of the socket. Next you hook in the other side of the mounting clip and move the lever.

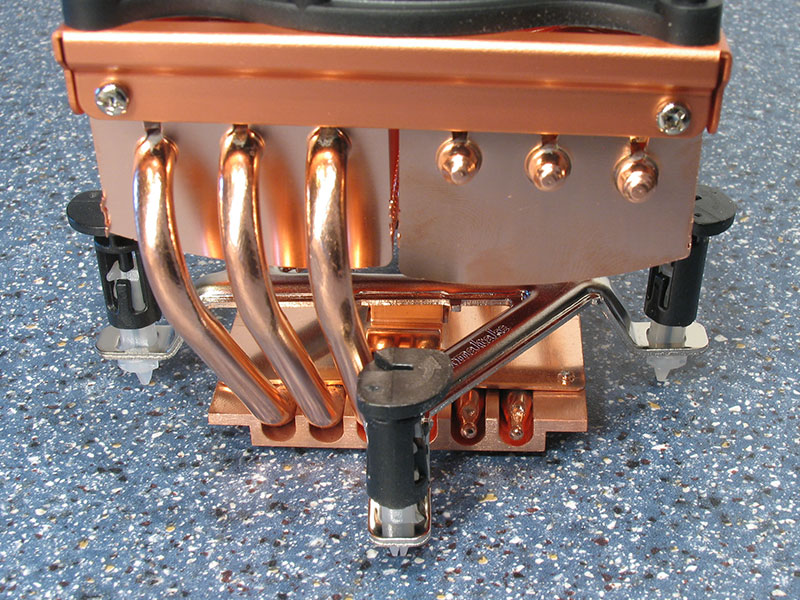
I found the lever a bit hard to move since it touches the copper fins of the heatsink a little bit. When installing the cooler you just pull the lever backwards a little and you can move it without touching the heatsink. Either way how you do it, this will not cause any further problems with the installation or the performance of the cooler.
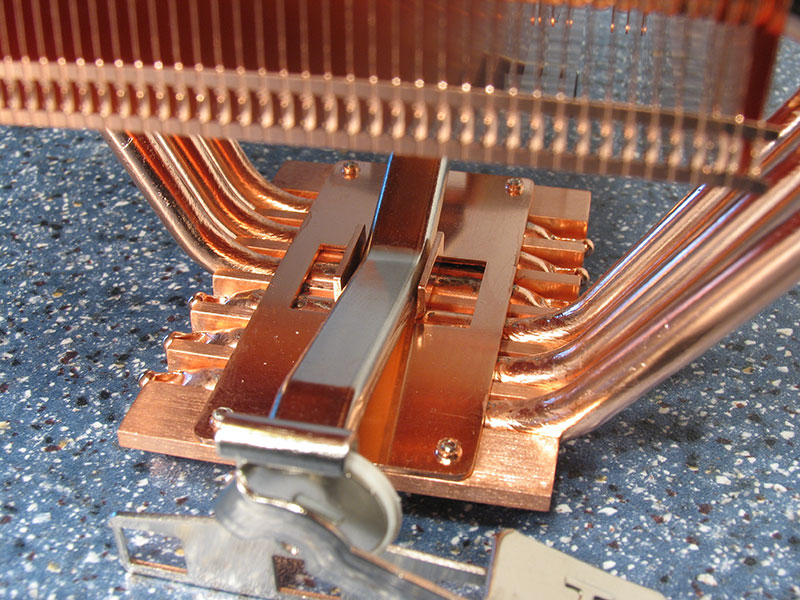
As you can see here the metal clip has no way to properly seat it, so it can freely move along the base and you may end up with a cooler which is off-center.
Another possibility is that you may end up with a slightly rotated cooler. Having most mounting pressure only in the center lets you rotate it when you apply some force.


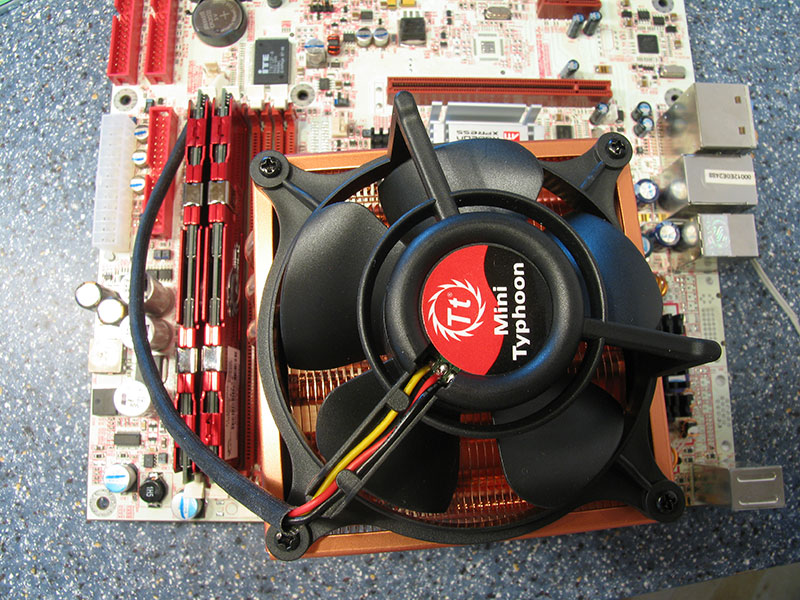
The design of the heatpipes allows memory access with the cooler installed. No space problems here at all.
LGA 775 Installation
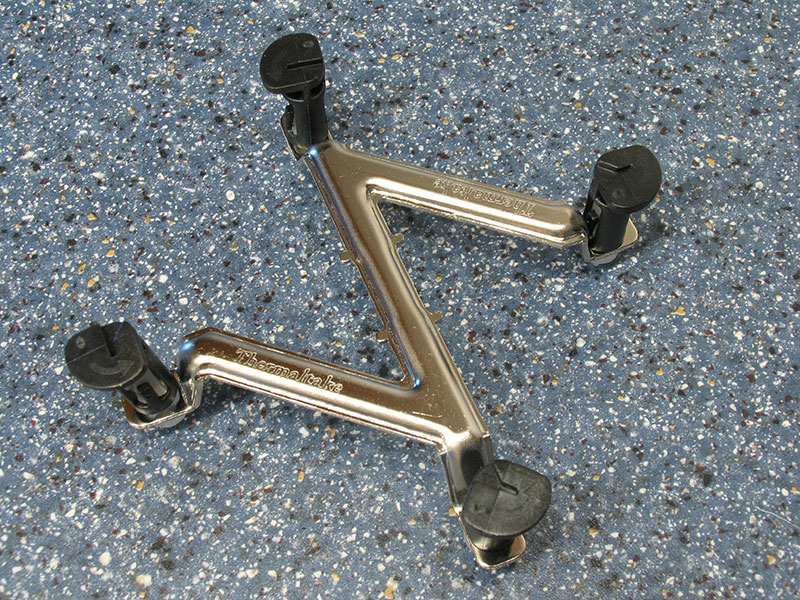
For Socket LGA775 you have to use this Z bracket.
Sliding it in under the cooler is a bit tricky....
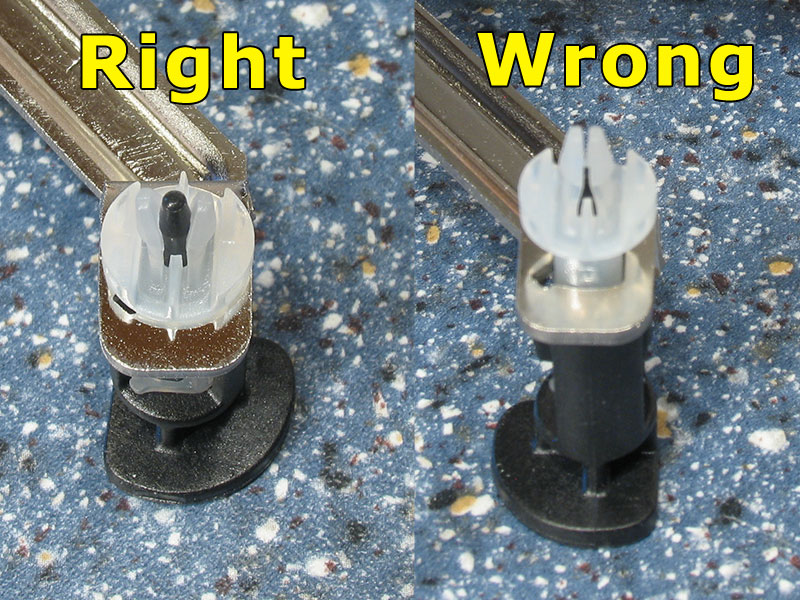
until you figure out that you have to put the mounting hole attachments into a certain position. Then the Z bracket slides in very easily.
Apr 24th, 2024 15:51 EDT
change timezone
Latest GPU Drivers
New Forum Posts
- Meta Horizon OS (13)
- Core PL1 + GPU PL1 + Ring EDP OTHER (5)
- Rare GPUs / Unreleased GPUs (1875)
- What's your latest tech purchase? (20336)
- What are you playing? (20524)
- Is there a way to have 2x chrome tabs side by side in fullscreen mode? (9)
- Embracer Group is breaking into 3 smaller companies... lol who saw this coming, what a joke (11)
- Will a RTX 4070 TI super bottleneck a Ryzen 9 7950X3D? (53)
- GTX 1070 Ti - TDP Issues - Always Power Throttling (0)
- Youtube layout has changed, how to go back ? (16)
Popular Reviews
- Fractal Design Terra Review
- Thermalright Phantom Spirit 120 EVO Review
- Corsair 2000D Airflow Review
- Minisforum EliteMini UM780 XTX (AMD Ryzen 7 7840HS) Review
- ASUS GeForce RTX 4090 STRIX OC Review
- NVIDIA GeForce RTX 4090 Founders Edition Review - Impressive Performance
- ASUS GeForce RTX 4090 Matrix Platinum Review - The RTX 4090 Ti
- MSI GeForce RTX 4090 Gaming X Trio Review
- MSI GeForce RTX 4090 Suprim X Review
- Gigabyte GeForce RTX 4090 Gaming OC Review
Controversial News Posts
- Sony PlayStation 5 Pro Specifications Confirmed, Console Arrives Before Holidays (116)
- NVIDIA Points Intel Raptor Lake CPU Users to Get Help from Intel Amid System Instability Issues (106)
- AMD "Strix Halo" Zen 5 Mobile Processor Pictured: Chiplet-based, Uses 256-bit LPDDR5X (101)
- US Government Wants Nuclear Plants to Offload AI Data Center Expansion (98)
- Windows 10 Security Updates to Cost $61 After 2025, $427 by 2028 (84)
- Developers of Outpost Infinity Siege Recommend Underclocking i9-13900K and i9-14900K for Stability on Machines with RTX 4090 (84)
- TechPowerUp Hiring: Reviewers Wanted for Motherboards, Laptops, Gaming Handhelds and Prebuilt Desktops (78)
- Intel Realizes the Only Way to Save x86 is to Democratize it, Reopens x86 IP Licensing (70)