 17
17
Zaward Gyre Review
Installation »A closer look


The Gyre is made from a mix of both aluminium and copper. The heat pipes of the cooler are all just pure copper, with no nickel coating. These three copper heat pipes run throughout the heatsink and appear on both sides, giving the impression that there are 6 heat pipes. The heat pipes run throughout a block of aluminium fins. The fins in this block are arranged in such a way that the heat can be dissipated into the area where there are no fins, and the 120mm fan at the top can just blow the heat away. The design of each fin is unique; they each have diverting blades allowing the heat to be centralised into the main area and again, be blown away.


The fins reside behind a transparent, black piece of plastic (known as a “chick” transparent cover) which is not just there for a nice looking finish. This black cover actually allows the heat to be trapped within the centralised area where there are no fins, so that the 120mm fan at the top can blow the heat straight out of the cooler. Towards the top of the cooler resides the black, 120mm blue LED fan. This fan connects straight to the chick cover, so all air it sucks in blows straight through the cooler and through the area where the heat is centralised by the fins, allowing maximum heat dissipation. This fan is attached via four screws, so it can be replaced very easily. Yet, the fan must be removed for the chick cover to be removed.

The cooler has a standard 4 pin power connector which can be plugged straight into the motherboard. This 4 pin connection (over the usual 3 pin connection) allows automatic fan speed control, which improves the performance to silence ratio. When the CPU heats up the fan will spin faster, making more noise but cooling the CPU down. To the reverse of this, when the CPU is only idling the fan will spin at a lower RPM, keeping the CPU cool but also keeping the fan quite.
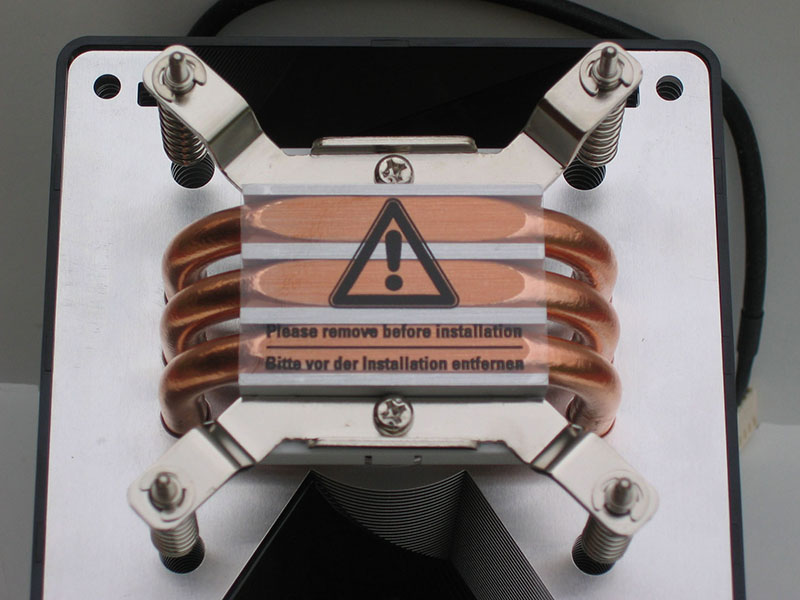


The heat pipes are made of pure copper, and have no nickel plated coating (hence the bronze colour of the pipes). Towards the bottom of the heatsink, these pipes actually form the base of the heatsink, as they are what connects to the CPU. This allows the heat from the CPU to transfer straight into the heat pipes and into the upper end of the heatsink, where the aluminium fins centralise the heat and the 120mm fan blows it all away. Towards the upper end of the cooler where the fins are located, all three pipes run throughout the block twice. They are designed in a U shape; they each run down the block of fins into the base, and then go back up into the block of fins on the other side. Also to note, the pipes run straight through the aluminium block of fins and are capped off on the other side, which again, allows maximum heat transfer as the heat will spread to all fins evenly.

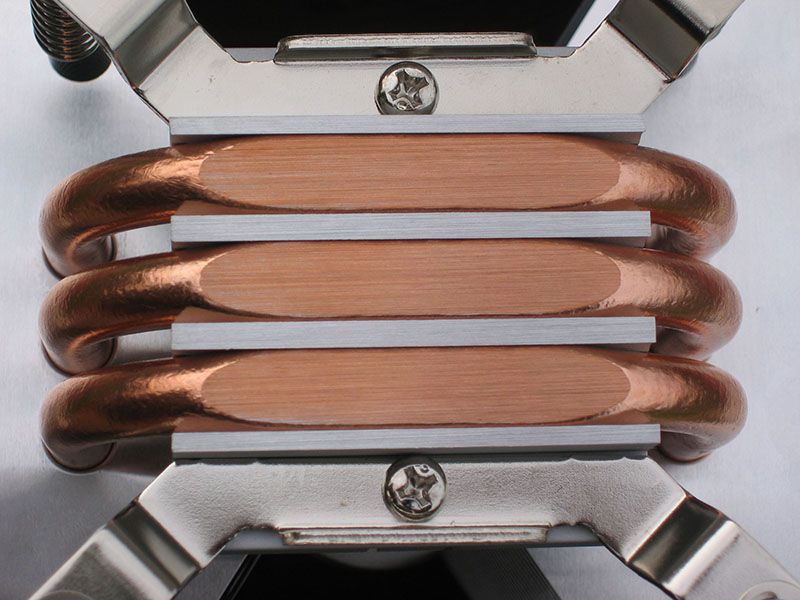
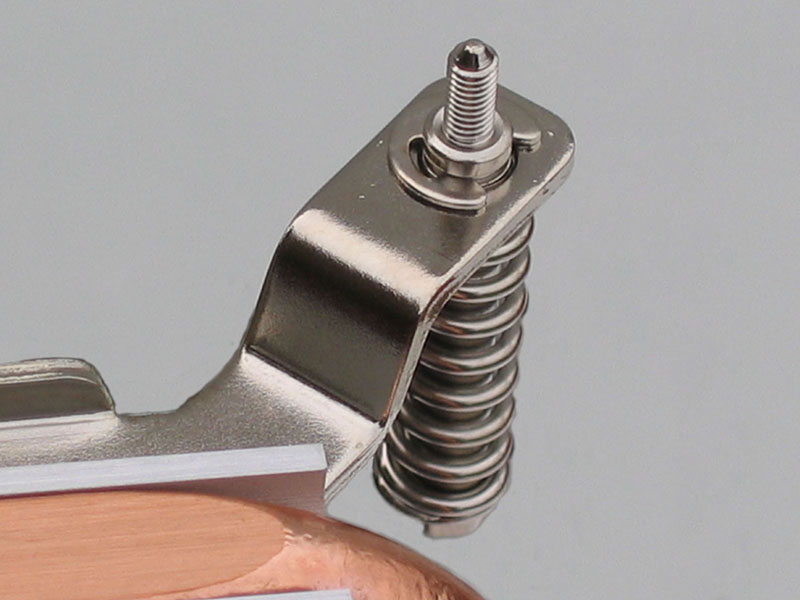
As mentioned, the base is made up of the actual heat pipes. These pipes have been shaved down to create a flat surface, and are wedged between aluminium fins. Zaward have not included a pre-applied thermal compound yet do supply thermal compound in a separate tube. This can have both advantages and disadvantages; it is good as it can be used more than once and the user can choose to use their own thermal compound, yet it is bad as the user actually has to apply the compound themselves, leaving room for error and making installation slightly harder. The cooler also has the spring screws attached to it, so the user does not have to attempt to hold the screw down and screw it in, they just have to align the screws correctly in their corresponding holes on the motherboard. These screws go straight into the supplied base for Intel Socket 775 based installations or into the standard AMD AM2 retention bracket.
Apr 24th, 2024 09:44 EDT
change timezone
Latest GPU Drivers
New Forum Posts
- What's your latest tech purchase? (20334)
- EK seems to be having major issues (36)
- Official Board Game Discussion (16)
- What phone you use as your daily driver? And, a discussion of them. (1464)
- My computer setup - Request for opinions (15)
- Is It The 1080 TI The Best GPU Ever? (205)
- Looking to build another system (0)
- Core i5-6300U (10)
- Which one to choose from these 3 laptops offer? (21)
- Blender 3.3.0 Benchmark (11)
Popular Reviews
- Fractal Design Terra Review
- Corsair 2000D Airflow Review
- Thermalright Phantom Spirit 120 EVO Review
- Minisforum EliteMini UM780 XTX (AMD Ryzen 7 7840HS) Review
- ASUS GeForce RTX 4090 STRIX OC Review
- NVIDIA GeForce RTX 4090 Founders Edition Review - Impressive Performance
- ASUS GeForce RTX 4090 Matrix Platinum Review - The RTX 4090 Ti
- MSI GeForce RTX 4090 Gaming X Trio Review
- MSI GeForce RTX 4090 Suprim X Review
- Gigabyte GeForce RTX 4090 Gaming OC Review
Controversial News Posts
- Sony PlayStation 5 Pro Specifications Confirmed, Console Arrives Before Holidays (116)
- NVIDIA Points Intel Raptor Lake CPU Users to Get Help from Intel Amid System Instability Issues (106)
- AMD "Strix Halo" Zen 5 Mobile Processor Pictured: Chiplet-based, Uses 256-bit LPDDR5X (101)
- US Government Wants Nuclear Plants to Offload AI Data Center Expansion (98)
- Windows 10 Security Updates to Cost $61 After 2025, $427 by 2028 (84)
- Developers of Outpost Infinity Siege Recommend Underclocking i9-13900K and i9-14900K for Stability on Machines with RTX 4090 (84)
- TechPowerUp Hiring: Reviewers Wanted for Motherboards, Laptops, Gaming Handhelds and Prebuilt Desktops (78)
- Intel Realizes the Only Way to Save x86 is to Democratize it, Reopens x86 IP Licensing (70)