• Welcome to TechPowerUp Forums, Guest! Please check out our forum guidelines for info related to our community.

[Case Gallery] Guts of my HAF922

triggs75

New Member
Joined
May 31, 2009
Messages
23 (0.00/day)
Location
Walnut Creek
Processor Intel Core i7 940 2.93GHz
Motherboard Evga X58
Cooling CM V8
Memory CORSAIR DOMINATOR 6GB (3x2GB)
Video Card(s) EVGA GeForce GTX 295
Storage WD VelociRaptor 600 (2x300) Raid 0 / WD Black 1TB (2x1TB) Raid 1
Display(s) Dell 2707WFP
Case CM HAF 922
Audio Device(s) Creative Sound Blaster X-Fi XtremeGamer 7.1
Power Supply CORSAIR 750W
Software Vista 64
Benchmark Scores 3DMark06 - 20640 3DMark Vantage - 22535
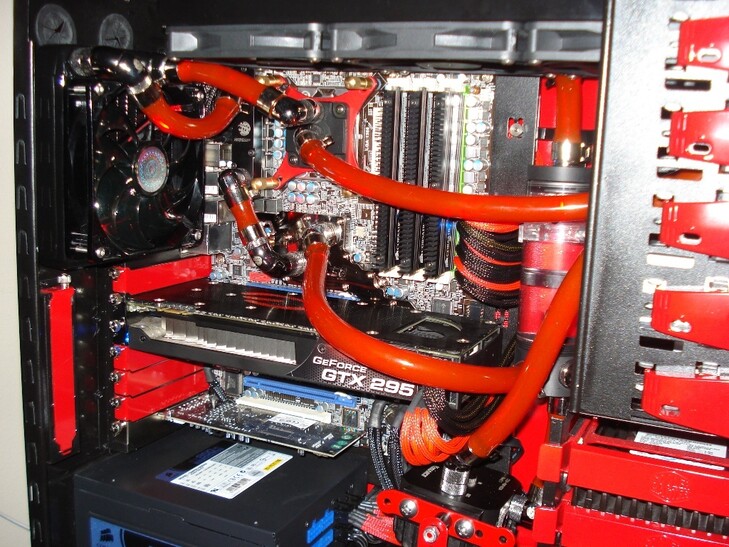
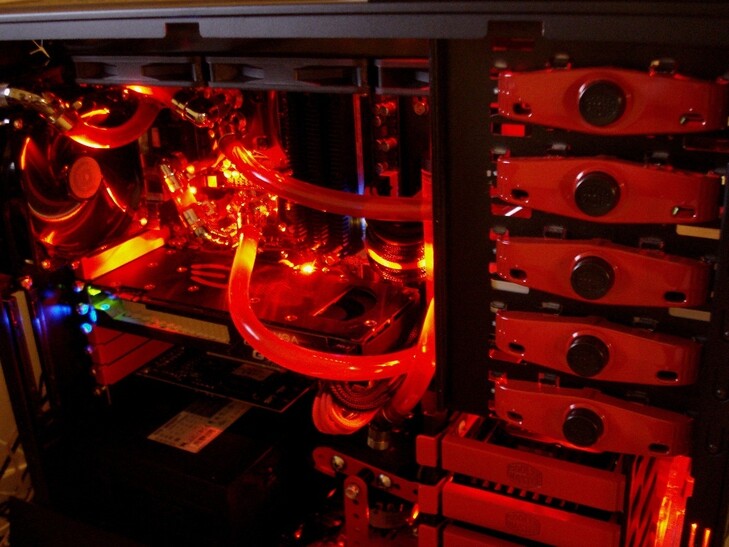
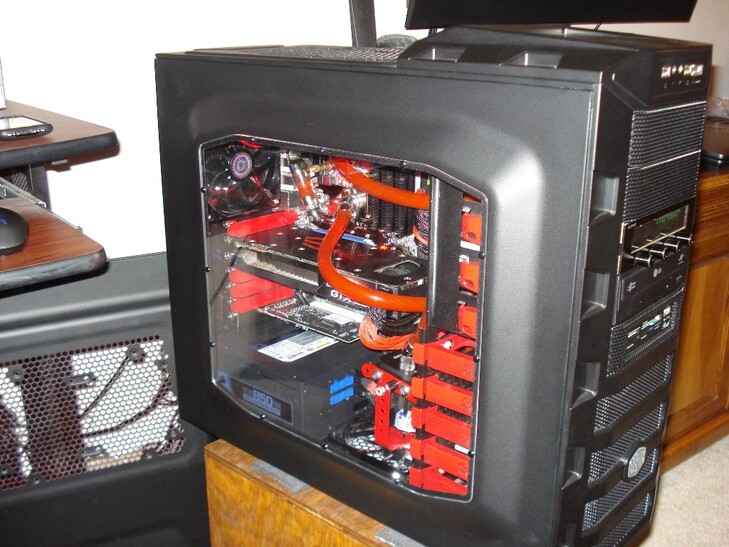
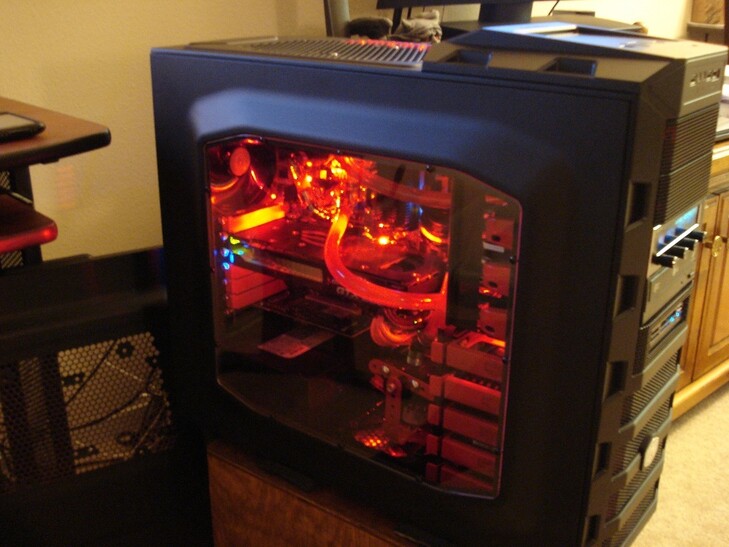
To view this case mod, go here.
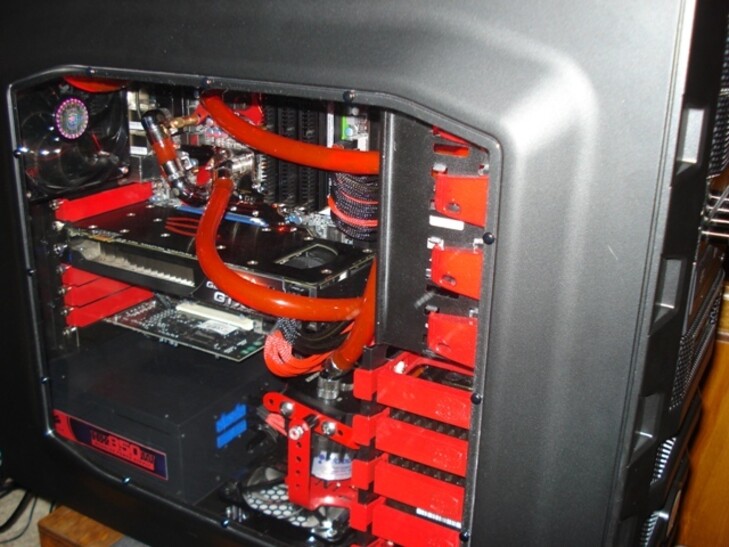


Specs:
» CM HAF 922 » CPU: Intel Core i7 940 OC'd to 3.69 » Motherboard: Evga X58 » CORSAIR DOMINATOR 6GB (3x2GB) » EVGA GeForce GTX 295 » WD VelociRaptor 600 (2x300) Raid 0 » WD Black 1TB (2x1TB) Raid 1 » 1 LG DVD SATA Model » CORSAIR 850W » Creative Sound Blaster X-Fi XtremeGamer 7.1 » Scythe Fan Controller » Vista 64 » Dell 2707WFP

Cooling:
» RAD - XSPC RS360 & XSPC RS120 » CPU Block - Alphacool H14 Yellowstone BRB » Koolance Northbridge/Southbridge Water Block » Black Feeser Mosfet Block » EK-Multioption RES 150 » Swiftech MCP655™ Series 12 VDC Water Pump » Koolance-D5 X-TOP
 
Last edited by a moderator:
Wow man that is sweet looking. I thought about doing the same thing to my haf. I just need to pick up a push pin remover so I cant start spraying.
 
Nice,,...btw what paint did u use for the red cd bay clips?
 
All that nice,,, Then you threw in a blue PSU
 
The PSU makes the difference with the hole theme.I think its nice!
i gave u a 10 cos of the great looks and the tons of great hardware fitted in your case!
 
Wow man that is sweet looking. I thought about doing the same thing to my haf. I just need to pick up a push pin remover so I cant start spraying.

Thank you. I did not take the rivets out of the case. Just stripped it down to the bare metal case and sprayed.

Nice,,...btw what paint did u use for the red cd bay clips?

Thank you It was Rustoleum Universal gloss Spray COLOR: 245211 - Gloss Cardinal Red

All that nice,,, Then you threw in a blue PSU

Thank you and I know, I know. I really like the corsair PSU's and the red one is only 650 watts. I was thinking of covering it up or pealing it off.

The PSU makes the difference with the hole theme.I think its nice!
i gave u a 10 cos of the great looks and the tons of great hardware fitted in your case!

Thank you
 
Nice specs, cool color combi! 9/10
 
Wuehehe you spend alot of money on it dude, Congrats nice painting and ... ohh man awesome specs.
 
You came a long way from what you started with. All your work paid off and this is an amazing rig. EPIC mod bro, great job! 9/10

As far as the Blue on the psu: you could paint it all black, paint the label with a fine red paint, or you can get even more crazy and print a custom red decal identical to Corsair's label. haha

Thank you. I wonder if a sticker shop would be able to make one red, or not... hmmm

Good thoughts on the PSU.
 
RED!! Cool color, very neat and tidy....9/10 from me
 
Did you install your motherboard before or after installing the XSPC RS360 radiator? It sure looks like it would be hard to install the motherboard with your radiator installed.

Looking at the top case image it looks you're using only 4 screws to secure the XSPC RS360 radiator to the case. Did the other holes not line up or were you just missing some screws?
 
I installed the motherboard before the radiator. Yeah it would not be possible installing the RAD first.

As for the 360 RAD, the holes do not match up as the fans are closer together on the radiatior. I do have those four screws in it along with two screws attached to the RAD under the top plastic section. I just drilled two holes to attached the RAD. The radiator is solid with zero movement at all even with the 4 screws attached to it, but I did add 2 more.
 
I just added a couple of pics with the LED's in the case.
 
Like the colour coordination, sell that PSU and get one that's red so it matches ha ha
 
great work and spec 9/10 may i know wht fitting u r using? thx
 
probably the best case design i've ever seen!
but i haven't seen that many...
it is good though :D
 
Like the colour coordination, sell that PSU and get one that's red so it matches ha ha

Thank you and yeah the PSU is going to get covered up.

great work and spec 9/10 may i know wht fitting u r using? thx

Thank you. The fittings are all bitspower barb fittings with koolance clamps on them.

probably the best case design i've ever seen!
but i haven't seen that many...
it is good though :D

Thank you....
 
how much did all that stuff cost? :O
 
how much did all that stuff cost? :O

I'm afraid to add it all up. The parts for the WC is around $800+ but well worth it. It was a really fun first liquid build for me. Not that this build will ever be finished as there will always be more fun stuff to buy.
 
Last edited:
I'm afraid to add it all up. The parts for the WC is around $800+ but well worth it. It was a really fun first liquid build for me. Not that this build will ever be finished as there will always be more fun stuff to buy.

haha fair enough
btw man your post count is set to 0 for some reason
that's weird lol
 
would u mind also show how the cable managed on the other side? thx..
until then, i would still hold the vote!
hehe j/k would be still 9/10 from me..
 
Back
Top